Category: Study Material

  • The Karagwe Kingdom: Origins, Organization, and Legacy

    Discover the history and organization of the Karagwe Kingdom, a significant political entity in present-day Tanzania. Learn about its rise, political structure, economic activities, and its cultural legacy in East Africa.

    Introduction:

    The Karagwe Kingdom, located in present-day Tanzania, was a powerful political entity in the East African Great Lakes region. Like many African kingdoms, its origins are deeply rooted in oral traditions and legends, making it challenging to trace a definitive historical timeline. However, through its structured political organization, vibrant economic activities, and rich cultural practices, the Karagwe Kingdom played a vital role in the region’s history. This blog will explore the origins of the Karagwe Kingdom, its organization, interactions with neighboring kingdoms, and its eventual decline during the colonial era. Although the kingdom no longer exists as a political entity, its cultural legacy continues to shape the identity of the region.

    1. Early Settlements and Migration:

    The Karagwe region, like many parts of East Africa, was inhabited by various Bantu-speaking ethnic groups. These groups were engaged in subsistence farming, animal husbandry, and other traditional activities. It is believed that the area that later became the Karagwe Kingdom was settled by Bantu-speaking communities who migrated into the region from other parts of East Africa.

    2. Formation of Local Chiefdoms:

    Over time, as communities settled in the Karagwe region, they established local chiefdoms or chieftaincies. These chiefdoms were often led by chiefs or clan leaders who had authority over their respective territories. These early political structures laid the groundwork for the eventual emergence of the Karagwe Kingdom.

    3. Rise of the Kingdom:

    The Karagwe Kingdom is said to have emerged as a political entity during the 18th century. Oral traditions suggest that a leader named Musinga was instrumental in uniting the local chiefdoms in the Karagwe region and establishing a more centralized authority. Musinga is often considered the first king of Karagwe, and he is revered as a founding figure in the kingdom’s history.

    4. Cultural and Political Identity:

    The Karagwe Kingdom developed its own cultural and political identity over time. It had its customs, traditions, and governance structures. The kingdom’s society was organized around clans, and the leadership of the king was supported by a council of elders and advisors.

    5. Interactions with Neighboring Kingdoms:

    The Karagwe Kingdom had interactions with neighboring kingdoms and chiefdoms, including the Kingdom of Buganda to the north. These interactions influenced trade, diplomacy, and cultural exchange in the region.

    6. Decline and Colonial Era:

    Like many traditional African kingdoms, the Karagwe Kingdom faced challenges during the colonial era. European colonial powers, particularly Germany and later Britain, exerted control over the region, impacting the autonomy and governance of the kingdom. The colonial period marked a significant turning point in the history of Karagwe and the broader East African region.

    Today, the Karagwe Kingdom no longer exists in its traditional form, as Tanzania is a republic with a different political structure. However, the historical legacy and cultural heritage of Karagwe continue to be a part of the region’s identity, and the kingdom’s history is preserved through oral traditions, folklore, and historical accounts.

    The organization of Karagwe kingdom

    The organization of the Karagwe Kingdom, like many traditional African kingdoms, was characterized by a structured political system, social hierarchy, economic activities, and cultural practices. Although the kingdom no longer exists as a political entity in its traditional form, it is essential to understand its historical organization:

    Political Organization:

    1. Monarchical System: The Karagwe Kingdom was a monarchical system with a king at its head. The king, known as the “Omugabe,” was the central political authority and held both political and spiritual power.
    2. Council of Elders: The king was advised by a council of elders and advisors who provided guidance on matters of governance, tradition, and culture. The council of elders played a significant role in decision-making and conflict resolution.
    3. Social Hierarchy:
    4. Clan System: The Karagwe Kingdom, like many African societies, was organized into clans, each with its own leadership and customs. Clans played a significant role in social identity, and individuals often identified strongly with their clan.
    5. Age-Set System: The age-set system was an important aspect of Karagwe’s social organization. Individuals of the same age group went through life stages together, creating strong bonds and shared experiences within their generation.
    6. Gender Roles: Traditional gender roles were observed, with men typically responsible for activities such as farming, hunting, and leadership, while women played essential roles in agriculture, food preparation, and household management.
    7. Marriage and Family: Marriage and the extended family were central to Karagwe society. Marriages often involved the exchange of bride-wealth (dowry), and extended families lived together in compounds and played crucial roles in social and economic life.

    Economic Activities:

    1. Agriculture: Agriculture was a fundamental economic activity in Karagwe. The fertile soils of the region allowed for the cultivation of crops such as millet, sorghum, beans, and maize. Agriculture provided food security and surplus for trade.
    2. Livestock: Cattle were important in Karagwe’s economy, providing meat, milk, hides, and social status. Livestock ownership symbolized wealth and played a role in bridewealth transactions during marriages.

    Cultural Practices:

    1. Religious Beliefs: Karagwe had its own traditional religious beliefs and practices. The Omugabe, in addition to political authority, often had a sacred role in Karagwe’s spiritual life. Religious leaders played significant roles in mediating between the earthly and spiritual realms.
    2. Oral Tradition: The history, customs, and legends of Karagwe were preserved through oral tradition. Storytelling, songs, and rituals conveyed the kingdom’s cultural heritage and identity.
    3. Initiation and Rites of Passage: Like many African societies, Karagwe had initiation rituals that marked important life stages, such as coming of age and marriage. These rites of passage were important cultural practices.

    While the Karagwe Kingdom no longer exists as a political entity, its cultural heritage and historical legacy continue to influence the region and its people today. The traditional organization of the kingdom played a vital role in shaping the identity and social structure of the Karagwe community.

    FAQs About the Karagwe Kingdom:

    1. What were the origins of the Karagwe Kingdom?
    The Karagwe Kingdom is believed to have emerged in the present-day Karagwe District of Tanzania. Its origins are traced to Bantu-speaking communities that migrated into the region, forming local chiefdoms that later united under the leadership of Musinga, who is considered the kingdom’s first king.

    2. How was the Karagwe Kingdom organized politically?
    The Karagwe Kingdom had a monarchical system with the king, known as the Omugabe, at its head. He held both political and spiritual authority, supported by a council of elders who provided advice and helped in governance and conflict resolution.

    3. What economic activities sustained the Karagwe Kingdom?
    Agriculture and livestock farming were the backbone of the Karagwe Kingdom’s economy. The fertile soils allowed for the cultivation of millet, sorghum, and maize, while cattle rearing was a symbol of wealth and status in the kingdom.

    4. What was the role of the Omugabe in Karagwe society?
    The Omugabe was the central figure in the Karagwe Kingdom, holding both political and spiritual power. He was responsible for leadership, governance, and maintaining the kingdom’s cultural and religious practices.

    5. What led to the decline of the Karagwe Kingdom?
    The decline of the Karagwe Kingdom occurred during the colonial era, when European powers, particularly Germany and later Britain, exerted control over the region. The colonial impact disrupted the kingdom’s autonomy and governance structures.

    6. How did the Karagwe Kingdom interact with neighboring kingdoms?
    The Karagwe Kingdom engaged in trade, diplomacy, and cultural exchanges with neighboring kingdoms such as Buganda. These interactions helped shape the political and economic landscape of the region.

    7. What cultural practices were significant in the Karagwe Kingdom?
    The Karagwe Kingdom was known for its clan system, age-set rituals, traditional religious beliefs, and oral traditions. These practices played a crucial role in maintaining social order and preserving the kingdom’s history.

    Conclusion:

    The Karagwe Kingdom was a central political and cultural force in East Africa, contributing to the region’s rich historical tapestry. Through its well-organized political structure, agricultural economy, and vibrant cultural practices, the Karagwe Kingdom left a lasting legacy that continues to influence the region today. Though it no longer exists as a political entity, the traditions, values, and history of the Karagwe people live on, passed down through generations and preserving the memory of this once-powerful kingdom.

  • Understanding Weather and Climate: Key Differences, Influences, and Global Impact

    Discover the distinctions between weather and climate, factors that influence them, and their importance in understanding global environmental patterns and impacts.

    ### **Introduction:**

    Weather and climate are two fundamental concepts in environmental science that shape the conditions of our planet. While often used interchangeably, they represent different aspects of the Earth’s atmosphere. Weather refers to short-term atmospheric conditions, while climate describes long-term patterns over decades or centuries. By understanding both weather and climate, we gain valuable insights into the forces driving changes in our environment and how they impact ecosystems, human activities, and the global economy.

    In this blog, we will explore the differences between weather and climate, the factors influencing each, and why these concepts are crucial for understanding our changing planet. We’ll also delve into the significance of studying weather patterns and climate zones, particularly in the context of climate change and sustainability.

    ### **What is Weather?**

    Weather is the daily state of the atmosphere in a specific place, characterized by temperature, precipitation, humidity, wind speed, and atmospheric pressure. These conditions are subject to rapid changes and can fluctuate significantly from one day to the next. Weather is measured over short periods and is usually forecasted for hours, days, or weeks. Common weather terms include:

    – **Temperature**: Indicates how hot or cold the air is, usually measured in degrees Celsius (°C) or Fahrenheit (°F).

    – **Precipitation**: The amount of rain, snow, sleet, or hail falling to the ground, measured in millimeters (mm) or inches.

    – **Humidity**: The amount of water vapor in the air, usually expressed as a percentage.

    – **Wind Speed**: Indicates the speed of the wind, usually measured in kilometers per hour (km/h) or miles per hour (mph).

    – **Atmospheric Pressure**: The weight of the air above us, measured in millibars (mb) or inches of mercury (Hg).

    **Examples of Weather Phenomena**:

    – A sunny, warm afternoon with temperatures reaching 25°C.

    – A sudden thunderstorm with heavy rain, lightning, and strong winds.

    – A cold, snowy day with temperatures below freezing.

    ### **What is Climate?**

    Climate represents the long-term average of weather patterns in a specific region, typically measured over 30 years or more. Unlike weather, which can change daily, climate reflects stable trends that persist over time. Climate is influenced by various factors such as geography, latitude, ocean currents, and altitude. Major climate zones include tropical, arid, temperate, polar, and Mediterranean climates, each with distinct characteristics.

    **Types of Climate Zones**:

    – **Tropical Climate**: Characterized by warm temperatures year-round and high precipitation, typically found near the equator.

    – **Arid Climate**: Known for low rainfall and desert-like conditions, common in regions like the Sahara Desert.

    – **Temperate Climate**: Moderate temperatures with four distinct seasons, found in places like the United States and Europe.

    – **Polar Climate**: Extremely cold temperatures with ice and snow-covered landscapes, such as Antarctica and the Arctic.

    – **Mediterranean Climate**: Mild, wet winters and hot, dry summers, common in areas like the Mediterranean Basin.

    **Examples of Climate Patterns**:

    – The consistently warm and humid climate of the Amazon rainforest.

    – The dry, hot summers and mild winters of the Mediterranean region.

    – The frigid, icy conditions of the Arctic tundra.

    ### **Differences Between Weather and Climate**

    Although both weather and climate refer to atmospheric conditions, they differ in terms of time scale, measurement, and predictability.

    1. **Time Scale**: 

       – *Weather*: Short-term, measured over hours, days, or weeks.

       – *Climate*: Long-term, measured over decades or centuries.

    2. **Measurement**: 

       – *Weather*: Specific conditions like temperature, precipitation, and wind speed.

       – *Climate*: Averages and patterns of weather over long periods.

    3. **Predictability**: 

       – *Weather*: Can be predicted with reasonable accuracy for a few days.

       – *Climate*: Predictable over extended periods but based on statistical averages.

    ### **Factors Affecting Weather and Climate**

    1. **Latitude**: 

       The distance from the equator affects both weather and climate. Regions closer to the equator typically experience warmer temperatures, while those closer to the poles experience colder climates.

    2. **Altitude**: 

       Higher altitudes are generally colder. For instance, mountainous regions like the Andes or the Himalayas experience cooler temperatures due to their elevation.

    3. **Ocean Currents**: 

       Ocean currents distribute heat around the globe. Warm currents, such as the Gulf Stream, warm nearby coastlines, while cold currents, like the California Current, have a cooling effect.

    4. **Wind Patterns**: 

       Global wind patterns distribute moisture and temperature, influencing regional weather and climate. For example, the trade winds carry moist air from the ocean, impacting precipitation in tropical regions.

    5. **Proximity to Water Bodies**: 

       Water bodies like oceans and lakes moderate temperatures. Coastal regions tend to have milder climates compared to inland areas due to the influence of water bodies.

    6. **Human Activities**: 

       Industrial activities, deforestation, and urbanization can impact local weather and global climate. These activities release greenhouse gases, leading to changes in temperature and precipitation patterns.

    ### **The Importance of Studying Weather and Climate**

    Understanding weather and climate is essential for various reasons:

    1. **Disaster Preparedness**: 

       Knowledge of weather patterns helps us prepare for extreme weather events, such as hurricanes, floods, and droughts, reducing their impact on communities.

    2. **Agriculture**: 

       Farmers rely on weather forecasts and climate data to plan planting and harvesting schedules. Different crops thrive in different climates, making climate data crucial for agricultural productivity.

    3. **Water Resources Management**: 

       Climate data informs water resource management, helping authorities maintain water supply and address drought conditions.

    4. **Environmental Protection**: 

       By understanding climate patterns, scientists can work to protect ecosystems that are sensitive to changes in temperature and precipitation.

    5. **Climate Change**: 

       Studying long-term climate data helps us understand the effects of climate change and develop strategies to mitigate its impact on the planet.

    ### **Climate Change and Its Impact on Weather Patterns**

    Climate change, driven by greenhouse gas emissions, is altering weather patterns worldwide. Rising temperatures lead to more frequent heatwaves, while shifts in precipitation patterns contribute to severe droughts and floods. Climate change also affects seasonal weather patterns, impacting ecosystems and human societies.

    For example:

    – Increased global temperatures are leading to polar ice melt, contributing to rising sea levels.

    – Warmer oceans fuel stronger hurricanes and cyclones, which result in more devastating impacts on coastal communities.

    – Changing precipitation patterns affect freshwater availability, influencing agriculture and food security.

    ### **Conclusion:**

    Understanding the differences between weather and climate, as well as the factors that influence them, is crucial for making informed decisions related to disaster preparedness, environmental protection, and climate change mitigation. As global warming continues to impact climate patterns and intensify extreme weather events, it becomes even more essential to monitor, study, and respond to changes in our atmosphere. By increasing our knowledge of weather and climate, we can better safeguard our planet and prepare for the challenges of a changing environment.

    ### **FAQs on Weather and Climate**

    **1. What is the difference between weather and climate?** 

    Weather refers to short-term atmospheric conditions, while climate is the long-term average of these conditions over decades or centuries.

    **2. How does latitude affect climate?** 

    Latitude influences temperature, with regions closer to the equator being warmer and regions near the poles being colder.

    **3. What are the main climate zones?** 

    The main climate zones include tropical, arid, temperate, polar, and Mediterranean climates, each with unique characteristics.

    **4. How does climate change affect weather patterns?** 

    Climate change leads to shifts in weather patterns, including more extreme weather events like heatwaves, floods, and hurricanes.

    **5. Why is it important to study weather and climate?** 

    Studying weather and climate is essential for disaster preparedness, agriculture planning, water resource management, and understanding the impacts of climate change.

    **6. What factors influence climate?** 

    Key factors include latitude, altitude, ocean currents, wind patterns, and proximity to water bodies, all of which shape a region’s climate.

    **7. How does human activity impact weather and climate?** 

    Human activities such as burning fossil fuels, deforestation, and urbanization release greenhouse gases, contributing to global warming and altering weather patterns.

  • Exploring Elements, Mixtures, and Compounds: Understanding the Building Blocks of Matter

    Learn the difference between elements, mixtures, and compounds. Discover their characteristics, examples, and roles in chemistry, with a focus on the periodic table and laboratory practices.

    Introduction:

    In the realm of chemistry, mixtures, elements, and compounds represent distinct categories of substances. A mixture is a combination of different substances that retain their individual identities and properties, such as a salad comprising various vegetables. Elements, on the other hand, are pure substances consisting of only one type of atom, exemplified by familiar elements like oxygen or gold. Compounds, meanwhile, are substances formed when two or more elements chemically combine in fixed ratios, creating entirely new entities with unique properties—water (H₂O) is a classic example of a compound. These concepts provide the foundation for understanding the diverse nature of substances encountered in the world, whether they exist as heterogeneous mixtures, individual elements, or chemically bonded compounds.

    Elements

     Understanding the Fundamental Building Blocks

    In the intricate tapestry of chemistry, elements stand as the foundational building blocks—the simplest and purest forms of matter. An element is characterized by its unique atomic structure, consisting of atoms with the same number of protons in their nuclei. This defining feature imparts distinct chemical properties to each element. The periodic table serves as a comprehensive catalog, organizing elements based on their atomic number and properties. Elements play a pivotal role in chemical reactions, combining to form compounds and contributing to the rich diversity of substances in the universe. Exploring the world of elements provides a profound insight into the essence of matter and the intricacies of the periodic table.

    What is an Element?

    An element is a substance comprised of atoms, each possessing the same number of protons in its nucleus. This fundamental unit cannot be broken down into simpler substances by chemical means. Elements are the foundational components of matter and are uniquely identified by their atomic number, which reflects the number of protons in their nuclei. While there are naturally occurring elements like oxygen and gold, scientists have also synthesized artificial elements, expanding the periodic table.

    Examples of Elements:

    1.         Hydrogen (H): The lightest and most abundant element in the universe.

    2.         Oxygen (O): Vital for life, a key component of the Earth’s atmosphere.

    3.         Gold (Au): Valued for its lustrous appearance and diverse applications.

    4.         Carbon (C): Essential to life, forming the backbone of organic compounds.

    5.         Iron (Fe): A crucial element in various industrial and biological processes.

    6.         Helium (He): Known for its low density and common use in balloons.

    7.         Sodium (Na): An alkali metal commonly found in salts.

    8.         Chlorine (Cl): A halogen with disinfectant properties and industrial uses.

    9.         Neon (Ne): A noble gas known for its use in neon lights.

    10.       Uranium (U): Notable for its role in nuclear reactions and energy production.

    These examples illustrate the diversity of elements, each contributing distinct properties to the composition and behavior of matter. Understanding elements forms the bedrock of chemical knowledge, enabling scientists to unravel the complexities of compounds and reactions.

    The periodic table

    The periodic table, a cornerstone of modern chemistry, has a rich history rooted in the collective efforts of numerous scientists over several decades. The concept of organizing elements systematically dates back to the 19th century when Dmitri Mendeleev, a Russian chemist, proposed the first recognizable periodic table in 1869.

    Mendeleev’s breakthrough came as he attempted to organize the known elements based on their properties. Despite gaps in the available data, he arranged the elements in order of increasing atomic mass, placing those with similar properties in the same columns. Strikingly, Mendeleev left gaps for undiscovered elements and predicted their properties with remarkable accuracy. This foresight lent immense credibility to the periodic table as a predictive tool.

    The subsequent development of the periodic table benefited from advancements in atomic theory, particularly the understanding of the atomic structure and the discovery of the proton by Ernest Rutherford in the early 20th century. With the realization that atomic number, corresponding to the number of protons in an atom, was a more fundamental property than atomic mass, the modern periodic table took shape.

    The work of Henry Moseley, an English physicist, was pivotal in refining the periodic table based on atomic number. By rearranging the elements according to increasing atomic number, Moseley addressed the anomalies associated with ordering elements by atomic mass. This breakthrough led to the creation of the modern periodic table, where elements are organized based on their atomic number, resulting in a more accurate representation of their properties.

    Today, the periodic table is a powerful tool that not only organizes elements but also provides insights into their properties, behaviors, and relationships. It serves as a central reference in chemistry, aiding scientists in predicting the characteristics of elements, understanding their reactivity, and exploring the vast landscape of chemical compounds. The periodic table stands as a testament to the collaborative efforts of scientists across generations, shaping our comprehension of the fundamental building blocks of matter.

    List of the first 20 elements along with their symbols on the periodic table

    Here is a list of the first 20 elements along with their symbols on the periodic table:

    1.         Hydrogen (H)

    2.         Helium (He)

    3.         Lithium (Li)

    4.         Beryllium (Be)

    5.         Boron (B)

    6.         Carbon (C)

    7.         Nitrogen (N)

    8.         Oxygen (O)

    9.         Fluorine (F)

    10.       Neon (Ne)

    11.       Sodium (Na)

    12.       Magnesium (Mg)

    13.       Aluminum (Al)

    14.       Silicon (Si)

    15.       Phosphorus (P)

    16.       Sulfur (S)

    17.       Chlorine (Cl)

    18.       Argon (Ar)

    19.       Potassium (K)

    20.       Calcium (Ca)

    These elements represent the first two periods (rows) of the periodic table, spanning the first and second shells of an atom. The elements are arranged in order of increasing atomic number from left to right and top to bottom on the periodic table.

    Laboratory practical investigations on water purification

    Let’s now switch our attention to Learning the criteria for Determining Purity. We’ll do a Laboratory practical Investigating melting point of pure water and impure water. Another Laboratory practical is to Investigate how to test for purity using boiling point of a liquid. How can we know that a given colorless liquid is water and it is pure?

    Criteria for Determining Purity

    The determination of purity is a critical aspect of chemical analysis, ensuring the reliability of substances used in various applications. Purity is often defined by the absence of impurities or the presence of only specified components. Several criteria contribute to assessing the purity of a substance, with physical properties such as melting point and boiling point serving as key indicators. These criteria are foundational in quality control processes across industries, guaranteeing the integrity of materials in scientific research, manufacturing, and everyday applications.

    1.         Melting Point:

    •          The melting point of a substance is the temperature at which it transitions from a solid to a liquid. Pure substances exhibit a sharp and well-defined melting point. Impurities can alter this point, causing a broadening or depression. By comparing the observed melting point to the known value of a pure substance, one can assess the purity of a sample.

    2.         Boiling Point:

    •          Similar to melting point, the boiling point of a substance is the temperature at which it changes from a liquid to a gas. Pure substances have a characteristic and consistent boiling point. Deviations or variations in the boiling point can indicate the presence of impurities. This criterion is particularly useful in identifying and assessing the purity of liquids.

    In conclusion, the criteria for determining purity, namely melting point and boiling point, offer valuable insights into the quality and integrity of substances. These physical properties serve as reliable benchmarks for assessing whether a material is pure or contains impurities. The precision and consistency of these values contribute to the rigorous standards upheld in chemical analysis, ensuring the reliability of substances in diverse fields.

    Laboratory Practical 1: Investigate Melting Point of Pure Water and Impure Water

    Materials:

    •          Pure water

    •          Impure water sample

    •          Melting point apparatus

    Procedure:

    1.         Set up the melting point apparatus according to the manufacturer’s instructions.

    2.         Place a small amount of pure water in one capillary tube and impure water in another.

    3.         Insert the capillary tubes into the melting point apparatus.

    4.         Gradually increase the temperature, observing when the substances begin to melt.

    5.         Record the melting points of both samples and compare the observations.

    Laboratory Practical 2: Investigate Testing for Purity Using Boiling Point of a Liquid

    Materials:

    •          Colorless liquid (assumed to be water)

    •          Boiling point apparatus

    Procedure:

    1.         Set up the boiling point apparatus.

    2.         Pour a sample of the colorless liquid into the boiling flask.

    3.         Heat the liquid gradually, monitoring the temperature.

    4.         Note the temperature at which the liquid begins to boil.

    5.         Compare the observed boiling point with the known boiling point of pure water to assess the purity of the liquid.

    These practical exercises provide hands-on experiences in applying the criteria for determining purity, offering valuable insights into the significance of melting and boiling points in chemical analysis.

    Finding Out the Substances Which are Elements, Compounds, and Mixtures

    Understanding the nature of substances is fundamental to chemistry. Substances are broadly classified into elements, compounds, and mixtures. Elements consist of only one type of atom, compounds are made up of two or more different elements chemically combined, and mixtures involve the physical combination of substances without a chemical reaction. This exploration aims to distinguish between elements, compounds, and mixtures, shedding light on their unique characteristics and how they contribute to the diversity of matter.

    1.         Elements:

    •          Elements are the simplest forms of matter and cannot be broken down further by chemical means. Examples include hydrogen, oxygen, and gold. Each element is represented by a unique chemical symbol.

    2.         Compounds:

    •          Compounds are substances formed when two or more elements chemically combine in fixed ratios. Water (H₂O) and carbon dioxide (CO₂) are examples of compounds. Compounds have distinct properties different from the elements that compose them.

    3.         Mixtures:

    •          Mixtures are combinations of different substances that retain their individual properties. These can be homogeneous (uniform composition) or heterogeneous (non-uniform composition). Common examples include air (a mixture of gases) and salad (a mixture of various vegetables).

    Laboratory Practical 1: Split Water into Simpler Substances

    Materials:

    •          Water

    •          Electrolysis setup (two electrodes, power source)

    •          Test tubes

    Procedure:

    1.         Set up the electrolysis apparatus.

    2.         Fill a test tube with water.

    3.         Pass an electric current through the water using the electrodes.

    4.         Observe the production of gases at the electrodes.

    5.         Test the gases evolved to identify their nature.

    Laboratory Practical 2: Forming Compounds of Sulphur and Iron

    Materials:

    •          Sulphur powder

    •          Iron filings

    •          Bunsen burner

    •          Crucible and lid

    Procedure:

    1.         Mix iron filings and sulphur powder in a crucible.

    2.         Heat the mixture strongly using a Bunsen burner.

    3.         Observe the changes and note the appearance of the resulting compound (iron sulfide).

    4.         Allow the compound to cool and examine its properties.

    Laboratory Practical 3: Classifying Elements

    Materials:

    •          Samples of various elements (e.g., copper, aluminum, sulfur)

    Procedure:

    1.         Examine the physical properties of each element sample (color, luster, conductivity, etc.).

    2.         Record the observations for each element.

    3.         Classify the elements based on their properties into groups (metals, nonmetals, metalloids).

    Laboratory Practical 4: Finding Out if Non-Metal Elements Burn in Air

    Materials:

    •          Samples of non-metal elements (e.g., sulfur, phosphorus)

    Procedure:

    1.         Take a small sample of each non-metal element.

    2.         Attempt to burn each sample in the presence of air.

    3.         Observe the reactions and record whether or not the non-metal elements burn.

    Conclusion:

    In conclusion, this exploration and the associated practical activities have provided valuable insights into distinguishing between elements, compounds, and mixtures. The hands-on experiments not only exemplify the unique characteristics of these substances but also illustrate the transformative nature of chemical processes, showcasing the diverse behaviors exhibited by elements and compounds in different situations. The ability to differentiate between these fundamental categories is foundational to understanding the complexities and variety found in the world of matter.

    Frequently asked questions (FAQs) on elements and the periodic table

    the following are some of the frequently asked questions (FAQs) on elements and the periodic table:

    1. Elements:

    Q1: What is an element? A1: An element is a pure substance composed of only one type of atom. Each element is defined by its unique number of protons, known as the atomic number.

    Q2: How many elements are currently known? A2: As of my knowledge cutoff in 2022, there are 118 known elements.

    Q3: How are elements arranged on the periodic table? A3: Elements are arranged on the periodic table based on their atomic number, which increases from left to right and top to bottom.

    Q4: What is the significance of an element’s position on the periodic table? A4: An element’s position reflects its atomic structure, properties, and relationships with other elements. Elements in the same column (group) often share similar properties.

    2. Periodic Table:

    Q5: Who is credited with the creation of the periodic table? A5: Dmitri Mendeleev is credited with the creation of the first widely recognized periodic table in 1869.

    Q6: Why are some elements placed outside the main body of the periodic table? A6: Elements placed below the main body of the periodic table are part of the lanthanides and actinides series. These series are often separated to maintain the table’s compact format.

    Q7: What information does each square on the periodic table provide? A7: Each square provides information about the element’s atomic number, symbol, name, and atomic mass.

    Q8: How are metals, nonmetals, and metalloids distributed on the periodic table? A8: Metals are found on the left side, nonmetals on the right side, and metalloids along the zigzag line dividing the table.

    3. Trends and Properties:

    Q9: What is atomic radius, and how does it change across a period and down a group? A9: Atomic radius is the size of an atom. Generally, it decreases across a period and increases down a group.

    Q10: What are the trends in ionization energy and electronegativity on the periodic table? A10: Ionization energy generally increases across a period and decreases down a group. Electronegativity follows a similar trend.

    Q11: How are elements classified as alkali metals, halogens, noble gases, etc.? A11: Elements are classified into groups based on shared properties. For example, alkali metals are found in Group 1, halogens in Group 17, and noble gases in Group 18.

    These FAQs cover essential aspects of elements and the periodic table, providing insights into their nature, organization, and properties.

  • Water Properties, Sources, Components, and Treatment: A Comprehensive Guide

    Explore the properties, sources, and components of water. Learn about the water cycle, treatment processes, and the importance of water conservation for sustaining life on Earth.


    Introduction:

    Water is a vital natural resource essential for life on Earth. It plays a crucial role in various processes, ecosystems, and human activities. Understanding the water cycle, the importance of recycling, and the sources of fresh and non-fresh waters is fundamental to appreciating its significance.

    Key Words:

    1. Natural Resource:
    • A natural resource is any material or substance found in the environment that is utilized by humans for their benefit. Water is a prime example of a critical natural resource.
    • Water Cycle:
    • The water cycle is the continuous process by which water circulates through the Earth’s atmosphere, land, and oceans. It involves processes such as evaporation, condensation, precipitation, and runoff.
    • Sewage:
    • Sewage refers to wastewater, primarily containing human waste and domestic runoff, which needs proper treatment before discharge to prevent environmental contamination.
    • Recycle:
    • Recycling refers to the process of treating used or waste materials to make them suitable for reuse. In the context of water, it often involves treating wastewater to meet quality standards before releasing it back into the environment.

    Astonishing Things about Water:

    • Universal Solvent: Water is often called the universal solvent because it has the ability to dissolve a wide variety of substances, making it an excellent medium for chemical reactions and biological processes.
    • Density Anomaly: Unlike most substances, water reaches its maximum density at around 4 degrees Celsius. Below or above this temperature, water expands, which is why ice (frozen water) floats on liquid water.
    • High Heat Capacity: Water has a high heat capacity, meaning it can absorb and retain a significant amount of heat energy. This property helps regulate Earth’s temperature and climate.

    Components and Formula for Water:

    • Components: Water is composed of two hydrogen atoms and one oxygen atom, forming a molecule with the chemical formula H₂O.

    Sources of Fresh and Non-fresh Waters on Earth:

    1. Sources of Fresh Water:
    • Surface Water: Rivers, lakes, and ponds.
      • Groundwater: Water stored underground in aquifers.
      • Glaciers and Ice Caps: Frozen freshwater.
    • Sources of Non-fresh Water:
    • Oceans: The vast majority of Earth’s water is in the form of saltwater in the oceans.
      • Salt Lakes: Inland bodies of water with high salinity.

    Study Tips:

    • Visualize the Water Cycle: Create diagrams or infographics to illustrate the stages of the water cycle.
    • Explore Conservation Practices: Learn about water conservation methods and their importance.
    • Research Water Treatment: Understand the processes involved in treating sewage and recycling water for various purposes.

    Laboratory Practical 1: Physical Properties of Water – Density

    Objective:

    To investigate the density of water and understand how it can affect the buoyancy of objects.

    Materials:

    1. Fresh egg
    2. Clear container
    3. Water
    4. Salt
    5. Graduated cylinder
    6. Balance

    Procedure:

    1. Fill the clear container with water.
    2. Carefully place the fresh egg into the water and observe its behavior.
    3. Record your observations regarding whether the egg sinks or floats.
    4. If the egg sinks, gradually add salt to the water while stirring until the egg begins to float.
    5. Measure and record the amount of salt needed to make the egg float.
    6. Using the graduated cylinder, measure the volume of water displaced by the egg.

    Analysis:

    1. Calculate the density of water using the formula: Density = Mass/Volume.
    2. Compare the density of water with and without salt.
    3. Discuss the concept of buoyancy and how it is influenced by the density of the surrounding liquid.

    Conclusion:

    Summarize the findings and explain how changes in water density affect the buoyancy of objects, using the fresh egg as an example.

    Laboratory Practical 2: Chemical Properties of Water – Water Detection

    Objective:

    To determine if a colorless liquid contains water using a simple chemical test.

    Materials:

    1. Colorless liquid (e.g., acetone or rubbing alcohol)
    2. Cobalt chloride paper (moisture-sensitive paper)
    3. Test tube
    4. Dropper
    5. Bunsen burner or heat source

    Procedure:

    1. Place a small amount of the colorless liquid in a test tube.
    2. Using a dropper, apply a drop of the colorless liquid onto the cobalt chloride paper.
    3. Observe any color changes in the paper.

    Analysis:

    1. If the cobalt chloride paper changes color (usually from blue to pink), it indicates the presence of water.
    2. Discuss the chemical property of water that allows it to be detected by the cobalt chloride paper.

    Conclusion:

    Summarize the results and explain how the chemical test demonstrated the presence of water in the colorless liquid. Discuss the significance of detecting water content in various substances.

    Safety Considerations:

    1. Handle chemicals with care, following proper laboratory safety guidelines.
    2. Use appropriate personal protective equipment, including goggles and gloves.

    physical properties of water

    The physical properties of water are characteristics that can be observed or measured without changing the chemical composition of water. Here are some key physical properties of water:

    1. State of Matter:

    • Water exists in three states: solid (ice), liquid (water), and gas (water vapor). The state depends on temperature and pressure.

    2. Melting Point:

    • The temperature at which ice melts and turns into liquid water is 0 degrees Celsius (32 degrees Fahrenheit) at standard atmospheric pressure.

    3. Boiling Point:

    • The temperature at which water changes from a liquid to a gas is 100 degrees Celsius (212 degrees Fahrenheit) at standard atmospheric pressure.

    4. Density:

    • The density of water is highest at 4 degrees Celsius. It is about 1 gram per cubic centimeter (g/cm³). The density decreases as water freezes or heats up.

    5. Color:

    • Pure water is colorless. The presence of impurities or dissolved substances can give water a color.

    6. Taste and Odor:

    • Pure water is tasteless and odorless. The taste and odor of water can be influenced by dissolved minerals, gases, or contaminants.

    7. Solvent Properties:

    • Water is often referred to as the “universal solvent” because it has the ability to dissolve a wide range of substances, making it essential for various biological and chemical processes.

    8. Heat Capacity:

    • Water has a high specific heat capacity, meaning it can absorb and store a significant amount of heat energy. This property helps moderate temperature changes in the environment and in living organisms.

    9. Surface Tension:

    • Water exhibits surface tension, allowing it to form droplets and support lightweight objects on its surface. This property is due to hydrogen bonding between water molecules.

    10. Transparency:

    • Water is transparent to visible light, allowing light to pass through. This property is important for aquatic ecosystems and the penetration of sunlight into bodies of water.

    11. Boiling and Freezing Point Elevation:

    • Dissolved solutes in water can elevate its boiling point and depress its freezing point, a phenomenon known as boiling point elevation and freezing point depression.

    12. Capillary Action:

    • Water can move upward in narrow tubes against the force of gravity due to capillary action, a result of cohesive and adhesive forces.

    13. Vapor Pressure:

    • Water vapor exerts pressure, known as vapor pressure, which is influenced by temperature. Warmer temperatures lead to higher vapor pressure.

    Understanding these physical properties is essential for various scientific disciplines, including chemistry, physics, and environmental science.

    Chemical properties of water

    The chemical properties of water are characteristics that involve its chemical composition and reactions. Here are some key chemical properties of water:

    1. Chemical Formula:

    • The chemical formula of water is H₂O, indicating that each molecule consists of two hydrogen atoms covalently bonded to one oxygen atom.

    2. Polarity:

    • Water is a polar molecule due to the electronegativity difference between oxygen and hydrogen. This polarity leads to the formation of hydrogen bonds between water molecules.

    3. Hydrogen Bonding:

    • Water molecules exhibit hydrogen bonding, where the positively charged hydrogen of one molecule is attracted to the negatively charged oxygen of another. This gives water unique properties such as high surface tension and cohesion.

    4. Ionization:

    • Water can undergo ionization, breaking into hydrogen ions (H⁺) and hydroxide ions (OH⁻). This process is represented as H₂O ⇌ H⁺ + OH⁻.

    5. Acid-Base Properties:

    • Water acts as a neutral substance but can also function as an acid or a base. It can donate a proton (H⁺) to behave as an acid or accept a proton to behave as a base.

    6. Reaction with Metals:

    • Water can react with certain metals, producing metal hydroxides and hydrogen gas. For example:
    • 2Na+2H2O→2NaOH+H22Na+2H2​O→2NaOH+H2​

    7. Reaction with Non-Metals:

    • Water can react with non-metals to form acids. For example:
    • �2+3H2O→2HNO3+2NH3N2​+3H2​O→2HNO3​+2NH3​

    8. Dissolving Substances:

    • Water is a universal solvent, dissolving many substances due to its polarity. This property is essential for various biological and chemical processes.

    9. Formation of Hydrates:

    • Some salts and compounds can form hydrates by incorporating water molecules into their crystal structures during their formation.

    10. Reaction with Carbon Dioxide:

    • Water can react with carbon dioxide to form carbonic acid in a reversible reaction. For example:
    • CO2+H2O⇌H2CO3CO2​+H2​O⇌H2​CO3​

    11. Hydrolysis:

    • Water participates in hydrolysis reactions, breaking down complex molecules into simpler ones by incorporating water molecules.

    12. Buffering Action:

    • Water exhibits buffering action in biological systems, helping to maintain a relatively constant pH.

    13. Oxidation-Reduction Reactions:

    • Water participates in redox reactions, either gaining or losing electrons. For example, in photosynthesis and cellular respiration.

    Understanding these chemical properties is crucial for comprehending the role of water in various chemical reactions, biological processes, and environmental systems.

    Water and pH:

    1. Water’s Role in pH:

    • Neutral Substance: Pure water is considered neutral, meaning it has a pH of 7. This is because the concentration of hydrogen ions (�+H+) is equal to the concentration of hydroxide ions (��−OH−).

    2. pH Scale:

    • Acidity and Alkalinity: The pH scale measures the acidity or alkalinity of a solution. It ranges from 0 to 14, where a pH of 7 is neutral, values below 7 are acidic, and values above 7 are alkaline or basic.

    3. Ionization of Water:

    • Self-Ionization: Water undergoes self-ionization, producing equal concentrations of �+H+ and ��−OH− ions. This is represented as 2H2O⇌H3O++OH−2H2​O⇌H3​O++OH−.

    4. Hydrogen Ion Concentration:

    • pH Calculation: The pH of a solution is calculated using the formula: pH=−log⁡[H+]pH=−log[H+], where [H+][H+] is the concentration of hydrogen ions.

    5. Acidic Solutions:

    • Higher Hydrogen Ion Concentration: In acidic solutions, the concentration of �+H+ ions is higher than ��−OH−, resulting in a pH below 7.

    6. Basic or Alkaline Solutions:

    • Higher Hydroxide Ion Concentration: In basic or alkaline solutions, the concentration of ��−OH− ions is higher than �+H+, resulting in a pH above 7.

    7. Buffering Capacity of Water:

    • Maintaining pH: Water has a limited ability to resist changes in pH, acting as a weak buffer. It can absorb or release �+H+ ions to resist significant changes in pH.

    8. Biological Significance:

    • pH in Biological Systems: pH is crucial in biological systems, influencing enzyme activity, cellular functions, and the overall health of organisms.

    9. Environmental Impact:

    • Acid Rain: Changes in pH can have environmental consequences, such as acid rain, which is caused by the presence of acidic substances in the atmosphere.

    10. Human Health:

    • pH in the Body: Maintaining the proper pH is essential for various physiological processes in the human body, including blood pH regulation.

    11. Water Treatment:

    • pH Adjustment: In water treatment, pH is often adjusted to optimize the efficiency of water purification processes and ensure the water’s safety.

    Study Tips:

    • Understand pH Calculations: Practice calculating pH values for acidic, neutral, and basic solutions.
    • Explore Real-world Applications: Investigate how pH plays a role in everyday life, from water quality to biological processes.
    • Experiment: Conduct simple experiments to observe the effects of acids and bases on indicators and pH levels.

    Water Cycle and a Laboratory practical on Making a model water cycle

    Water Cycle

    The water cycle, also known as the hydrological cycle, is a continuous and dynamic process that describes the movement of water on, above, and below the Earth’s surface. It involves various stages, including evaporation, condensation, precipitation, runoff, and infiltration. The water cycle is essential for sustaining life on Earth and plays a crucial role in regulating climate and weather patterns.

    1. Evaporation:

    • Water from oceans, lakes, and rivers is heated by the sun and turns into water vapor, rising into the atmosphere.

    2. Condensation:

    • As the water vapor rises, it cools and condenses into tiny water droplets, forming clouds in the atmosphere.

    3. Precipitation:

    • When the water droplets in clouds combine and become heavy enough, they fall to the Earth’s surface as precipitation. This can take the form of rain, snow, sleet, or hail.

    4. Runoff:

    • Precipitation that falls on the Earth’s surface can either be absorbed into the ground (infiltration) or flow over the surface as runoff, eventually reaching rivers, lakes, and oceans.

    5. Infiltration:

    • Some precipitation is absorbed by the soil and moves into underground aquifers, becoming groundwater.

    6. Transpiration:

    • Plants absorb water from the soil through their roots and release water vapor into the atmosphere through a process known as transpiration.

    In conclusion, The water cycle is a continuous and interconnected system that ensures the distribution and circulation of water across the Earth. It plays a vital role in maintaining ecosystems, supporting agriculture, and influencing weather patterns. Understanding the water cycle is crucial for addressing environmental challenges, managing water resources, and predicting climate changes.

    Laboratory Practical: Making a Model Water Cycle

    Objective:

    To create a model that illustrates the various stages of the water cycle.

    Materials:

    1. Large transparent container (representing the atmosphere)
    2. Small shallow container (representing a body of water)
    3. Plastic wrap
    4. Heat lamp or light source
    5. Ice cubes
    6. Blue food coloring
    7. Small plastic or paper cutouts (representing clouds)

    Procedure:

    1. Fill the small shallow container with water and add a few drops of blue food coloring to represent a body of water.
    2. Place the container in the large transparent container to create a closed system.
    3. Cover the large container with plastic wrap, ensuring it is sealed tightly to represent the atmosphere.
    4. Position the heat lamp or light source over the water in the small container to simulate the heat from the sun.
    5. Observe the model over time and note the changes that occur.
    6. Record the formation of “clouds” (condensation) on the plastic wrap and observe any precipitation (water droplets) falling back into the small container.
    7. Place ice cubes on the plastic wrap to simulate cooling and observe any changes in the model.

    Analysis:

    1. Discuss the observed stages of the water cycle in the model, including evaporation, condensation, precipitation, and runoff.
    2. Explain how the heat source represents the sun’s energy driving evaporation.
    3. Discuss how the plastic wrap represents the atmosphere, allowing water vapor to condense and form clouds.
    4. Highlight the significance of the closed system in demonstrating the continuous nature of the water cycle.

    Through this hands-on model, students gain a visual understanding of the water cycle and its interconnected processes. It provides a practical way to reinforce concepts and encourages discussion about the environmental importance of the water cycle.

    Understanding the Occurrence of Water:

    Water is a fundamental substance on Earth, existing in various states and playing a critical role in sustaining life and shaping the planet’s geology and climate. Understanding the occurrence of water involves exploring its distribution, forms, and significance in different environments.

    Occurrence of Water Forms:

    1. Surface Water:
    • Rivers and Lakes: Significant bodies of freshwater that play a vital role in ecosystems and human activities.
      • Oceans: Vast saltwater bodies covering about 71% of the Earth’s surface, influencing climate and supporting diverse marine life.
    • Groundwater:
    • Water stored below the Earth’s surface in aquifers and permeable rock formations, providing a vital source for wells and springs.
    • Atmospheric Water:
    • Water vapor present in the atmosphere, contributing to the water cycle through processes like evaporation, condensation, and precipitation.
    • Polar Ice and Glaciers:
    • Huge reservoirs of freshwater stored as ice in polar regions and mountainous glaciers, influencing sea levels and freshwater availability.

    Water Cycle and Occurrence:

    1. Evaporation:
    • Water from oceans, lakes, and rivers transforms into water vapor due to solar energy.
    • Condensation:
    • Water vapor condenses into clouds in the atmosphere, forming visible masses of water droplets.
    • Precipitation:
    • Water droplets in clouds combine and fall back to the Earth as rain, snow, sleet, or hail.
    • Runoff and Infiltration:
    • Precipitation either runs off the surface into rivers and oceans or infiltrates into the ground, becoming groundwater.
    • Transpiration:
    • Plants absorb water through their roots and release water vapor into the atmosphere through transpiration.

    Significance of Water:

    1. Essential for Life:
    • Water is a critical component for the survival and functioning of all living organisms.
    • Climate Regulation:
    • Water plays a key role in regulating Earth’s climate through its heat-absorbing and transporting capabilities.
    • Erosion and Weathering:
    • Water contributes to the breakdown of rocks through erosion and weathering processes, shaping landscapes.
    • Human Activities:
    • Water is essential for agriculture, industry, and domestic use, impacting human societies and economies.
    • Biodiversity Support:
    • Aquatic ecosystems provide habitats for diverse plant and animal species, contributing to global biodiversity.

    Challenges and Conservation:

    1. Water Scarcity:
    • Some regions face water scarcity due to over-extraction, pollution, and climate change.
    • Pollution:
    • Human activities contribute to water pollution through the release of contaminants and pollutants.
    • Climate Change Impact:
    • Changes in global climate patterns can affect water availability and exacerbate water-related challenges.

    Water and Sewage Treatment Stages:

    Water and Sewage Stage Two: Primary Treatment

    Objective: The primary treatment phase focuses on the physical removal of large solids and materials from wastewater to reduce its pollutant load before further treatment.

    Processes:

    1. Screening:
    • Wastewater passes through screens or grates to remove large debris like sticks, leaves, and plastics.
    • Primary Sedimentation:
    • Wastewater is allowed to settle in large tanks, enabling the separation of suspended solids. Heavier particles settle to the bottom as sludge.
    • Grit Removal:
    • Grit (sand, gravel) is settled out in grit chambers to prevent damage to equipment in subsequent treatment stages.

    Outcome:

    • Reduction in the amount of solid material in the wastewater, preparing it for further treatment.

    Water and Sewage Stage Three: Secondary Treatment

    Objective: The secondary treatment phase targets the biological degradation of organic matter and the removal of dissolved and suspended pollutants.

    Processes:

    1. Activated Sludge Process:
    • Wastewater is mixed with activated sludge (microorganisms) in aeration tanks. Microorganisms consume organic matter, and aeration provides oxygen for their growth.
    • Trickling Filters:
    • Wastewater trickles over microbial-coated surfaces (rock or plastic media) where microorganisms break down organic matter.
    • Rotating Biological Contactors (RBCs):
    • Wastewater flows over rotating disks with microbial growth, facilitating biological treatment.

    Outcome:

    • Significant reduction in organic pollutants and improvement in water quality.

    Water and Sewage Stage Four: Final Treatment

    Objective: The final treatment stage involves additional processes to ensure the removal of remaining impurities and pathogens from the treated water.

    Processes:

    1. Tertiary Treatment:
    • Advanced treatment to further reduce remaining pollutants, including nutrients (nitrogen and phosphorus).
    • Disinfection:
    • The treated water undergoes disinfection to eliminate remaining pathogens. Common methods include chlorination, UV radiation, or ozonation.
    • Filtration:
    • Water passes through filters (sand, gravel, or membrane filters) to capture any remaining particles.
    • pH Adjustment:
    • The pH of the treated water is adjusted to meet regulatory standards.

    Outcome:

    • Production of high-quality effluent suitable for discharge into receiving waters or for reuse.

    Conclusion:

    The sequential stages of water and sewage treatment aim to transform raw wastewater into environmentally safe and often reusable effluent. Each stage employs specific processes to address different aspects of water pollution, ultimately ensuring the protection of public health and the environment. Proper treatment is crucial for maintaining water quality and safeguarding ecosystems downstream.

    All in all, Understanding the occurrence of water involves recognizing its various forms, distribution patterns, and the dynamic processes within the water cycle. As a precious resource, water’s sustainable management and conservation are essential for the well-being of ecosystems and human societies.

    Frequently Asked Questions (FAQs) on Water:

    1. (a) Name five sources of natural water.
    (b) How do you normally make the water from those sources safe for drinking?

    Answer: a. Five sources of natural water include rivers, lakes, groundwater, oceans, and rain. b. To make water safe for drinking, it undergoes processes such as filtration, disinfection (e.g., chlorination), and sometimes, additional treatments like reverse osmosis or boiling to remove impurities and pathogens.

    2. Describe an experiment that can be conducted to show that living materials contain water.

    Answer: Experiment: Place a fresh piece of plant material (e.g., leaves or a small twig) in an oven and heat it at a low temperature. Weigh the material before and after heating. The loss in weight indicates the presence of water, demonstrating that living materials contain water.

    3. Describe one method you can use to purify water at home.

    Answer: Method: Boiling Boiling water is a simple and effective method to purify it at home. Bring water to a rolling boil for at least one minute (or three minutes at higher altitudes) to kill most microorganisms, making it safe for consumption.

    4. Describe the process of recycling water naturally.

    Answer: Natural Water Recycling: Water is naturally recycled through the water cycle. Evaporation from oceans, lakes, and rivers forms clouds, leading to precipitation. This water replenishes surface and groundwater, completing the cycle and ensuring a continuous supply of fresh water.

    5. How does water get polluted?

    Answer: Water Pollution: Water gets polluted through the introduction of contaminants such as chemicals, heavy metals, sewage, agricultural runoff, and industrial discharges. Improper disposal of waste, oil spills, and atmospheric deposition also contribute to water pollution.

    6. Describe human activities that can cause water pollution.

    Answer: Human Activities Contributing to Water Pollution: Activities such as industrial discharges, agricultural runoff (pesticides and fertilizers), improper waste disposal, oil spills, and untreated sewage discharge into water bodies contribute significantly to water pollution.

    7. Describe the stages of sewage treatment. Why is sewage treated?

    Answer: Sewage Treatment Stages: Sewage treatment involves primary treatment (physical removal of solids), secondary treatment (biological degradation of organic matter), and final treatment (additional processes for pollutant removal and disinfection). Sewage is treated to protect public health, prevent environmental pollution, and ensure the safe disposal of wastewater into natural water bodies.

  • Pesticides: Types, Effective Usage, and How to Make Organic Pesticides

    Pesticides: Types, Effective Usage, and How to Make Organic Pesticides

    Learn about different types of pesticides, their regulatory guidelines, effective usage methods, and how to create organic pesticides with practical tips for application in your garden.

    Introduction:

    Pesticides play a vital role in protecting crops from pests and diseases, but it’s essential to understand their types and proper usage to ensure safety and effectiveness. From chemical pesticides to organic alternatives, each has specific regulatory guidelines and best practices for application. Additionally, making your own organic pesticides can offer a natural, eco-friendly solution to pest control. In this guide, we’ll explore the types of pesticides, how to use them effectively, the regulations governing their application, and step-by-step instructions for making organic pesticides, along with helpful tips for safe and efficient application.

    What are pesticides?

    Pesticides are substances used to control, repel, or eliminate pests that threaten crops. They encompass a wide range of chemicals designed to combat insects, weeds, fungi, and other organisms that can harm plants. In agricultural contexts, pesticides play a significant role in maintaining crop health and increasing yields. However, their usage requires careful consideration due to their potential impact on the environment, human health, and non-target organisms.

    Types of Pesticides:

    1.            Insecticides: Target and control insect pests.

    2.            Herbicides: Designed to manage weeds and unwanted plants.

    3.            Fungicides: Used to combat fungal diseases that affect crops.

    4.            Rodenticides: Aimed at controlling rodent populations that can damage crops.

    Considerations and Challenges:

    1.            Effectiveness: Pesticides can be highly effective in controlling pests and diseases, helping to protect crop yield and quality.

    2.            Environmental Impact: Some pesticides, if not used carefully, can harm non-target organisms, contaminate soil and water, and disrupt ecosystems.

    3.            Residue and Health Concerns: Residues of pesticides on produce can pose health risks if consumed in large quantities. Long-term exposure for farmworkers can also be a concern.

    4.            Resistance: Prolonged use of a particular pesticide can lead to the development of resistance in pest populations, making the pesticide less effective over time.

    Safe and Effective Usage:

    1.            Integrated Pest Management (IPM): Emphasizes a holistic approach to pest management, combining various strategies—cultural, biological, and chemical—to minimize the use of pesticides.

    2.            Selective Pesticides: Opt for pesticides that specifically target the intended pests to minimize the impact on non-target organisms.

    3.            Proper Application: Follow manufacturer instructions for dosage, timing, and application methods to ensure effectiveness and minimize environmental impact.

    4.            Alternatives: Explore organic pesticides or biocontrol agents as alternatives to synthetic chemical pesticides.

    Regulatory Oversight:

    Most countries have regulatory bodies that oversee the registration, sale, and usage of pesticides. They set guidelines and restrictions on the types of pesticides allowed, their concentrations, and application methods to safeguard human health and the environment.

    While pesticides can be valuable tools in agriculture, their use must be judicious and well-informed. Balancing effective pest control with minimizing adverse effects on the environment and human health is crucial. Integrated approaches, proper application, and consideration of alternative methods are key to responsible pesticide use in agriculture.

    how to make organic pesticides

    there are many ways of making organic fertilisers. We in most cases use neem oil and/or pepper and garlic.

    Neem oil is a popular organic pesticide due to its effectiveness in controlling a wide range of pests while being relatively safe for beneficial insects. Here’s a simple recipe for a neem oil organic pesticide, along with a few other formulations using common household ingredients:

    Neem Oil Organic Pesticide:

    Ingredients:

    •             1-2 teaspoons of neem oil (100% pure cold-pressed neem oil)

    •             A few drops of mild liquid soap (e.g., dish soap)

    •             1 quart (1 liter) of water

    Instructions:

    1.            Mix the neem oil and mild liquid soap in a small container.

    2.            Add this mixture to the water in a spray bottle.

    3.            Shake the solution well before using to ensure the oil is properly dispersed.

    Application:

    •             Spray the solution on both sides of the plant leaves, targeting pests. Repeat every 7-14 days or as needed, especially after rainfall or irrigation.

    Other Organic Pesticide Formulas:

    1.            Garlic and Pepper Spray:

    •             Blend a couple of cloves of garlic and a hot pepper with water.

    •             Let the mixture steep overnight, strain, and add a few drops of liquid soap.

    •             Spray on affected plants.

    2.            Soap Spray:

    •             Mix 1-2 tablespoons of mild liquid soap in a gallon of water.

    •             Spray on plants affected by aphids, spider mites, and other soft-bodied insects.

    3.            Oil and Baking Soda Spray:

    •             Mix 1 tablespoon of vegetable oil, 1 tablespoon of baking soda, and a few drops of mild soap in a gallon of water.

    •             Use this to combat fungal diseases like powdery mildew.

    Safety Tips for Using Organic Pesticides:

    •             Always test spray a small area of the plant and wait 24 hours to ensure the solution doesn’t damage the plant.

    •             Apply pesticides during cooler parts of the day to avoid leaf damage from the sun.

    •             Wear protective gear, such as gloves and goggles, especially when handling concentrated solutions.

    •             Store any leftover solutions in a labeled, tightly sealed container away from children and pets.

    These organic pesticide recipes offer effective alternatives to synthetic pesticides, but it’s important to reapply as needed, especially after rainfall or if pests persist. Always remember that prevention, early detection, and a combination of pest management strategies can significantly reduce the need for pesticides.

    Conclusion:

    Pesticides, when used correctly, can be powerful tools in maintaining a healthy garden or farm. Understanding the different types, following regulatory guidelines, and applying them effectively will ensure that your crops remain pest-free without harming the environment. For those seeking natural alternatives, homemade organic pesticides offer an eco-conscious option. By following the tips and practices outlined in this guide, you can safely and efficiently manage pests while promoting a sustainable approach to agriculture.

    d Organic Alternatives

    FAQs on Pesticides: Types, Usage, and Organic Alternatives

    1. What are the different types of pesticides?
    There are several types of pesticides, including insecticides (for insects), herbicides (for weeds), fungicides (for fungi), rodenticides (for rodents), and bactericides (for bacteria). Each type is designed to target specific pests and is available in chemical or organic forms.

    2. What regulations govern the use of pesticides?
    Pesticide use is regulated by government agencies to ensure safety for humans, animals, and the environment. In most countries, regulatory bodies like the EPA (Environmental Protection Agency) in the U.S. or similar organizations set guidelines for pesticide approval, labeling, storage, and application. Always check your local regulations before purchasing or applying pesticides.

    3. How do I apply pesticides effectively?
    To use pesticides effectively, follow the manufacturer’s instructions for dilution, application method, and timing. Apply pesticides during calm weather to avoid drift, and target the affected areas rather than blanket-spraying. Wearing protective gear such as gloves and masks is also crucial for safe handling.

    4. Can I make my own organic pesticides at home?
    Yes, many organic pesticides can be made from natural ingredients. Popular DIY organic pesticide recipes include mixtures made from neem oil, garlic, chili pepper, or soap. These organic pesticides are effective in controlling pests without harmful chemicals, making them safer for the environment.

    5. What are some tips for applying organic pesticides?

    • Always test organic pesticides on a small portion of your plants first to ensure no adverse effects.
    • Reapply after rain, as organic pesticides may wash away.
    • Focus on the undersides of leaves, where pests often hide.
    • Regularly monitor your garden to adjust your pesticide use based on pest activity.

    6. Are organic pesticides as effective as chemical pesticides?
    Organic pesticides can be effective, but they often work slower than chemical alternatives. They typically require more frequent application and are best used as part of an integrated pest management (IPM) system, which combines multiple strategies like crop rotation, natural predators, and manual removal.

    7. What safety precautions should I take when using pesticides?
    Always wear protective clothing (gloves, long sleeves, masks) when handling pesticides. Follow application instructions carefully, store pesticides in labeled, sealed containers away from children and pets, and wash your hands and equipment thoroughly after use.

    8. Can organic pesticides harm beneficial insects?
    Yes, some organic pesticides, such as neem oil, can harm beneficial insects like bees and ladybugs. To minimize this risk, apply them early in the morning or late in the evening when beneficial insects are less active, and focus on the areas with pest problems.

  • The Buganda Kingdom: Origins, Growth, and Legacy

    Explore the rich history of the Buganda Kingdom, one of the oldest and most influential kingdoms in East Africa. Learn about its origins, political organization, and factors that led to its growth and influence in Uganda.

    Introduction:

    The Buganda Kingdom stands as one of the most powerful and culturally rich kingdoms in East Africa, particularly in present-day Uganda. With roots deeply embedded in oral traditions and myth, the kingdom traces its origins to the legendary figure Kintu, who is believed to be the first Kabaka (king). Over the centuries, Buganda grew through political centralization, military strength, agricultural success, and strategic alliances, positioning itself as a dominant force in the region. This blog delves into the history, organization, and factors that contributed to the growth of Buganda, offering insights into how this kingdom has shaped the cultural and political landscape of East Africa.

    The origin of Buganda kingdom

    The Buganda Kingdom is one of the oldest and most powerful traditional kingdoms in East Africa, located in what is now Uganda. Its origin is shrouded in legend and oral tradition, and while there isn’t a definitive historical account, Buganda’s founding is attributed to a combination of historical, mythological, and cultural factors.

    According to Buganda’s oral traditions, its founding is associated with Kintu, a legendary figure who is considered the first Kabaka (king) of Buganda. The story of Kintu’s arrival and establishment of the kingdom is a central part of Buganda’s mythology. Key aspects of the origin story include:

    Migration and Arrival: According to legend, Kintu and his companions migrated to the region from the north or northeast. They are said to have arrived at a place known as Bigo bya Mugenyi, near present-day Kampala, and were initially welcomed by the indigenous Bantu-speaking communities in the area.

    Unity and Marriage: Kintu’s arrival led to unity and alliances with local clans. He married Nambi, the daughter of Ggulu (the sky god), which solidified his connection to the spiritual and divine aspects of the region’s culture.

    Establishment of the kingdom: Kintu is believed to have introduced a centralized system of governance and social organization, which laid the foundation for the Buganda Kingdom. He became the first Kabaka, marking the beginning of Buganda’s monarchy. The Baganda people, who trace their ancestry to Kintu and Nambi, became the core population of the kingdom.

    Cultural and Religious Significance: The Buganda Kingdom’s founding myth has deep cultural and religious significance for the Baganda people. It connects them to their ancestral roots and reinforces their belief in the divine and spiritual aspects of their history.

    While the story of Kintu’s arrival and the establishment of the Buganda Kingdom is deeply ingrained in Buganda’s cultural identity, it’s important to note that the historical accuracy of the legend is a subject of debate among scholars. The Buganda Kingdom has a rich and complex history that extends over centuries, encompassing periods of expansion, conflict, and colonial rule, and it remains a vital part of Uganda’s cultural heritage to this day.

    the organization of Buganda kingdom

    The Buganda Kingdom, one of the oldest and most influential kingdoms in East Africa, had a well-structured political, social, and economic organization. It was located in what is now Uganda, with its capital in present-day Kampala. Here’s an overview of each aspect of Buganda’s organization:

    Political Organization:

    1. Kabaka (King): The Kabaka was the central political figure in Buganda. The monarchy was hereditary, and the Kabaka’s authority was considered divine. The Kabaka’s role included governing the kingdom, making decisions, and representing the people in both internal and external affairs.
      1. Lukiko (Parliament): The Lukiko was Buganda’s legislative council, consisting of clan representatives and chiefs. It had advisory and decision-making functions, providing checks and balances to the Kabaka’s power. It was responsible for discussing and passing laws, resolving disputes, and making recommendations to the Kabaka.
        1. Administrative Units: Buganda was divided into administrative units called counties (masaza), each led by a chief (saza chief). The chief was responsible for local governance, tax collection, and maintaining order within their county.
        1. Clans and Lineages: Buganda society was organized into clans, with each clan having its own chief or head. Clans played a significant role in social and political identity, and they were responsible for various cultural roles and responsibilities.

    Social Organization:

    1. Clan System: The clan system was a fundamental aspect of Buganda’s social structure. People identified strongly with their clans, and clan affiliations influenced marriage, social status, and inheritance.
      1. Age-Set System: Buganda had an age-set system where people of the same age group (generation) went through life stages together, which helped establish bonds and shared experiences among community members.
        1. Gender Roles: Traditional gender roles were observed, with men often responsible for activities such as hunting, defense, and political leadership, while women played crucial roles in agriculture, food production, and household management.
          1. Marriage and Family: Marriage was highly valued in Buganda society. Marriages were often arranged by families, and the exchange of bride-wealth (dowry) was customary. Extended families were important, and they often lived together in compounds.

    Economic Organization:

    1. Agriculture: Agriculture was the backbone of Buganda’s economy. Staple crops like bananas, millet, maize, and sweet potatoes were cultivated. The kingdom had an elaborate system of land allocation and use, with land belonging to the king but allocated to chiefs, clans, and individuals for cultivation.
      1. Trade: Buganda was strategically located on trade routes connecting the interior of Africa to the coast. Trade, including the exchange of goods such as ivory, salt, and textiles, played a vital role in the kingdom’s economy.
        1. Livestock: Cattle, goats, and sheep were raised for their milk, meat, hides, and social prestige. Livestock ownership symbolized wealth and status.
          1. Craftsmanship: Skilled artisans produced a wide range of crafts, including pottery, textiles, and iron tools. These crafts were essential for daily life and trade.
          1. Taxes and Tribute: Taxes were collected by local chiefs and officials and often included agricultural produce, livestock, and labor services. These resources supported the kingdom’s administration and infrastructure.

    Buganda’s well-structured political, social, and economic organization contributed to its stability and influence in the region. However, it also faced significant challenges during the colonial period when British colonialists imposed their administrative structures and policies on the kingdom, leading to significant changes in Buganda’s traditional institutions and governance.

    Factors that led to the growth of Buganda Kingdom

    The growth and expansion of the Buganda Kingdom, one of the most prominent kingdoms in East Africa, can be attributed to a combination of historical, political, social, and economic factors:

    1. Political Centralization: Buganda’s growth was facilitated by its early centralization of power under strong and capable leaders, particularly during the reign of Kabaka (King) Kintu. This centralization allowed for more effective governance, coordination, and expansion.
    2. Military Strength: Buganda had a well-organized military force, including skilled warriors and a hierarchical command structure. This military strength allowed Buganda to defend itself against external threats and expand its territory through conquest.
    3. Alliances and Diplomacy: Buganda’s leadership skillfully formed alliances with neighboring kingdoms and chiefdoms, both through diplomacy and strategic marriages. These alliances helped consolidate power and expand influence.
    4. Agricultural Surplus: The fertile soil of Buganda’s region allowed for successful agriculture. The surplus food production not only supported a growing population but also provided resources for trade and tribute, strengthening Buganda’s economic base.
    5. Strategic Location: Buganda was strategically located at the crossroads of trade routes, making it a vital trading hub in East Africa. Its central position allowed it to control trade networks and collect revenue from traders passing through the kingdom.
    6. Effective Taxation and Tribute System: Buganda had a well-structured system of taxation and tribute collection. Chiefs and local leaders collected taxes and tribute from their subjects, which contributed to the kingdom’s wealth and stability.
    7. Cultural Unity: The Baganda people shared a common language, culture, and identity. This cultural unity fostered a sense of cohesion and loyalty to the kingdom, making it easier to govern and expand.
    8. Institutional Governance: The Buganda Kingdom had established institutions, including the Lukiko (parliament) and administrative units, which helped maintain order, resolve conflicts, and facilitate governance across the kingdom’s expanding territories.
    9. Innovation and Adaptation: Buganda’s leaders were often open to adopting and adapting new ideas and technologies. They incorporated aspects of foreign cultures and innovations, such as ironworking and agricultural practices, into their society, which contributed to economic development and growth.
    10. Religious and Spiritual Leadership: The Buganda Kingdom’s spiritual and religious leaders played a significant role in the growth of the kingdom. They provided spiritual guidance, mediated disputes, and legitimized the authority of the Kabaka.
    11. Population Growth: A growing population within Buganda led to increased labor resources, agricultural output, and military manpower, which were essential for territorial expansion.
    12. Leadership and Stability: The Buganda Kingdom experienced periods of stable leadership under capable kabakas who could implement policies, maintain order, and lead successful military campaigns, all of which contributed to the kingdom’s growth.

    The growth of the Buganda Kingdom was a complex interplay of these factors, and it allowed Buganda to become a dominant political and cultural force in the Great Lakes region of East Africa. However, it’s important to note that the history of Buganda also includes periods of internal strife, external conflicts, and challenges, reflecting the dynamic nature of its growth and evolution over time.

    Conclusion:

    The Buganda Kingdom remains a significant chapter in the history of East Africa, with a legacy that continues to influence modern Uganda. Its centralized political structure, cultural unity, and economic success made it one of the most powerful kingdoms in the Great Lakes region. By understanding the origins, growth, and factors that contributed to Buganda’s rise, we can appreciate the kingdom’s role in shaping the political and cultural identity of East Africa. Today, the traditions and values of Buganda continue to hold a central place in Uganda’s society.

    FAQs About the Buganda Kingdom:

    1. Who founded the Buganda Kingdom?
    The Buganda Kingdom is believed to have been founded by the legendary figure Kintu, who became the first Kabaka (king) and established the monarchy that shaped the kingdom’s political and cultural identity.

    2. What was the political organization of the Buganda Kingdom?
    Buganda had a highly centralized political system, with the Kabaka at the top. The kingdom had administrative units called counties (masaza), led by chiefs, and a legislative body called the Lukiko, which helped advise the king.

    3. How did the Buganda Kingdom grow and expand?
    The growth of Buganda was driven by factors such as political centralization, military strength, strategic alliances, agricultural surplus, and a well-structured taxation system.

    4. What role did agriculture play in the growth of Buganda?
    Agriculture was the backbone of Buganda’s economy, with fertile land supporting the production of crops like bananas and millet. The agricultural surplus enabled the kingdom to sustain its population, engage in trade, and collect tribute.

    5. What were the key factors that led to Buganda’s dominance in East Africa?
    Key factors included strong leadership, effective governance, military power, cultural unity, strategic location for trade, and a robust system of taxation and tribute collection.

    6. How did the Buganda Kingdom interact with neighboring regions?
    Buganda engaged in trade and formed alliances with neighboring kingdoms and chiefdoms. These interactions helped strengthen Buganda’s influence and expand its territorial reach.

    7. What challenges did the Buganda Kingdom face?
    While the kingdom enjoyed periods of growth, it also faced internal strife, external conflicts, and challenges brought by the arrival of European colonial powers in the region.

  • How Students in Uganda Can Earn Money Online Without Investment

    Discover effective ways for Ugandan students to earn money online without any upfront investment. From freelancing to affiliate marketing, explore accessible and flexible opportunities to build income as a student.

    Introduction

    Earning money online as a student in Uganda has become increasingly accessible thanks to the rapid growth of the digital economy. There are numerous ways to make money online without needing upfront investments, which can help students gain financial independence and even build valuable skills for future career opportunities. In this blog, we’ll explore various methods that allow students in Uganda to earn money online without any initial investment, covering options that are flexible and accessible from a mobile phone or computer. Let’s dive into some of the best ways to start earning!e

    —

    Ways through which students can start earning money without a huge investment

    ### **1. Freelancing**

    Freelancing is one of the most popular ways for students to earn money online, offering flexibility and a range of services to provide. As a freelancer, you can offer skills you already possess, such as writing, graphic design, social media management, or programming, and connect with clients from around the world on platforms like Upwork, Fiverr, and Freelancer.

    – **Skills Needed**: Vary based on the service you choose (writing, graphic design, programming, etc.).

    – **Where to Start**: Sign up on freelancing platforms, create a profile, and start applying for jobs.

    – **Earning Potential**: Payment varies with skill level and client, ranging from $5 to $100+ per project.

    ### **2. Online Surveys and Research**

    Completing online surveys is a straightforward way to earn a small amount of money, which can be a great start if you’re looking for a quick and easy task. Many survey sites pay for sharing your opinion on various products and services. You can also participate in market research studies or product testing when opportunities are available in Uganda.

    – **Skills Needed**: No specific skills required.

    – **Where to Start**: Survey sites such as Swagbucks, Survey Junkie, and Toluna.

    – **Earning Potential**: Payment ranges from $0.50 to $5 per survey, depending on the length.

    ### **3. Affiliate Marketing**

    Affiliate marketing involves promoting products or services from other companies and earning a commission when someone purchases through your unique affiliate link. As a student, you can share affiliate links on your social media pages, a blog, or YouTube channel if you have a following. Choose products or services that align with your interests to make it feel more authentic.

    – **Skills Needed**: Basic marketing skills, and an understanding of social media or content creation.

    – **Where to Start**: Join affiliate programs on sites like Amazon Associates, Jumia, and ClickBank.

    – **Earning Potential**: Commission rates vary by program and product, ranging from 1% to 50%.

    ### **4. Content Writing or Blogging**

    If you enjoy writing, consider content writing or starting a blog. Many websites and businesses need content for their blogs, and you can offer your writing services on platforms like iWriter, Medium, or even start your blog on platforms like WordPress or Blogger. You can monetize your blog with ads or affiliate marketing once you build a readership.

    – **Skills Needed**: Writing and research skills.

    – **Where to Start**: Sign up on content writing platforms or create a blog with WordPress or Blogger.

    – **Earning Potential**: $10 to $100+ per article or blog post, depending on length and expertise.

    ### **5. Online Tutoring**

    Online tutoring is a great way for students who excel in particular subjects to make money while helping others. You can offer tutoring services for subjects like mathematics, science, or English on websites such as Chegg Tutors or TutorMe. Alternatively, you can create a YouTube channel for educational content, attracting views and ad revenue.

    – **Skills Needed**: Proficiency in the subject you plan to teach.

    – **Where to Start**: Online tutoring platforms like Chegg, TutorMe, or create an educational YouTube channel.

    – **Earning Potential**: $10 to $30 per hour, depending on the subject and platform.

    ### **6. Social Media Management**

    If you enjoy social media, consider offering social media management services. Many small businesses need help with posting content, engaging with followers, and managing their online presence on platforms like Facebook, Instagram, and Twitter. As a social media manager, you can charge a monthly fee to handle these tasks for them.

    – **Skills Needed**: Understanding of social media platforms and engagement strategies.

    – **Where to Start**: Promote your services on LinkedIn, Fiverr, or contact local businesses directly.

    – **Earning Potential**: $50 to $300 per month per client.

    ### **7. Selling Photos Online**

    If you have a good camera or even a smartphone with a high-quality camera, you can sell your photos on stock photography sites. Platforms like Shutterstock, Adobe Stock, and iStock allow you to upload and sell your photos each time someone downloads them. Nature photography, cityscapes, and lifestyle photos are often in high demand.

    – **Skills Needed**: Photography skills.

    – **Where to Start**: Sign up and upload photos on stock photography websites like Shutterstock, Adobe Stock, or iStock.

    – **Earning Potential**: Earn between $0.25 and $2.00 per download.

    ### **8. Transcription Jobs**

    Transcription involves listening to audio files and typing out what you hear. It’s a simple task but requires good listening skills and attention to detail. Websites like Rev and TranscribeMe offer transcription jobs that pay per minute of audio transcribed. As a student, you can work on transcription tasks during your free time to earn extra cash.

    – **Skills Needed**: Good listening and typing skills.

    – **Where to Start**: Platforms like Rev, TranscribeMe, and GoTranscript.

    – **Earning Potential**: $0.25 to $1.10 per audio minute.

    ### **9. YouTube Channel Creation**

    Creating a YouTube channel is a fantastic way to earn money by sharing your knowledge, talents, or interests. Popular content for students includes study tips, entertainment, vlogging, tech reviews, and tutorials. Once you have enough subscribers and views, you can earn through YouTube’s Partner Program, which includes ad revenue and sponsorships.

    – **Skills Needed**: Content creation and video editing skills.

    – **Where to Start**: Start a YouTube channel, and once you reach 1,000 subscribers and 4,000 watch hours, apply for monetization.

    – **Earning Potential**: $1 to $10 per 1,000 views, depending on your audience and location.

    ### **10. Online Data Entry Jobs**

    Data entry jobs are often simple, requiring minimal skills, making them an ideal option for students. You can find data entry opportunities on freelancing sites and job boards. While pay rates vary, data entry jobs provide a flexible way to make money online without any initial investment.

    – **Skills Needed**: Basic computer skills, attention to detail.

    – **Where to Start**: Platforms like Upwork, Freelancer, and local job boards.

    – **Earning Potential**: $5 to $20 per hour, depending on the job

    complexity.


    How to Earn Money Online as a College Student in Uganda

    For college students, earning online provides not only financial support but also the flexibility needed to balance studies and work. Discover ways you can leverage your skills and interests to generate income while completing your education.


    How to Start Earning Money as a High School Student in Uganda

    High school students can also explore ways to make money online. From simple tasks like surveys to starting a YouTube channel, here are some accessible ways for high school students to earn income online.


    5 Ways to Earn Money as a Full-Time Student

    Balancing full-time studies with online work may seem challenging, but these five methods offer flexibility and require minimal investment. Learn how you can earn money as a full-time student while developing new skills.

    • Free Lansing
    • Writing paid essays
    • Creating a blog website
    • Creating a YouTube channel
    • Creating a money-lending project

    How to Earn Money from TikTok

    If you’re wondering how to turn your followers, likes, and views into income, here’s a complete beginner-friendly guide on how to earn from TikTok.


    ✅ 1. TikTok Creator Fund (Available in Some Regions)

    TikTok pays eligible creators through the Creator Fund, which rewards users based on views and engagement. While currently not available in every country (including Uganda), TikTok may roll it out further.

    Requirements:

    • Be 18 years or older
    • Have at least 10,000 followers
    • Have 100,000+ views in the past 30 days
    • Post original content regularly

    This option works best for users in countries like the US, UK, and parts of Europe.


    ✅ 2. Brand Sponsorships & Influencer Deals

    If you build a niche audience (such as fitness, fashion, cooking, or humor), brands will approach you for sponsored posts. This is one of the most popular and profitable ways to earn.

    Tips:

    • Build a consistent brand
    • Post high-quality, engaging videos
    • Use hashtags to reach more viewers

    Even micro-influencers (with 5K–20K followers) can earn by promoting local products or services.


    ✅ 3. Affiliate Marketing

    Affiliate marketing means promoting a product and earning a commission on every sale made through your link.

    How to start:

    • Join platforms like Jumia Affiliate, Amazon Associates, or ClickBank
    • Create content demonstrating how to use the product
    • Add your affiliate link in your bio or comments

    This works well for creators who do product reviews or tutorials.


    ✅ 4. Live Gifting & TikTok Coins

    If you have 1,000+ followers, you can go live. Viewers can send you virtual gifts, which you convert into real money.

    Pro tip:
    Engage with your audience during live streams. Use Q&A sessions, shoutouts, and giveaways to increase support.


    ✅ 5. Sell Your Products or Services

    Are you a musician, artist, tailor, teacher, or entrepreneur? Use TikTok to promote and sell your goods or services.

    Examples:

    • Sell music or art online
    • Offer private classes (like makeup, cooking, or dance)
    • Promote your small business (e.g., fashion boutique)

    Your videos should be entertaining, short, and clear about what you’re offering.


    TikTok isn’t just a place to dance or lip-sync—it’s a modern digital marketplace. With creativity, consistency, and smart monetization strategies, you can earn money even as a student or beginner.

    Start by building a loyal audience, post engaging content, and explore income options like brand deals, affiliate links, and product promotion. With the right approach, your TikTok account could turn into a real side hustle—or even a full-time business.

    How to Earn Money as a Graduate in Uganda

    As a recent graduate, earning money online can help bridge the gap between college and your first job. Explore options like freelancing, online tutoring, and affiliate marketing to start building an income stream.


    Extra Tip:

    After accumulating some significant savings, you’re at liberty to enjoy a decent holiday. Look no further than Livhola community living. It’s an excellent place to visit in Singapore. Trust me, you’ll have a memorable experience, and your investment will be truly worthwhile.

    Conclusion

    Earning money online as a student in Uganda is not only possible but also provides an excellent opportunity to gain financial independence and develop valuable skills. From freelancing and tutoring to selling photos and content creation, there are many ways to make money online without any investment. As you explore these options, consider your strengths, interests, and availability to find the most suitable opportunity for you. With dedication and consistency, these online ventures can open doors to even more possibilities in the future.

    Frequently asked questions on how to earn money online as a student

    **1. How can I start earning online with no investment?** 

    You can start earning online without investment by freelancing, online surveys, content writing, and social media management. Platforms like Upwork, Fiverr, and Swagbucks are free to join.

    **2. Is it safe for students to work online?** 

    Yes, working online is generally safe, but it’s essential to use reputable platforms and avoid sharing personal information. Always research any site or client before accepting work.

    **3. How much can I earn online as a student in Uganda?** 

    Earnings vary depending on the type of work. Freelancing, content writing, and tutoring can provide moderate to high incomes, while online surveys and data entry jobs typically offer lower pay.

    **4. Do I need special skills to make money online?** 

    Not necessarily. Some opportunities, like online surveys, require no special skills, while others like freelancing or content creation may need specific skills. Consider starting with something that aligns with your strengths.

    **5. Can I earn money online using just my smartphone?** 

    Yes, many online jobs can be done with a smartphone, including taking surveys, selling photos, and managing social media accounts. However, tasks like transcription and video editing may require a computer.

    6. Is There Any Way for Students to Earn Money Online?

    Yes, there are many ways for students to earn money online in Uganda, from freelancing and content writing to taking surveys and affiliate marketing. These opportunities offer flexibility and allow students to start making money without any initial investment.

    7. How Can a Broke Student Make Money Online?

    If you’re a student on a tight budget, you can still make money online with no upfront costs. Options like joining survey sites, starting a blog, or signing up for affiliate marketing programs allow you to earn money without needing any initial funds.

    8. What is the Best Online Job for a Student?

    The best online job for a student depends on your skills, interests, and available time. Popular options include freelancing, online tutoring, content creation, and virtual assistant work. Choose one that aligns with your strengths and fits your schedule.

    How can I Earn Money from Google at Home?

    Google offers several ways to earn money from home. You can sign up for programs like Google AdSense for websites or YouTube channels, participate in Google Opinion Rewards, or work with Google affiliates. These opportunities make it possible to earn money by creating content and sharing it online.

  • Air Pollution: Causes, Main Pollutants, Effects, and Control Measures

    Discover the causes of air pollution, the main pollutants involved, and the harmful effects on health and the environment. Learn effective control measures to combat air pollution.

    Introduction:

    Air pollution is one of the most pressing environmental challenges faced by societies around the world. It occurs when harmful substances like gases, chemicals, and particulates are released into the atmosphere, causing damage to human health, ecosystems, and the global climate. With industrialization, vehicular emissions, and fossil fuel combustion being the major contributors, air pollution has far-reaching impacts. In this blog, we will explore the causes of air pollution, identify the main pollutants, examine the effects on both humans and the environment, and discuss how to control and reduce air pollution for a healthier planet.

    Causes of Air Pollution:

    1. Combustion of Fossil Fuels:
    • Burning of coal, oil, and natural gas releases pollutants into the air.
    • Industrial Emissions:
    • Factories and industrial processes emit pollutants, including particulate matter and gases.
    • Vehicular Emissions:
    • Exhaust emissions from vehicles contribute to air pollution, releasing pollutants like carbon monoxide and nitrogen oxides.
    • Agricultural Activities:
    • Use of fertilizers and pesticides releases pollutants into the air.
    • Waste Disposal:
    • Improper disposal and burning of waste contribute to air pollution.

    Main Air Pollutants:

    1. Particulate Matter (PM):
    • Fine particles suspended in the air, originating from combustion and industrial processes.
    • Nitrogen Oxides (NOx):
    • Gases produced from combustion processes, primarily from vehicles and industrial sources.
    • Sulfur Dioxide (SO2):
    • Released during the burning of fossil fuels containing sulfur, like coal and oil.
    • Carbon Monoxide (CO):
    • Produced by incomplete combustion of fossil fuels.
    • Ozone (O3):
    • Formed through complex reactions involving precursor pollutants in the presence of sunlight.

    Fossil Fuels and Air Pollution:

    • Coal: Releases sulfur dioxide, nitrogen oxides, particulate matter, and carbon dioxide when burned.
    • Oil: Produces sulfur dioxide, nitrogen oxides, and carbon dioxide during combustion.
    • Natural Gas: While cleaner than coal and oil, it still emits carbon dioxide and contributes to air pollution.

    Effects of Air Pollution:

    1. Respiratory Issues:
    • Increased incidence of asthma, bronchitis, and other respiratory diseases.
    • Environmental Impact:
    • Harm to plants, animals, and ecosystems.
    • Global Warming:
    • Greenhouse gas emissions contribute to climate change.
    • Acid Rain:
    • Sulfur dioxide and nitrogen oxides lead to acid rain, harming aquatic ecosystems and vegetation.

    How to Control Air Pollution:

    1. Switch to Clean Energy Sources:
    • Promote the use of renewable energy sources like solar and wind power.
    • Improve Industrial Processes:
    • Implement technologies to reduce emissions and enhance efficiency.
    • Regulate Vehicular Emissions:
    • Enforce emission standards and promote electric vehicles.
    • Waste Management:
    • Encourage proper waste disposal and recycling to reduce air pollution from burning waste.
    • Afforestation and Green Spaces:
    • Planting trees and creating green spaces helps absorb pollutants.
    • Environmental Policies:
    • Enact and enforce stringent environmental regulations to control emissions.
    • Public Awareness and Education:
    • Raise awareness about the impact of air pollution and promote sustainable practices.

    Study Tips:

    • Stay Informed: Keep up with current environmental issues and regulations.
    • Engage in Discussions: Discuss the impact of air pollution and possible solutions with peers.
    • Explore Technologies: Learn about innovative technologies aimed at reducing air pollution.

    Understanding the causes, effects, and control measures of air pollution is crucial for creating a sustainable and healthier environment.


    Conclusion:

    Air pollution poses a significant threat to public health, the environment, and the global climate. It is imperative that we take immediate and sustained action to reduce pollutants in the atmosphere by transitioning to clean energy, improving industrial practices, regulating emissions, and promoting public awareness. By implementing effective air pollution control measures, we can create a cleaner, healthier, and more sustainable environment for current and future generations.


    FAQs About Air Pollution:

    1. What are the main causes of air pollution?
    The primary causes of air pollution include the combustion of fossil fuels, industrial emissions, vehicular emissions, agricultural activities, and improper waste disposal.

    2. How does air pollution affect human health?
    Air pollution can cause respiratory diseases like asthma, bronchitis, and lung cancer. Long-term exposure can lead to chronic respiratory issues and cardiovascular problems.

    3. What are the main pollutants contributing to air pollution?
    The main air pollutants are particulate matter (PM), nitrogen oxides (NOx), sulfur dioxide (SO2), carbon monoxide (CO), and ozone (O3).

    4. How can we control air pollution?
    Air pollution can be controlled by switching to clean energy sources, improving industrial processes, regulating vehicular emissions, promoting afforestation, and raising public awareness about pollution.

    5. What is the role of fossil fuels in air pollution?
    Fossil fuels, when burned, release harmful pollutants like sulfur dioxide, nitrogen oxides, carbon monoxide, and particulate matter, which contribute to air pollution and global warming.

    6. How does air pollution contribute to global warming?
    Air pollution releases greenhouse gases like carbon dioxide and methane, which trap heat in the Earth’s atmosphere, contributing to global warming and climate change.

    7. What is acid rain and how does it affect the environment?
    Acid rain is caused by sulfur dioxide and nitrogen oxides reacting with water vapor in the atmosphere. It harms aquatic ecosystems, corrodes buildings, and damages vegetation and crops.

  • How to grow vegetables in Uganda: a comprehensive guide from nursery bed to marketing and pest disease control

    How to grow vegetables in Uganda: a comprehensive guide from nursery bed to marketing and pest disease control

    Discover the benefits of growing vegetables, from starting with nursery beds to managing pests and diseases, and learn how to successfully grow and sell vegetables in the market.

    Introduction:

    Growing vegetables offers more than just fresh produce for the table—it also brings environmental, economic, and health benefits in Uganda. Whether you are growing vegetables for personal consumption or for sale, understanding the steps from nursery bed preparation to cultivating vegetables in the main garden is key to success. Along the way, effective pest and disease control ensures healthy crops and profitable yields. This guide covers the value of vegetable growing, how to start with nursery beds, tips for transplanting to the main garden, and strategies for selling in the market, along with essential pest and disease management techniques.

    Vegetable cultivation in Uganda plays a significant role in both the economy and food security of the country. The introduction of vegetable farming has brought about various positive impacts on the agricultural landscape and the livelihoods of Ugandans.

    Introduction:

    Uganda has a favorable climate and soil conditions suitable for growing a wide variety of vegetables. The country’s diverse agro-ecological zones allow for the cultivation of different vegetables throughout the year. Some commonly grown vegetables in Uganda include:

    1.            Tomatoes: These are extensively cultivated due to their high demand and versatility in local cuisines.

    2.            Cabbages: They grow well in various regions and are known for their nutritional value.

    3.            Onions: Uganda produces a significant quantity of onions, which are used in various dishes.

    4.            Carrots, Spinach, and Peppers: These are also commonly cultivated.

    Value of Growing Vegetables:

    1.            Food Security: Vegetable farming contributes significantly to food security in Uganda. Locally grown vegetables provide essential nutrients and vitamins, combating malnutrition and contributing to a balanced diet.

    2.            Income Generation: Many small-scale farmers rely on vegetable farming for their livelihoods. The surplus produce is often sold in local markets, providing a source of income for these farmers.

    3.            Employment Opportunities: The vegetable farming sector creates employment opportunities, from farm labor to transportation and marketing of produce. This is particularly vital for rural communities.

    4.            Export Potential: Uganda’s vegetable produce also has the potential for export, contributing to the country’s economy. With proper management and quality control, these vegetables can be exported to neighboring countries and even further afield.

    5.            Soil Improvement and Crop Rotation: Vegetables are often part of a crop rotation system, which can improve soil fertility and reduce pest and disease issues.

    6.            Diversification: Vegetable farming allows farmers to diversify their crops, reducing risks associated with reliance on a single crop.

    To further enhance the value of growing vegetables in Uganda, there are ongoing efforts to introduce modern farming techniques, improve irrigation systems, and provide training and education to farmers. Additionally, the government and various organizations offer support in terms of access to markets, credit facilities, and agricultural extension services to help farmers increase their yield and improve the quality of their produce.

    Establishing a Nursery Bed for vegetables

    Establishing a nursery bed is a crucial initial step in cultivating vegetables, especially in regions like Uganda. Here’s a basic guide to setting up a nursery bed:

    1. Site Selection:

    •             Choose a location with good sunlight and access to water. Partial shade can be suitable for some delicate seedlings.

    •             Ensure the area is easily accessible for watering, weeding, and monitoring.

    2. Preparation:

    •             Clear the area of weeds and debris.

    •             Loosen the soil to a depth of about 6-8 inches to allow for easy root penetration.

    •             Incorporate well-decomposed organic matter or compost to improve soil fertility.

    3. Bed Construction:

    •             Create raised beds or seedling trays to facilitate drainage and prevent waterlogging.

    •             For raised beds, form rows about 1-1.5 feet wide with paths in between for easy access.

    4. Sowing Seeds:

    •             Use good quality seeds from reputable sources.

    •             Plant the seeds at the recommended depth and spacing for the specific vegetable variety.

    •             Label rows or trays to easily identify the different types of vegetables.

    5. Watering:

    •             Keep the soil consistently moist but not waterlogged. Avoid overwatering as it can lead to damping off (a fungal disease).

    •             Use a fine spray or watering can to prevent disturbing the seeds.

    6. Protection:

    •             Protect seedlings from harsh weather conditions. In some cases, use shading materials or covers to shield seedlings from excessive sunlight or heavy rains.

    •             Use mulch to retain moisture and prevent weed growth.

    7. Care and Maintenance:

    •             Regularly inspect the nursery bed for pests, diseases, and weeds.

    •             Thin out the seedlings if they’re overcrowded to ensure better growth.

    •             Provide necessary nutrients if the soil lacks fertility.

    8. Transplanting:

    •             When seedlings have grown to an appropriate size (usually with a few true leaves), they are ready for transplanting into the main garden or field.

    •             Transplant during cooler hours of the day to reduce transplant shock.

    9. Record Keeping:

    •             Maintain a record of the varieties sown, dates of planting, and any observations on growth or issues encountered. This helps in planning future planting and diagnosing problems.

    Tips to follow while establishing a vegetable nursery bed

    •             Hygiene: Ensure clean tools, trays, and hands to prevent disease spread.

    •             Monitor: Keep an eye on seedlings daily for signs of growth, pests, or diseases.

    •             Timing: Start the nursery bed based on the recommended planting season for the specific vegetables.

    Establishing a nursery bed properly is essential for healthy seedling development, which, in turn, contributes to a successful vegetable crop. Tailor the process to the specific vegetables being cultivated and local environmental conditions for the best results.

    Growing Vegetables in the main Garden

    Growing vegetables in a garden can be a rewarding and relatively straightforward process. Here are some steps to consider:

    1. Choose the Right Location:

    •             Select a spot with at least 6-8 hours of sunlight.

    •             Ensure good drainage to prevent waterlogging.

    2. Soil Preparation:

    •             Test and amend the soil for optimal pH and fertility. Add organic matter like compost or well-rotted manure to improve soil structure.

    3. Selecting Vegetables:

    •             Choose vegetables suited to your local climate and the season. Some common options in Uganda might include tomatoes, cabbages, onions, peppers, and spinach.

    4. Planting:

    •             Follow planting guidelines for each vegetable regarding depth, spacing, and timing.

    •             Some plants might be started from seeds directly in the garden, while others might benefit from being transplanted as seedlings from a nursery bed.

    5. Watering:

    •             Provide consistent and adequate water. Aim for the soil to be consistently moist but not waterlogged. Water deeply, allowing the soil to dry slightly between watering.

    6. Mulching:

    •             Mulch around plants to retain soil moisture, suppress weeds, and regulate soil temperature.

    7. Fertilizing:

    •             Consider periodic fertilization based on the specific needs of each vegetable. Organic fertilizers or compost can be great options.

    8. Weeding:

    •             Regularly remove weeds that compete for nutrients and space. Weeds can be a host for pests and diseases, so it’s important to keep the garden clean.

    9. Pest and Disease Management:

    •             Monitor for signs of pests and diseases. Use organic or chemical solutions as necessary, but be cautious about the impact on the environment and your health.

    10. Support Systems:

    •             Some vegetables like tomatoes, beans, or cucumbers might need stakes or trellises for support as they grow.

    11. Harvesting:

    •             Harvest vegetables at the right time to ensure the best flavor and nutrition. Different vegetables have different indicators of ripeness.

    Tips:

    •             Companion Planting: Some plants grow better when planted near certain other plants. For example, planting marigolds alongside vegetables might deter pests.

    •             Rotation: Consider crop rotation to prevent soil depletion and control pests and diseases.

    •             Observation: Regularly observe the garden for any signs of issues and address them promptly.

    •             Learning: Keep learning and experimenting. Gardening involves a fair amount of trial and error, so don’t be afraid to try new methods.

    By paying attention to the specific needs of each vegetable, providing proper care, and being vigilant about potential issues, you can grow a bountiful vegetable garden in Uganda. Enjoy the process and the fresh produce it brings!

    How to Control pests in Vegetables

    In vegetable cultivation, pests pose a significant threat to the health and yield of crops. Uganda, like many other regions, faces various pests that can damage vegetable plants. Many farmers however, don’t have the knowledge on how to control pests. Here’s an introduction to some common pests and methods for their control:

    Common Pests in Vegetable Growing:

    1.            Aphids: These tiny insects feed on plant sap, causing distortion and yellowing of leaves. They reproduce rapidly and can quickly infest a plant.

    2.            Caterpillars: Various types of caterpillars feed on vegetable leaves, leading to holes and damage. Examples include the cabbage looper and diamondback moth caterpillar.

    3.            Thrips: These tiny insects suck plant sap, causing stippling, discoloration, and deformities on leaves.

    4.            Whiteflies: They feed on plant sap, causing yellowing, wilting, and the spread of diseases like viruses.

    5.            Cutworms: These pests cut young plants at the soil level, leading to wilting and death.

    6.            Mites: Spider mites can cause stippling, webbing, and yellowing of leaves, affecting the overall health of the plant.

    Controlling Pests in Vegetables:

    1.            Cultural Methods:

    •             Crop Rotation: Avoid planting the same vegetables in the same area season after season to disrupt pest cycles.

    •             Companion Planting: Some plants repel pests. For example, marigolds can deter nematodes.

    •             Maintaining Cleanliness: Remove and destroy infested plant debris to prevent the spread of pests.

    2.            Biological Control:

    •             Predatory Insects: Introduce or encourage beneficial insects like ladybugs or lacewings that feed on pests.

    •             Microbial Insecticides: Use bacteria or fungi that target specific pests, such as Bacillus thuringiensis (Bt) for caterpillars.

    3.            Mechanical Control:

    •             Handpicking: Remove larger pests like caterpillars by hand.

    •             Using Barriers: Use physical barriers like row covers to prevent pests from reaching plants.

    4.            Chemical Control:

    •             Pesticides: Consider chemical solutions as a last resort and use them sparingly. Always follow safety instructions and consider less harmful options.

    •             Organic Sprays: Neem oil or insecticidal soaps can be effective against certain pests.

    5.            Monitoring and Early Intervention:

    •             Regularly inspect plants for signs of pests or damage. Early detection allows for quicker and more effective control measures.

    6.            Integrated Pest Management (IPM):

    •             Combine various control methods in an integrated approach to manage pests sustainably and effectively.

    Tips on how to control pests in vegetables in Uganda

    •             Timing: Apply control measures at the right time in the pest’s life cycle for maximum effectiveness.

    •             Education: Learn about specific pests in your region and their behaviors to better control them.

    •             Balanced Ecosystem: Aim for a diverse and healthy garden, as a balanced ecosystem can naturally limit pest population growth.

    By employing a combination of these methods and staying vigilant, you can effectively manage and control pests in vegetable cultivation in Uganda. It’s essential to maintain a balance between pest control and the overall health of the ecosystem to ensure sustainable and healthy crop production.

    How to control vegetable diseases in Uganda

    In vegetable cultivation, diseases can significantly impact crop health and yield. They’re caused by various pathogens such as fungi, bacteria, viruses, and even environmental factors. In Uganda, as in many agricultural regions, certain diseases affect vegetable crops. Here’s an introduction to common diseases and methods to control them:

    Common Diseases in Vegetables:

    1.            Fungal Diseases:

    •             Powdery Mildew: Affects a wide range of vegetables, causing white powdery patches on leaves, ultimately leading to leaf distortion and reduced photosynthesis.

    •             Downy Mildew: Attacks plants like cucumbers and squash, leading to yellow spots on leaves that turn brown, withering the foliage.

    2.            Bacterial Diseases:

    •             Bacterial Leaf Spot: Causes dark spots with a yellow halo on leaves, affecting the plant’s ability to photosynthesize.

    •             Bacterial Wilt: Affects cucumbers, causing wilting and eventual death of the plant.

    3.            Viral Diseases:

    •             Cucumber Mosaic Virus: Causes mosaic patterns, stunted growth, and deformed or discolored leaves.

    •             Tomato Yellow Leaf Curl Virus: Affects tomatoes, leading to yellowing and curling of leaves.

    Controlling Diseases in Vegetables:

    1.            Crop Rotation and Sanitation:

    •             Rotate Crops: Avoid planting the same vegetable in the same area for consecutive seasons to break disease cycles.

    •             Cleanliness: Remove and destroy infected plant debris to prevent disease spread.

    2.            Resistant Varieties:

    •             Plant disease-resistant varieties when available. Select seeds that are known to be less susceptible to prevalent diseases in the region.

    3.            Proper Watering and Soil Management:

    •             Avoid overwatering, as excess moisture can promote the growth of certain diseases.

    •             Use well-draining soil and avoid waterlogging.

    4.            Biological Control:

    •             Beneficial Microorganisms: Introduce beneficial bacteria or fungi to the soil to suppress disease-causing pathogens.

    •             Biocontrol Agents: Use predatory insects or mites that feed on disease-causing pests.

    5.            Chemical Control:

    •             Fungicides and Bactericides: Apply these substances as needed and according to the specific disease. Use them sparingly and strictly follow instructions.

    6.            Preventative Measures:

    •             Mulching: Helps maintain soil moisture levels and prevents soil-borne diseases from splashing onto plants.

    •             Quarantine New Plants: Inspect and isolate new plants to prevent introducing diseases into your garden.

    7.            Monitoring and Early Intervention:

    •             Regularly inspect plants for signs of disease. Early detection can prevent the spread of diseases.

    Tips on how to control vegetable diseases in Uganda

    •             Weather Monitoring: Certain diseases thrive in specific weather conditions. Adjust preventive measures accordingly.

    •             Observation: Learn the signs and symptoms of common diseases in your region to take action promptly.

    •             Integrated Pest and Disease Management: Combine various control methods to manage diseases effectively while maintaining a healthy ecosystem.

    By integrating these strategies and being attentive to the health of your vegetable plants, you can effectively manage and control diseases in vegetable cultivation in Uganda. The goal is to minimize the impact of diseases while ensuring a healthy and productive vegetable garden.

    Harvest and post-harvest handling  in vegetables

    Harvest handling is a crucial aspect of vegetable farming that directly impacts the quality, shelf life, and market value of the produce. Proper handling techniques from the moment of harvest to transportation and storage are essential. Here’s a guide to effective harvest handling:

    Harvesting Techniques:

    1.            Timing:

    •             Harvest at the appropriate stage of maturity for each vegetable. This ensures optimal taste, texture, and nutritional value.

    2.            Tools:

    •             Use sharp, clean tools suitable for each crop to prevent damage during harvest.

    •             For delicate produce, like tomatoes or berries, consider handpicking to avoid bruising.

    3.            Handling:

    •             Handle produce with care to minimize bruising or damage. Rough handling can reduce quality and shelf life.

    Post-Harvest Handling in vegetables

    1.            Cleaning:

    •             Remove dirt, debris, or any field contaminants from the produce. For some vegetables, like root crops, washing might be necessary.

    2.            Sorting and Grading:

    •             Separate produce based on size, color, and quality. This ensures uniformity and facilitates packaging.

    3.            Packaging:

    •             Choose appropriate packaging materials that allow for proper ventilation and protection. Crates, baskets, or boxes are common choices.

    Transportation:

    1.            Handling Practices:

    •             Secure produce properly during transportation to prevent shifting, bruising, or damage.

    •             Minimize exposure to extreme temperatures during transit.

    2.            Timeliness:

    •             Aim to deliver produce as quickly as possible to maintain freshness.

    Storage:

    1.            Temperature and Humidity:

    •             Store vegetables at the appropriate temperature and humidity levels. Different vegetables have varying storage requirements.

    •             Consider cold storage or refrigeration for many types of vegetables to prolong shelf life.

    2.            Ventilation:

    •             Provide adequate airflow to prevent moisture buildup, which can lead to rotting.

    Tips in post-harvest handling of vegetables

    •             Prevent Overcrowding: Allow space between harvested vegetables to prevent bruising or rot caused by contact.

    •             Monitor Conditions: Regularly inspect stored produce for signs of spoilage or decay and remove any affected items promptly.

    •             Train Workers: Ensure all personnel involved in harvest handling understand proper techniques and hygiene practices.

    Proper harvest handling not only maintains the quality of vegetables but also impacts consumer satisfaction and market value. Minimizing damage, maintaining freshness, and following best practices throughout the process from harvest to storage and transport is key to preserving the quality of the produce.

    Post-Harvest Handling

    Post-harvest handling encompasses the activities that occur after crops are harvested and plays a critical role in maintaining the quality, extending the shelf life, and preserving the nutritional value of vegetables. Here’s a detailed breakdown of post-harvest handling:

    Cleaning and Preparation:

    1.            Cleaning and Sanitizing:

    •             Remove field debris and dirt from the harvested produce. Ensure tools and surfaces used are clean to prevent contamination.

    •             Sanitize containers, tools, and surfaces to reduce the risk of spoilage and disease.

    2.            Trimming and Sorting:

    •             Trim excess foliage or damaged parts from the vegetables to improve appearance and reduce potential sources of decay.

    •             Sort produce based on size, shape, and quality for uniformity and ease of handling.

    Cooling and Temperature Management:

    1.            Rapid Cooling:

    •             Cool vegetables promptly after harvest to slow down the aging process and maintain freshness.

    •             For some sensitive vegetables, like leafy greens, cooling within hours of harvest is crucial to preserve quality.

    2.            Refrigeration and Cold Storage:

    •             Use refrigeration or cold storage facilities to maintain the right temperature and humidity levels for various vegetables.

    Packaging and Storage:

    1.            Packaging:

    •             Choose appropriate packaging materials that allow for ventilation and protection from damage during transportation and storage.

    •             Packaging should be designed to reduce moisture loss and maintain quality.

    2.            Storage Conditions:

    •             Maintain the recommended temperature, humidity, and air circulation suitable for each type of vegetable to prevent spoilage.

    Quality Control and Monitoring:

    1.            Inspection:

    •             Regularly inspect stored produce for signs of decay, mold, or other issues. Remove any spoiled items to prevent the spread of deterioration.

    2.            Quality Assessment:

    •             Assess the quality of stored vegetables based on appearance, texture, and smell to ensure they meet market standards.

    Transportation and Distribution:

    1.            Handling during Transportation:

    •             Carefully load and secure produce to prevent damage during transit. Use appropriate temperature-controlled transport for perishable items.

    2.            Timely Delivery:

    •             Aim for timely delivery to maintain freshness and quality. Minimize the time between harvest and market or distribution.

    Record-Keeping and Documentation:

    Maintain records of handling practices, storage conditions, and any issues encountered during post-harvest handling. This documentation aids in assessing and improving future practices.

    Training and Education:

    Regularly educate and train personnel involved in post-harvest handling to ensure they understand and implement best practices for preserving vegetable quality.

    Effective post-harvest handling is essential for minimizing losses, preserving nutritional content, and ensuring the marketability of vegetables. Proper cooling, handling, storage, and transportation practices are integral in preserving the quality and extending the shelf life of harvested produce.

    Marketing and Delivering Vegetables to buyers

    Marketing vegetables involves a series of steps from preparing the produce for market, transportation, and eventually delivering to the consumer. Here’s a breakdown of the process:

    Preparing for Market:

    1.            Harvest and Handling:

    •             Follow proper harvest and post-harvest handling techniques to ensure the produce is fresh, clean, and of high quality.

    2.            Packaging and Grading:

    •             Package vegetables appropriately for transport and display. Grade produce based on size, quality, and appearance to meet market standards.

    Transportation:

    1.            Transport Options:

    •             Choose suitable transportation methods based on distance, quantity, and the type of vegetables. This could include trucks, vans, or even specialized refrigerated vehicles for perishable items.

    2.            Loading and Securing:

    •             Load produce carefully and secure it to prevent damage during transportation. Maintain proper temperature and humidity conditions, especially for perishable items.

    Market Delivery:

    1.            Wholesale Markets:

    •             Deliver to wholesale markets where retailers, restaurants, and larger buyers purchase produce in bulk. Understand their requirements and schedules for delivery.

    2.            Local Markets and Retailers:

    •             Consider delivering directly to local markets, supermarkets, and small retailers. Follow their guidelines for presentation and packaging.

    3.            Direct-to-Consumer:

    •             Sell directly to consumers through farmers’ markets, community-supported agriculture (CSA), or even online platforms. Ensure packaging and presentation are appealing to consumers.

    Building Relationships:

    1.            Networking with Buyers:

    •             Establish relationships with potential buyers, understanding their needs and preferences for quality, quantity, and delivery schedules.

    2.            Consistent Quality and Communication:

    •             Maintain consistent quality and keep open communication with buyers. Address their concerns promptly to build trust and reliability.

    Marketing Strategies:

    1.            Branding and Presentation:

    •             Develop a brand identity and presentation that sets your produce apart. This could involve unique packaging, labels, or highlighting organic or sustainable growing practices.

    2.            Promotion and Advertising:

    •             Utilize social media, local advertising, or participation in local events to promote your produce and reach a broader audience.

    Administrative Tasks:

    1.            Pricing and Invoicing:

    •             Determine competitive yet profitable prices for your produce. Ensure proper invoicing and documentation for sales.

    2.            Compliance and Regulations:

    •             Adhere to food safety regulations, labeling requirements, and any specific market standards.

    Evaluation and Adaptation:

    Continuously evaluate the market response, customer feedback, and sales data. Use this information to adapt your strategies and offerings to meet consumer demand and preferences.

    Successfully delivering vegetables to the market involves a combination of quality produce, effective transportation, strategic marketing, and strong relationships with buyers. Adapting to market demands and maintaining high standards will contribute to long-term success in the industry.

    Conclusion:

    Growing vegetables provides both a rewarding and sustainable way to produce fresh food, with opportunities for profit through market sales. By mastering the essentials of vegetable gardening—from nursery bed preparation and transplanting to pest control—you can grow healthy crops that thrive. With the right knowledge and care, vegetable farming can be a productive and profitable endeavor that benefits both individuals and Ugandan communities.

    FAQs on Growing Vegetables in Uganda

    1. What are the benefits of growing vegetables in Uganda?
    Growing vegetables offers numerous benefits, including providing fresh and nutritious food for households, improving food security, and generating income through sales at local markets. It also promotes environmental sustainability through the use of organic farming practices.

    2. What is the importance of preparing a nursery bed?
    A nursery bed provides a controlled environment for seedlings to grow before being transplanted to the main garden. It helps ensure strong, healthy plants with better survival rates. The nursery bed allows you to monitor growth, protect young plants from harsh conditions, and maximize space.

    3. What vegetables grow well in Uganda?
    Uganda’s climate supports the growth of a variety of vegetables, including tomatoes, cabbages, onions, spinach, eggplant, kale, carrots, and green peppers. The warm, tropical weather and fertile soils make it an ideal location for vegetable farming throughout the year.

    4. When is the best time to plant vegetables in Uganda?
    The best time to plant vegetables in Uganda depends on the specific crop and the rainy seasons. Generally, it is advisable to plant during the onset of the rainy season (March to May and September to November), as this provides sufficient water for the crops. However, with irrigation, vegetables can be grown year-round.

    5. How do I transplant vegetables from a nursery bed to the main garden?
    To transplant seedlings, first, ensure they are strong enough with a good root system. Water them well before transplanting. Dig holes in the main garden, gently remove the seedlings from the nursery, and place them in the holes, making sure not to damage the roots. Water them immediately after transplanting to reduce transplant shock.

    6. How can I protect my vegetables from pests and diseases?
    To control pests and diseases, practice crop rotation, maintain garden hygiene, and use organic or chemical pesticides as needed. Introducing natural predators like ladybugs or applying organic remedies, such as neem oil, can also help manage pest populations. Regularly inspect your plants for early signs of infestation.

    7. What organic fertilizers can I use for vegetable farming?
    Compost, manure, and green manure are excellent organic fertilizers for vegetable farming in Uganda. These enrich the soil with nutrients, improve soil structure, and help retain moisture, promoting healthy plant growth without harmful chemicals.

    8. How can I sell my vegetables in the market?
    Selling vegetables in Uganda’s markets can be done through direct sales at local markets, selling to vendors, or forming cooperatives to reach larger markets. It’s important to harvest at the right time, ensure the vegetables are fresh, and transport them in a way that preserves their quality.

    9. What are some common pests and diseases affecting vegetables in Uganda?
    Common pests include aphids, whiteflies, and caterpillars, while diseases like blight, wilt, and powdery mildew frequently affect vegetable crops. Regular monitoring, early detection, and proper pest management practices are key to controlling these threats.

    10. What are the challenges of growing vegetables in Uganda?
    Challenges include unpredictable weather patterns, water shortages during dry seasons, pests and diseases, and limited access to high-quality seeds and fertilizers. However, with proper planning, irrigation, and sustainable farming practices, these challenges can be mitigated.

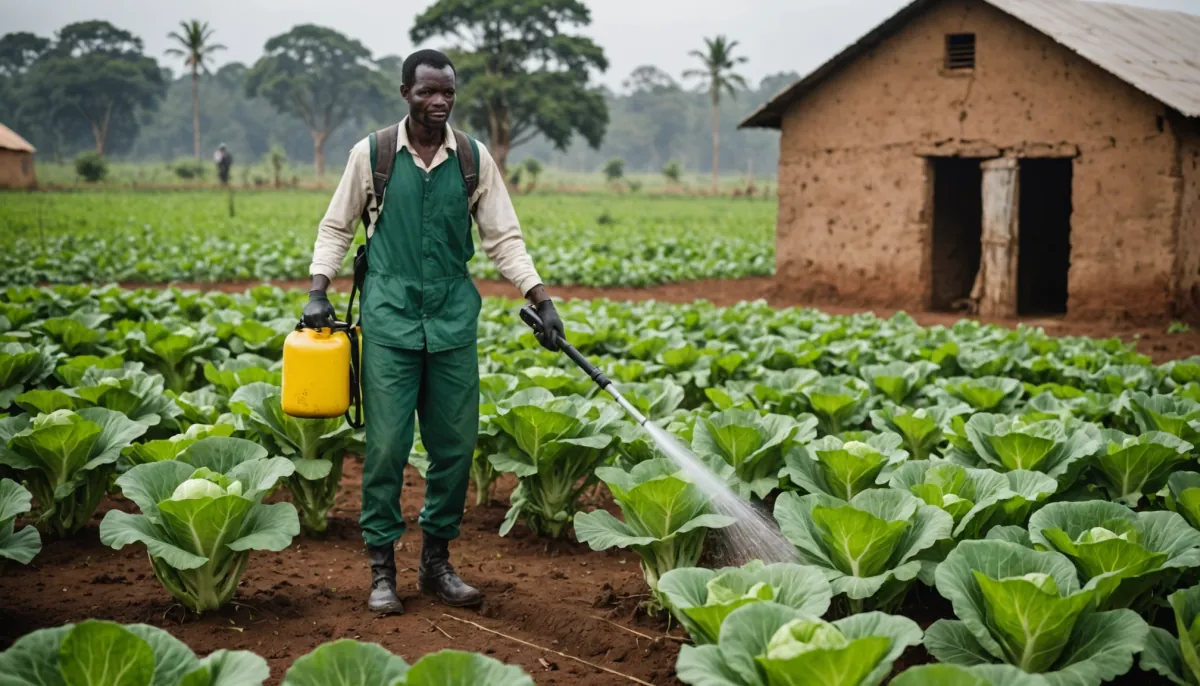
  • The Ankole Kingdom: Origins, Organization, and Decline

    Explore the rich history of the Ankole Kingdom in Uganda, from its origins and political structure to its decline under colonial rule. Learn about the factors that shaped this traditional African kingdom.

    Introduction:

    The Ankole Kingdom, located in present-day western Uganda, is a historical and cultural cornerstone of the region. Known for its unique political structure, strong cattle economy, and rich cultural heritage, the Ankole Kingdom thrived for centuries before its decline during the colonial era. In this blog, we will explore the origins of the Ankole people, the organization of their kingdom, and the factors that led to its eventual decline. Understanding the Ankole Kingdom provides valuable insights into the broader dynamics of state formation in East Africa.

    THE ORIGIN OF ANKOLE KINGDOM

    The origin of the Ankole people, who inhabit the Ankole region of western Uganda, has been a subject of interest and debate among scholars. Several theories have been proposed to explain the origins of the Ankole people:

    1. Migration Theory: This theory suggests that the Ankole people migrated to the region from elsewhere. One commonly proposed origin is the Bantu migration theory, which posits that Bantu-speaking groups gradually migrated southward from their ancestral homeland in West Africa. According to this theory, the Ankole people would have been part of this larger migration and settled in the Ankole region over a long period.
      1. Nilotic Theory: Another theory suggests that the Ankole people have Nilotic origins. This theory is based on linguistic and cultural evidence that shows some similarities between the Ankole people and Nilotic-speaking groups in East Africa. It’s possible that there was a mixture of Nilotic and Bantu influences in the region’s history.
        1. Cattle Migration Theory: Cattle have played a central role in Ankole culture and economy. Some theories propose that the Ankole people may have migrated to the region following the movement of cattle herds. This could explain the importance of cattle in Ankole society and the distinctive Ankole longhorn cattle breed.
          1. Local Origins and Cultural Developments: Some scholars argue that the Ankole people may have originated locally within the Ankole region itself. They suggest that the development of Ankole culture and society was influenced by interactions with neighboring groups, including Bantu-speaking communities and Nilotic pastoralists.
          1. Integration Theory: This theory posits that the Ankole people are the result of the integration of different ethnic and cultural groups over time. It suggests that the Ankole region served as a cultural melting pot where various groups converged, intermarried, and created a distinct Ankole identity.
          1. Mythological Origins: Like many other ethnic groups, the Ankole people have their own oral traditions and myths about their origins. These myths often involve legendary figures, such as kings and heroes, and may not be rooted in historical accuracy but serve to reinforce cultural identity.

    It’s important to note that the precise origins of the Ankole people are still a subject of ongoing research and debate, and the truth likely involves a complex interplay of multiple factors, including migration, cultural exchange, and adaptation over time. Additionally, oral traditions and historical records may be limited, making it challenging to establish a definitive origin story.

    FACTORS FOR THE RISE OF ANKOLE KINGDOM

    The rise of the Ankole Kingdom, located in present-day western Uganda, can be attributed to a combination of historical, political, social, and economic factors. The kingdom’s development and prominence were influenced by the interplay of these factors:

    1. Political Leadership: Effective leadership played a crucial role in the rise of the Ankole Kingdom. The Ankole kings (Bakama or Bahinda) provided stability, governance, and leadership, which helped consolidate the kingdom’s power and influence.
      1. Territorial Expansion: The Ankole Kingdom expanded its territory through conquest and diplomacy. This expansion allowed the kingdom to control important trade routes, fertile lands, and valuable resources.
      1. Military Strength: The Ankole Kingdom maintained a strong and organized military force. This military strength not only protected the kingdom from external threats but also enabled territorial expansion through conquest.
      1. Cattle Economy: Cattle played a central role in the Ankole Kingdom’s economy and culture. The kingdom’s longhorn cattle were a valuable resource, providing food, wealth, and status. The ability to manage and control cattle herds contributed to the kingdom’s prosperity.
      1. Trade and Exchange: The Ankole Kingdom was strategically located along trade routes connecting the interior of Africa to the coast. This advantageous position facilitated trade with neighboring regions, including the exchange of cattle, agricultural products, and other goods.
      1. Agriculture: Agriculture was an essential economic activity in Ankole. The kingdom’s fertile soils allowed for the cultivation of crops like millet, sorghum, and beans. Agriculture provided food security and surplus for trade.
      1. Cultural Identity: The Ankole people shared a strong cultural identity. They had a common language, cultural practices, and social organization, which fostered a sense of unity and cohesion within the kingdom.
      1. Religious and Ritual Practices: Ankole had its own religious and ritual practices that were intertwined with political authority. Kings often held spiritual significance, and religious leaders played important roles in legitimizing their rule.
      1. Alliances and Diplomacy: The Ankole Kingdom formed alliances with neighboring kingdoms and chiefdoms, which allowed for peaceful coexistence and collaboration. Diplomacy and strategic marriages helped solidify these alliances.
      1. Centralized Governance: The Ankole Kingdom had a centralized system of governance, with a hierarchical administrative structure. Chiefs and sub-chiefs governed specific areas, ensuring effective administration and resource management.
      1. Oral Tradition: Like many African societies, the Ankole Kingdom had a rich oral tradition that preserved its history, customs, and legends. These oral traditions reinforced cultural identity and contributed to the kingdom’s sense of continuity.
      1. Adaptation and Resilience: The Ankole people adapted to changing circumstances and challenges. Their ability to innovate and respond to external pressures contributed to the kingdom’s resilience and longevity.

    The rise of the Ankole Kingdom was a dynamic and complex process influenced by a variety of factors. Its historical development reflects the adaptability and agency of the Ankole people in navigating the challenges and opportunities presented to them over time.

    THE ORGANISATION OF ANKOLE

    The organization of Ankole, also known as the Ankole Kingdom, was characterized by a structured political system, social hierarchy, economic activities, and cultural practices. Ankole, located in present-day western Uganda, had a well-organized society that revolved around its political and traditional institutions:

    Political Organization:

    1. Kingdom Leadership: The Ankole Kingdom was ruled by a hereditary king known as the “Mugabe” or “Omugabe.” The Mugabe held both political and spiritual authority in the kingdom. The position of Mugabe was passed down through a dynastic line.
      1. Administrative Units: Ankole was divided into smaller administrative units known as counties or “Igongo.” Each county was governed by a chief, referred to as a “Bashwera” or “Saza chief,” who was responsible for local governance, tax collection, and law enforcement.
      1. Council of Elders: The kingdom had a council of elders called the “Bamugyenyi” or “Bashema” who advised the king and provided wisdom and guidance based on their experience and knowledge of tradition.
      1. Judicial System: Ankole had a traditional judicial system for settling disputes and enforcing laws. It involved local councils and chiefs who presided over cases, with the king serving as the highest authority in legal matters.
      1. Social Hierarchy:
      1. Clan System: Ankole society was organized into clans, each with its own leadership structure and customs. Clans played a significant role in social identity, and individuals often identified strongly with their clan.
      1. Age-Set System: The age-set system was an important aspect of Ankole’s social organization. Individuals of the same age group went through life stages together, creating strong bonds and shared experiences within their generation.
      1. Gender Roles: Traditional gender roles were observed, with men typically responsible for activities such as cattle herding, defense, and leadership, while women played crucial roles in agriculture, food preparation, and household management.
      1. Marriage and Family: Marriage was highly valued in Ankole society, and it often involved the exchange of bride-wealth (dowry). Extended families, including multiple generations, lived together in compounds and played essential roles in social and economic life.

    Economic Activities:

    1. Cattle Herding: Cattle were central to Ankole’s economy and culture. The Ankole longhorn cattle, known for their distinctive horns, provided meat, milk, hides, and served as a symbol of wealth and social status.
      1. Agriculture: Agriculture was a fundamental economic activity. Ankole’s fertile soils allowed for the cultivation of crops such as millet, sorghum, beans, and sweet potatoes. Agriculture provided food and surplus for trade.
      1. Trade and Exchange: Ankole’s strategic location along trade routes facilitated trade with neighboring regions. The kingdom engaged in trade, exchanging cattle, agricultural products, and other goods with neighboring communities.

    Cultural Practices:

    1. Religious Beliefs: Ankole had its own religious and spiritual beliefs. The king had a sacred role in Ankole’s spiritual life, and religious leaders played significant roles in mediating between the earthly and spiritual realms.
      1. Oral Tradition: Ankole’s history, customs, and legends were preserved through oral tradition. Storytelling, songs, and rituals conveyed the kingdom’s cultural heritage and identity.
        1. Initiation and Rites of Passage: The initiation of young people into adulthood was an important cultural practice in Ankole. It involved rituals, teachings, and ceremonies that marked the transition to new life stages.

    The organization of Ankole reflected a well-structured society with clear roles and responsibilities for different members of the community. While the Ankole Kingdom no longer exists as a political entity, its cultural and historical legacy continues to influence the region and its people today.

    Factors for the decline of the Ankole kingdom

    The decline of the Ankole Kingdom, like many other traditional African kingdoms, was influenced by a combination of internal and external factors. The decline of Ankole occurred during the colonial period and was marked by significant changes in governance, politics, and society. Here are key factors contributing to the decline of the Ankole Kingdom:

    1. Colonial Rule: The arrival of European colonial powers, particularly the British, had a profound impact on Ankole. Colonial authorities imposed their administrative structures, undermined traditional leadership, and introduced new laws and policies that eroded the authority of the kingdom.
      1. Loss of Sovereignty: The Ankole Kingdom lost its sovereignty as colonial powers asserted control over the region. The Mugabe (king) and traditional chiefs had their powers and authority significantly diminished, as colonial administrators assumed greater control over governance.
        1. Land Alienation: Colonial policies often led to land alienation. Land that was traditionally owned by the kingdom and communities was taken over by colonial authorities, settlers, and commercial interests. This had a detrimental impact on agriculture and the livelihoods of the Ankole people.
        1. Taxation and Labor Policies: The introduction of taxation and forced labor policies by colonial authorities placed significant burdens on the Ankole population. People were required to pay taxes in cash or labor, leading to economic hardships and discontent.
        1. Divide and Rule: Colonial powers sometimes exploited ethnic and regional divisions within Ankole, exacerbating tensions and weakening solidarity among different communities. This strategy contributed to social and political instability.
        1. Religious Conversion: The spread of Christianity and Islam in Ankole led to religious conversions, which, in some cases, resulted in a decline in traditional religious practices and spiritual authority.
        1. Social Disruption: Colonialism disrupted traditional social and cultural norms. New economic systems, educational institutions, and social hierarchies emerged, challenging traditional practices and structures.
        1. Resistance Movements: There were various resistance movements and uprisings against colonial rule in Ankole, including the Nyangire Revolt and the Rwampara Uprising. While these movements demonstrated resistance to colonial oppression, they were often met with violence and suppression.
        1. Economic Transformation: The colonial era brought changes to the economic system, including the introduction of cash crops like coffee and cotton. While these crops had economic potential, they also shifted focus away from traditional subsistence agriculture.
        1. Transition to Independence: With the end of colonial rule and the attainment of independence, the political landscape of Ankole underwent further changes. The kingdom’s role and influence were further reduced as Uganda transitioned to a republic.
        1. Urbanization and Modernization: The growth of urban centers and modernization processes further transformed Ankole society. Younger generations increasingly pursued education and urban opportunities, leading to shifts in cultural values and practices.

    Overall, the decline of the Ankole Kingdom was a complex process driven by the impact of colonialism, changes in governance, shifts in economic systems, and evolving societal dynamics. While the kingdom no longer exists in its traditional form, the cultural heritage and historical legacy of Ankole continue to be part of the identity of the region and its people.

    FAQs on The Ankole Kingdom:

    1. What is the origin of the Ankole Kingdom?
    The Ankole Kingdom originated in western Uganda, with various theories explaining its origins, including the Bantu migration theory, Nilotic influence, and the role of cattle in Ankole culture.

    2. What factors contributed to the rise of the Ankole Kingdom?
    The rise of the Ankole Kingdom was influenced by factors such as effective leadership, territorial expansion, military strength, a thriving cattle economy, and strategic trade and alliances.

    3. How was the Ankole Kingdom organized?
    The Ankole Kingdom had a structured political system, with a king (Mugabe) at the top, followed by chiefs overseeing local governance. The economy was based on cattle herding and agriculture, while cultural practices included clan systems and initiation rites.

    4. What caused the decline of the Ankole Kingdom?
    The decline of the Ankole Kingdom was largely due to colonial rule, loss of sovereignty, land alienation, and the disruption of traditional governance and social systems.

    5. What role did cattle play in the Ankole Kingdom?
    Cattle were central to the Ankole Kingdom’s economy and culture, symbolizing wealth and status. The Ankole longhorn cattle breed is a distinctive feature of the region’s heritage.

  • Mysteries of Bunyoro-Kitara: A Deep Dive into the Batembuzi and Bachwezi Dynasties

    Discover the legendary dynasties of Bunyoro-Kitara, exploring the Batembuzi and Bachwezi. Unravel their origins, cultural contributions, and the enduring impact they’ve left on East African history. (159 characters)

    Introduction

    Embark on a journey through time to the heart of the Bunyoro-Kitara Empire, a historical realm shrouded in mystery and legend. This exploration delves into the enigmatic dynasties that shaped the region’s cultural landscape: the Batembuzi and Bachwezi. These semi-divine lineages, believed to possess supernatural abilities, introduced significant cultural and technological advancements to East Africa. Let’s unravel their stories and understand their enduring legacy.

    About the Bunyoro-Kitara empire

    the kingdom was founded by the Batembuzi.  these were later succeeded by the Bacwezi .

    BATEMBUZI

    The Batembuzi were a legendary dynasty in the history of the Bunyoro-Kitara Empire, which was situated in the Great Lakes region of East Africa, encompassing parts of present-day Uganda, Rwanda, and Tanzania. The Batembuzi are often regarded as the mythical predecessors to the more historically documented Bachwezi Dynasty. According to oral traditions and legends, the Batembuzi were believed to be a semi-divine lineage, possibly of divine origin, and were associated with remarkable supernatural abilities.

    The Batembuzi were credited with introducing important cultural and technological innovations to the region. These innovations included advanced agricultural techniques, the introduction of ironworking, and the establishment of a structured political and social order. They were revered for their leadership and contributions to the empire’s development.

    However, like the Bachwezi Dynasty that succeeded them, the Batembuzi also faced mysterious declines and disappearances, often attributed to divine intervention or supernatural forces. Despite the limited historical evidence, the Batembuzi hold significant cultural and mythological importance in the Bunyoro-Kitara region, shaping the region’s historical identity and contributing to its rich tapestry of legends and folklore. Their legacy continues to be celebrated and remembered as part of the region’s cultural heritage.

    The Bachwezi Dynasty

    The Bachwezi Dynasty, also known as the Chwezi or Chwezi Dynasty, is a legendary and mysterious dynasty in East African history, particularly associated with the Great Lakes region, including parts of present-day Uganda, Rwanda, and Tanzania. It is important to note that the Bachwezi Dynasty is the subject of various oral traditions, myths, and historical accounts, making it challenging to establish a definitive historical record. As such, much of what is known about the Bachwezi Dynasty is based on oral history and legend rather than concrete historical evidence.

    The origin of the Bachwezi Dynasty is shrouded in myth and legend, and there are multiple versions of their origin story. Some of the key elements in these origin stories include:

    1. Divine or Semi-Divine Origins: According to many legends, the Bachwezi were believed to have divine or semi-divine origins. They were often depicted as supernatural beings with extraordinary powers, including control over the elements, such as rain and lightning. Some traditions suggest that the Bachwezi were descendants of a deity or ancestral spirits.
      1. Migration and Settlement: Legends also describe the Bachwezi as a migratory group that arrived in the Great Lakes region from the north or west. They are said to have settled in the region and established their dynasty, ruling over various ethnic groups in the area.
      1. Cultural and Technological Advancements: The Bachwezi were often credited with introducing advanced cultural practices and technologies to the region, including pottery, agriculture, and ironworking. They were believed to be skilled craftsmen and innovators.
      1. Decline and Mysterious Disappearance: The Bachwezi Dynasty is associated with a sudden and mysterious decline and disappearance. According to many legends, they fell from power due to a combination of factors, including arrogance, conflict, and supernatural forces. Their sudden and unexplained disappearance contributed to the mystique surrounding the dynasty.

    It’s important to emphasize that the historical existence of the Bachwezi Dynasty has been a subject of debate among scholars. While there is some evidence of archaeological sites and artifacts associated with the Bachwezi in the Great Lakes region, there is limited written historical documentation about their rule. Moreover, the Bachwezi are often considered a semi-legendary or mythical group due to the lack of concrete historical records.

    Significance of Chwezi civilisation for the peoples of the

    Interlacustrine region

    The Chwezi or Bachwezi civilization holds significant cultural, historical, and mythological importance for the peoples of the Interlacustrine region in East Africa, including Uganda, Rwanda, Burundi, and parts of Tanzania and the Democratic Republic of Congo. The significance of the Chwezi civilization for the peoples of this region can be understood in various ways:

    1. Cultural Legacy: The Chwezi civilization is often associated with cultural advancements and innovations, such as pottery, ironworking, and agricultural practices. These cultural contributions are part of the region’s heritage and have had a lasting impact on the material culture of the Interlacustrine peoples. Traditional practices, such as pottery-making and iron-smelting techniques, are still preserved and practiced by some communities in the region, and they trace their origins to the Chwezi.
      1. Mythological and Spiritual Significance: The Chwezi Dynasty is shrouded in myth and legend, often depicted as semi-divine or supernatural rulers with extraordinary powers. The legends of the Bachwezi continue to be an integral part of the region’s mythology and spiritual beliefs. They are sometimes revered as ancestral spirits or deities, and their stories are incorporated into rituals and ceremonies.
        1. Historical Identity: The Chwezi Dynasty is a foundational part of the historical identity of the Interlacustrine region. The legends of the Bachwezi provide a sense of continuity and historical depth to the various ethnic groups in the area. The stories of their rise and fall, as well as their interactions with other ethnic groups, contribute to the historical narrative of the region.
        1. Unity and Shared Heritage: The Chwezi civilization can serve as a unifying factor among the diverse ethnic groups of the Interlacustrine region. The shared knowledge of the Bachwezi, their legends, and their cultural contributions can foster a sense of common heritage and identity among the peoples of the region.
        1. Tourism and Cultural Preservation: The Chwezi civilization, with its myths and archaeological sites, has the potential to attract tourists interested in exploring the history and culture of the Interlacustrine region. Tourism can bring economic opportunities and promote the preservation of historical sites and traditions associated with the Chwezi.
        1. Research and Scholarship: The mystery surrounding the Chwezi civilization continues to be a subject of interest for scholars and researchers studying the history and archaeology of East Africa. Ongoing research efforts help uncover more about the Chwezi civilization and its significance in the context of the region’s history.

    In summary, the Chwezi civilization holds cultural, historical, and mythological significance for the peoples of the Interlacustrine region. It contributes to their cultural identity, historical narratives, and spiritual beliefs, while also offering opportunities for tourism, research, and cultural preservation. The legends of the Bachwezi remain an important part of the rich tapestry of East African history and culture.

    The organisation of the Chwezi empire

    The Bachwezi civilization, also known as the Chwezi or Chwezi Dynasty, is a legendary and semi-mythical civilization in East African history, particularly associated with the Great Lakes region, including parts of present-day Uganda, Rwanda, Burundi, and Tanzania. As the Bachwezi are often regarded as semi-legendary, historical records about their social, political, and economic organization are limited and subject to debate. Nevertheless, various oral traditions and historical accounts provide insights into their civilization:

    Social Organization of the Bachwezi:

    1. Clan-Based Society: The Bachwezi were said to have organized their society into clans and lineages, much like many other African societies. Clans were significant kinship groups, and members of each clan were considered part of a broader extended family. Clans played a central role in identity and social cohesion.
      1. Hierarchical Social Structure: The Bachwezi society was hierarchical, with a ruling elite at the top. The paramount chief, known as the “Omugabe” or “Mugabe,” held supreme authority. Below the Omugabe were subordinate chiefs, noble families, and commoners. Social status was often determined by birth, and lineage affiliations played a crucial role in one’s position in society.
        1. Gender Roles: Gender roles were likely well-defined, with men often responsible for activities such as hunting, warfare, and leadership, while women played essential roles in agriculture, food production, and household management. However, the division of labor and gender roles could vary across different regions and time periods.

                                                                                   Political Organization of the Bachwezi:

    1. Paramount Chiefdom: The Bachwezi were ruled by a paramount chief, the Omugabe, who held significant political power. The Omugabe’s authority extended over a territory comprising multiple clans and villages. Subordinate chiefs and local leaders assisted in the administration of the chiefdom.
      1. Centralized Authority: The Bachwezi Dynasty is often associated with centralized authority, with the Omugabe acting as both a political and spiritual leader. They were believed to possess supernatural powers and were responsible for maintaining order, making decisions, and collecting tribute.
        1. Tribute and Labor: Tribute and labor services were essential aspects of the Bachwezi political organization. Local communities and subordinate chiefs often owed tribute to the Omugabe, which could consist of agricultural produce, livestock, or labor. This tribute supported the central administration and elite.

                                                                                               Economic Organization of the Bachwezi:

    1. Agriculture: Agriculture played a vital role in the Bachwezi economy. They cultivated various crops, including millet, sorghum, beans, and maize. Agriculture served both subsistence and tribute purposes, as a portion of the agricultural produce was often collected as tribute.
      1. Trade: The Bachwezi were active participants in trade networks that extended to the East African interior and coastal regions. They engaged in trade, exchanging agricultural products and other goods, such as ivory, salt, and iron, with neighboring groups and traders along trade routes.
        1. Craftsmanship: Artisans and craftsmen likely played a role in Bachwezi society, producing items such as pottery, metalwork, and textiles. These items were used for both local consumption and trade.
          1. Livestock: Livestock, particularly cattle, played a significant role in the Bachwezi economy. Cattle were not only a source of food and hides but also a measure of wealth and status.

    It’s important to emphasize that the Bachwezi civilization is primarily known through oral traditions and legends, and the historical accuracy of these accounts is debated. Additionally, the Bachwezi are often considered a semi-legendary or mythical group, making it challenging to separate fact from folklore. As a result, the details of their social, political, and economic organization remain a subject of ongoing study and interpretation by historians and archaeologists.

    Conclusion

    Conclusion

    The Batembuzi and Bachwezi Dynasties remain enigmatic figures in East African history, their stories woven into the fabric of the region’s cultural heritage. Despite the limited historical evidence, their contributions to innovation, leadership, and societal development continue to be celebrated. As we delve deeper into the mysteries surrounding these dynasties, we gain a richer understanding of the complex and fascinating tapestry of the Bunyoro-Kitara Empire.

    Frequently Asked Questions (FAQs) about the Bunyoro-Kitara Empire

    Batembuzi and Bachwezi Dynasties:

    • Q: What is the relationship between the Batembuzi and Bachwezi Dynasties?
      • A: The Batembuzi are often considered the mythical predecessors to the Bachwezi Dynasty. They are both legendary dynasties that ruled over the Bunyoro-Kitara Empire.
    • Q: Are the Batembuzi and Bachwezi considered historical or mythical figures?
      • A: Both dynasties are shrouded in myth and legend. While there is some archaeological evidence associated with them, much of what is known about them comes from oral traditions.
    • Q: What were the main contributions of the Batembuzi and Bachwezi to the Bunyoro-Kitara Empire?
      • A: Both dynasties are credited with introducing cultural innovations, such as advanced agricultural techniques and ironworking. They also played significant roles in establishing political and social order in the region.

    The Chwezi Civilization:

    • Q: What is the significance of the Chwezi civilization for the peoples of the Interlacustrine region?
      • A: The Chwezi civilization holds cultural, historical, and mythological significance for the region. It contributes to their cultural identity, historical narratives, and spiritual beliefs.
    • Q: What are the main cultural contributions of the Chwezi?
      • A: The Chwezi are associated with cultural advancements like pottery, ironworking, and agricultural practices.
    • Q: How did the Chwezi Dynasty decline and disappear?
      • A: The reasons for the decline and disappearance of the Chwezi Dynasty are shrouded in mystery and legend. Various theories attribute it to factors such as internal conflicts, supernatural forces, or changes in the environment.

    General Questions:

    • Q: Where was the Bunyoro-Kitara Empire located?
      • A: The Bunyoro-Kitara Empire was located in the Great Lakes region of East Africa, encompassing parts of present-day Uganda, Rwanda, and Tanzania.
    • Q: Are there any archaeological sites associated with the Batembuzi and Bachwezi?
      • A: Yes, there are some archaeological sites in the region that have been linked to these dynasties, providing evidence of their existence and activities.
    • Q: Can you recommend any further reading on the Bunyoro-Kitara Empire?
  • Mastering the Layers of the Atmosphere: Understanding Air and Its Components

    Explore the layers of the atmosphere and their significance. Discover the importance of air, its properties, and the uses of gases like oxygen, nitrogen, and rare gases in our daily lives.

    Introduction

    The atmosphere is a vast and complex layer that surrounds our planet, playing a crucial role in sustaining life on Earth. It is composed of various layers, each with distinct characteristics and functions. Air, a vital component of the atmosphere, consists of different gases, including oxygen, nitrogen, and rare gases, each contributing uniquely to our environment. This blog delves into the layers of the atmosphere, the importance and properties of air, and the essential uses of its components, providing a comprehensive understanding of the invisible yet indispensable blanket enveloping our world.

    What is  air?

    Air is a mixture of gases, primarily nitrogen (78%), oxygen (21%), argon (0.93%), carbon dioxide, and trace gases.

    Importance of Air

    Air plays a significant role in the environment and for individuals. The following are the  uses of air:

    • Sustains life through oxygen for respiration.
      • Acts as a medium for various atmospheric processes.

    Properties of Air

    • Colorless, odorless, and tasteless.
      • Compressible and expandable.

    Layers of the Atmosphere

    1. Troposphere

    This is the lowest layer, extends up to 8-15 kilometers.

    • It is featured with Weather events, temperature decreases with altitude.
    • Stratosphere

    It is Above the troposphere and  extends up to 50 kilometers.

    • Its features include: the ozone layer, temperature increases with altitude.
    • Mesosphere

    The Mesosphere is located just  Above the stratosphere, extends up to 85 kilometers.

     In this layer, temperature decreases with altitude.

    • Thermosphere

    This layer is above the mesosphere. It  extends beyond 600 kilometers.

    It has high temperatures due to solar activity and  contains ionosphere.

    • Exosphere

    The exosphere is the Outermost layer. It is the gradual transition into outer space.

    In this layer, there is Very low density and few molecules. In fact, satellites orbit is here.


    Importance of Atmospheric Layers

    1. Troposphere
    • Where weather phenomena occur.
      • Essential for life as it contains the air we breathe.
    • Stratosphere
    • Ozone layer absorbs and protects from harmful UV radiation.
    • Mesosphere
    • Where most meteorites burn upon entry into the Earth’s atmosphere.
    • Thermosphere
    • Location of the auroras (northern and southern lights).
      • Key for satellite communication and orbits.
    • Exosphere
    • Gradual transition into space.

    Atmospheric Circulation

    1. Convection Currents
    • Warm air rises, creating low pressure, while cool air descends, creating high pressure.
      • Influences wind patterns and weather systems.
    • Jet Streams
    • High-altitude, fast-flowing air currents.
      • Affects weather patterns and aviation routes.

    Study Tips: on layers of the atmosphere

    • Visualize: Use diagrams and illustrations to understand the layers of the atmosphere.
    • Experiment: Conduct simple experiments to demonstrate the properties of air.
    • Current Events: Stay informed about current environmental issues related to the atmosphere.

    These notes provide a foundational understanding of air and the layers of the atmosphere, helping students grasp the fundamental concepts in their studies.


    Laboratory Experiment: Determining the Percentage of Oxygen in Air

    Objective:

    To determine the percentage of oxygen in the air using a simple experimental setup.

    Materials:

    1. Candle
    2. Large glass jar or beaker
    3. Graduated cylinder
    4. Ruler
    5. Matches/lighter
    6. Small dish or container
    7. Stopwatch or timer
    8. Thermometer
    9. Masking tape
    10. Safety goggles

    Procedure:

    1. Preparation: a. Put on safety goggles. b. Set up the graduated cylinder, thermometer, and ruler on a stable surface. c. Place the candle in the small dish and light it. d. Allow the candle to burn for a minute to stabilize the flame.
    2. Measurement of Air Volume: a. Fill the graduated cylinder with water. b. Place the cylinder upside down in the dish of water, ensuring that no air bubbles are trapped. c. Carefully place the large glass jar or beaker over the cylinder, creating a sealed environment. d. Lift the beaker slightly to allow water to enter the graduated cylinder, displacing the air. e. Measure and record the initial volume of air in the graduated cylinder.
    3. Burning the Oxygen: a. Carefully lower the beaker back into place, trapping the air inside. b. Lower the lit candle into the beaker, making sure the flame does not touch the sides. c. Observe the candle until it extinguishes. The oxygen in the air will be used up in the combustion process.
    4. Post-Combustion Measurement: a. Once the flame is extinguished, carefully lift the beaker, allowing water to re-enter the graduated cylinder. b. Measure and record the new volume of air in the graduated cylinder.
    5. Calculations: a. Calculate the volume of air consumed by subtracting the post-combustion volume from the initial volume. b. Convert the volume to moles using the ideal gas law. c. Use the molar ratio of oxygen to air (approximately 1:5) to find the moles of oxygen. d. Calculate the percentage of oxygen in the air.

    Safety Considerations:

    1. Handle the candle with care to avoid burns or accidents.
    2. Ensure proper ventilation in the laboratory.
    3. Wear safety goggles throughout the experiment.
    4. Keep a fire extinguisher or safety equipment nearby.

    Notes:

    This experiment provides a practical demonstration of the concept of oxygen in the air and allows students to apply their knowledge of stoichiometry and gas laws to calculate the percentage of oxygen. The simplicity of the setup makes it suitable for a classroom or laboratory environment.

    how to Separate Components of Air

    Separating the components of air involves various methods based on the physical and chemical properties of the components. Here’s a simplified explanation of some common methods:

    1. Fractional Distillation:

    Objective: To separate air into its major components—nitrogen, oxygen, and argon—using differences in boiling points.

    Procedure:

    1. Compression: Air is compressed to high pressure.
    2. Cooling: The compressed air is cooled to a low temperature, causing it to liquefy.
    3. Fractional Distillation: The liquefied air is then passed through a fractionating column. As the air is gradually warmed up, components with different boiling points vaporize and are collected at different levels. Nitrogen, with the highest boiling point, is collected at the top, followed by oxygen, and then argon.

    2. Adsorption:

    Objective: To separate gases based on their adsorption onto a solid surface.

    Procedure:

    1. Use of Adsorbent: An adsorbent material, such as activated charcoal or zeolite, is employed.
    2. Passing Air: Air is passed through the adsorbent, where certain components (like carbon dioxide and water vapor) are adsorbed onto the surface.
    3. Release: The adsorbed components can be desorbed (released) by changing conditions, such as increasing temperature.

    3. Membrane Separation:

    Objective: To separate gases based on their ability to pass through a semi-permeable membrane.

    Procedure:

    1. Selection of Membrane: Use a membrane that selectively allows certain gases to pass through.
    2. Pressure Difference: Apply a pressure difference across the membrane.
    3. Separation: Certain gases, like oxygen, may pass through more readily than others, allowing for separation.

    4. Cryogenic Separation:

    Objective: To separate gases by exploiting their different boiling points at extremely low temperatures.

    Procedure:

    1. Cooling: Air is cooled to very low temperatures, causing it to liquefy.
    2. Separation: The liquid air is then separated into components based on their boiling points through fractional distillation.

    5. Chemical Absorption:

    Objective: To selectively absorb one component of air using a chemical reaction.

    Procedure:

    1. Use of Absorbent: A chemical absorbent, such as potassium hydroxide (KOH), is used.
    2. Reaction: The absorbent reacts with a specific component of air, for example, carbon dioxide, forming a new compound.
    3. Separation: The remaining components of air are not affected, allowing for separation.

    Safety Considerations while conducting a laboratory experiment on separating gases

    1. Follow safety guidelines for handling compressed gases.
    2. Be cautious with extremely cold temperatures in cryogenic separation.
    3. Use appropriate materials and equipment for adsorption and absorption processes.

    These methods are employed on an industrial scale for large-scale separation of air components, and the principles can be adapted for educational purposes in a laboratory setting.

    Uses of Air

    Let’s discuss the uses of air in general.  The Uses of specific gases like oxygen, nitrogen and  noble gases will also be explored.

    1. Breathing:
    • Oxygen in the air is essential for the process of respiration in humans and many other organisms.
    • Combustion:
    • Oxygen supports combustion. It is necessary for the burning of fuels, such as in the operation of engines and the production of energy.
    • Oxidation Reactions:
    • Many chemical reactions involve the oxidation of substances, and oxygen from the air plays a crucial role in these processes.
    • Weather Phenomena:
    • Air is involved in various atmospheric processes, including wind formation, cloud formation, and precipitation.
    • Transportation:
    • Air is used in various transportation modes, such as in tires to maintain pressure and in aviation for combustion in engines.
    • Drying Processes:
    • The movement of air aids in drying processes, helping to evaporate moisture from surfaces.

    Uses of Oxygen:

    1. Medical Applications:
    • Oxygen is used in medical settings for respiratory support, including in oxygen masks and ventilators.
    • Welding and Cutting:
    • Oxygen is crucial for oxy-fuel welding and cutting processes, where it supports the combustion of acetylene or other fuel gases.
    • Water Treatment:
    • Oxygen is employed in water treatment processes to enhance the oxidation of impurities and improve water quality.
    • Rocket Propulsion:
    • In space exploration, oxygen is used as an oxidizer in rocket propulsion systems.
    • Steel Production:
    • Oxygen is used in the production of steel through processes like the basic oxygen steelmaking (BOS) method.
    • Chemical Manufacturing:
    • Many chemical processes require oxygen as a reactant or as part of the production process.

    Uses of Nitrogen:

    1. Food Preservation:
    • Nitrogen is used in the food industry to create a nitrogen-rich atmosphere, preventing the spoilage of food products.
    • Manufacturing:
    • Nitrogen is used in various industries, including electronics manufacturing, where it helps create inert atmospheres.
    • Pharmaceuticals:
    • In pharmaceutical manufacturing, nitrogen is used to displace oxygen and moisture, preventing oxidation and degradation of sensitive compounds.
    • Agriculture:
    • Liquid nitrogen is used as a cryogenic agent in agricultural practices for freezing and preserving seeds, embryos, and other biological materials.
    • Oil and Gas Industry:
    • Nitrogen is employed in enhanced oil recovery and as an inert gas for purging pipelines and tanks in the oil and gas industry.

    Uses of Noble Gases:

    1. Helium:
    • Used in cryogenics for cooling purposes.
      • Inflates balloons for various applications.
      • Used in certain medical and industrial applications.
    • Argon:
    • Used in welding processes to create an inert atmosphere.
      • Fills incandescent and fluorescent light bulbs.
    • Krypton and Xenon:
    • Used in lighting applications, such as in high-intensity discharge lamps.
    • Radon:
    • Used in cancer treatment and certain diagnostic procedures.
    • Neon:
    • Used in neon signs and lighting.

    While air is a mixture of gases, each component has specific applications and plays critical roles in various industrial, medical, and scientific processes.

    Conclusion

    Understanding the layers of the atmosphere and the components of air is fundamental to appreciating the delicate balance that sustains life on Earth. Each layer of the atmosphere plays a specific role, and the gases within it have unique properties and uses that are integral to our daily lives and industrial processes. As we continue to explore and utilize the atmosphere’s resources, it is crucial to maintain the balance and ensure its preservation for future generations.

    FAQs on layers of the atmosphere, air and its components

    1. What are the five layers of the atmosphere?
    • The five layers of the atmosphere are the troposphere, stratosphere, mesosphere, thermosphere, and exosphere.
    • Why is oxygen important in the atmosphere?
    • Oxygen is essential for the respiration of most living organisms and is also used in medical applications and industrial processes.
    • How does the ozone layer protect life on Earth?
    • The ozone layer absorbs and scatters ultraviolet solar radiation, preventing it from reaching the Earth’s surface and harming living organisms.
    • What are the uses of nitrogen in the atmosphere?
    • Nitrogen is used in food preservation, manufacturing of fertilizers, and as a protective atmosphere in various industrial processes.
    • What role does air pressure play in our environment?
    • Air pressure is crucial for breathing, weather patterns, and various applications in aviation and meteorology.
    • How does the atmosphere regulate Earth’s temperature?
    • The atmosphere helps regulate the Earth’s temperature by trapping heat and distributing solar energy, which maintains the planet’s climate.
    • What are rare gases, and what are their uses?
    • Rare gases include helium, neon, argon, krypton, and xenon, and they are used in lighting, welding, and as inert gases in various scientific and industrial processes.
    • What is the significance of the thermosphere?
    • The thermosphere is characterized by high temperatures and is where the auroras occur. It also plays a role in the absorption of high-energy radiation.
    • Why is the mesosphere important?
    • The mesosphere is where most meteors burn up upon entering the atmosphere, preventing them from reaching the Earth’s surface.
    1. How does the atmosphere contribute to climate regulation?
    • The atmosphere helps regulate climate by trapping heat and distributing solar energy, ensuring a stable and habitable environment on Earth.

    More Frequently Asked Questions (FAQs) on Air and its Components:

    Q1: What is air composed of?

    •  Air is a mixture of gases, primarily nitrogen (78%), oxygen (21%), argon (0.93%), carbon dioxide, and trace gases.

    Q2: How is air separated into its components?

    •  Air can be separated through methods like fractional distillation, adsorption, membrane separation, cryogenic separation, and chemical absorption, exploiting the different physical and chemical properties of its components.

    Q3: Why is oxygen important in the atmosphere?

    •  Oxygen is crucial for the process of respiration in living organisms, supports combustion, and plays a vital role in various oxidation reactions.

    Q4: What are the main uses of nitrogen?

    •  Nitrogen is used in food preservation, manufacturing, pharmaceuticals, agriculture, and the oil and gas industry, among other applications.

    Q5: How is oxygen used in medical applications?

    •  Oxygen is used in medical settings for respiratory support, including in oxygen masks and ventilators.

    Q6: What are the unique properties of noble gases?

    •  Noble gases, such as helium, argon, krypton, xenon, and radon, are inert and have low reactivity. They find applications in lighting, cryogenics, welding, and medical treatments.

    Q7: Why is air essential for combustion?

    •  Combustion requires oxygen, and air provides the necessary oxygen for the burning of fuels, such as in engines and various industrial processes.

    Q8: How does fractional distillation work in separating air components?

    •  Fractional distillation involves cooling and liquefying air and then gradually warming it up. The different components, with varying boiling points, vaporize at different levels and can be collected separately.

    Q9: What safety precautions should be taken in air-related experiments?

    •  Safety precautions include handling compressed gases with care, ensuring proper ventilation, using appropriate materials and equipment, and wearing safety goggles.

    Q10: How is nitrogen used in the food industry?

    •  Nitrogen is used to create a nitrogen-rich atmosphere, preventing the spoilage of food products. It is commonly employed in food packaging and storage.

    Q11: In the separation of air into its gases:

    a. Why is the air compressed and then expanded?

    •  Compression raises the pressure and temperature, facilitating liquefaction of the air. Expansion allows for cooling, leading to the separation of components based on their boiling points during fractional distillation.

    Q12. Why is argon obtained before oxygen?

    •  Argon has a lower boiling point than oxygen, so it vaporizes and is collected before oxygen during fractional distillation.

    Q13. What do you think is the biggest expense? Explain.

    •  The cooling and liquefaction processes, especially for cryogenic separation, are energy-intensive, making them a significant expense in the separation of air.

    Q14: Give two uses of oxygen gas.

    •  Oxygen is utilized in medical applications for respiratory support, and it is crucial in oxy-fuel welding and cutting processes.

    Q15: A mixture of oxygen and acetylene burns with a much hotter flame than a mixture of air and acetylene. Why?

    •  Oxygen supports combustion more efficiently than air because it provides a concentrated source of oxygen, resulting in a hotter flame during the burning of acetylene.

    Q16: Nitrogen is used to keep food frozen during transportation. Which properties make it suitable for this?

    •  Nitrogen is inert and does not react with food products. Its low temperature, achieved through liquefaction, helps preserve and keep the food frozen during transportation.

    Q5: Give three uses of noble gases.

    • : Noble gases have various applications, including in lighting (e.g., neon signs), cryogenics (e.g., helium for cooling), and welding (e.g., argon for creating an inert atmosphere).
  • State Formation in East Africa: Understanding the Dynamics of Centralized and Non-Centralized States

    Explore the complexities of state formation in East Africa, focusing on the characteristics of centralized and non-centralized states in Uganda, Kenya, and Tanzania. Learn about political structures, governance, and the influence of trade, migrations, and external cultures.

    ### **Introduction:** 

    State formation in East Africa during the precolonial era was a multifaceted process that shaped the political, economic, and social landscapes of the region. Uganda, Kenya, and Tanzania were home to a diverse range of ethnic groups and societies, each developing its own political structures, from centralized monarchies to non-centralized societies based on kinship and clan systems. In this blog, we delve into the features of centralized and non-centralized states in East Africa, highlighting the key differences in governance, leadership, and the role of trade and

    migrations in shaping these entities.

    In Uganda, kingdoms like Buganda, Bunyoro, and Ankole emerged as powerful political entities. They had centralized monarchies with hierarchical systems of governance, often ruled by hereditary kings. These kingdoms controlled vast territories and engaged in trade, diplomacy, and warfare with neighboring communities.

    Kenya was similarly marked by diverse political entities. The Swahili city-states along the coast, such as Mombasa and Lamu, engaged in trade with the Arab world and Asia, contributing to the development of sophisticated urban centers. Inland, various Bantu-speaking groups had decentralized systems of governance, often organized around clan and age-set systems.

    Tanzania, with its mix of Bantu-speaking, Nilotic, and Cushitic peoples, saw the emergence of states like Kilwa and Zanzibar on the coast. Inland, the Kingdom of Maravi and the Meru Kingdoms represented varying degrees of political centralization.

    State formation in East Africa was influenced by trade routes, migrations, and interactions with external cultures, including Arab and Indian traders. While some regions developed centralized monarchies, others maintained decentralized systems of governance. These precolonial states laid the foundation for the complex political landscapes that later colonial powers would encounter and reshape during the European colonization of East Africa in the late 19th and early 20th centuries.

    In precolonial East Africa, various types of states and political entities emerged, reflecting the diversity of cultures, societies, and geographic landscapes in the region. These states can be broadly categorized into the following types:

    1. Centralized Monarchies: Some East African societies developed centralized monarchies with hereditary rulers who held significant power. Examples include:

    Buganda Kingdom (Uganda): Known for its well-organized and hierarchical system, Buganda had a Kabaka (king) at the helm and an elaborate administrative structure.

    Kilwa Sultanate (Tanzania): A powerful Swahili city-state with a sultan as its ruler, Kilwa was a center of trade and culture along the East African coast.

    • City-States: Along the East African coast, Swahili city-states emerged as influential trade hubs. These city-states were often characterized by urban centers with diverse populations and economic activities. Examples include Mombasa, Zanzibar, and Lamu.
      • Clan-Based Societies: Many inland regions of East Africa were organized into clan-based societies with decentralized authority. Leadership was often determined by clan elders or councils. These societies relied on kinship ties and communal decision-making. Examples include various Bantu-speaking communities in Kenya and Tanzania.
      • Federation and Confederation: In some cases, neighboring chiefdoms or smaller states formed federations or confederations to increase their collective strength. The Maasai, for instance, had a loose confederation of semi-autonomous groups.
      • Segmentary Societies: Some East African societies followed a segmentary lineage system, where larger units were composed of smaller, autonomous segments. These societies were often organized around age sets, with each set having specific roles and responsibilities. The Nuer in South Sudan and parts of Kenya are examples of such societies.
      • Nomadic Societies: In arid and semi-arid regions of East Africa, nomadic pastoralist societies, such as the Somali, had their own unique forms of governance based on clan structures and mobility.

    It’s important to note that East Africa’s political landscape was not static, and the types of states and governance systems varied across time and space. Trade networks, migrations, and interactions with neighboring societies influenced the evolution of these political structures. This diversity in state formation and governance systems in precolonial East Africa played a crucial role in shaping the region’s history and dynamics.

    Features of centralized states in east Africa

    Centralized states in East Africa have historically been characterized by certain features that distinguish them from other forms of governance. While the specific details and structures have evolved over time, here are some key features of centralized states in East Africa:

    1. Strong Central Authority: Centralized states in East Africa typically have a strong central authority or monarchy that holds significant power and control over the territory. The authority of the central ruler is often absolute and unchallenged.
    2. Hereditary Leadership: Leadership in centralized states is usually hereditary, with rulers passing their authority and titles down through a royal lineage. Succession is often determined by birthright or a specific system of inheritance.
    3. Administrative Bureaucracy: These states often have well-organized administrative bureaucracies to manage various aspects of governance, including taxation, law enforcement, and public administration.
    4. Tribute and Taxation: Centralized states typically collect tribute or taxes from their subjects. This revenue is used to fund state activities, maintain infrastructure, and support the ruling elite.
    5. Territorial Expansion: Centralized states in East Africa historically engaged in territorial expansion, conquering neighboring regions to extend their influence and control.
    6. Legal Systems: Centralized states typically have well-defined legal systems to maintain order and enforce the ruler’s authority. These systems often include a hierarchy of courts and legal officials.
    7. Standing Armies: To maintain control and protect the state’s interests, centralized states usually maintain standing armies, which can be used for both defense and expansion.
    8. Administrative Divisions: The state is divided into administrative regions or provinces, each with its own local authorities responsible for implementing the central government’s policies.
    9. Infrastructure Development: Centralized states often invest in infrastructure development, such as roads, irrigation systems, and fortifications, to enhance their control over the territory and support economic activities.
    10. Patronage and Redistribution: The central authority typically engages in patronage and redistribution, providing favors or resources to loyal nobles and elites in exchange for their support and loyalty.
    11. Cultural and Religious Influence: Centralized states may promote a particular culture or religion, often closely tied to the ruling elite. This can help unify the population under a shared identity and belief system.
    12. Control of Resources: The central authority often seeks to control and regulate the distribution of key resources, such as land, minerals, and trade routes, to enhance its power and wealth.
    13. Diplomacy and Alliances: Centralized states engage in diplomacy and may form alliances with neighboring states, both for protection and to facilitate trade and other strategic interests.

    It’s important to note that the specific features and details of centralized states in East Africa have varied throughout history and across different regions of the continent. Additionally, as of my last knowledge update in January 2022, there may have been developments or changes in the region that could impact the nature of centralized states in East Africa.

    FEATURES OF NONCENTRALISED STATES IN EAST AFRICA

    Non-centralized states in East Africa, in contrast to centralized states, are characterized by a different set of features. These states are often more decentralized in terms of authority and governance, and authority may be distributed across multiple local entities. Here are some key features of non-centralized states in East Africa:

    1. Localized Authority: Non-centralized states tend to have authority and governance structures that are more localized, with power distributed among various regional or local leaders and councils.
    2. Decentralized Leadership: Leadership in these states may not be hereditary or centralized in a single authority figure or monarchy. Instead, leadership can be distributed among different clans, chiefs, or local councils.
    3. Clan and Kinship Systems: Many non-centralized states in East Africa rely on clan or kinship systems to determine leadership and resolve disputes. Leaders often emerge from within the dominant clans or kin groups.
    4. Traditional Governance: Traditional and customary systems of governance are prevalent in non-centralized states, with decisions often made through consensus among elders and community leaders.
    5. Local Justice Systems: These states may have local justice systems that handle disputes and conflicts within their respective communities. These systems often prioritize customary and traditional practices.
    6. Limited Territorial Expansion: Non-centralized states are less likely to engage in aggressive territorial expansion. Instead, they tend to maintain a relatively fixed territory and focus on local governance.
    7. Limited Taxation: Taxation in non-centralized states is often minimal or less systematic compared to centralized states. Local communities may contribute to the collective welfare through communal efforts or contributions.
    8. Informal Economy: Economic activities in non-centralized states may be more informal, relying on barter systems, local trade, and subsistence agriculture. There may be less formal trade and taxation.
    9. Resource Control: Local communities and leaders have greater control over the distribution and management of resources, including land, water, and pastures.
    10. Reliance on Customary Law: Customary law plays a significant role in resolving disputes and regulating behavior within non-centralized states. Customary norms and practices are essential for maintaining order.
    11. Alliance-Based Security: Non-centralized states often rely on alliances and cooperation with neighboring communities for security rather than maintaining standing armies.
    12. Ethnically Diverse: These states are often ethnically diverse, with various ethnic groups coexisting within the same territory. Each group may have its own leaders and governance structures.
    13. Social Cohesion: Non-centralized states often prioritize social cohesion and cooperation among community members. Decision-making and conflict resolution emphasize maintaining harmony within the community.

    It’s important to note that the features of non-centralized states in East Africa can vary widely from one region to another, and they may evolve over time due to changing social, economic, and political factors. Additionally, the distinctions between centralized and non-centralized states are not always clear-cut, as some states may exhibit a combination of centralized and decentralized features.

    The process of state formation in East Africa reflects the rich diversity of the region’s political, social, and economic systems. Centralized states, with their strong monarchies and administrative structures, coexisted alongside non-centralized societies based on kinship and clan systems. These precolonial political entities laid the groundwork for the complex political landscapes that would later be shaped by European colonization. Understanding the differences between centralized and non-centralized states provides valuable insights into East Africa’s historical development and its enduring cultural diversity.

    Conclusion

    State formation in East Africa during the precolonial era, specifically in Uganda, Kenya, and Tanzania, was a complex and diverse process characterized by various forms of political organization and governance. These regions were home to numerous ethnic groups and societies, each with its own distinct social, economic, and political structures.

    ### **FAQs on State Formation in East Africa**:

    **1. What are the main features of centralized states in East Africa?** 

    Centralized states in East Africa are characterized by strong central authority, hereditary leadership, administrative bureaucracy, territorial expansion, and the use of standing armies.

    **2. How did non-centralized states in East Africa operate?** 

    Non-centralized states operated under localized forms of governance, with leadership often distributed among clans, elders, or councils, and decision-making based on customary laws and communal consensus.

    **3. What factors influenced state formation in East Africa?** 

    State formation in East Africa was influenced by trade, migrations of Bantu-speaking and Nilotic peoples, and external interactions with Arab, Indian, and European traders.

    **4. How did trade affect the development of states in East Africa?** 

    Trade routes connecting East Africa to the Arab world and Asia facilitated the rise of powerful coastal city-states like Kilwa and Mombasa, contributing to the region’s economic and political development.

    **5. What role did external cultures play in East African state formation?** 

    External cultures, particularly from Arab and Indian traders, introduced new technologies, governance systems, and religious practices that influenced the political development of East African states.

  • world climate zones: altitude and vegetation cover

    Discover the different world climate zones, altitude and vegetation cover. Learn climate characteristics, and how they shape the environment and ecosystems. Learn about tropical, temperate, arid, polar, and more climate zones around the globe.

    Introduction:

    Climate zones are a fundamental part of Earth’s geography and have a significant impact on the environment, ecosystems, and the way people live. These zones are classified based on factors like temperature, humidity, precipitation, and seasonal variations, and they shape the weather patterns and environmental conditions across the globe. Understanding the world’s climate zones helps explain why some regions are lush and tropical, while others are dry and arid.

    In this blog, we’ll explore the major climate zones of the world, explain their characteristics, and discuss how these zones influence the lives of people and wildlife in different parts of the world. We shall later on discuss altitude and vegetation cover.

    Types of World Climate Zones

    There are five main types of climate zones that cover the Earth’s surface: tropical, dry (arid), temperate, polar, and highland climates. These climate zones are based on the Köppen-Geiger climate classification system and are determined by patterns of temperature and precipitation.

    1. Tropical Climate Zones

    Tropical climates are found near the equator and are characterized by warm temperatures and high humidity year-round. This region experiences very little seasonal variation and has two major subtypes: tropical rainforest and tropical savanna.

    • Tropical Rainforest: These areas receive heavy rainfall throughout the year and maintain constant warm temperatures. Examples include the Amazon Basin in South America and the Congo Basin in Africa.
    • Tropical Savanna: These regions experience distinct wet and dry seasons. They are home to grasslands with scattered trees and are typically found in Africa, India, and parts of Australia.

    Key Features:

    • Warm temperatures all year long (average above 18°C/64°F).
    • Heavy rainfall, especially in rainforest regions.
    • High biodiversity and lush vegetation.

    2. Dry (Arid) Climate Zones

    Arid climates, or desert climates, cover about one-third of the Earth’s surface. These areas are characterized by low precipitation, extreme temperature variations between day and night, and sparse vegetation.

    • Hot Deserts: Examples include the Sahara Desert in Africa and the Arabian Desert in the Middle East. These regions experience extremely hot days and cold nights with little to no rainfall.
    • Cold Deserts: Found in regions like Antarctica and the Gobi Desert, cold deserts have low temperatures and are covered with snow or ice for much of the year.

    Key Features:

    • Very little rainfall (less than 250 mm per year).
    • Sparse vegetation.
    • Large temperature swings between day and night.

    3. Temperate Climate Zones

    Temperate zones are located between tropical and polar regions and experience moderate weather conditions. These zones are known for having four distinct seasons—winter, spring, summer, and autumn.

    • Mediterranean Climate: Found in parts of Europe, California, and coastal regions of Australia, Mediterranean climates have mild, wet winters and hot, dry summers.
    • Oceanic Climate: These climates, like those found in parts of the UK and New Zealand, experience moderate temperatures year-round with no extreme seasonal differences.
    • Continental Climate: Areas with continental climates, like the central and eastern United States, experience hot summers and cold winters with significant seasonal temperature variations.

    Key Features:

    • Moderate temperatures and precipitation.
    • Four distinct seasons.
    • Varied ecosystems, from forests to grasslands.

    4. Polar Climate Zones

    Polar climates are found near the poles and are characterized by extremely cold temperatures and low precipitation. These areas are covered in ice or snow for most of the year.

    • Tundra Climate: Found in areas like northern Canada and Siberia, tundra climates have short, cool summers and long, harsh winters.
    • Ice Cap Climate: The polar ice caps, such as those in Antarctica and Greenland, are the coldest regions on Earth and are permanently covered in ice and snow.

    Key Features:

    • Extremely cold temperatures (average below 0°C/32°F).
    • Very little precipitation, mostly in the form of snow.
    • Limited vegetation, with only mosses and lichens in some areas.

    5. Highland Climate Zones

    Highland climates occur in mountainous regions where temperature and precipitation vary depending on elevation. These areas can experience a variety of climate conditions within short distances.

    • Alpine Climate: Found in mountain ranges like the Alps, Rockies, and Himalayas, alpine climates are cooler than the surrounding areas due to high altitude. Temperatures drop as elevation increases, and precipitation can vary significantly.

    Key Features:

    • Cooler temperatures at higher elevations.
    • Precipitation increases with elevation, with snow common at higher altitudes.
    • Diverse ecosystems, ranging from forests at lower elevations to tundra-like conditions near mountain peaks.

    Factors Influencing World Climate Zones

    Several factors contribute to the characteristics of these climate zones. The most important factors include:

    • Latitude: The closer a region is to the equator, the warmer it tends to be, while regions closer to the poles are colder.
    • Altitude: Higher altitudes generally lead to cooler temperatures.
    • Proximity to Oceans: Regions near large bodies of water tend to have more moderate climates, while inland areas experience more extreme temperature fluctuations.
    • Wind Patterns: Prevailing winds can bring moisture or dryness to a region, influencing its climate.
    • Ocean Currents: Warm or cold ocean currents can affect the temperature and humidity of coastal areas.

    Conclusion:

    Understanding the different climate zones of the world helps us appreciate the diversity of ecosystems and human cultures across the globe. From the hot, humid conditions of the tropics to the freezing temperatures of polar regions, climate zones shape the way people live, work, and adapt to their environments. By studying climate patterns, we can better prepare for and respond to changes in our environment, such as those brought about by climate change. As we continue to explore these zones, we learn more about the interconnectedness of the Earth’s climate system and the importance of preserving its delicate balance.

    Altitude and Its Impact on Climate Zones

    Altitude refers to the height of a location above sea level. It plays a crucial role in determining climate characteristics and can significantly affect temperature, precipitation, and overall weather patterns.

    How Altitude Affects Climate Zones:

    1. Temperature Variation:
      • Cooling Effect: As altitude increases, the temperature generally decreases. This is due to the fact that air becomes thinner and less able to retain heat at higher elevations. For every 1,000 meters (approximately 3,280 feet) above sea level, the temperature typically drops by about 6.5°C (11.7°F). This is known as the lapse rate.
      • Frost Line: The decrease in temperature with altitude often leads to the formation of frost lines, where vegetation types and agricultural practices change due to cooler temperatures.
    2. Precipitation Patterns:
      • Orographic Effect: Mountains and highland areas often experience increased precipitation due to the orographic effect. When moist air rises over a mountain range, it cools and condenses, leading to higher rainfall on the windward side of the mountain. The leeward side, or rain shadow, often receives significantly less precipitation.
      • Snowfall: In higher altitudes, precipitation is more likely to fall as snow rather than rain. This contributes to the accumulation of glaciers and ice caps in mountainous regions.
    3. Vegetation and Ecosystems:
      • Altitude Zones: The types of vegetation and ecosystems present at different altitudes can vary significantly. For example, tropical forests at lower altitudes give way to temperate forests and alpine meadows as altitude increases. The higher the elevation, the more the vegetation shifts to adapt to cooler temperatures and reduced oxygen levels.
      • Agriculture: Farming practices are also influenced by altitude. At higher elevations, crops that are adapted to cooler temperatures, such as potatoes and barley, are more common, whereas tropical crops are typically grown at lower altitudes.
    4. Human Adaptations:
      • Building Designs: In high-altitude regions, buildings and infrastructure must be adapted to withstand cooler temperatures and potential snowfall. Architectural designs often incorporate insulation and heating systems to ensure comfort.
      • Health Considerations: People living at high altitudes may experience altitude sickness due to reduced oxygen levels. This can affect physical performance and requires acclimatization for newcomers to these areas.

    Examples of High-Altitude Climate Zones:

    • The Andes Mountains: Stretching along the western coast of South America, the Andes experience a range of climates depending on altitude, from tropical rainforests at lower elevations to alpine tundra at higher altitudes.
    • The Himalayas: The highest mountain range in the world, the Himalayas have varying climates based on altitude, including temperate forests and icy, high-altitude deserts.
    • The Rockies: In North America, the Rocky Mountains exhibit a range of climatic conditions, with temperate forests at lower elevations and alpine conditions at higher altitudes.

    Conclusion:

    Altitude is a critical factor influencing climate zones and weather patterns around the world. By understanding how altitude affects temperature, precipitation, and vegetation, we can gain insights into the diverse climates and ecosystems found in mountainous and highland regions. This knowledge helps in predicting weather patterns, planning agricultural practices, and designing infrastructure that is suitable for varying elevations. As we continue to explore and study the impacts of altitude, we can better appreciate the complexity of Earth’s climate system and its influence on our environment.

    Vegetation Cover and Its Role in Climate Zones

    Vegetation cover refers to the layer of plant life, including trees, shrubs, grasses, and other forms of vegetation, that covers the land surface. It plays a vital role in determining climate zones and influencing local and global weather patterns.

    How Vegetation Cover Affects Climate Zones:

    1. Temperature Regulation:
      • Shade and Cooling: Vegetation provides shade, which can lower surface temperatures and reduce the heat island effect in urban areas. Forests and dense vegetation areas help in cooling the atmosphere by blocking direct sunlight and through the process of transpiration, where plants release moisture into the air.
      • Insulation: In cold climates, vegetation can act as an insulating layer, trapping heat and maintaining warmer temperatures at the ground level.
    2. Precipitation Patterns:
      • Moisture Recycling: Vegetation plays a crucial role in the hydrological cycle by absorbing and releasing moisture. Forests, for instance, contribute to local precipitation through transpiration and evaporation, which can enhance rainfall in the region.
      • Rainfall Influence: Dense vegetation can affect rainfall patterns by influencing cloud formation. Forests and large vegetation areas can lead to increased cloud cover and precipitation due to the continuous moisture release into the atmosphere.
    3. Erosion Control:
      • Soil Stabilization: Vegetation cover helps in stabilizing the soil and preventing erosion. Roots of plants bind the soil together, reducing the risk of soil loss due to wind and water erosion. This is especially important in areas prone to landslides and desertification.
      • Sediment Filtering: Plants also act as natural filters, trapping sediments and pollutants from runoff water, which helps in maintaining soil quality and water purity.
    4. Biodiversity Support:
      • Habitat Provision: Vegetation cover provides habitat and food sources for a wide range of wildlife. Diverse plant life supports various animal species, contributing to overall biodiversity and ecosystem health.
      • Ecological Balance: The presence of different types of vegetation, such as forests, grasslands, and wetlands, maintains ecological balance and supports complex food webs.
    5. Carbon Sequestration:
      • Climate Change Mitigation: Vegetation acts as a carbon sink, absorbing carbon dioxide from the atmosphere and storing it in plant tissues. This process helps in mitigating climate change by reducing the amount of greenhouse gases in the air.
      • Forest Management: Forests, in particular, play a significant role in carbon sequestration. Sustainable forest management practices are essential for maintaining this function and combating global warming.

    Examples of Vegetation Cover in Different Climate Zones:

    • Tropical Rainforests: Dense, lush vegetation found near the equator, characterized by high biodiversity and continuous rainfall. Examples include the Amazon Rainforest and the Congo Basin.
    • Temperate Forests: Deciduous or mixed forests in temperate regions, with moderate rainfall and distinct seasons. Examples include the forests of North America and Europe.
    • Mediterranean Shrublands: Vegetation adapted to hot, dry summers and mild, wet winters. Examples include the chaparral in California and the maquis in the Mediterranean region.
    • Desert Vegetation: Sparse vegetation adapted to arid conditions with minimal rainfall. Examples include cacti in the Sonoran Desert and xerophytes in the Sahara Desert.
    • Alpine Vegetation: Vegetation found at high altitudes with cold temperatures and short growing seasons. Examples include alpine meadows in the Rockies and the Himalayas.

    Conclusion on world climate zones, altitude and vegetation cover

    We looked at world climate zones, altitude and vegetation cover.

    Vegetation cover is a fundamental component of Earth’s climate system, significantly influencing temperature regulation, precipitation patterns, erosion control, biodiversity, and carbon sequestration. The type and extent of vegetation cover can determine the characteristics of different climate zones and impact local and global weather patterns. By understanding the role of vegetation in climate dynamics, we can better appreciate the importance of preserving diverse plant life and implementing sustainable land management practices to support ecological balance and climate stability.

    FAQs About world climate zones, altitude and vegetation cover

    1. What are the major world climate zones?
    The major world climate zones include tropical, dry (arid), temperate, polar, and highland climates. Each has distinct temperature and precipitation patterns.

    2. How do climate zones affect human activities?
    Climate zones influence the types of crops that can be grown, the types of homes people build, and the clothing they wear, among other lifestyle factors.

    3. What is the Köppen-Geiger climate classification system?
    The Köppen-Geiger system is a widely used climate classification method that divides the world into different climate zones based on temperature and precipitation patterns.

    4. What causes the differences between climate zones?
    Factors such as latitude, altitude, wind patterns, ocean currents, and proximity to large bodies of water all contribute to the differences between climate zones.

    5. How does climate change impact climate zones?
    Climate change can alter the boundaries and characteristics of climate zones, leading to shifts in temperature, precipitation, and the frequency of extreme weather events.

    6. How does altitude affect temperature?
    Altitude causes temperatures to decrease with height. For every 1,000 meters (3,280 feet) above sea level, the temperature typically drops by about 6.5°C (11.7°F).

    7. What is the orographic effect?
    The orographic effect occurs when moist air rises over mountains, cools, and condenses, leading to increased precipitation on the windward side and reduced rainfall on the leeward side.

    8. How does altitude influence vegetation?
    Vegetation changes with altitude, with different types of plants adapted to varying temperatures and conditions. Lower altitudes often support tropical forests, while higher elevations feature alpine meadows and tundra.

    8. What are some examples of high-altitude climate zones?
    Examples include the Andes Mountains in South America, the Himalayas in Asia, and the Rocky Mountains in North America. Each region has distinct climate zones based on altitude.

    9. How does living at high altitude affect people?
    Living at high altitudes can lead to altitude sickness due to lower oxygen levels. Adaptations such as building designs and acclimatization are necessary to manage these conditions effectively.

    10. How does vegetation cover affect temperature regulation?
    Vegetation cover provides shade and cooling through transpiration, which helps lower surface temperatures and reduces the heat island effect in urban areas.

    11. What role does vegetation play in precipitation patterns?
    Vegetation influences local precipitation by contributing to moisture recycling through transpiration and evaporation, which can enhance rainfall in the region.

    12. How does vegetation cover help control erosion?
    Vegetation stabilizes soil with plant roots, reducing erosion caused by wind and water. It also acts as a natural filter, trapping sediments and pollutants from runoff water.

    13. Why is vegetation important for biodiversity?
    Vegetation provides habitat and food sources for a wide range of wildlife, supporting biodiversity and maintaining ecological balance within ecosystems.

    14. How does vegetation contribute to climate change mitigation?
    Vegetation acts as a carbon sink, absorbing carbon dioxide from the atmosphere and storing it in plant tissues, which helps in reducing greenhouse gases and combating global warming.

  • Advantages and Disadvantages of Inorganic Fertilizers: A Comprehensive Guide

    Advantages and Disadvantages of Inorganic Fertilizers: A Comprehensive Guide

    Explore the pros and cons of using inorganic fertilizers in your garden. Learn how they work, their impact on plant growth, and how to balance their use for healthier soil and crops.

    Introduction:

    Inorganic fertilizers are widely used in agriculture and gardening due to their quick-release nutrients that promote rapid plant growth. However, they come with both advantages and disadvantages. Understanding how inorganic fertilizers function, their potential effects on the environment, and how they compare to organic alternatives is crucial for any gardener or farmer. This guide will provide insights into the benefits and drawbacks of using inorganic fertilizers, helping you make informed decisions about their application in your garden.

    WHAT ARE INORGANIC FERTILIZERS

    Inorganic fertilizers, also known as synthetic or chemical fertilizers, are man-made substances that provide essential plant nutrients to improve soil fertility and promote plant growth. Unlike organic fertilizers, which are derived from natural sources, inorganic fertilizers are manufactured chemically.

    Inorganic fertilizers are formulated to contain specific nutrient ratios, primarily focusing on three essential macronutrients:

    •             Nitrogen (N): Promotes leafy growth, green foliage, and overall plant vigor.

    •             Phosphorus (P): Supports root development, flowering, and fruit set.

    •             Potassium (K): Aids in overall plant health, disease resistance, and stress tolerance.

    Inorganic fertilizers play a critical role in modern agriculture and horticulture, where precise nutrient management is necessary to maximize crop yields and ensure plant health. However, responsible use, adherence to recommended guidelines, and environmental considerations are essential to minimize potential negative impacts on ecosystems and water quality.

    advantages of using inorganic fertilizers

    Inorganic or synthetic fertilizers offer several advantages when used in agriculture and gardening:

    1.            Precision Nutrient Delivery: Inorganic fertilizers are formulated with specific nutrient ratios, making it easy to provide precise amounts of essential nutrients to plants. This allows growers to address nutrient deficiencies effectively.

    2.            Quick Nutrient Availability: one of the advantages of inorganic fertilisers is that they release nutrients quickly when applied to the soil. This rapid release provides plants with an immediate nutrient boost, helping to correct deficiencies and support rapid growth.

    3.            Customization: Growers can select inorganic fertilizers with the exact nutrient composition required for their crops. This customization allows for tailored nutrient management to meet the specific needs of different plants.

    4.            Ease of Application: the other advantage of inorganic fertilizers is that Many inorganic fertilizers are available in granular or water-soluble forms, making them easy to apply through various methods, including broadcasting, banding, foliar spraying, and fertigation (application through irrigation systems).

    5.            High Nutrient Content: Inorganic fertilizers typically have a high nutrient content, which means a relatively small quantity of fertilizer can provide a significant amount of essential nutrients to plants, reducing the volume of material to transport and store.

    6.            Reduced Risk of Pathogens: Properly manufactured inorganic fertilizers are free from pathogens and weed seeds, reducing the risk of introducing diseases and unwanted plants into the growing environment.

    7.            Long Shelf Life: Inorganic fertilizers have a long shelf life and are not subject to decomposition or nutrient loss over time, as is the case with some organic fertilizers.

    8.            Control Over Nutrient Ratios: Inorganic fertilizers provide precise control over nutrient ratios, enabling growers to balance the nutrient composition to meet plant requirements, enhance growth, or achieve specific outcomes.

    9.            Commercial Agriculture: Inorganic fertilizers are widely used in commercial agriculture, where precise nutrient management is essential for optimizing crop yields and quality.

    10.         Nutrient Availability in Alkaline Soils: Inorganic fertilizers can effectively deliver nutrients to plants in alkaline soils where nutrient availability may be limited due to high soil ph.

    11.         Ease of Storage and Handling: Inorganic fertilizers are easy to store and handle, as they typically come in dry or granulated forms that are less prone to decomposition or odors compared to some organic fertilizers.

    While inorganic fertilizers offer many advantages, it’s important to use them responsibly to minimize potential negative impacts on the environment, such as nutrient runoff and soil degradation. Proper application rates, timing, and adherence to recommended guidelines are crucial for sustainable and effective use.

    disadvantage of using inorganic fertilizers

    While inorganic or synthetic fertilizers offer advantages, they also have several disadvantages and potential negative impacts when used in agriculture and gardening:

    1.            Environmental Pollution: Inorganic fertilizers can contribute to environmental pollution when applied excessively. Nutrient runoff from fields can contaminate water bodies, leading to problems like eutrophication, harmful algal blooms, and water quality degradation.

    2.            Soil Degradation: Over time, the repeated use of inorganic fertilizers without adequate organic matter incorporation can lead to soil degradation, reduced microbial activity, and impaired soil structure.

    3.            Nutrient Imbalance: Excessive use of inorganic fertilizers can lead to nutrient imbalances in the soil. Over-fertilization with a particular nutrient can result in nutrient antagonism or deficiency of other essential nutrients.

    4.            Acidification of Soils: Some inorganic fertilizers, particularly those containing ammonium-based nitrogen sources, can contribute to soil acidification. Acidic soils may reduce nutrient availability and harm plant health.

    5.            Leaching of Nutrients: Water-soluble inorganic fertilizers are susceptible to leaching, where nutrients are carried down into the groundwater, making them unavailable to plants and potentially contributing to groundwater pollution.

    6.            Reduction in Soil Organic Matter: Frequent use of inorganic fertilizers can discourage the incorporation of organic matter into the soil, leading to a decline in soil organic matter content and reduced soil fertility over time.

    7.            Environmental and Health Risks: The manufacturing and transportation of inorganic fertilizers can have environmental and health risks, particularly if the production process involves hazardous chemicals or energy-intensive methods.

    8.            Carbon Footprint: The production of inorganic fertilizers is energy-intensive, contributing to greenhouse gas emissions and a larger carbon footprint compared to organic fertilizers.

    9.            Short-Term Nutrient Release: Inorganic fertilizers release nutrients quickly, but this rapid release may lead to a short-term nutrient surge that can affect plant growth and may require more frequent applications.

    10.         Limited Soil Microbial Activity: Inorganic fertilizers do not enhance soil microbial activity to the same extent as organic matter and organic fertilizers, potentially limiting the overall health and vitality of the soil ecosystem.

    11.         Risk of Overuse: Due to their ease of application, there is a risk of overuse and misuse of inorganic fertilizers, which can have negative consequences on plant health, soil quality, and the environment.

    WHAT YOU AUGHT TO KNOW ABOUT INORGANIC FERTILIZERS

    To mitigate these disadvantages, responsible and judicious use of inorganic fertilizers is essential. Proper soil testing, precise application rates, timing, and adherence to recommended guidelines can help reduce the potential negative impacts and promote sustainable and efficient nutrient management. Additionally, integrated nutrient management strategies that combine organic and inorganic fertilizers can help maximize the benefits while minimizing the drawbacks.

    Conclusion:

    Inorganic fertilizers can provide immediate benefits to plant growth, but their long-term impact on soil health and the environment requires careful consideration. By weighing the advantages and disadvantages of using inorganic fertilizers, you can create a balanced fertilization plan that supports both healthy plants and sustainable gardening practices.

    FAQs on the Advantages and Disadvantages of Inorganic Fertilizers

    1. What are inorganic fertilizers?
    Inorganic fertilizers are synthetic or chemically manufactured substances that supply plants with essential nutrients like nitrogen, phosphorus, and potassium (NPK) in concentrated forms. They are often used to promote fast plant growth and improve crop yields.

    2. What are the advantages of using inorganic fertilizers?

    • Quick nutrient release: Inorganic fertilizers provide nutrients immediately, leading to faster plant growth.
    • Precise nutrient content: They offer a specific balance of nutrients tailored to different crops’ needs.
    • Cost-effective: Inorganic fertilizers can be less expensive than organic options, especially when considering large-scale farming.
    • Easily available: They are widely accessible and come in different formulations for various soil types and crops.

    3. What are the disadvantages of using inorganic fertilizers?

    • Environmental impact: Overuse of inorganic fertilizers can lead to soil degradation, water pollution, and harm to local ecosystems due to runoff.
    • Soil degradation: Continuous use without adding organic matter can deplete soil structure and reduce fertility over time.
    • Dependence on external inputs: Inorganic fertilizers require frequent application since they do not improve long-term soil health.
    • Harmful to beneficial organisms: They may negatively affect soil microbes, earthworms, and other beneficial organisms in the soil.

    4. Are inorganic fertilizers harmful to the environment?
    Yes, when used excessively or incorrectly, inorganic fertilizers can harm the environment. They can lead to nutrient runoff into water bodies, causing problems like eutrophication, which results in algal blooms that deplete oxygen in the water and harm aquatic life. They can also contribute to greenhouse gas emissions.

    5. How can I use inorganic fertilizers safely?
    To use inorganic fertilizers safely, follow the recommended application rates on the packaging, avoid over-fertilizing, and apply them during the right growth stages of your plants. Using them in conjunction with organic matter like compost can help maintain soil health and reduce environmental impact.

    6. Can inorganic fertilizers improve soil health?
    Inorganic fertilizers provide essential nutrients but do not improve the organic matter content or structure of the soil. Over time, this can lead to soil degradation. To improve soil health, it’s recommended to combine inorganic fertilizers with organic amendments like compost or green manure.

    7. How do inorganic fertilizers compare to organic fertilizers?

    • Inorganic fertilizers provide immediate nutrients and are chemically precise but can harm long-term soil health.
    • Organic fertilizers improve soil structure and fertility over time but release nutrients slowly, making them less suitable for quick growth. Combining both in a balanced approach can yield the best results.

    8. How often should inorganic fertilizers be applied?
    The frequency of application depends on the crop type, soil condition, and specific fertilizer used. Some fertilizers may need to be applied several times during a growing season, while others may last longer. It’s essential to follow soil tests and manufacturer recommendations to avoid overuse.

    9. What crops benefit most from inorganic fertilizers?
    Inorganic fertilizers are particularly beneficial for high-demand crops like maize, rice, and wheat, where fast growth and large yields are desired. However, almost all crops can benefit from their application when used correctly.

    10. Can inorganic fertilizers be combined with organic fertilizers?
    Yes, combining inorganic and organic fertilizers can be highly effective. The inorganic fertilizer provides immediate nutrients, while the organic material improves long-term soil fertility and structure, leading to more sustainable farming practices.

  • Understanding brick making and Materials Used for Building Houses in Uganda

    Explore the building materials  used in Uganda. Entangle with the science of making strong bricks and the factors to consider while choosing building materials.

    In Uganda, the materials used for building houses vary based on factors such as location, budget, and local availability. However, some common materials for roofing, walls, and floors include:

    **1. Roofing Materials:

    •          Corrugated Iron Sheets: Widely used for roofing due to their durability and resistance to harsh weather conditions.

    •          Clay Tiles: Provide a traditional and aesthetically pleasing roofing option.

    •          Concrete Tiles: Durable and versatile, suitable for various architectural styles.

    •          Thatch: Common in rural areas, especially for traditional huts. Provides natural insulation.

    2. Wall Construction Materials:

    •          Fired Bricks: Commonly used for walls due to their strength and durability. They are made from clay and baked in kilns.

    •          Cement Blocks: Precast concrete blocks are widely used and provide a sturdy option for wall construction.

    •          Stone: In some regions, natural stone is used for building, especially in areas with ample local stone resources.

    •          Rammed Earth: An eco-friendly option where earth is compacted to form walls.

    3. Floor Materials:

    •          Ceramic Tiles: Popular for their durability, easy maintenance, and a variety of designs.

    •          Terrazzo Flooring: A composite material made of chips of marble, granite, or other stones set in concrete. It is durable and aesthetically pleasing.

    •          Vinyl Flooring: Affordable and easy to install, suitable for various spaces.

    •          Hardwood Flooring: Provides a natural and elegant option, though it may be more expensive.

    Additional Considerations:

    •          Timber: Used for framing, especially in rural areas where it’s locally sourced.

    •          Cement: Essential for various construction purposes, including bonding bricks and creating concrete.

    •          Sand: A key ingredient in concrete and mortar.

    •          Steel: Used for reinforcement in concrete structures.

    Factors Influencing building Material Choice:

    •          Cost: Affordability is a crucial factor in material selection.

    •          Climate: Materials should withstand local weather conditions.

    •          Availability: Local availability influences material choices and transportation costs.

    •          Aesthetics: Personal preferences and architectural styles play a role.

    Construction Techniques:

    •          Masonry Construction: Common for walls using materials like fired bricks or cement blocks.

    •          Timber Frame Construction: In areas with abundant timber resources.

    •          Concrete Construction: Used for various components, including foundations, floors, and walls.

    It’s important to note that building practices may vary across regions in Uganda, and modern construction methods are increasingly being adopted. Local builders and architects are often knowledgeable about suitable materials and construction techniques for specific contexts.

    Strength of a Brick in Building Construction:

    Materials Needed to Make a Brick:

    1.         Clay: The primary raw material for bricks. The type and quality of clay significantly impact the strength and characteristics of the final product.

    2.         Water: Essential for mixing and shaping the clay.

    3.         Additives: Some bricks may include additives like sand, lime, or ash to enhance specific properties.

    How to Make a Strong Brick for building in Uganda:

    1. Clay Selection:

    •          Choose high-quality clay with suitable properties for brickmaking. Clay composition affects the brick’s strength and durability.

    2. Preparation of Clay:

    •          The clay is excavated and then prepared by removing impurities such as stones and organic matter. It is then mixed with water to achieve the desired consistency.

    3. Mixing with Additives:

    •          Depending on the type of brick, additives like sand, lime, or ash may be added to the clay mixture. These additives can enhance the brick’s strength, reduce shrinkage, or improve other properties.

    4. Molding:

    •          The prepared clay is shaped into bricks using molds. The molding process should be done carefully to ensure uniform size and density.

    5. Drying:

    •          The molded bricks are left to dry naturally in the sun. Proper drying is crucial to prevent cracking during the firing process.

    6. Firing:

    •          The dried bricks are fired in kilns at high temperatures. Firing hardens the bricks and enhances their strength. The duration and temperature of firing influence the final strength of the brick.

    7. Quality Control:

    •          Implement quality control measures during each step of the process. Regular testing for dimensions, absorption rates, and compressive strength ensures that the bricks meet standards.

    Tips for Making Strong Bricks:

    •          Proper Mixing: Ensure thorough mixing of clay and additives to achieve a homogeneous mixture.

    •          Uniform Size: Maintain consistent size and shape during molding to ensure even firing.

    •          Correct Firing Temperature: Control the firing temperature to achieve the desired strength without causing defects.

    •          Adequate Drying: Allow bricks to dry completely before firing to prevent cracking.

    Importance of Brick Strength in Construction:

    •          Structural Integrity: Strong bricks contribute to the structural integrity of buildings, providing support and stability.

    •          Durability: High-strength bricks are more durable, withstanding environmental factors and ensuring a longer lifespan.

    •          Load-Bearing Capacity: In load-bearing walls, the strength of bricks is crucial for supporting vertical loads.

    In Uganda, the process of making strong bricks involves a combination of proper clay selection, meticulous preparation, careful molding, controlled drying, and precise firing. Local knowledge, expertise, and adherence to quality control measures contribute to the production of bricks with the required strength for various construction applications.

  • The Earth’s Revolution: Seasons, Climate, and Their Impact on Human Activities

    Explore how the Earth’s revolution around the Sun causes seasonal changes, affects climate patterns, and influences human activities. Learn about key moments like solstices and equinoxes, and understand how the Earth’s tilt plays a crucial role in defining the seasons.

    Introduction

    The solar system is an intricate and vast cosmic structure that includes the Sun and all the celestial objects bound by its gravity. It’s where we live, and it consists of planets, moons, asteroids, comets, and dwarf planets. When we think about space, the solar system is often the first concept that comes to mind because it encompasses everything in our immediate cosmic neighborhood. This blog will delve into what the solar system is, explain its formation, and explore why it’s called the “solar system.”

    What is the Solar System?

    The solar system is a collection of celestial bodies, including planets, moons, asteroids, and comets, that revolve around the Sun due to its gravitational pull. It is primarily made up of eight major planets, their moons, and a variety of smaller objects. The Sun is at the center of the solar system, exerting a gravitational force that holds all these objects in orbit.

    The solar system is located in the Milky Way galaxy, which is one of the many galaxies in the universe. While it may seem immense from a human perspective, the solar system is just a tiny fraction of the universe. Yet, it remains vital to us because it’s home to our planet, Earth.

    Composition of the Solar System

    The solar system can be broken down into several key components, including:

    1. The Sun
      The Sun is a massive ball of hydrogen and helium gas, responsible for the vast majority of the energy that powers life on Earth. It makes up 99.8% of the total mass of the solar system and is the primary source of light and heat. The Sun’s immense gravitational pull keeps all other bodies in the system bound to it.
    2. Planets
      The solar system contains eight planets that orbit the Sun. These are divided into two groups:
      • Terrestrial planets: Mercury, Venus, Earth, and Mars are rocky and smaller in size.
      • Gas giants: Jupiter and Saturn are massive planets made primarily of hydrogen and helium, while ice giants, Uranus and Neptune, have more ices like water, ammonia, and methane.
    3. Moons
      Most planets in the solar system have natural satellites or moons. For example, Earth has one moon, while Jupiter and Saturn have dozens. Moons are also varied in composition, with some being rocky, others icy, and a few even having volcanic activity.
    4. Asteroids and Meteoroids
      The asteroid belt between Mars and Jupiter contains rocky remnants from the formation of the solar system. These objects are smaller than planets but can vary in size from tiny rocks to large bodies hundreds of kilometers across.
    5. Comets
      Comets are icy bodies that originate from the outer regions of the solar system. When they approach the Sun, the heat causes the ice to vaporize, creating a glowing head (coma) and a tail that points away from the Sun.
    6. Dwarf Planets
      Dwarf planets, such as Pluto, are smaller than the main planets and are found mostly in the Kuiper Belt beyond Neptune. They share characteristics with planets but have not cleared their orbital paths of other debris.

    Why Is It Called the Solar System?

    The term “solar system” derives from the Latin word “sol,” meaning Sun. It is called the solar system because the Sun is at the center and all the other celestial objects, including planets, moons, and asteroids, revolve around it. The Sun’s gravitational force binds these objects together in a systematic order, creating a structure that is collectively referred to as the solar system.

    In essence, the solar system is a Sun-centered system. Every planet and object within it exists because of the Sun’s powerful gravitational pull. Without the Sun, the solar system wouldn’t exist as we know it. The Sun provides the energy required for life on Earth and influences the climates and seasons of the planets.

    Formation of the Solar System

    The solar system formed approximately 4.6 billion years ago from a massive cloud of gas and dust known as the solar nebula. This cloud collapsed under its gravity, with most of the material condensing at the center to form the Sun. The remaining dust and gas particles formed smaller clumps that eventually became planets, moons, and other objects in the solar system.

    Through this process of accretion, rocky planets formed closer to the Sun, while gas and ice giants formed in the colder, outer regions. Gravity continued to shape the solar system, pulling these bodies into orbit around the Sun, where they remain to this day.

    The Importance of the Solar System

    Understanding the solar system is crucial for various reasons:

    • Scientific Exploration: The study of the solar system helps scientists understand the origins of the Earth, the possibility of life elsewhere, and the nature of cosmic phenomena.
    • Navigation and Timekeeping: The solar system’s movements influence calendars, time zones, and space travel.
    • Environmental and Climate Understanding: By studying other planets and their atmospheres, we can gain insights into the Earth’s climate and potential ways to mitigate environmental challenges.

    The solar system is a fascinating and complex arrangement of celestial objects centered around the Sun. It contains a wide variety of planets, moons, and smaller objects, all of which contribute to our understanding of the universe. The system is called “solar” because of the central role of the Sun, whose gravitational force holds everything together.

    From the Sun to the outermost reaches of the Kuiper Belt, the solar system is full of dynamic and mysterious phenomena waiting to be explored. Through ongoing research and space missions, humanity continues to uncover the secrets of this cosmic neighborhood, gaining deeper insight into our place in the universe.

    The Rotation of the Earth

    The rotation of the Earth refers to the spinning of our planet on its axis. This axis is an imaginary line that runs through the North and South Poles, and Earth completes one full rotation approximately every 24 hours. This daily rotation is what gives us the cycle of day and night.

    How Does Earth Rotate?

    Earth rotates from west to east, meaning if you were observing from space, you would see the Earth turning counterclockwise when viewed from above the North Pole. This movement happens at a steady speed of about 1,670 kilometers per hour (1,040 miles per hour) at the equator, but the speed decreases as you move towards the poles.

    Effects of Earth’s Rotation

    1. Day and Night
      One of the most important consequences of Earth’s rotation is the alternation between day and night. As Earth spins, different parts of the planet are exposed to sunlight. The side facing the Sun experiences daylight, while the side facing away from the Sun is in darkness, resulting in night.
    2. Time Zones
      Earth’s rotation also led to the development of time zones. Since the planet is divided into 24 longitudinal zones, the time in each zone is determined by its position relative to the Sun. For example, when it is midday in one part of the world, it may be midnight on the opposite side.
    3. Coriolis Effect
      The rotation of the Earth affects the movement of fluids such as air and water. This phenomenon, known as the Coriolis effect, causes winds and ocean currents to curve as they move across the surface of the Earth. In the Northern Hemisphere, this deflection is to the right, and in the Southern Hemisphere, it’s to the left.
    4. Apparent Movement of the Sun
      Earth’s rotation creates the illusion that the Sun rises in the east and sets in the west. However, it is actually the planet’s rotation that causes this daily movement of the Sun across the sky.

    Duration of Earth’s Rotation

    The Earth takes approximately 23 hours, 56 minutes, and 4 seconds to complete one full rotation, but for practical purposes, we round this off to 24 hours. This is called a sidereal day. The slight difference in time accounts for the movement of the Earth in its orbit around the Sun, meaning that a solar day—the time from one noon to the next—is exactly 24 hours.

    The Revolution of the Earth

    The revolution of the Earth refers to its orbit around the Sun. This motion, distinct from Earth’s rotation on its axis, involves the Earth traveling in an elliptical (oval-shaped) path around the Sun. A complete revolution takes approximately 365.25 days, or one year. This annual journey is what gives us the changing seasons, the length of the year, and many other natural cycles.

    How Does the Earth Revolve?

    The Earth revolves around the Sun at an average distance of about 93 million miles (150 million kilometers). Despite this vast distance, the gravitational pull of the Sun keeps the Earth in orbit. The elliptical orbit means that Earth is sometimes slightly closer to the Sun (perihelion) and sometimes slightly farther away (aphelion), but the variation in distance is not the main factor that causes the seasons.

    The Tilt of the Earth’s Axis

    One of the most critical aspects of Earth’s revolution is the tilt of its axis. Earth’s axis is tilted at an angle of about 23.5 degrees relative to its orbit around the Sun. This tilt plays a vital role in the changing seasons as different parts of the Earth receive varying amounts of sunlight throughout the year.

    The Seasons and Earth’s Revolution

    1. Summer and Winter
      When the Northern Hemisphere is tilted toward the Sun, it experiences summer, receiving more direct sunlight and longer daylight hours. Conversely, the Southern Hemisphere experiences winter at the same time, as it is tilted away from the Sun, receiving less direct sunlight and shorter daylight hours. Six months later, the positions reverse, with the Southern Hemisphere experiencing summer and the Northern Hemisphere in winter.
    2. Spring and Autumn
      During the equinoxes (around March 21 and September 23), the Earth’s axis is not tilted towards or away from the Sun. During these times, the Sun shines directly on the equator, and both hemispheres receive equal amounts of sunlight. These periods mark the beginning of spring and autumn, respectively.

    Duration of the Earth’s Revolution

    Earth takes approximately 365.25 days to complete one full orbit around the Sun. To account for the extra 0.25 days, we add an extra day (February 29) every four years, creating a leap year. This system ensures that our calendar stays aligned with the Earth’s position in its orbit and the seasons remain consistent.

    Impact of Earth’s Revolution on Life

    The Earth’s revolution is responsible for more than just the changing seasons:

    1. Variation in Day Length
      As Earth moves through its orbit, the length of the day varies throughout the year. During summer, days are longer, while in winter, they are shorter. This fluctuation affects human activities, biological rhythms, and agriculture.
    2. Solar Intensity
      The angle at which sunlight strikes the Earth changes during its revolution. In the summer, the Sun’s rays hit more directly, making it warmer, while in the winter, the rays are more slanted, leading to cooler temperatures.
    3. Agricultural Cycles
      The revolution of the Earth is the basis for the agricultural calendar. Different crops are planted and harvested according to the seasons, and many species have evolved to adapt their reproductive cycles to the changes in temperature and daylight.

    Key Phases in the Earth’s Revolution

    1. Solstices
      The solstices occur when the Sun is at its greatest distance from the equator. Around June 21 (summer solstice), the Northern Hemisphere experiences its longest day of the year, while the Southern Hemisphere has its shortest. Around December 21 (winter solstice), the situation reverses.
    2. Equinoxes
      The equinoxes happen when the Sun is directly over the equator, resulting in nearly equal day and night lengths. The spring equinox occurs around March 21, and the autumn equinox around September 23.

    Elliptical Orbit and Climate

    Although Earth’s orbit is elliptical, the slight variation in distance from the Sun has minimal impact on the Earth’s climate. However, over long periods, gradual changes in the shape of Earth’s orbit and its axial tilt (known as Milankovitch cycles) can contribute to significant climate shifts, such as ice ages.

    Conclusion

    The revolution of the Earth around the Sun is a fundamental process that governs many aspects of life on Earth. From the changing seasons to the variation in day length, the revolution ensures the regularity of our environment and has profound effects on ecosystems, weather patterns, and human life. Understanding the Earth’s revolution provides valuable insights into the planet’s relationship with the Sun and the delicate balance that sustains life.

    The Earth’s movements—both its rotation and revolution—are fundamental in shaping the environment, climate, and seasons that impact our daily lives. From the cycle of day and night to the changing seasons, these celestial phenomena have a profound effect on agriculture, culture, and human activities. Understanding how the Earth’s tilt and orbit around the Sun create seasonal variations helps us appreciate the intricate balance that governs life on our planet. As we continue to observe the effects of these movements, it’s clear that the Earth’s place in the solar system is both dynamic and vital to sustaining the rhythms of life.

    FAQs on solar system

    1. What is the solar system made of?
      The solar system consists of the Sun, eight planets, their moons, asteroids, meteoroids, comets, and dwarf planets.
    2. Why is the solar system called “solar”?
      It is called “solar” because the Sun (Sol) is at the center, and everything within the system revolves around it.
    3. How many planets are in the solar system?
      There are eight planets: Mercury, Venus, Earth, Mars, Jupiter, Saturn, Uranus, and Neptune.
    4. What are gas giants?
      Gas giants are large planets primarily composed of hydrogen and helium, such as Jupiter and Saturn.
    5. What is the role of the Sun in the solar system?
      The Sun’s gravitational pull holds the solar system together, and it provides the energy necessary for life on Earth.
    6. How old is the solar system?
      The solar system is about 4.6 billion years old.
    7. What is the difference between a comet and an asteroid?
      Comets are icy bodies that develop glowing comas and tails when near the Sun, while asteroids are rocky bodies that primarily orbit in the asteroid belt.
    8. Find out the hottest months in places along the equator.
    • Places along the equator typically experience minimal seasonal variation in temperature. However, the hottest months often align with the sun being directly overhead, which is usually around March and September.
    • When is it summer in the Northern Hemisphere?
    • Summer in the Northern Hemisphere occurs between June 21 and September 23, starting at the summer solstice when the Sun is at its highest point in the sky.
    • When is it spring in the Southern Hemisphere?
    • Spring in the Southern Hemisphere starts around September 23 and lasts until December 21, beginning at the September equinox when day and night are almost equal.
    • When is it summer in the Southern Hemisphere?
    • Summer in the Southern Hemisphere runs from December 21 to March 21, beginning with the summer solstice when the Sun is at its highest position in the sky.
    • How do the four seasons influence people’s activities and way of life?
    • The four seasons shape agricultural practices, holiday traditions, and daily routines. For instance, spring and summer are key for farming and outdoor activities, while fall and winter often involve harvesting and adapting to colder, shorter days.
  • Organic Fertilizers: How to Make Compost Tea, Tips for Use, and Application in Gardens

    Organic Fertilizers: How to Make Compost Tea, Tips for Use, and Application in Gardens

    Discover the benefits and challenges of using organic fertilizers, learn how to make compost tea, and get expert tips on applying organic fertilizers in your garden to boost plant health naturally.

    Introduction:

    Organic fertilizers have gained popularity among gardeners and farmers as an eco-friendly way to improve soil health and promote plant growth. Whether you’re a seasoned gardener or a beginner, understanding the right procedures and techniques for making and using organic fertilizers can significantly impact your garden’s productivity. In this guide, we’ll explore the steps to create compost tea, share essential tips on using organic fertilizers, and discuss both the advantages and disadvantages of incorporating these fertilizers into your garden care routine.

    KEY TAKEAWAYS ON APPLICATION OF ORGANIC FERTILISERS

    •          Start with a soil test to determine your garden’s nutrient needs.

    •          Choose the right fertilizer based on the soil test results.

    •          Carefully read and follow the fertilizer label instructions.

    •          Calculate the correct application rates to avoid over-fertilization.

    •          Time your fertilizer applications to match each plant’s growth stage.

    •          Apply fertilizers evenly, preventing direct contact with plant parts.

    •          For granular fertilizers, incorporate them into the soil’s top few inches.

    •          Water the garden after fertilizer application to disperse nutrients.

    •          Use mulch to conserve moisture and reduce nutrient loss.

    •          Maintain a fertilization schedule tailored to your plant’s needs.

    •          Keep records of your fertilizer applications for future reference.

    •          Practice safety precautions when handling fertilizers.

    •          Responsible fertilizer application enhances plant health, yield, and environmental protection.

    Organic fertilizers are derived from natural sources and can improve soil health while providing essential nutrients to plants. Common organic fertilizers include compost, manure, bone meal, and fish emulsion. Here’s a brief overview of organic fertilizers:

    •             Compost: Compost is made from decomposed organic matter, such as kitchen scraps, yard waste, and leaves. It is rich in organic matter and supplies a variety of nutrients to plants. To use compost, simply spread it on the soil’s surface or mix it into the top few inches of soil.

    •             Manure: Animal manure, like cow or chicken manure, is a valuable organic fertilizer. It provides nitrogen, phosphorus, and potassium, as well as organic matter. Ensure that fresh manure is aged or composted before applying it to avoid burning plants.

    •             Bone Meal: Bone meal is made from ground animal bones and is an excellent source of phosphorus and calcium. It is often used for flowering and fruiting plants. Sprinkle bone meal in planting holes or mix it into the soil.

    •             Fish Emulsion: Fish emulsion is a liquid organic fertilizer made from fish waste. It is a quick-release fertilizer rich in nitrogen and other nutrients. Dilute it with water and use it as a foliar spray or for root drenching.

    Procedure for Making Biological Tea (Compost Tea)

    Biological tea, often referred to as compost tea, is an innovative way to supply beneficial microorganisms to plants and improve soil health. Here’s a simplified procedure for making compost tea:

    Ingredients

    You’ll need well-aged compost, water, a container, and an aeration source.

    PROCEDURE

    1.            Container: Use a large container (e.g., a 5-gallon bucket). Fill it about one-third full with compost.

    2.            Water: Add non-chlorinated water (rainwater or dechlorinated tap water) to the container, covering the compost.

    3.            Aeration: Place an aquarium air pump with an air stone into the container. This provides oxygen to the tea and encourages the growth of beneficial microorganisms.

    4.            Steeping: Let the mixture steep for 24-48 hours. Stir it occasionally to ensure even aeration.

    5.            Straining: After brewing, strain the liquid to remove any solid particles. The remaining liquid is your compost tea.

    6.            Application: Apply the compost tea to your garden soil or plants as a soil drench or foliar spray. It introduces beneficial microorganisms to the soil, improving nutrient cycling and plant health.

    Tips on using organic fertilizers

    •             Use compost tea within a few hours of brewing to ensure its microbial activity remains high.

    •             Do not store compost tea for extended periods, as the microbial populations will decline over time.

    •             Adjust the brewing time and compost-to-water ratio based on your specific needs and the strength of microbial activity desired.

    •             Compost tea can help improve soil structure, enhance nutrient availability, and promote plant health and disease resistance.

    advantages of using organic fertilizers

    Organic fertilizers, which are derived from natural sources, offer several advantages when used in agriculture and gardening:

    1.            Improved Soil Health: Organic fertilizers contain organic matter that enriches the soil, enhances its structure, and increases its water-holding capacity. This promotes healthy soil ecosystems and encourages beneficial microorganisms.

    2.            Slow-Release Nutrients: Organic fertilizers release nutrients gradually as they decompose. This slow-release nature provides a steady and consistent supply of nutrients to plants, reducing the risk of nutrient imbalances or over-fertilization.

    3.            Reduced Environmental Impact: Organic fertilizers are less likely to leach into water bodies or cause pollution compared to inorganic fertilizers, making them a more environmentally friendly option.

    4.            Enhanced Nutrient Retention: Organic matter in these fertilizers helps soils retain nutrients, making them more available to plants and less susceptible to leaching.

    5.            Minimized Soil Erosion: The improved soil structure resulting from organic matter in these fertilizers reduces the risk of soil erosion, particularly in gardens and agricultural fields.

    6.            Sustainable Nutrient Management: Organic fertilizers promote sustainable agriculture by recycling organic waste materials, reducing reliance on synthetic chemicals, and conserving resources.

    7.            Nutrient Diversity: Organic fertilizers often contain a broader range of nutrients, including micronutrients and beneficial trace elements, which contribute to plant health and overall soil fertility.

    8.            Increased Microbial Activity: Organic fertilizers encourage beneficial microbial activity in the soil, which aids in nutrient cycling, organic matter decomposition, and overall soil health.

    9.            Reduced Risk of Over-Fertilization: The slow-release nature of organic fertilizers reduces the risk of over-fertilization and nutrient imbalances, promoting healthier plant growth.

    10.         Lower Energy Requirements: Organic fertilizer production typically requires less energy compared to the energy-intensive processes used in synthetic fertilizer manufacturing.

    11.         Safer for Wildlife: Organic fertilizers are less likely to harm wildlife, as they lack the chemical residues found in some synthetic fertilizers.

    12.         Improved Plant Resilience: Organic fertilizers enhance plant disease resistance and stress tolerance, leading to healthier and more resilient crops or garden plants.

    13.         Enhanced Flavor and Nutrient Content: Organic farming practices that utilize organic fertilizers have been associated with improved flavor and nutrient content in crops and produce.

    14.         Reduced Carbon Footprint: Organic farming and the use of organic fertilizers can contribute to reduced greenhouse gas emissions, supporting more sustainable and environmentally friendly agricultural practices.

    15.         Safe for Human Health: Organic fertilizers are typically safer for human health, as they do not contain synthetic chemicals or harmful residues.

    While organic fertilizers offer numerous advantages, it’s important to note that their nutrient content may vary, and they often release nutrients more slowly than inorganic fertilizers. Proper nutrient management, soil testing, and a combination of both organic and inorganic fertilizers can be employed to maximize plant growth and soil health while minimizing potential drawbacks.

    disadvantage of using organic fertilizers

    Organic fertilizers, despite their many advantages, also have some disadvantages and limitations when used in agriculture and gardening:

    1.            Nutrient Variability: The nutrient content in organic fertilizers can vary widely depending on the source and production process. This variability may make it challenging to provide precise nutrient levels to plants.

    2.            Slow Nutrient Release: Organic fertilizers release nutrients gradually as they decompose, which may not meet the immediate nutrient demands of certain fast-growing crops or during critical growth stages.

    3.            Bulk and Storage: Organic fertilizers are often bulkier and less concentrated than inorganic fertilizers. This can require more storage space and may be less convenient for transport and application.

    4.            Higher Cost: Organic fertilizers can be more expensive per unit of nutrient compared to inorganic fertilizers, mainly due to their lower nutrient concentration and the cost of sourcing and processing organic materials.

    5.            Application Timing: Properly timing the application of organic fertilizers to meet plant nutrient requirements can be more challenging due to the slow-release nature of these fertilizers.

    6.            Odor and Aesthetics: Some organic fertilizers, such as manure or fish emulsion, can have strong odors that may be unpleasant to work with or affect nearby residents. The appearance of organic materials may also be less visually appealing.

    7.            Potential Pathogens and Weeds: If not properly composted or aged, organic materials used as fertilizers may contain pathogens or weed seeds, which can be introduced to the soil.

    8.            Nutrient Imbalance: Organic fertilizers may not always provide the ideal balance of nutrients required for specific crops. Supplemental nutrients or soil amendments may be needed to correct nutrient imbalances.

    9.            Microbial Activity: Organic fertilizers encourage microbial activity, which can sometimes lead to nutrient immobilization, where soil microorganisms temporarily tie up nutrients, making them less available to plants.

    10.         Lower Nutrient Content: In general, organic fertilizers contain lower nutrient concentrations compared to inorganic fertilizers, requiring larger quantities for the same nutrient application.

    11.         Leaching and Runoff: In some cases, nutrients from organic fertilizers can be leached or washed away by heavy rainfall, contributing to nutrient runoff and potential water pollution.

    12.         Transportation and Distribution: Organic materials used in organic fertilizers may have limited availability and distribution, particularly in regions without a readily accessible supply of organic materials.

    13.         Decomposition Rates: The decomposition rate of organic materials used in fertilizers can vary, and some may take years to fully release their nutrients.

    14.         Certification and Standards: Organic fertilizers must meet specific certification and quality standards in organic farming, which can lead to higher production and testing costs.

    WHAT YOU MUST KNOW

    Despite these disadvantages, organic fertilizers are valuable tools for promoting sustainable and environmentally friendly agricultural practices. Proper nutrient management, soil testing, and using organic and inorganic fertilizers in combination can help maximize their benefits while mitigating potential drawbacks.

    How to apply fertilizers in gardens

    Applying fertilizers in gardens requires careful planning and proper techniques to ensure effective nutrient delivery to plants. The following are steps to follow when applying fertilizers in gardens:

    1. Soil Testing:

    •          Before applying any fertilizer, conduct a soil test to determine the nutrient levels and pH of your garden soil. This will help you make informed decisions about which fertilizers to use and in what quantities.

    2. Choose the Right Fertilizer:

    •          Select a fertilizer that matches the specific nutrient requirements of your plants as indicated by the soil test results. Fertilizers are available in various forms, including granular, liquid, and organic options.

    3. Follow Fertilizer Labels:

    •          Read the fertilizer label carefully to understand the nutrient content and recommended application rates. The label provides important information about the fertilizer’s composition and proper usage.

    4. Timing:

    •          Apply fertilizers at the right time for your plants. Different plants have varying nutrient needs at different growth stages. Common timings include spring for general fertilization, fall for root development, and before flowering for flowering plants.

    5. Calculate Application Rates:

    •          Calculate the correct amount of fertilizer to apply based on the nutrient requirements of your plants and the area to be fertilized. Avoid over-fertilization, as it can harm plants and the environment.

    6. Uniform Application:

    •          Spread the fertilizer evenly across the garden area to ensure uniform nutrient distribution. Use a spreader for granular fertilizers to achieve even coverage.

    7. Avoid Fertilizer Contact with Plant Tissues:

    •          Be cautious when applying fertilizer to prevent it from coming into direct contact with plant stems, leaves, or fruits, as this can cause burns or damage. Keep the fertilizer at a safe distance from plant parts.

    8. Incorporate Fertilizer into the Soil:

    •          For granular fertilizers, lightly incorporate the fertilizer into the top few inches of the soil using a rake or hoe. This helps prevent nutrient loss due to runoff.

    9. Water After Application:

    •          Water the garden after applying fertilizer to help dissolve and disperse the nutrients into the root zone. Watering is particularly important for water-soluble fertilizers.

    10. Mulch the Garden:

    •          Applying mulch to the garden surface helps conserve moisture, regulate soil temperature, and reduce nutrient loss. It can also minimize weed growth, which can compete with plants for nutrients.

    11. Maintain a Fertilization Schedule:

    •          Create a fertilization schedule based on plant needs and follow it throughout the growing season. Avoid applying fertilizers when plants are dormant or during hot, dry periods.

    12. Keep Records:

    •          Maintain records of your fertilizer applications, including types, quantities, and dates. This information can be valuable for future gardening seasons and to track plant responses to specific fertilizers.

    13. Safety Precautions:

    •          When handling fertilizers, wear appropriate protective gear, such as gloves and safety goggles. Store fertilizers in a cool, dry place away from children and pets.

    Properly applying fertilizers in your garden can significantly improve plant health, growth, and yield while minimizing the risk of nutrient imbalances and environmental harm. Following recommended guidelines and soil testing are essential for effective fertilization.

    MORE ON How to Apply Fertilizers in Gardens:

    •             Soil Test: Conduct a soil test to determine the current nutrient levels and pH of your soil.

    •             Choose the Right Fertilizer: Select the appropriate fertilizer based on the nutrient needs identified in the soil test.

    •             Application Rates: Follow the recommended application rates on the fertilizer label. Over-application can harm plants and the environment.

    •             Application Methods: Fertilizers can be applied by broadcasting over the soil, banding near plant roots, or as a foliar spray. Follow label instructions for proper methods.

    •             Timing: Apply fertilizers at the right time for your plants. For example, apply slow-release fertilizers at the beginning of the growing season and water-soluble fertilizers as needed.

    •             Watering: Water the area after applying the fertilizer to help nutrients move into the root zone. Water-soluble fertilizers require immediate watering.

    •             Safety: Store fertilizers in a cool, dry place and follow safety guidelines for handling and storage.

    Balanced and responsible fertilizer use is crucial for plant health and environmental protection in gardens. Soil tests, proper timing, and choosing the right type of fertilizer are key considerations when applying fertilizers.

    Conclusion:

    Using organic fertilizers is a sustainable way to nurture your garden, benefiting both the environment and plant health. From making compost tea to understanding the pros and cons of organic fertilizers, applying them correctly in your garden can yield excellent results. By following the right practices, you’ll not only enrich your soil but also grow healthier, more vibrant plants.

    frequently asked questions about making and using organic fertilizers:

    1. What are organic fertilizers, and why are they important for gardening and agriculture?

    •             Organic fertilizers are derived from natural sources and provide essential nutrients to plants. They improve soil health, promote sustainability, and reduce the need for synthetic chemicals.

    2. What are the primary nutrients found in organic fertilizers, and what do they do for plants?

    •             Organic fertilizers typically contain nitrogen (N), phosphorus (P), and potassium (K). Nitrogen promotes leafy growth, phosphorus supports root development and flowering, while potassium aids overall plant health and disease resistance.

    3. How can I make organic fertilizer at home?

    •             Homemade organic fertilizers can be created using compost, kitchen scraps, or natural materials like banana peels, eggshells, and coffee grounds. Composting these materials can produce rich, nutrient-rich compost.

    4. What is compost, and how is it used as an organic fertilizer?

    •             Compost is organic matter that has decomposed into a nutrient-rich soil conditioner. It can be used as a top dressing, mixed into the soil, or as a component of homemade organic fertilizers.

    5. How do I make compost at home, and what materials can be composted?

    •             To make compost, collect organic materials like fruit and vegetable scraps, yard waste, leaves, and coffee grounds. Create a compost pile or use a compost bin and follow basic guidelines for layering, turning, and maintaining the compost.

    6. What are the benefits of using organic fertilizers in gardening?

    •             Organic fertilizers improve soil structure, increase microbial activity, and promote plant health and disease resistance. They also reduce the risk of nutrient runoff and pollution.

    7. Can I use animal manure as an organic fertilizer, and how should I apply it?

    •             Yes, well-rotted animal manure can be an effective organic fertilizer. It should be aged or composted to avoid burning plants. Apply it by spreading it on the soil or incorporating it into the top few inches of soil.

    8. Are there any precautions or guidelines for using organic fertilizers?

    •             Ensure that organic fertilizers are properly composted or aged to avoid potential pathogens. Use them in accordance with recommended application rates and techniques.

  • Religion  Importance: Characteristics and Biblical Teachings on Harmonious Living

    Explore the vital role of religion in society, its universal characteristics, and how Bible teachings promote harmonious living. Learn how religion shapes moral values and social cohesion.

    Introduction:

    Religion has always played a central role in shaping societies, offering moral guidance, a sense of purpose, and fostering communal bonds. Across different cultures and civilizations, religion has been the bedrock of ethical conduct and social harmony. While religions may vary in beliefs and practices, they share common characteristics that underline their importance in society. Additionally, the Bible, as a religious text, provides profound teachings on how to live harmoniously with others, emphasizing love, respect, and justice. This blog explores the essential role of religion in society, the universal characteristics of all religions, and how biblical teachings guide us toward harmonious living.

    THE IMPORTENCE OF RELIGION TO SOCIETY

    We shall look at the importance of religion to society. To discuss this, we shall   use a speech to achieve our objective.

    Ladies and gentlemen,

    Today, I stand before you to illuminate the profound significance of religion in our society. Religion is not just a set of beliefs or practices; it serves as a guiding light that shapes our communities, our morals, and our collective well-being.

    First and foremost, religion provides a moral compass, offering ethical guidelines that instill a sense of right and wrong, promoting compassion, kindness, and respect for all individuals. It forms the bedrock of our societal values, shaping our interactions and fostering a sense of accountability for our actions.

    Religion unites us in a shared sense of purpose, offering solace and hope in times of adversity. It provides a sense of belonging, connecting individuals within communities and fostering a collective identity. It stands as a pillar of strength during moments of joy and in times of sorrow, providing support and a sense of community.

    Moreover, it serves as a repository of wisdom, preserving cultural heritage, traditions, and rituals that enrich our lives. It bridges generations, passing down stories and teachings that shape our identities and guide us in navigating life’s complexities.

    Religion also plays a pivotal role in social welfare and philanthropy, promoting charitable acts and service to those in need. It encourages us to look beyond ourselves, fostering a spirit of generosity and compassion toward our fellow human beings.

    In a world marked by diversity, religion serves as a catalyst for tolerance and understanding, encouraging us to embrace and respect different beliefs and traditions. It promotes dialogue and fosters a platform for mutual understanding, fostering a harmonious coexistence in our society.

    Therefore, as we acknowledge the importance of religion, let us recognize its power to inspire, uplift, and unite us. Let us embrace its teachings of compassion, justice, and unity to create a society founded on respect, empathy, and mutual support.

    Characteristics of all religions

    Religions, despite their diversity, often share certain common characteristics:

    1. Belief System: Religions typically have a defined set of beliefs, doctrines, or teachings that explain the nature of existence, ethics, morality, and the purpose of life.

    2. Sacred Texts: Most religions have sacred scriptures or texts that serve as foundational sources of guidance and wisdom, often considered divinely inspired or authoritative.

    3. Rituals and Practices: Rituals, ceremonies, prayers, and specific practices form integral parts of religious observance, providing a framework for worship and spiritual connection.

    4. Community and Leadership: Religious communities often have leaders or clergy who guide and oversee the faith community. Communal gatherings, services, or congregational worship are common.

    5. Ethics and Morality: Virtues, ethics, and moral principles are central to most religions, guiding adherents’ behavior and interactions with others.

    6. Symbols and Artifacts: Religious symbols, such as icons, clothing, architecture, and artifacts, hold significance and convey spiritual meanings within the faith.

    7. Creation Myths and Cosmology: Religions often offer explanations about the origin of the world, humanity, and the cosmos, providing cosmological narratives and creation myths.

    8. Sacred Spaces: Places of worship, pilgrimage sites, or sacred locations hold significance and often serve as focal points for religious practices and spiritual connection.

    9. Afterlife and Eschatology: Many religions offer beliefs about the afterlife, including concepts of heaven, hell, reincarnation, or final judgment, providing perspectives on life beyond earthly existence.

    10. Theoretical and Practical Aspects: Religions encompass both theoretical or philosophical aspects (theology, metaphysics) and practical or applied aspects (ethical teachings, rituals).

    While these characteristics exist across many religions, the specific beliefs, practices, and interpretations can vary widely between different faiths and traditions.

    bible teaching on harmonious living

    The Bible offers guidance on harmonious living, emphasizing principles that promote peace, unity, and healthy relationships within communities. It emphasizes harmonious living among people of different sex, religion, race, tribe, political affiliation and so on. Here are some key teachings:

    1. Love and Forgiveness: The Bible encourages love and forgiveness. Passages like Ephesians 4:32 promote being kind and compassionate to one another, forgiving as God forgave you. Loving one another and showing forgiveness are foundational to harmony.

    2. Unity and Peace: Biblical teachings emphasize unity among believers. In passages like Romans 12:16 and Psalm 133:1, the importance of living in harmony and peace is highlighted, fostering unity among individuals.

    3. Humility and Respect: The Bible promotes humility and respect. Philippians 2:3-4 encourages humility and considering others as more important than oneself. Respect for others, regardless of differences, is a crucial element in fostering harmony.

    4. Peacemaking: The Bible teaches about being peacemakers. In Matthew 5:9, Jesus says, “Blessed are the peacemakers, for they will be called children of God.” This emphasizes the importance of actively working towards peace and resolution in conflicts.

    5. Communication and Encouragement: The Bible teaches about the power of words. Ephesians 4:29 encourages using words that build up and encourage others. Effective and positive communication fosters understanding and harmony.

    6. Compassion and Kindness: The Bible emphasizes compassion and kindness. Colossians 3:12 encourages believers to clothe themselves with compassion, kindness, humility, gentleness, and patience, which contribute to harmonious relationships.

    7. Conflict Resolution: The Bible provides guidance on conflict resolution. Matthew 18:15 outlines steps for resolving disputes within the community, emphasizing reconciliation and forgiveness.

    These teachings, among others in the Bible, serve as foundational principles for fostering harmonious living, promoting love, peace, unity, and understanding within communities and among individuals.

    8. Self-Control and Patience: The Bible encourages self-control and patience in dealing with others. Proverbs 15:18 teaches that a patient person calms a quarrel, emphasizing the importance of patience in conflict resolution.

    9. Service and Sacrificial Love: The Bible promotes serving others and sacrificial love. Galatians 5:13 speaks of using freedom to serve one another in love, advocating a selfless and giving attitude for the well-being of the community.

    10. Honesty and Integrity: The Bible teaches the importance of honesty and integrity. Proverbs 11:3 emphasizes the integrity of the upright guides them, promoting the value of honesty in fostering trust and harmony.

    11. Acceptance and Tolerance: The Bible encourages acceptance and tolerance among believers. Romans 14:1 speaks about welcoming those who differ in opinions without passing judgment on disputable matters, promoting tolerance within the community.

    12. Empathy and Compassionate Action: The Bible teaches about empathy and compassionate action. 1 John 3:17 encourages believers to take action to help those in need, reflecting the importance of compassionate and empathetic behavior.

    13. Submission to Authority and Obedience: The Bible discusses submission to authority and obedience. Romans 13:1 emphasizes the need for everyone to submit to the governing authorities, promoting order and peace within society.

    14. Gratitude and Thankfulness: The Bible encourages gratitude and thankfulness. Colossians 3:15 urges believers to be thankful, promoting an attitude of gratitude, which contributes to a harmonious mindset.

    These teachings complement the foundational principles of love, unity, and respect, further emphasizing virtues and behaviors that promote harmonious living and peaceful coexistence. Despite the difference in religion, race, sex, disability, age and tribe, we ought to live harmoniously.

    Conclusion:

    Religion continues to be a vital force in society, influencing not only personal beliefs but also communal practices and societal norms. The common characteristics shared by all religions, such as the pursuit of truth, moral guidance, and community building, highlight the universal nature of religious experience. Biblical teachings, particularly those focused on harmonious living, offer timeless principles that encourage peace, understanding, and cooperation among individuals and communities. As we reflect on the importance o

    FAQs on importance of religion

    1.         Q: How does religion impact societal values? A: It instills moral values, promotes unity, and shapes ethical norms within communities.

    2.         Q: What role does religion play in community bonding? A: It fosters a sense of belonging, unity, and provides support during personal and communal challenges.

    3.         Q: Does religion influence cultural heritage? A: Yes, it plays a significant role in preserving and passing down cultural traditions and values.

    4.         Q: Can religious teachings promote tolerance and understanding? A: Yes, many religious teachings advocate tolerance, understanding, and respect for diversity.

    5.         Q: How do these religions differ in their beliefs? A: Christianity and Islam emphasize monotheism, while African Traditional Religion often involves animism and ancestor reverence.

    6.         Q: What values are common among these faiths? A: Shared values include ethics, community, spirituality, and a moral code guiding interactions.

    7.         Q: Are there similarities in their ritual practices? A: Yes, rituals for prayer, community gatherings, and rites of passage are present, though in varying forms.

    8.         Q: What are the universal characteristics among religions? A: Shared traits include belief systems, rituals, ethical teachings, and community values.

    9.         Q: Do religions have common beliefs despite differences? A: Yes, the belief in a higher power, moral conduct, and the afterlife often appears across faiths.

    10.       Q: How do rituals vary across religions? A: Rituals differ but often involve prayer, ceremonies, and communal practices in their own cultural context.

    11.       Q: Are there shared values like love and compassion? A: Yes, virtues like love, compassion, and kindness transcend various faith traditions.

    12. Why is religion important to society?
    Religion is important to society because it provides a moral framework, fosters social cohesion, and offers individuals a sense of purpose and belonging. It also promotes ethical behavior and encourages community support and cooperation.

    13. What are the common characteristics of all religions?
    All religions share common characteristics such as the belief in a higher power, a set of moral or ethical guidelines, rituals and ceremonies, a community of followers, and sacred texts or teachings that guide the believers.

    14. How does the Bible teach about harmonious living?
    The Bible teaches harmonious living through principles such as love for one’s neighbor, forgiveness, humility, and the pursuit of peace. It encourages believers to treat others with kindness, respect, and fairness, fostering a community where individuals live in harmony.

    15. How does religion contribute to social cohesion?
    Religion contributes to social cohesion by bringing people together in shared beliefs and practices. It creates a sense of community and belonging, encouraging individuals to support one another and work towards common goals.

    16. Can religion and modern society coexist harmoniously?
    Yes, religion and modern society can coexist harmoniously. Many religious teachings align with contemporary values such as human rights, social justice, and ethical behavior. Religion can provide a moral compass in a rapidly changing world, promoting peace and understanding in diverse societies.

    17. How do different religions promote peace?
    Different religions promote peace by advocating for values such as compassion, forgiveness, and non-violence. Religious leaders and texts often emphasize the importance of resolving conflicts peacefully and treating others with respect and dignity.

    18. What role does religion play in personal development?
    Religion plays a significant role in personal development by offering spiritual guidance, moral teachings, and a sense of purpose. It helps individuals navigate life’s challenges, make ethical decisions, and cultivate virtues such as patience, humility, and generosity.

  • Bad Cultural Practices in East Africa: Protecting Children and Promoting Positive Cultural Identity

    Explore examples of bad cultural practices in East Africa and Uganda, and discover effective ways to protect children from negative cultural influences while fostering a strong, positive cultural identity.

    Introduction:

    Cultural practices are an integral part of any society, shaping the values, beliefs, and behaviors of its people. In East Africa, cultural traditions have been passed down through generations, providing a sense of identity and belonging. However, not all cultural practices are beneficial. Some traditions, particularly those rooted in outdated beliefs, can be harmful and perpetuate inequalities, especially for children and vulnerable groups. This blog examines examples of bad cultural practices in East Africa, with a focus on Uganda, and offers strategies for parents and communities to protect children from these negative influences while supporting their cultural identity.

    Examples of bad cultures in Uganda

    Identifying and addressing negative cultural practices or values in any society is essential for promoting positive social change. In Uganda, as in any country, there may be cultural practices that are considered detrimental to individuals or the community. Some examples include:

    1. Female Genital Mutilation (FGM): Although not as prevalent as in some other African countries, FGM still occurs in some Ugandan communities, particularly in the northeastern regions. This practice poses severe health risks and violates the rights of girls and women.
      1. Child Marriage: Child marriage remains an issue in certain parts of Uganda, with girls being married off at a young age, often against their will. This can result in early pregnancies, limited educational opportunities, and health complications.
        1. Widow Cleansing: In some Ugandan communities, a widow is expected to participate in a cultural practice called widow cleansing, which involves sexual relations with a male relative of her deceased husband. This practice can expose women to health risks and perpetuate gender inequality.
        1. Discrimination Against Albinos: Some Ugandan communities hold superstitions about albinos, leading to discrimination and stigmatization, putting individuals with albinism at risk of violence and exclusion.

    How can you control your children from getting bad cultural values from the community?

    To prevent children from adopting negative cultural values from their community, parents and caregivers can take several steps:

    1. Open Communication: Foster open and honest communication with your children. Encourage them to ask questions and express their thoughts and concerns.
      1. Education: Provide your children with accurate information about cultural practices and their potential consequences. Teach them critical thinking skills to evaluate these practices.
        1. Promote Positive Values: Instill values of respect, empathy, equality, and human rights in your children. Encourage them to question cultural practices that may conflict with these values.
          1. Lead by Example: Be a role model by embodying the positive values and behaviors you wish to instill in your children.
        1. Community Involvement: Engage with your community to advocate for positive change and raise awareness about harmful cultural practices. Join or support local organizations working to address these issues.
        1. Legal Support: Familiarize yourself with and utilize legal protections against harmful practices, such as laws against child marriage and FGM, to ensure the safety and well-being of your children.

    It’s essential to approach these issues with cultural sensitivity and respect for local traditions while working toward positive change and safeguarding the rights and well-being of children.

    What are Some Examples of Inequalities in Uganda?

    Uganda, like many other countries, faces several forms of inequality that affect various aspects of life. These inequalities often stem from social, economic, and cultural factors that perpetuate disparities among different groups within society. Understanding these inequalities is crucial for addressing them and working towards a more equitable society.

    1. Gender Inequality:
    One of the most prevalent forms of inequality in Uganda is gender inequality. Women and girls often face significant disadvantages in access to education, employment, and healthcare. Cultural practices such as early marriage, gender-based violence, and unequal inheritance rights further exacerbate the situation, limiting opportunities for women to fully participate in economic and social life.

    2. Economic Disparities:
    Economic inequality in Uganda is marked by a wide gap between the rich and the poor. While urban areas may experience more development and better access to services, rural communities often struggle with poverty, limited infrastructure, and fewer economic opportunities. This urban-rural divide contributes to persistent economic disparities that hinder the overall development of the country.

    3. Educational Inequality:
    Access to quality education varies significantly across different regions and social groups in Uganda. Children from poorer families, especially in rural areas, often have limited access to educational resources, leading to lower school enrollment and higher dropout rates. Additionally, cultural biases sometimes prioritize boys’ education over girls’, further entrenching gender inequality in education.

    4. Ethnic and Regional Inequality:
    Uganda is home to diverse ethnic groups, and unfortunately, ethnic and regional disparities often lead to unequal access to resources and opportunities. Certain regions, particularly in the north and east, have historically been marginalized in terms of development and infrastructure investment, leading to significant socio-economic disparities between these areas and more developed regions like Central Uganda.

    5. Inequality in Healthcare Access:
    Healthcare inequality is another critical issue in Uganda. Rural areas frequently suffer from a lack of healthcare facilities, medical supplies, and trained professionals. This disparity means that people living in remote regions often have limited access to essential healthcare services, leading to higher mortality rates and poorer health outcomes compared to those in urban centers.

    6. Disability Discrimination:
    People with disabilities in Uganda face considerable barriers in accessing education, employment, and public services. Cultural stigma, lack of accessible infrastructure, and limited support services contribute to their marginalization. Despite efforts to promote disability rights, significant challenges remain in ensuring equal opportunities for people with disabilities.

    7. Social Inequality Based on Age:
    Age-based discrimination is another form of inequality in Uganda, where both the elderly and the youth may face social and economic exclusion. The elderly often lack adequate social protection, while young people, particularly in rural areas, struggle with high unemployment rates and limited opportunities for personal and professional development.

    Addressing these inequalities requires comprehensive strategies that involve policy reforms, community engagement, and the promotion of social justice and equity. By acknowledging and addressing these disparities, Uganda can move towards a more inclusive and equitable society.

    Conclusion:

    While cultural practices are essential for maintaining a sense of identity and community, it is crucial to recognize and address those that are harmful or abusive. In East Africa and Uganda, efforts to combat these negative cultural practices must be accompanied by initiatives that promote positive cultural values and protect children from harm. By fostering open communication, educating children about their cultural heritage, and supporting positive practices, parents and communities can help children develop a strong sense of identity while shielding them from the dangers of harmful traditions. Ultimately, a balanced approach to cultural preservation and reform is necessary to ensure a safe and inclusive environment for future generations.

    FAQs on bad cultural practices in Uganda

    1. What are some examples of bad cultural practices in East Africa? Examples include female genital mutilation (FGM), early child marriage, and certain initiation rites that involve harmful physical practices or discrimination.

    2. How can you control your children from adopting bad cultural values from the community? Parents can control this by fostering open communication, teaching children about positive cultural values at home, and encouraging critical thinking so that children can distinguish between harmful and beneficial traditions.

    3. What are the bad cultural practices in Uganda? Harmful practices in Uganda include FGM, child marriage, and certain discriminatory practices against women and people with disabilities.

    4. What are abusive cultural practices? Abusive cultural practices are traditions that cause physical, emotional, or psychological harm. These can include forced marriages, gender-based violence, and rites of passage that involve coercion or harm.

    5. What are some examples of inequalities in Uganda? Inequalities in Uganda often arise from discriminatory cultural practices, such as gender inequality, limited access to education for girls, and economic disparities based on ethnicity or social status.

    6. How can harmful traditional practices be stopped? Stopping harmful traditional practices requires a multi-faceted approach, including education, community outreach, legal reforms, and the promotion of alternative, positive cultural practices.

    7. What are some of the bad cultural practices done in your community? These might include harmful initiation rites, gender discrimination, or practices that exclude or marginalize certain groups based on age, gender, or social status.

    8. How can you help children develop a sense of cultural identity? Encourage children to learn about their cultural heritage, participate in positive cultural activities, and engage with elders and community leaders who can impart valuable cultural knowledge.

    9. How can parents support a child’s culture? Parents can support their child’s culture by practicing cultural traditions at home, celebrating cultural festivals, and exposing children to their heritage through storytelling, language, and music.

    10. What are the long-term effects of harmful cultural practices? Long-term effects can include physical and psychological trauma, perpetuation of gender and social inequalities, and the loss of positive cultural traditions. Combatting these practices is essential for building a healthier, more equitable society.

×
🚀 Stuck in School? Catch Up and Stand Out!

🚀 Stuck in School? Catch Up and Stand Out!

Don't let difficult topics hold you back. Our fast-track Remedial Courses are designed to bridge the gap and boost your confidence instantly.

What We Offer:

  • Speak Kiswahili From Day One: Master conversational Swahili with zero stress.

  • English for Locals: Perfect your grammar and speak English with absolute confidence.

  • Targeted Remedial Support: Easily catch up on core subjects you find challenging.

Stop struggling. Start mastering.


Learn More
Listen to Remedial Radio

Listen to Remedial Radio

Enjoy the rhythm of knowledge. where books sing!
Learn More