Category: agriculture

  • Anatomy and Physiology of Cattle: Digestive and Reproductive Systems

    Anatomy and Physiology of Cattle: Digestive and Reproductive Systems

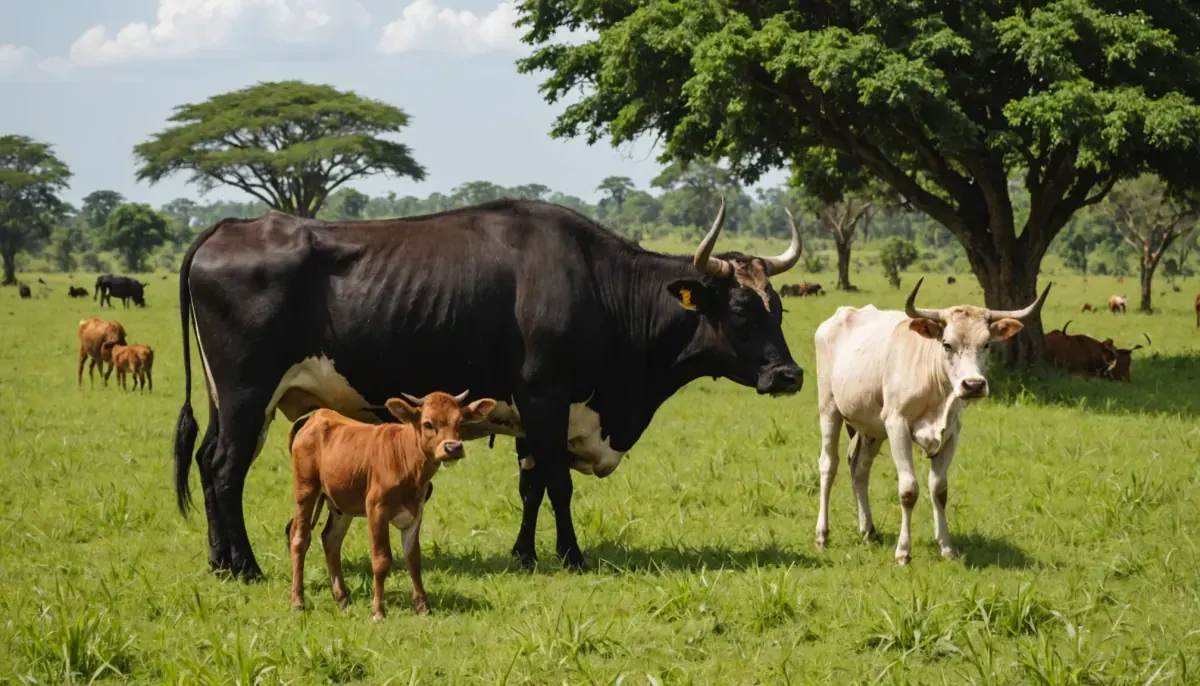
    Ankole long-horned cow and a zebu calf grazing open pasture on a Ugandan cattle farm
    An Ankole long-horned cow and a zebu calf graze open pasture, the kind of communal grazing where most of Uganda’s indigenous cattle feed.

    Cattle anatomy and physiology is the study of the body structures (anatomy) of a cow or bull and how those structures work (physiology). For Senior 3 Agriculture in Uganda, it means the internal organs, the four-compartment bovine digestive system, rumination, and the female and male reproductive systems.

    A cow turns grass into milk and meat because microbes in its rumen break down fibre the cow cannot digest alone. These notes apply every idea to an Ankole steer on communal grazing and a Friesian in a zero-grazing unit in Wakiso, and they close with a revision summary you can use before your exam.

    This page is part of the Senior 3 Agriculture notes on cattle production series. It follows the NCDC Agriculture Syllabus (2019, ISBN 978-9970-00-120-0), theme “Animal Production”, Senior 3 topic “Cattle production” (Term 1, 48 periods), and covers learning outcomes 3.1(c) and 3.1(d) on the internal organs, the digestive system and the reproductive systems. See the full Senior 3 Agriculture notes hub for the other topics in the course.

    Internal organs of cattle and their functions

    Understanding cattle anatomy and physiology begins with the internal organs, the structures inside the chest and abdomen that keep the animal alive and productive. For the S3 exam, focus on the organs of the digestive tract and the reproductive tract, then the lungs, heart, liver and kidneys that support them. Each organ has one main job, and each fails in a recognisable way.

    The same cattle anatomy and physiology serves every Ugandan herd, whether it is an Ankole steer grazing open rangeland in the cattle corridor or a Friesian housed in a zero-grazing stall. Uganda’s national herd stood at 14.5 million cattle in 2021, of which 77% (11.2 million) were indigenous zebu and Ankole and 23% exotic or cross-bred, according to the UBOS National Livestock Census 2021.

    A quick check of the share: 14.5 million × 0.77 = 11.165 million, which UBOS rounds to 11.2 million.

    • Heart — a muscular pump in the chest that pushes blood through the lungs and around the body, carrying oxygen and nutrients to every organ.
    • Lungs — two spongy organs that take in oxygen and remove carbon dioxide, which the blood delivers to and collects from all body tissues.
    • Liver — the largest internal organ, which processes nutrients absorbed from the gut, stores energy as glycogen and removes poisons from the blood.
    • Kidneys — a pair of organs that filter waste products such as urea out of the blood and send them to the bladder to leave the body as urine.
    • Spleen — an organ near the stomach that filters old red blood cells and helps the immune system fight infection.
    • Rumen — the first and largest stomach compartment, a fermentation vat where microbes break down the fibre in grass.
    • Reticulum — the second stomach compartment, whose honeycomb lining traps heavy objects a cow swallows before they reach the gut.
    • Omasum — the third compartment, a book-like organ with many folds that squeezes water and minerals out of partly digested feed.
    • Abomasum — the fourth compartment, also called the true stomach, which secretes acid and enzymes to digest protein like a human stomach.
    • Small intestine — a long coiled tube where enzymes finish digestion and the villi absorb sugars, amino acids and fatty acids into the blood.
    • Large intestine — the wider final part of the gut that absorbs water and forms solid faeces for excretion.
    • Ovaries — two organs in the cow that produce ova (eggs) and the hormones oestrogen and progesterone.
    • Uterus — the hollow muscular organ where a fertilised egg implants and the foetus grows during pregnancy.
    • Testes — two organs in the bull’s scrotum that produce spermatozoa and the male hormone testosterone throughout adult life.
    OrganFunctionWhat goes wrong when it fails
    HeartPumps blood to deliver oxygen and nutrientsWeak circulation, swelling, collapse and death
    LungsExchange oxygen and carbon dioxideLaboured breathing and pneumonia
    LiverProcesses nutrients and removes toxinsPoison build-up, jaundice and poor growth
    KidneysFilter waste from blood into urineWaste build-up (uraemia) and illness
    RumenFerments fibre using microbesBloat, indigestion and poor body condition
    ReticulumTraps heavy swallowed objectsHardware disease, a pierced gut wall
    OmasumAbsorbs water and mineralsDehydration and hard, dry digesta
    AbomasumDigests protein with acid and enzymesDisplaced abomasum and poor digestion
    Small intestineAbsorbs digested nutrientsDiarrhoea and malnutrition
    Large intestineAbsorbs water and forms faecesConstipation or scouring

    Common mistake: learners write that the heart “digests food” or that the liver “pumps blood”. Match each organ to its one main job — the heart pumps, the lungs breathe, the liver processes nutrients, and the four stomach compartments digest.

    Anatomy of the bovine digestive system

    The digestive half of cattle anatomy and physiology follows one long tube from the mouth to the anus, but because cattle are ruminants it begins with four stomach compartments before the small and large intestines. The four compartments — rumen, reticulum, omasum and abomasum — work in that order to turn fibrous grass into nutrients the cow can absorb. Learning the order is worth easy marks in the exam.

    Whether an Ankole steer picks grass from open range or a Friesian eats cut Napier in a stall, the same tube processes the feed. The difference between the two is what is fed and how it is managed, which the cattle management systems notes cover. Anatomy stays the same across breeds.

    • Mouth and teeth — the cow has no upper incisors; a hard dental pad meets the lower incisors to grip and tear grass.
    • Tongue — a long, rough, muscular organ that wraps around grass and pulls it into the mouth.
    • Salivary glands — produce large volumes of alkaline saliva that moisten feed and buffer acid produced in the rumen.
    • Oesophagus — the tube carrying feed from the mouth to the stomach, and carrying the cud back up during rumination.
    • Rumen — the enormous first compartment filling the left side of the abdomen, where billions of microbes ferment fibre.
    • Reticulum — the second compartment, a small honeycomb-lined pouch next to the heart that sorts feed and traps heavy objects.
    • Omasum — the third compartment, the “book” with many leaf-like folds that absorb water and grind feed particles.
    • Abomasum — the fourth compartment, the true stomach, which secretes hydrochloric acid and pepsin to digest protein.
    • Small intestine — the duodenum, jejunum and ileum, where enzymes and bile finish digestion and villi absorb nutrients.
    • Large intestine — the caecum, colon and rectum, which absorb the remaining water and form faeces.
    • Liver — receives nutrient-rich blood from the gut through the hepatic portal vein and processes the absorbed products.
    • Pancreas — a gland that releases digestive enzymes and hormones into the small intestine.
    • Gall bladder — stores bile produced by the liver and releases it to emulsify fats in the intestine.
    • Anus — the exit through which undigested residue leaves the body as faeces.
    CompartmentAlso calledFunctionPosition and size
    RumenPaunchFerments fibre with microbes into volatile fatty acids and microbial proteinLargest; fills the left abdomen
    ReticulumHoneycombTraps heavy objects and sorts feed for regurgitationSmall; lies next to the heart
    OmasumManyplies / bookAbsorbs water and minerals and grinds feedMany leaf-like folds
    AbomasumTrue stomachSecretes acid and enzymes to digest proteinOnly compartment with glands

    Exam tip: memorise the order with the letters R–R–O–A: Rumen, Reticulum, Omasum, Abomasum. If a question asks for the “true stomach”, the answer is always the abomasum.

    Physiological processes of ruminant digestion

    A core idea in cattle anatomy and physiology, ruminant digestion is the process by which cattle break down fibrous plant feed using microbes in the rumen before the feed reaches the true stomach. Rumination is the process of bringing back swallowed feed from the rumen, re-chewing it, and swallowing it again. The microbes, not the cow’s own enzymes, do most of the work on cellulose.

    A zebu steer on communal grazing eats mature grass and must ruminate for hours to expose the fibre to its rumen microbes. A Friesian in a zero-grazing unit in Wakiso is fed cut-and-carry forage and concentrates, so it spends less time chewing cud. The underlying cattle anatomy and physiology is identical; only the feed quality differs.

    Zebu steer chewing the cud on communal rangeland while a second cow rests nearby
    A zebu steer chews the cud on communal rangeland, the visible sign of rumination that follows a grazing bout.
    • Ingestion — the cow grips grass, chews it only lightly, and swallows it quickly so it can graze for longer.
    • Microbial fermentation — bacteria, protozoa and fungi in the rumen break down cellulose, which the cow’s own enzymes cannot.
    • Volatile fatty acids — the microbes produce acetate, propionate and butyrate, which the rumen wall absorbs as the cow’s main energy source.
    • Microbial protein — the multiplying microbes are later digested in the abomasum, giving the cow protein even from poor grass.
    • Rumination — swallowed feed is regurgitated, re-chewed and re-swallowed so microbes can attack more surface area.
    • Eructation — the cow belches out fermentation gases such as methane and carbon dioxide; if gas is trapped, bloat follows.
    • Reticulo-rumen contractions — rhythmic muscle movements mix the contents and push digested feed onward.
    • Passage to the omasum — fine particles flow to the omasum, where water and minerals are squeezed out.
    • Abomasal digestion — acid denatures protein and pepsin begins breaking it down, in a process like human digestion.
    • Intestinal digestion — pancreatic enzymes and bile complete the breakdown of protein, fat and carbohydrate.
    • Absorption — finger-like villi in the small intestine take sugars, amino acids and fatty acids into the blood.
    • Saliva buffering — bicarbonate in saliva neutralises the acid produced in the rumen, keeping the microbes alive.
    • Bloat — a build-up of trapped gas that can kill a cow, caused by frothy feed or a blocked eructation.
    • Calf digestion — a calf’s oesophageal groove lets milk bypass the undeveloped rumen straight to the abomasum.
    FeatureRuminant (cattle)Monogastric (pig, human)
    StomachOne stomach, four compartmentsOne simple stomach
    Cellulose digestionYes, by rumen microbesVery limited
    ChewingRuminates (chews the cud)Chews once and swallows
    Fermentation vatRumenNone (some hindgut in the pig)
    Main energy sourceVolatile fatty acidsGlucose
    Protein sourceMicrobial protein plus feed proteinFeed protein only
    Gas releaseBelches methane regularlyMinimal gas
    Natural dietFibrous forage and grassGrains and mixed feeds

    Common mistake: don’t say a cow “has four stomachs”. It has one stomach with four compartments. Saying “four stomachs” is the single most common error examiners mark wrong.

    Female reproductive system in cattle

    The reproductive half of cattle anatomy and physiology starts with the female, whose system produces ova (eggs), receives sperm, supports pregnancy and delivers the calf. It lies in the pelvic and abdominal cavity and is made up of the ovaries, oviducts, uterus, cervix, vagina and vulva. The cow is polyoestrous, meaning she comes on heat repeatedly through the year rather than only in one season.

    • Ovaries — two small organs that release mature ova and produce the hormones oestrogen and progesterone.
    • Ovulation — the release of a mature ovum from the ovary, which in the cow happens during each oestrous cycle.
    • Oviducts — the two fallopian tubes that catch the released ovum and are the site where fertilisation occurs.
    • Uterus — a hollow organ with two horns and a body, where the fertilised egg implants and the foetus develops.
    • Cervix — a thick muscular neck that seals the uterus shut during pregnancy and opens at calving.
    • Vagina — the muscular canal that receives the penis during mating and forms part of the birth canal.
    • Vulva — the external opening of the female tract through which the calf is born.
    • Oestrous cycle — the repeating cycle of about 21 days in which a cow comes on heat, ovulates and returns to heat if not mated.
    • Oestrus (heat) — the short receptive period when a cow stands to be mounted and will accept a bull.
    • Oestrogen — the hormone that brings a cow into heat and causes the visible signs of oestrus.
    • Progesterone — the hormone that maintains pregnancy once the cow has conceived.
    • Fertilisation — the joining of a sperm and an ovum in the oviduct to form a zygote.
    • Gestation — the period of pregnancy, which in cattle lasts about nine months (roughly 280 days).
    • Parturition — the process of giving birth, also called calving, which ends with delivery of the calf.
    • Ankole reproductive performance — FAO/UNEP AGRI 15 recorded an Ankole age at first calving of about 51 months and a calving interval of 342 days (historical research-station figures).
    OrganFunction
    OvaryProduces ova and the hormones oestrogen and progesterone
    OviductCatches the ovum; site of fertilisation
    UterusHolds and nourishes the developing foetus
    CervixSeals the uterus during pregnancy
    VaginaReceives the penis; forms the birth canal
    VulvaExternal opening of the tract

    Ugandan performance: Ankole on range, Friesian in the shed

    Friesian dairy cow standing in a roofed zero-grazing stall with a feed trough on a Wakiso farm
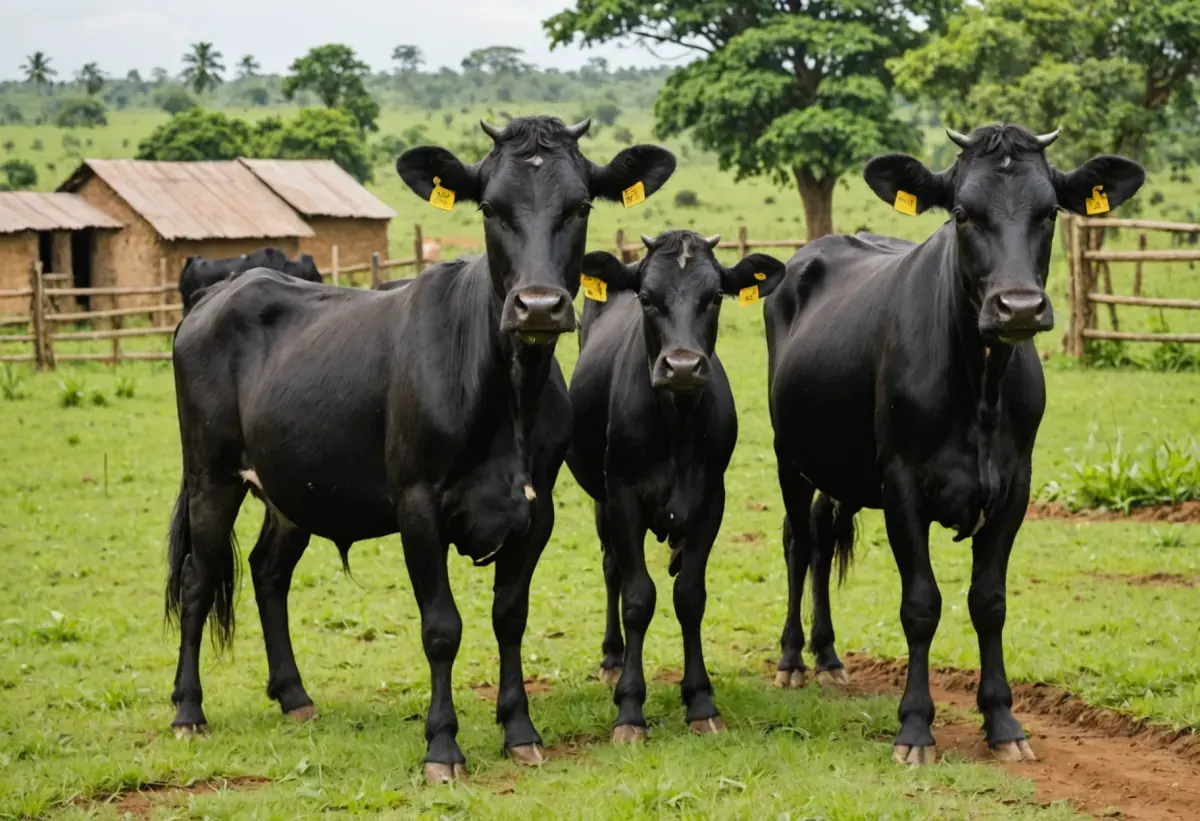
    A Friesian dairy cow stands in a roofed zero-grazing stall with a feed trough on a smallholder farm in Wakiso district.

    The reproductive data explains why Ugandan farmers cross Ankole with Friesian. The FAO/UNEP AGRI 15 Uganda country report recorded these historical research-station figures: an Ankole first calves at about 51 months and gives 882 litres in a lactation, while a zebu first calves at 43 months and gives 692 litres.

    A 2008 on-farm study of 18 farms in Kiruhura (Galukande et al.) measured daily yields of 2.4 litres for Ankole and 11.2 litres for a 50% Friesian cross.

    TraitAnkoleZebuNganda
    Age at first calving (months)514342
    Lactation length (days)243239267
    Calving interval (days)342362420
    Lactation milk yield (litres)882692859

    Two worked examples. First, the difference in daily milk: 11.2 litres minus 2.4 litres equals 8.8 litres more milk per day for the Friesian cross. Second, UBOS recorded 71.7 million litres of milk per week in 2021; multiply by 52 weeks to get 3,728.4 million litres, about 3.7 billion litres a year. Both are re-checked: 11.2 − 2.4 = 8.8, and 71.7 × 52 = 3,728.4.

    Exam tip: if asked to trace an ovum, write: ovary → ovulation → oviduct (fertilisation) → uterus (implantation). That four-step path earns full marks on the most repeated reproductive question.

    Male reproductive system in cattle

    Cattle anatomy and physiology also covers the bull, whose reproductive system produces spermatozoa and the hormone testosterone, then delivers the sperm into the female tract. Its main organs are the testes, epididymis, vas deferens, accessory glands and penis. The testes hang outside the body in the scrotum so they stay a few degrees cooler than the body, which sperm production requires.

    • Testes — two oval organs that produce spermatozoa continuously and secrete the male hormone testosterone.
    • Scrotum — the skin pouch holding the testes outside the body to keep them cool enough for sperm to form.
    • Epididymis — the coiled tube attached to each testis where sperm are stored and mature.
    • Vas deferens — the sperm duct that carries sperm from the epididymis to the urethra.
    • Accessory glands — the seminal vesicles, prostate and bulbourethral glands add seminal fluid to nourish and carry the sperm.
    • Penis — the organ that deposits semen into the cow’s vagina during mating.
    • Prepuce (sheath) — the fold of skin that protects the penis when it is not erect.
    • Spermatogenesis — the continuous production of sperm in the testes, which happens best at a temperature slightly below body heat.
    • Semen — the mixture of spermatozoa and seminal plasma that is ejaculated into the female tract.
    • Testosterone — the hormone responsible for the bull’s libido and male characteristics such as a thick neck and muscling.
    • Castration — removal of the testes to make a steer or bullock calmer, a syllabus skill done for draught and fattening animals.
    • Serving capacity — a bull’s willingness and ability to mate, which determines how many cows one bull can serve.
    • NAGRC&DB bull stud — Uganda’s national breeding centre collects semen from selected bulls for artificial insemination across the country.
    • Zebu and Ankole bulls — both carry the hump over the shoulder; zebu bulls are also widely used for draught work on Ugandan farms.
    OrganFunction
    TestisProduces sperm and testosterone
    ScrotumKeeps the testes cooler than the body
    EpididymisStores and matures sperm
    Vas deferensCarries sperm to the urethra
    Accessory glandsAdd seminal fluid to semen
    PenisDeposits semen in the vagina

    Common mistake: learners write that sperm are made in the penis or the bladder. Sperm are made in the testes, mature in the epididymis, and only travel through the penis during mating. Castration and identification are also part of the routine husbandry practices you must be able to describe.

    Frequently asked questions about cattle anatomy and physiology

    What are the four stomach compartments of a cow?

    A cow has one stomach divided into four compartments: the rumen, reticulum, omasum and abomasum. The rumen ferments fibre with microbes, the reticulum traps heavy objects, the omasum absorbs water, and the abomasum secretes acid and enzymes. Only the abomasum is a true stomach.

    Why do cattle chew the cud?

    Cattle chew the cud to break fibrous feed into smaller pieces so rumen microbes can digest it faster. Swallowed grass is brought back up from the rumen, re-chewed and re-swallowed in a process called rumination. Extra chewing also produces more saliva, which buffers the rumen.

    How is a cow’s stomach different from a human’s stomach?

    A human is monogastric and has one simple stomach, while a cow is a ruminant with four compartments. The cow’s rumen holds microbes that digest cellulose and release volatile fatty acids and microbial protein. A human stomach uses only its own acid and enzymes and cannot digest grass fibre.

    What are the main internal organs of a cow and their functions?

    The main internal organs are the heart, lungs, liver, kidneys, spleen, the four stomach compartments, small and large intestines, and the reproductive organs. These are the ovaries and uterus in the cow and the testes in the bull. Each organ pumps, filters, digests or reproduces, and each fails in a recognisable way.

    How long is a cow pregnant for?

    A cow is pregnant for about nine months (roughly 280 days), a period called gestation. During this time the foetus grows inside the uterus and is sealed in by the cervix. The cow then delivers the calf in a process called parturition, or calving.

    What happens during the oestrous cycle of a cow?

    The oestrous cycle is the repeating cycle of about 21 days in which a cow comes on heat, ovulates, and, if she is not fertilised, returns to heat. Oestrogen drives heat and progesterone maintains pregnancy. Cows are polyoestrous, so they keep cycling all year.

    Key terms and revision summary

    Use this glossary to check your cattle anatomy and physiology revision before you attempt the questions below.

    TermDefinition
    AnatomyThe study of the body structures of an animal
    PhysiologyThe study of how those body structures work
    RuminationBringing back swallowed feed, re-chewing it and re-swallowing it
    RumenThe first and largest stomach compartment, a microbial fermentation vat
    AbomasumThe true stomach, which secretes acid and enzymes
    Oestrous cycleThe repeating cycle of about 21 days of heat and ovulation in a cow
    OestrusThe period of heat when a cow accepts a bull
    GestationThe period of pregnancy, about nine months in cattle
    OvulationThe release of a mature ovum from an ovary
    Artificial inseminationPlacing semen into the female tract without natural mating
    EructationBelching out fermentation gas from the rumen
    MonogastricAn animal with a single simple stomach, such as a pig or human

    Exam-style questions

    1. Name the four stomach compartments of a cow in order and give one function of each. Rumen (ferments fibre), reticulum (traps heavy objects), omasum (absorbs water), abomasum (digests protein with acid and enzymes).
    2. Explain why a cow can digest grass but a pig cannot. A cow’s rumen microbes break cellulose into volatile fatty acids and microbial protein; a pig is monogastric with no rumen microbes, so it digests very little fibre.
    3. Outline the path an ovum follows from the ovary until fertilisation. Ovary (ovulation) → oviduct (fertilisation by sperm) → uterus (implantation if fertilised).
    4. Worked calculation: UBOS recorded 71.7 million litres of milk per week in Uganda in 2021. Work out the annual total in billion litres. Working: 71.7 × 52 = 3,728.4 million litres = 3.7284 billion ≈ 3.7 billion litres a year.
    5. Worked calculation: an Ankole cow yields 2.4 litres of milk a day while a Friesian cross yields 11.2 litres. Calculate the difference per day. Working: 11.2 − 2.4 = 8.8 litres more milk per day for the cross.

    Test yourself with these Agriculture quiz questions, and check the breeds and physical selection of production cattle notes to connect anatomy to the breed you are describing.
  • Mathematical Formulation and Blending of Compound Feeds: A Comprehensive Guide

    Mathematical Formulation and Blending of Compound Feeds: A Comprehensive Guide

    Mathematical Formulation and Blending of Compound Feeds

    In the livestock industry, the mathematical formulation and blending of compound feeds stands as a cornerstone of animal nutrition and farm profitability. Whether you are raising poultry, swine, cattle, rabbits, or fish, the quality of feed directly influences growth rates, reproductive performance, and overall herd health. This comprehensive academic note delves into the scientific principles and practical techniques for creating balanced, cost-effective compound feeds. It covers essential calculation methods, step-by-step formulation strategies for specific animal classes, and the critical art of blending feed ingredients to achieve uniform nutrient distribution. By mastering these concepts, students, feed mill operators, and farmers can optimize animal performance and reduce feed costs.

    Technique for making air-dried livestock compound feeds

    Air-dried compound feeds are the most common form of commercial livestock feed because they are easy to store, handle, and feed. The technique involves a series of deliberate steps that transform raw ingredients into a stable, palatable, and nutritious meal or pellet. The process requires careful planning and hygiene to prevent spoilage and contamination.

    Key Steps in the Production of Air-Dried Feeds

    1. Ingredient Selection and Quality Control: Only high-quality grains (maize, wheat, sorghum), protein sources (soybean meal, fish meal, groundnut cake), and micronutrients (vitamins, minerals) should be used. Each ingredient must be thoroughly inspected for mould, insect damage, and foreign matter.
    2. Grinding and Particle Size Reduction: Whole grains and oilseed cakes are ground to a uniform particle size, typically 500–800 microns for poultry and 800–1000 microns for pigs and ruminants. Grinding increases the surface area for digestion and ensures uniform mixing.
    3. Weighing and Batching: Each ingredient is accurately weighed according to the formulated recipe. Even small deviations can lead to nutrient imbalances or toxicity.
    4. Mixing: The weighed ingredients are thoroughly mixed in a horizontal or vertical mixer to achieve a homogeneous blend. This is critical to ensure that every animal consumes the correct proportion of nutrients.
    5. Conditioning (Optional for Mash): For mash feeds, mixing may be followed by the addition of molasses or oil to reduce dustiness and improve palatability. The mix is left to aerate for a short period.
    6. Drying (if needed): Some feeds include wet ingredients like fresh fish or kitchen waste; these must be air-dried or sun-dried to a moisture content of 10–12% to prevent microbial growth. Air-drying involves spreading the mix in thin layers on clean, raised racks in a well-ventilated area.
    7. Pelleting (optional): For pelleting, the mash is conditioned with steam and pressed through a die to form pellets. Pellets reduce ingredient segregation and feed wastage.
    8. Cooling and Packaging: After drying or pelleting, the feed is cooled to ambient temperature, then bagged in moisture-proof bags, labeled with the date and composition.

    Important: The entire process must minimize heat exposure, as high temperatures can destroy heat-labile vitamins and reduce protein quality.

    The air-drying technique is particularly suitable for small to medium-scale operations because it requires minimal equipment and is energy-efficient. It is extensively used for making mash feeds for poultry and pigs, as well as for producing calf weaner meals and rabbit pellets.

    Mathematical calculations for balanced feed nutrients

    To formulate a balanced feed, one must calculate the exact amounts of ingredients needed to meet the animal’s nutrient requirements—most importantly, energy (expressed as Metabolizable Energy or ME), crude protein (CP), and essential amino acids. Several mathematical methods are employed, from simple algebraic equations to linear programming.

    1. Pearson Square Method

    The Pearson square (or rectangle) is a simple tool for blending two feedstuffs to achieve a desired nutrient level. for instance, to create a feed with 18% crude protein using maize (10% CP) and soybean meal (45% CP):

    • Draw a square; write the desired CP (18%) in the center.
    • Write the CP of each ingredient at the left corners (10 on top-left, 45 on bottom-left).
    • Subtract diagonally and take absolute values: 45-18=27 parts of maize; 18-10=8 parts of soybean meal.
    • Total parts = 27+8=35. Thus, proportion of maize = 27/35 = 77.14%, soybean meal = 8/35 = 22.86%.
    Ingredient CP % Parts Percentage
    Maize 10 27 77.14%
    Soybean meal 45 8 22.86%
    Total 35 100%

    This method is limited to two ingredients but can be extended by fixing some ingredients in the diet and using the square for the two protein sources.

    2. Algebraic Equations

    When more than two ingredients are involved, a system of equations is set up. for instance, if we need 100 kg of feed with 22% CP, and we have maize (10% CP) and groundnut cake (40% CP), we solve:

    1. Let x = kg of maize, y = kg of groundnut cake.
    2. x + y = 100 (total weight)
    3. 0.10x + 0.40y = 22 (total protein)
    4. Solving gives x = 60 kg, y = 40 kg.

    3. Linear Programming

    For commercial feed mills, linear programming (LP) software calculates the least-cost blend that meets all nutritional constraints. LP considers ingredient prices, nutrient limits, and ingredient availability. It is the most powerful and flexible method, handling dozens of ingredients and nutrients simultaneously.

    4. Calculating Nutrient Composition

    After formulating proportions, the total nutrient composition is calculated as the weighted average of each ingredient’s contribution. For instance, if a diet is 70% maize (9% CP) and 30% soybean meal (45% CP), the total CP = 0.70 × 9 + 0.30 × 45 = 6.3 + 13.5 = 19.8%. The same principle is applied for energy, calcium, phosphorus, and amino acids.

    Remember: Always account for moisture content and or inclusion of vitamin-mineral premixes (usually at 0.2–3% of the diet).

    Mastering these mathematical calculations is essential for those seeking to produce cost-effective and nutritionally precise compound feeds.

    Formulating calf pellets and calf weaner

    Calf nutrition demands a delicate balance between milk-derived nutrients and solid feed to stimulate rumen development. Calf pellets and weaner diets are formulated to provide around 18-20% crude protein and high energy (ME > 12 MJ/kg DM).

    Nutrient Requirements for Calves

    Nutrient Calf Starter (Early Weaning) Calf Weaner (Post-Weaning)
    Crude Protein (%) 20-22 18-20
    ME (MJ/kg DM) 12-13 11-12
    Calcium (%) 0.8-1.0 0.7-0.9
    Phosphorus (%) 0.5-0.6 0.4-0.5

    Formulation Strategy

    Calf pellets are dense, small-diameter pellets (3/16 inch) that prevent selective eating. They are often crumbled for very young calves.

    • Ingredients: Maize, soybean meal, wheat bran, molasses, dicalcium phosphate, limestone, vitamins and minerals.
    • Example recipe (per 100 kg):
      Maize: 50 kg, Soybean meal: 25 kg, Wheat bran: 15 kg, Molasses: 5 kg, Dicalcium phosphate: 2 kg, Limestone: 1 kg, Premix: 2 kg. This handles approx. 20% CP.

    Calf weaner is introduced at 4-6 weeks of age to encourage dry feed intake. Palatability is enhanced with molasses and flavourings. The weaner diet must be physically stable to withstand cloven-hoof trampling and water exposure.

    Formulation targets: The pelleting process requires a binder like wheat bran or lignosulfonate to maintain pellet durability. The pellets must pass a durability test with >95% intact after tumbling.

    Practical Tip: Start calves with a small amount of fresh calf pellets on top of milk to create positive association; gradually increase over 3 weeks.

    Formulation of chick mash broiler starter and layer mash

    Poultry feeds are the most technically demanding due to extreme sensitivity of birds to nutritional imbalances. Three main categories are covered: chick mash, broiler starter, and layer mash.

    Chick Mash (0-8 Weeks)

    Chick mash is a finely ground, crumbly feed designed for day-old chicks. It must contain 20-22% CP, 11-12 MJ/kg ME, and be extremely palatable. Key formulation:

    • Maize: 55%, Soybean meal: 30%, Fish meal: 4%, Wheat bran: 5%, Vegetable oil: 2%, Dicalcium phosphate: 1.5%, Limestone: 1%, Premix: 0.25%, Methionine: 0.1%.
    • All ingredients are ground to a fine particle size (500 microns) and mixed thoroughly. Chick mash is often given as a crumble to reduce waste.

    Broiler Starter (0-3 Weeks)

    Broiler starter has higher protein (23% CP) and energy (12.5 MJ/kg) to support rapid growth. The formulation often includes high-quality protein sources like fish meal and soybean meal. Example:

    Ingredient Inclusion (%)
    Maize 50
    Soybean meal 30
    Fish meal 5
    Wheat bran 8
    Vegetable oil 3
    Limestone 1
    Dicalcium phosphate 1.5
    Vit/Min premix 0.5
    Lysine & Methionine 0.2 each

    This mixture provides approx. 23% CP and 12.4 MJ/kg ME.

    Layer Mash (18+ Weeks)

    Laying hens need a diet with 16-18% CP but high calcium (3.5-4%) for eggshell formation. Layer mash has reduced protein and increased limestone. A typical formulation:

    • Maize: 60%, Soybean meal: 20%, Wheat bran: 5%, Fish meal: 3%, Limestone: 8%, Dicalcium phosphate: 1%, Vegetable oil: 1%, Premix: 1%, Salt: 0.5%.
    • Calcium is supplied partly as large particles (oyster shell) to allow hens to consume it as needed.

    Important: Never use layer mash for broiler starters; the high calcium will cause kidney damage in growing birds.

    Formulating sow weaner rabbit pellets and fish meal

    This section covers three distinct species and products: sow weaner diets, rabbit pellets, and fish meal formulations—each with unique nutritional considerations.

    Sow Weaner Feed

    Weaned piglets (around 21-28 days) require a highly digestible diet with complex protein sources to minimize post-weaning lag. Sow weaner feed should contain 20-22% CP, 14 MJ/kg ME, and high levels of milk by-products or high-quality proteins.

    • Ingredients: Maize, soybean meal, skimmed milk powder, whey powder, fish meal, plasma protein, enzymes, and organic acids. The feed is often pelleted to 3mm diameter.
    • Formulation: A common recipe: Maize 45%, Soybean meal 20%, Whey powder 15%, Fish meal 10%, Vegetable oil 3%, Dicalcium phosphate 1%, Limestone 1%, Premix 1%, Lysine 0.3%, Methionine 0.2%. Acidifiers like citric acid are added at 1% to lower stomach pH.
    • It is critical to ensure ingredients are fresh and high-quality; weaner pigs are very sensitive to mycotoxins.

    Rabbit Pellets

    Rabbits require high-fiber (12-16% crude fiber) diets to prevent digestive disorders. The pellet mash should be ground to 1-2 mm and formed into 4mm pellets to encourage chewing. For growing rabbits, CP of 16-18% and ME of 9-10 MJ/kg is adequate.

    • Ingredients: Alfalfa hay (40%), maize (20%), wheat bran (15%), soybean meal (10%), barley (10%), limestone (2%), premix (1%), molasses (2%). This mixture provides enough fiber.
    • Rabbits are prone to hairball formation; adding 5-10% dehydrated grass or lucerne improves fiber length.

    Fish Meal as an Ingredient

    Fish meal is a major protein source in livestock feeds, especially for aquaculture and young animals. It isn’t a feed itself but a critical ingredient. When formulating sow weaner, rabbit pellets, or poultry feed, fish meal is included at 5-10%.

    Nutritional profile: Fish meal contains 60-72% CP, rich in lysine and methionine, and is an excellent source of calcium and phosphorus. but, over-inclusion can cause rancid odor and high cost. Proper storage is essential to prevent oxidation.

    Formulation note: The inclusion of fish meal in rabbit pellets is limited because rabbits are herbivores. A maximum of 2% is used when needed for amino acid balance. For piglets and poultry, fish meal is a gold-standard protein source.

    Blending prepared livestock feeds

    Blending—often called mixing or compounding—is the final step that ensures uniform distribution of all nutrients and additives throughout the feed. Even the best formula fails if the blend is inconsistent. This section covers blending techniques, mixer types, and quality control.

    Why Blending Matters

    • Prevents segregation of fine and large particles.
    • Ensures every animal receives the same dose of vitamins, minerals, and drugs.
    • Improves palatability by combining flavors.
    • Allows the addition of small quantities of potent ingredients (e.g., premixes) safely.

    Types of Mixers

    Mixer Type Ideal For Advantages Disadvantages
    Horizontal ribbon mixer Mash feeds with dry ingredients Even mix, short time (5-10 min) Requires high maintenance
    Vertical screw mixer Smaller batches, low cost Simple, low capital Longer mixing time (15-20 min), less uniform
    Twin-shaft paddle mixer High-volume commercial mixes Fast (3-5 min), excellent homogeneity Expensive

    Mixing Process

    1. Pre-mixing: Micro-ingredients (vitamins, minerals, drugs) are first blended with a carrier (wheat flour or soybean meal) in a small mixer to make a premix. This ensures they are diluted safely.
    2. Loading: The bulk ingredients (maize, soybean meal) are loaded into the main mixer first, followed by the premix and oil/molasses.
    3. Mixing time: Over-mixing can cause particles to separate; under-mixing leaves nutrient pockets. The optimal time varies with mixer type (check manufacturer’s specification).
    4. Quality Checks: Samples are taken from different locations for uniformity tests (e.g., coefficient of variation < 5%).

    Air-Dried Feeds and Blending

    For air-dried compound feed, blending is done before drying if wet ingredients are used. After drying, the mix may be crumbled or pelleted. To blend dry ingredients, care must be taken to avoid dust explosions; bonding agents like molasses are often added to bind fines.

    Pro Tip: Always clean mixers between batches to prevent cross-contamination, especially when mixing medicated and non-medicated feeds.

    Conclusion

    The mathematical formulation and blending of compound feeds is both a science and an art. It demands a solid grasp of animal nutrient requirements, ingredient compositions, and mathematical methods—from simple Pearson squares to complex linear programming. The technique for making air-dried livestock compound feeds ensures shelf-stability, while accurate mathematical calculations guarantee balanced macro- and micronutrients. Formulations for different species—calf pellets, chick mash, broiler starter, layer mash, sow weaner, rabbit pellets—are tailored to exact physiological needs. Finally, careful blending of prepared livestock feeds is the arbiter of feed uniformity and nutrient delivery. Master these principles, and you are equipped to produce high-quality, cost-effective feeds that enhance animal performance and farm profitability. Whether you are an agronomy student, an animal scientist, or a commercial feed manufacturer, the future of livestock nutrition depends on precise feed formulation.

    Frequently Asked Questions (FAQ)

    1. What is the Pearson Square method in feed formulation?

    The Pearson Square is a visual, algebraic method used to calculate the proportions of two feed ingredients needed to achieve a desired nutrient concentration. It is most commonly used for crude protein. You place the desired nutrient level in the center, list the nutrient concentrations of the two ingredients on the left, subtract diagonally, and take the absolute values to get the parts of each ingredient. Summing those parts gives the total; the proportion of each is its part divided by the total.

    2. How do you calculate a balanced feed ration?

    To calculate a balanced ration, you first identify the animal species, age, and production stage to determine nutrient requirements (ME, CP, Ca, P, etc.). Then, select available feedstuffs and determine their nutrient compositions. Using methods like algebra, Pearson’s square, or linear programming, you calculate the amounts of each ingredient that together meet all requirements while minimizing cost. Finally, verify by calculating the total nutrients and adjust as needed.

    3. What are the main ingredients in calf weaner feed?

    Calf weaner feed typically includes cereal grains (maize, oats), protein sources (soybean meal, milk by-products), wheat bran for fiber, molasses for palatability, dicalcium phosphate and limestone for minerals, and a vitamin-mineral premix. The aim is to provide 18-20% crude protein and encourage solid feed intake to develop the rumen.

    4. How do I formulate chick mash at home?

    For a simple chick mash, combine 50% maize, 30% soybean meal, 5% fish meal, 8% wheat bran, 2% vegetable oil, 1% limestone, 1% dicalcium phosphate, 0.5% salt, and 0.25% vitamin-mineral premix. Grind all ingredients to a fine particle size, mix thoroughly, and feed from day one. Ensure the mix is fresh and protected from moisture.

    5. Why is blending important in prepared livestock feeds?

    Blending ensures uniformity of nutrients, vitamins, and medications in the feed. Without proper blending, animals may selectively consume ingredients, causing nutrient excesses or deficiencies. for instance, medicated feeds rely on even distribution to prevent underdosing or toxicity. A coefficient of variation of less than 5% is often used to indicate ideal blending.

    6. Can I use layer mash for broilers?

    No, layer mash has high calcium (3-4%) to support eggshell formation and slightly lower protein (16-18%). Broilers need high protein (20-23%) and less calcium (0.9-1%). Feeding layer mash to broilers can cause calcium toxicity, kidney issues, and poor growth. Always use species-appropriate feeds.

    7. What is the ideal particle size for poultry crumble?

    For chicks, fine mash particles of 500 microns are ideal. For broilers and layers, a crumble texture (ground pellets) is recommended. Particle size affects feed intake and digestion; too fine can lead to beak irritation, too coarse can cause sorting. The feed industry standard for broiler mash is 600-800 microns.

  • Classification of Livestock Feeds and Raw Ingredients: A Complete Guide

    Classification of Livestock Feeds and Raw Ingredients: A Complete Guide

    Introduction

    Livestock feeding is the cornerstone of productive and profitable animal agriculture. The science of animal nutrition revolves around providing balanced diets that meet the physiological needs of animals while optimizing growth, reproduction, and health. To achieve this, farmers, nutritionists, and feed millers must understand the array of available feedstuffs, their nutritional composition, and the specific requirements of different animal species. This article explores the systematic classification of livestock feeds and raw ingredients, providing an academic yet practical overview of range and types of available livestock feeds, feed ingredients and nutritional values, specific nutritional requirements of different animals, and selecting raw materials for feed processing. By mastering these core concepts, stakeholders can enhance feed efficiency, reduce costs, and promote sustainable animal production.

    Range and Types of Available Livestock Feeds

    The diversity of livestock feeds is vast, ranging from simple pasture grasses to complex compound feeds. Feeds can be classified based on origin, composition, and purpose. Understanding the full spectrum of feed types is essential for ration formulation and on-farm feeding strategies.

    1. Roughages and Forages

    Roughages are plant-based feeds with high fiber content, typically exceeding 18% crude fiber on a dry matter basis. They are the foundation of ruminant diets and provide bulk and energy via microbial fermentation.

    • Green forages: Fresh grasses, legumes, and leafy crops. Examples include napier grass, alfalfa, clover, and oats. They are rich in vitamins and minerals, with moderate protein depending on maturity.
    • Dry roughages: Sun-dried or artificially dried forages such as hay and straw. Hay from legumes (e.g., lucerne) has high protein, while cereal straws are low in quality and digestibility.
    • Silage: Fermented, high-moisture stored forages. Maize silage, grass silage, and legume silage are common. Silage preserves nutrients through anaerobic fermentation, making it a reliable winter feed.
    • Crop residues: Stalks, husks, and leaves left after grain harvest. These include maize stover, wheat straw, and groundnut haulms. They are abundant but low in protein and energy, often requiring supplementation.

    2. Concentrates

    Concentrates are feeds with high nutrient density and low crude fiber (below 18%). They are further divided into energy and protein feeds.

    • Energy feeds: Rich in easily digestible carbohydrates and fats. Cereal grains like maize, barley, sorghum, and wheat are primary energy sources. High-moisture grains and molasses also fall under this category.
    • Protein feeds: Contain more than 20% crude protein. Oilseed cakes (soybean meal, groundnut cake, sunflower cake), fish meal, blood meal, and legume seeds (e.g., lupins) are common. Some protein feeds are of animal origin, such as meat and bone meal.
    • By-product feeds: Industrial residues such as wheat bran, rice bran, brewers’ grains, and distillers’ dried grains. These often provide both energy and moderate protein, making them cost-effective.

    3. Supplements and Feed Additives

    Supplements are used to balance specific nutrients, while additives are non-nutritive products that improve feed utilization, preservation, or animal health.

    • Mineral supplements: Limestone, dicalcium phosphate, magnesium oxide, and trace mineral premixes. They correct deficiencies in calcium, phosphorus, selenium, zinc, etc.
    • Vitamin supplements: Synthetic or natural vitamins added to compensate for losses during processing or to meet high demands in stressed animals.
    • Non-protein nitrogen (NPN): Urea and ammonium salts used in ruminant diets to supply nitrogen for microbial protein synthesis.
    • Feed additives: Antibiotics (growth promoters), probiotics, enzymes, antioxidants, mold inhibitors, and flavoring agents. These improve feed efficiency, gut health, and product quality.

    4. Special Feeds

    • Milk replacers: Formulated for young calves, lambs, and piglets when maternal milk is insufficient. They contain dried skim milk, whey, and vegetable fats.
    • Pet foods: Complete, balanced diets for dogs and cats, often extruded or canned.
    • Aqua feeds: Pellets or extruded feeds for fish and shrimp with specific buoyancy and water stability.

    5. Classification by Nutrient Content

    • Basal feeds: High in energy, low in protein, such as maize and molasses.
    • Supplemental feeds: High in protein or minerals, such as oilseed cakes and phosphate salts.
    • Complete feeds: Nutritionally balanced mixtures intended as the sole diet, e.g., compound pellets for poultry or dairy cows.

    Classification Systems for Livestock Feeds

    Various systems exist to categorize feedstuffs systematically, permitting standardized identification and rational use. The most renowned is the International Feed Number (IFN) system, which assigns a six-digit code to each feed. Another common scheme divides feeds into eight classes: dry forages and roughages, pasture/range plants, silages, energy feeds, protein supplements, mineral supplements, vitamin supplements, and additives. This classification simplifies feed formulation and database management.

    Feed Ingredients and Nutritional Values

    Each feed ingredient possesses a unique chemical composition that dictates its acceptance and value in animal diets. The primary nutritional parameters include moisture, crude protein (CP), ether extract (EE), crude fiber (CF), nitrogen-free extract (NFE), minerals, and vitamins. Energy is often expressed as Total Digestible Nutrients (TDN), Digestible Energy (DE), Metabolizable Energy (ME), or Net Energy (NE). The table below illustrates the nutritional values of commonly used feed ingredients.

    Typical Nutritional Composition of Common Feed Ingredients (% DM)
    Ingredient Dry Matter Crude Protein TDN Calcium Phosphorus
    Maize grain 88 9 85 0.02 0.30
    Soybean meal 89 48 73 0.25 0.60
    Wheat bran 89 15 78 0.10 1.20
    Alfalfa hay 90 17 58 1.20 0.25
    Fish meal 92 65 72 5.00 3.00
    Molasses 75 4 70 0.10 0.10
    Limestone 99 0 0 38.00 0.02

    Beyond these staples, alternative protein sources like insect meal (black soldier fly larvae) are emerging as sustainable ingredients, offering up to 60% crude protein. Similarly, algae and yeast products are valued for bioactive compounds and high protein content. Understanding the exact nutritional value of each batch of raw material is critical because natural variation occurs due to variety, climate, soil, and storage conditions. so, proximate analysis (Weende scheme) and near-infrared spectroscopy (NIR) are routinely used to predict nutrient composition.

    Anti-Nutritional Factors

    Some ingredients contain substances that interfere with nutrient utilization. Tannins in sorghum, phytic acid in cereal bran, trypsin inhibitors in raw soybean, gossypol in cottonseed cake, and glucosinolates in rapeseed meal must be inactivated or limited through processing or dietary inclusion caps. For instance, diets for monogastrics shouldn’t exceed 10-15% untreated cottonseed cake due to gossypol toxicity.

    Specific Nutritional Requirements of Different Animals

    Animals have distinct nutritional needs based on species, age, production stage, and physiological status. These requirements are best expressed as a percentage of the diet or grams per day. Below we discuss the unique needs of cattle, sheep/goats, poultry, and swine.

    Cattle (Beef and Dairy)

    Ruminants rely on microbial digestion in the rumen. so, their diets must include adequate roughage (at least 25-30% fiber) to maintain rumen function. Dairy cows in early lactation have remarkably high energy demands—sometimes exceeding 1.6 Mcal NE_l/kg of dry matter—and require about 17-18% crude protein. Beef cattle on finishing diets need lower fiber (10-20%) and higher energy to promote marbling. Mineral requirements include calcium (0.6% for lactating cows), phosphorus (0.4%), magnesium (0.2%), and sodium (0.25%). Trace minerals such as zinc, copper, and selenium are vital for immune function and reproduction.

    Sheep and Goats

    These small ruminants are often more efficient in using fibrous feeds than cattle. Their nutritional requirements vary with wool growth, milk production, and multiple foetuses. Pregnant ewes require elevated energy and protein in late gestation (90% of fetal growth occurs in the last 6 weeks). Protein needs range from 12-16% of diet dry matter, while fiber should be above 20%. Copper is essential but toxic in sheep at low levels (threshold 25 mg/kg), so specialized mineral mixtures are necessary.

    Poultry (Layers and Broilers)

    Poultry have simple stomachs and require highly digestible, concentrated diets. Broilers need high-energy, high-protein rations: starter (22-24% CP, 3000 kcal ME/kg), grower (20-22%), and finisher (18-20%). Layers require ample calcium (3.5-4.0%) for eggshell formation, but too much phosphorus can cause calcium depletion. Amino acid profiles, especially lysine and methionine, are critical because cereals are deficient in these. Enzymes like phytase are frequently added to enhance phosphorus utilization. Water intake is also strictly correlated with feed intake.

    Swine (Pigs)

    Pigs, like chickens, are monogastric and need well-balanced, nutrient-dense feeds. Gestating sows need 12-14% CP, while lactating sows require 18-20% CP. Grower-finisher pigs respond to crystalline amino acids (lysine, threonine, tryptophan) to lower nitrogen excretion. Fiber should be limited to 3-5% for high-energy diets. Essential fatty acids (linoleic acid) are needed for skin health and growth. Starter piglets (up to 20 kg) benefit from milk-derived ingredients due to enzyme immaturity.

    Other Animals (Horses, Rabbits, Fish)

    • Horses: Their hindgut fermentation allows them to digest fiber, but they are sensitive to starch overload; diets are forage-first with moderate grain concentrates.
    • Rabbits: Require high fiber (15-20%) to prevent digestive disorders; caecotrophy supplements B-vitamins and protein.
    • Fish: Coldwater species like trout need high protein (40-50%) and fat (15%); warmwater fish like tilapia can utilize plant proteins and carbohydrates more efficiently.

    Always consult established standards such as the National Research Council (NRC) or Ensminger’s Feeds & Nutrition to determine precise nutrient requirements for your specific animal breed and production environment.

    Selecting Raw Materials for Feed Processing

    Selecting the right raw materials is a multidimensional decision that affects feed quality, animal performance, and economics. Feed millers and farmers must evaluate each ingredient against several criteria before inclusion in a formulation.

    Key Selection Criteria

    • Nutritional value: The ingredient must supply the targeted nutrients in adequate quantities and be digestible by the species. for instance, vegetable proteins are ideal for monogastrics if balanced for amino acids.
    • Cost: The price per unit of nutrient (e.g., cost per ton of crude protein) is more important than the absolute price. Local by-products may be cheaper and equally valuable.
    • Palatability: Animals must readily consume the feed. Molds, rancid fats, or bitter compounds reduce intake.
    • Safety: Raw materials should be free from mycotoxins (e.g., aflatoxin, vomitoxin), pesticide residues, heavy metals, and pathogenic bacteria. Aflatoxin B1 is highly carcinogenic and immunosuppressive.
    • Processing characteristics: Particle size, bulk density, and flowability affect mixing and pelleting. Ingredients that are dusty or bridge in bins complicate feed manufacturing.
    • Availability and storage: Consistent supply throughout the year and ease of storage (dry, cool) reduce the risk of nutrient degradation.
    • Legal and environmental constraints: Some countries ban animal proteins in ruminant feeds, and the feedlot industry faces scrutiny over phosphorus excretion.

    Quality Assurance Practices

    Prior to acceptance, raw materials should be sampled and subjected to laboratory analysis. Rapid test kits (e.g., ELISA) for mycotoxins, moisture meters, and density tests offer on-the-spot screening. Regular supplier audits and feed safety programs like HACCP (Hazard Analysis and Critical Control Points) are essential in modern feed production. Storage should be managed to maintain quality: grains kept at <14% moisture, protein meals in ventilated silos, and fats stored with antioxidants.

    Formulation and Mixing

    Once ingredients are selected, they are proportioned using linear programming to meet nutrient specifications at minimal cost. The formulator must account for ingredient variability by including safety margins (e.g., 2-5% above NRC requirements). Thorough mixing ensures uniformity; the coefficient of variation (CV) for trace nutrients should be less than 10%. Pelleting or extrusion can improve nutrient digestibility and hygiene.

    Conclusion

    The classification of livestock feeds and raw ingredients is a dynamic and essential field that integrates animal physiology, feed chemistry, and economics. By understanding the range and types of available livestock feeds—from forages to supplements—and their feed ingredients and nutritional values, managers can craft diets that meet the specific nutritional requirements of different animals, thereby maximizing productivity and welfare. Moreover, meticulous selecting raw materials for feed processing ensures safety, cost-effectiveness, and consistency. As global demand for animal protein increases, the efficient and sustainable use of feed resources will remain pivotal. This guide serves as a foundational reference for students, agribusiness professionals, and farmers seeking to optimize livestock nutrition.

    Frequently Asked Questions

    What is the primary difference between roughages and concentrates?

    Roughages are high in fiber (over 18% crude fiber) and include pasture, hay, and silage, providing bulk and promoting rumen health. Concentrates are low in fiber and high in energy or protein, such as grains and oilseed cakes, and are used to increase nutrient density of the diet.

    How are feed ingredients tested for nutritional value?

    Laboratory methods include proximate analysis for moisture, protein, fat, fiber, and ash; bomb calorimetry for energy; and amino acid analysis via HPLC. Near-infrared spectroscopy (NIR) offers rapid, non-destructive screening of many nutrients simultaneously.

    What are the signs of a nutrient deficiency in animals?

    Common signs include poor growth, reduced milk yield, dull coat, infertility, weak bones (rickets or osteomalacia), and impaired immune response. for instance, vitamin A deficiency leads to night blindness in cattle, whereas calcium deficiency causes milk fever in dairy cows around calving.

    Can one feed formula work for all animal species?

    No. Different species have distinct digestive systems and metabolic needs. For instance, ruminants can utilize urea and high-fiber feeds, whereas poultry and pigs can’t. Formulating a universal feed would either under- or over-supply nutrients, leading to inefficiencies and health issues.

    What are the best raw materials for small-scale feed processing?

    For smallholders, locally available materials such as maize, soybean meal, rice bran, and vegetable waste are optimal. These are cost-effective and accessible. It is crucial to balance them with a vitamin-mineral premix, and to analyze for mold and aflatoxins.

    Why is particle size important in feed processing?

    Particle size affects surface area, nutrient digestibility, and mixing uniformity. For piglets, fine grinding improves digestion, but for dairy cows, too fine a grind can reduce rumen pH and fiber utilization. Ideal particle size varies by species and production stage.

    How does feed storage impact nutritional quality?

    Improper storage can lead to moisture-induced mold growth, rancidity of fats, and loss of vitamins. Storing feeds in cool, dry, well-ventilated areas and using preservatives like organic acids can extend shelf life and maintain nutrient integrity.

  • Hygienic Milking Techniques & Quality Cattle Handling: A Comprehensive Academic Guide

    Hygienic Milking Techniques & Quality Cattle Handling: A Comprehensive Academic Guide

    Cattle farming is both a science and an art. Whether managing a small dairy herd or a large beef operation, the quality and safety of your products hinge on the practices you adopt. From the moment a cow is milked to the time a steak reaches the consumer’s plate, every step demands precision, cleanliness, and a deep understanding of animal health. This comprehensive guide covers the entire spectrum of hygienic milking techniques, quality handling of cattle products, and the strategies needed to thrive in today’s competitive market. You will learn how to protect animal welfare, prevent contamination, and create value-added products that stand out. Let’s dive into the world of cattle product excellence.

    Importance of Hygienic Milking Techniques

    Milking isn’t just about extracting milk; it is the very first step in a chain of quality. Hygienic milking techniques are essential for producing safe, high-quality milk that is free from harmful bacteria and contaminants. Poor practices can lead to spoilage, foodborne illness, and economic losses for the farmer. Below, we explore the multifaceted importance of hygienic milking and how it benefits animals, producers, and consumers alike.

    1. Milk Quality and Consumer Safety

    Milk is a highly nutritious medium that also serves as a perfect breeding ground for bacteria. Unhygienic milking can introduce pathogens such as E. coli, Salmonella, and Listeria directly into the milk. These pathogens can cause serious illnesses in humans, including food poisoning, meningitis, and even death in vulnerable individuals. By adopting hygienic milking techniques, you significantly reduce the microbial load, ensuring the milk is safe for consumption and has a longer shelf life.

    2. Prevention of Mastitis

    Mastitis, an inflammation of the udder, is one of the most costly diseases in dairy farming. It is often caused by bacteria entering the teat canal during milking. Unhygienic conditions—like dirty udders, contaminated milking equipment, and poor milker hygiene—increase the risk of mastitis infection. Regular and proper cleaning of the udder, teat dipping, and using sanitized equipment are critical preventive measures. Healthy udders produce more milk, and prevention is far more cost-effective than treatment.

    3. Enhanced Milk Composition and Market Value

    Hygienic milking practices directly influence the composition and quality of milk. Milk with high somatic cell counts (SCC), evidence of mastitis, or contamination is penalized by processors and often rejected. Clean milking results in lower SCC, higher fat and protein content, and a more desirable taste. This increases the market value of the milk and allows farmers to command premium prices, especially in markets that reward quality.

    4. Animal Health and Welfare

    Hygienic milking isn’t only about the milk; it’s also about the cow. Gentle and clean milking reduces stress, prevents udder injuries, and promotes overall animal health. Cows that are well-cared-for produce more milk and have longer productive lives. Good hygiene also prevents the spread of contagious diseases among the herd, reducing the need for antibiotics and veterinary interventions.

    5. Compliance with Legal and Industrial Standards

    Dairy farming is heavily regulated in most countries. Laws and industry standards (e.g., Pasteurized Milk Ordinance in the US, EU Hygiene Package) mandate specific milking practices, equipment standards, and testing protocols. Failure to comply can result in fines, shutdowns, or loss of market access. Hygienic milking ensures you meet these legal obligations and facilitates successful audits and certifications.

    6. Economic Efficiency and Reduced Waste

    Unhygienic practices lead to milk discards due to rejection, spoilage, or contamination. This waste represents a direct loss of revenue and wasted resources. Implementing rigorous hygiene protocols reduces spoilage, minimizes the need for costly antibiotics, and optimizes production efficiency. In the long run, the savings and improved yields significantly outweigh the costs of hygiene investments.

    7. Public Perception and Brand Reputation

    Consumers are increasingly concerned about food safety and animal welfare. A single scandal involving contaminated milk can ruin a farm’s reputation and devastate sales. Adopting and promoting hygienic milking techniques builds consumer trust and enhances your brand image. This is particularly important in niche markets like organic or artisanal dairy, where trust is a key purchase driver.

    r>

    Aspect Hygienic Milking Unhygienic Milking
    Udder Prep Thorough washing and drying with single-service paper towels Wiping with shared cloth or no cleaning
    Teat Dipping Pre- and post-milking dipping with sanitizer No dipping
    Equipment Sanitation Cleaned and sanitized after every use Rinsed with water only
    Somatic Cell Count Low (<200,000 cells/ml) High (>400,000 cells/ml)
    Bacterial Load Low – meets export standards High – risk of milk spoilage

    Milking Hygiene Checklist

    • Ensure the milking parlor is clean and well-ventilated.
    • Inspect the udder and teats for clinical signs of mastitis.
    • Wash the udder with warm, sanitized water and dry with single-use towels.
    • Fore-strip each teat into a strip cup to discard contaminated milk.
    • Dip teats in a pre-milking sanitizer and allow contact time before drying.
    • Attach milking units promptly and ensure proper vacuum levels.
    • Post-milky, dip teats with a barrier disinfectant.
    • Clean all equipment immediately after milking with approved detergents and sanitizers.
    • Maintain milk cooling at or below 4°C within 30 minutes of milking.

    “Hygiene is the shield that protects milk’s purity. Every drop reflects the care you take.”

    Detecting Milk Abnormalities Using a Strip Cup

    The strip cup is one of the simplest yet most powerful diagnostic tools in a dairy farm. It is a shallow, dark-bottomed dish with a fine mesh or screen used to examine the first few streams of milk from each teat. This practice, called fore-stripping, is both a component of hygienic milking and a method for detecting subtle signs of mastitis and other abnormalities. Here, we explain the science of the strip cup, how to use it, and how to interpret your findings.

    What is a Strip Cup?

    A strip cup is typically made of stainless steel or plastic, with a dark, often black, interior to provide contrast for detecting small flakes or clots. Some have a screen to catch solids. Its primary function is to allow visual inspection of milk for abnormalities such as color changes, viscosity, and presence of pus or blood.

    Why Use a Strip Cup?

    • Detects Clinical Mastitis: Visible changes in milk appearance are often the first signs of mastitis.
    • Identifies Subclinical Infections: While subclinical mastitis doesn’t visibly change milk, a strip cup can sometimes reveal tiny particles aided by the dark background.
    • Contributes to Hygiene: Fore-stripping removes the high-bacterial milk from the teat canal, reducing contamination of the bulk milk.
    • Monitors Udder Health: Regular use helps track the health status of each quarter over time.
    • Early Intervention: Early detection allows for timely treatment, reducing the severity of the infection and preventing spread.

    Steps for Using a Strip Cup Correctly

    1. Prepare the Cup: Ensure the strip cup is clean and dry before starting. Some models have a black plastic insert; keep it visible.
    2. Identify the Cow and Teat: Work in a consistent order (e.g., left to right) to avoid confusion.
    3. Wipe the Teat: Dispose off any debris by wiping with a clean paper towel.
    4. Discard the First Streams: Squeeze 3-4 streams from the first teat into the strip cup. Avoid touching the cup to the teat to prevent contamination.
    5. Examine the Milk: Visually assess the milk on the cup’s surface against the dark background. Look for any changes in color, consistency, or the presence of particles.
    6. Check Every Teat: Repeat for all four teats, using the same cup but observing each separately.
    7. Record and Act: Note any abnormal findings in the cow’s health record. If abnormalities are present, mark the cow and don’t attach the milking machine. Milk infected quarters last or into a separate container to avoid contaminating the bulk tank.
    8. Clean the Cup: After each cow, empty the cup and rinse it thoroughly. Sanitize it between cows to avoid cross-contamination.

    Interpreting Strip Cup Results: A Guide to Visual Changes

    Observation Possible Cause Action
    Normal: Thin, uniform white to cream color Healthy milk Milking can proceed
    Watery, bluish appearance Early lactation or mastitis Investigate further; check SCC
    Clots or flakes (yellow/white) Clinical mastitis (presence of fibrin and leucocytes) don’t milk into bulk tank; treat and quarantine
    Blood (pink/red) Trauma, hemorrhage, or mastitis (e.g., due to E. coli) Check for injury; consult veterinarian
    Watery and with bluish tinge Subclinical or per acute mastitis Test for SCC and bacteria
    Thick, yellow purulent discharge Severe mastitis No milking, immediate treatment
    Gas bubbles Coliform mastitis (e.g., E. coli) Emergency vet call, avoid human consumption

    When using a strip cup, always wear gloves that are washed between cows. The cup itself should be sanitized; some farms use multiple cups to avoid cross-contamination. While the strip cup is effective, it only catches clinical cases. For subclinical mastitis, other tests like the California Mastitis Test (CMT) or electronic SCC testing are recommended.

    The strip cup is the farmer’s first line of defense against milk quality failures.

    Principles of Clean Milk and Meat Production

    Clean food production is a cornerstone of public health and agricultural sustainability. Cattle products—milk and meat—are highly perishable and prone to microbial contamination if proper principles aren’t followed. This section outlines the fundamental principles that govern clean milk and meat production, from the farm environment to the final packaging, to ensure safety, quality, and compliance with international standards.

    Principles of Clean Milk Production

    Clean milk production begins long before the milking machine is attached. It involves the animal’s environment, feed, water, and handling practices.

    • Healthy, Clean Animals: Cows must be free from diseases and kept clean. Dried, well-bedded areas reduce the risk of dirt and manure contact with the udder.
    • Clean Environment: The milking parlor, calf pens, and loafing areas should be regularly cleaned and disinfected. Prevent accumulation of manure and mud.
    • Quality Feed and Water: Poor-quality silage can impart off-flavors and toxins. Water sources must be clean and safe to avoid bacterial contamination.
    • Hygienic Milking Procedures: As discussed earlier, this includes udder washing, teat dipping, fore-stripping, and using clean equipment.
    • Prompt Cooling: Milk must be cooled to below 4°C within 2 hours of milking to inhibit bacterial growth. The cold chain must be maintained throughout storage and transport.
    • Sanitation of Equipment: All utensils, pipelines, and bulk tanks must be cleaned and sanitized after each milking.
    • Hygiene of Personnel: Milkers should wear clean clothing and gloves; they shouldn’t suffer from infectious diseases or open wounds.
    • Traceability and Testing: Regular testing for antibiotics, microbial counts, and somatic cells ensures ongoing compliance.

    Principles of Clean Meat Production

    Meat production involves a multi-stage process from live animal to carcass. Hygiene is critical to prevent contamination and ensure food safety.

    1. Ante-Mortem Inspection: Healthy animals must be selected for slaughter. An official vet examines the animals to identify any signs of disease or injury.
    2. Proper Rearing and Transport: Animals should be raised in a clean environment, transported safely, and rested before slaughter to reduce stress and contamination.
    3. Cleanabbatoir Design: The slaughterhouse must be hygienically designed with separate areas for dirty and clean operations to avoid cross-contamination.
    4. Staff Hygiene: Workers must wear protective clothing, wash hands, and follow rigorous sanitation protocols.
    5. Clean Slaughtering Techniques: Use of sterilized knives, minimal contact between incisions, and avoiding puncturing the stomach or intestines to prevent fecal contamination.
    6. Chilling of Carcasses: Rapid cooling within 4-6 hours to below 7°C prevents bacterial growth.
    7. Skilled Deboning and Cutting: Work surfaces and tools must be sanitized; workers must handle meat with gloved hands.
    8. Packaging and Labeling: Use food-grade packaging and clear labels with storage instructions.

    Comparison: Clean Milk vs. Clean Meat Principles

    Stage Milk Production Meat Production
    Pre-harvest Udder health, cleanliness Animal health, feed quality
    Harvest Milking technique, equipment sanitization Slaughter techniques, evisceration care
    Post-harvest Cooling, cold chain Chilling, butchery hygiene
    Safety Testing for antibiotics and adulterants Meat inspection for pathogens

    Both milk and meat production share the core principle of prevention of contamination at every step. Also crucial is the concept of Hazard Analysis and Critical Control Points (HACCP), a systematic preventive approach that identifies potential hazards and ensures controls at each stage.

    The One Health Perspective

    Clean milk and meat production isn’t just a farming issue; it protects human health. Many zoonotic diseases such as tuberculosis, brucellosis, and salmonellosis can be transmitted through contaminated dairy and meat. By adhering to clean production principles, we contribute to the One Health framework, which recognizes the interconnection between people, animals, and the environment.

    Clean milk and meat production is the silent guardian of public health.

    Processing and Handling Dairy and Beef Cattle Products

    Once milk is harvested and beef is produced, proper processing and handling are essential to preserve quality, extend shelf life, and create diverse products for consumers. This section covers the key techniques for processing dairy and beef cattle products, from simple cooling to complex fermentation, and discusses the best practices for handling and storage.

    Dairy Processing: From Raw Milk to Value-Added Goods

    Dairy processing transforms raw milk into a wide range of products such as pasteurized milk, cheese, yogurt, butter, and cream. The primary goals are to ensure safety, improve shelf life, and create tailored products for different markets.

    1. Pasteurization

    Pasteurization is a heat treatment that destroys pathogenic microorganisms without drastically changing the milk’s nutritional quality. Common methods include:

    • High-Temperature Short-Time (HTST): Heating milk to 72°C for 15 seconds, the most common method.
    • Ultra-High Temperature (UHT): Heating to 135°C for 1-2 seconds, producing shelf-stable milk.
    • Low-Temperature Long-Time (LTLT): 63°C for 30 minutes, used in small-scale operations.

    2. Homogenization

    Homogenization is a mechanical process that breaks up fat globules into smaller particles, preventing cream separation. This results in a uniform, creamy texture and improved mouthfeel.

    3. Fermentation

    Fermentation uses beneficial bacteria to convert lactose into lactic acid, creating products like yogurt, kefir, and sour cream. This process extends shelf life and introduces probiotics beneficial to human gut health.

    4. Cheese Making

    Cheese production involves coagulating milk through rennet and/or acid, then pressing and aging to develop the final product. Different ripening processes produce hundreds of cheese varieties, from mozzarella to aged cheddar.

    5. Butter and Ghee

    Butter is made by churning cream to separate butterfat from buttermilk. Ghee is clarified butter made by evaporating water and removing milk solids, offering a high smoke point and longer shelf life.

    Dairy Product Handling and Storage

    • Cold Chain: Maintain a temperature of ≤4°C for fresh dairy, and ≤-18°C for frozen dairy.
    • Packaging: Use airtight, food-grade packaging to prevent contamination and light damage.
    • Stock Rotation: Follow FIFO (First-In, First-Out) to ensure freshness.
    • Hygiene: All equipment and surfaces must be sanitized to avoid reintroducing pathogens.

    Beef Processing: From Carcass to Consumer

    Beef processing is a complex chain that covers slaughtering, aging, cutting, and packaging. The goal is to produce tender, flavorful meat with minimal contamination risk.

    1. Slaughtering and Bleeding

    The animal is humanely stunned and killed, then bled to ensure meat quality and to promote hygienic handling. The bleeding process removes blood, which is a nutrient source for bacteria.

    2. Deboning and Carcass Chilling

    After removal of the hide and internal organs, the carcass is split and chilled. Chilling prevents bacterial growth and begins the process of rigor mortis resolution. Rapid chilling may cause cold shortening if applied too early, so controlled chilling is preferred.

    3. Aging

    Aging enhances tenderness and flavor. Two methods:

    • Wet aging: Vacuum-packed cuts stored for 7-28 days at 1-2°C.
    • Dry aging: Carcasses stored in humidity-controlled environments for 2-6 weeks, creating a concentrated flavor.

    4. Cutting and Packaging

    Cuts are deboned and trimmed, then packaged in vacuum bags or modified atmosphere packaging (MAP) to maintain color and extend shelf life. Ground beef is a higher-risk product due to increased surface area.

    5. Preservation Techniques

    • Refrigeration: Keeps meat at 0-4°C.
    • Freezing: at ≤-18°C, stops microbial growth.
    • Curing: Adding salt, nitrates, and spices (e.g., corned beef).
    • Smoking: Adds flavor and preserves meat through phenolic compounds.
    • Canning: Sterilization in airtight containers.

    By-Products Utilization

    Cattle processing creates valuable by-products beyond meat and milk:

    By-Product Use
    Hides Leather goods
    Tallow Soap, cosmetics, biodiesel
    Bones Gelatin, bone meal, fertilizer
    Blood Blood meal for animal feed (if processed properly)
    Hooves and Horns Animal feed, fertilizer, albumen

    Proper handling of by-products is crucial to prevent waste and pollution while adding an income stream.

    Processing turns perishable, low-value raw materials into durable, high-value goods.

    Marketing Strategies for Cattle Products and Bi-products

    Marketing is the bridge between production and consumption. For cattle products to be profitable, farmers must understand their target markets, differentiate their products, and utilize effective distribution channels. This includes not only primary products like milk and beef but also valuable by-products. Here are robust marketing strategies to maximize profitability.

    1. Know Your Market

    Conduct thorough market research to understand:

    • Consumer preferences: Demand for organic, grass-fed, or Halal/Kosher products.
    • Local vs. export: Identify whether selling locally or overseas yields better returns.
    • Competition: Assess existing suppliers and market gaps.

    2. Product Differentiation

    Stand out by offering unique characteristics:

    • Organic certification: Milk from pasture-fed cows without hormones or antibiotics.
    • Grass-fed beef: Higher in omega-3 fatty acids and CLA.
    • Traditions & provenance: Highlight specific breeds or local farming heritage.
    • Value-added products: Cheese, yogurt, sausages, or jerky to attract diverse customers.

    3. Pricing Strategies

    Choose a pricing model that reflects costs and value:

    • Cost-plus pricing: add a margin to production cost.
    • Value-based pricing: charge based on perceived value (e.g., premium for organic).
    • Competitive pricing: price similar to competitors.
    • Promotional pricing: offer discounts to trial and retain customers.

    4. Distribution Channels

    • Farm gate sales: Direct to local consumers, maximizing farmer’s revenue.
    • Farmers’ markets: Ideal for building relationships and showcasing quality.
    • Retail supermarket chains: Requires consistent volume and packaging.
    • Hotels, restaurants, and institutions: Long-term contracts for fresh, quality products.
    • E-commerce and home delivery: Growing trend; use a website or apps like FarmLink.

    5. Branding and Packaging

    Invest in effective branding:

    • Farm brand: Create a memorable logo, story, and mission.
    • Packaging design: Use eye-catching, eco-friendly labels with clear information about origin, ingredients, and certifications.
    • Transparency: Include QR codes for traceability to build consumer trust.

    6. Marketing Bi-products

    don’t neglect by-products; they can contribute significant income:

    • Manure: Sell as organic fertilizer directly to gardeners or through landscaping companies.
    • Hides: Partner with tanneries; sell exotic or branded leather goods.
    • Horn and bone: Craft souvenirs or dog chews.
    • Blood and offal: Market to pet food producers or specialized chefs (e.g., blood sausage).

    7. Regulatory Compliance and Certifications

    Certifications like Organic, Non-GMO, Animal Welfare Approved, or GlobalG.A.P. enhance credibility and access to niche markets. Ensure your operation meets all food safety regulations, as compliance is a marketing advantage in itself.

    8. Digital Marketing and Social Media

    Leverage online platforms to reach a wider audience:

    • Website: Showcase products, practices, and ordering info.
    • Social media: Use Instagram and Facebook for visual storytelling—share farm life, product photos, and health benefits.
    • Email marketing: Build a newsletter list to inform customers about specials and arrivals.
    • Influencer collaborations: Partner with food bloggers or local chefs to promote your products.

    9. Direct Marketing and Agri-Tourism

    Invite the public to your farm. Set up a farm stall, host dairy days, or provide tours. Experience-based marketing creates loyal customers who understand and value your practices.

    Selling the product is the last step; the true essence of marketing is creating demand and trust.

    Frequently Asked Questions

    Why is fore-stripping important even with clean cows?

    Fore-stripping removes the thick, high-bacteria milk that accumulates in the teat canal between milkings. This milk is unsuitable for consumption and can contaminate the bulk tank. It also allows you to detect mastitis early. As part of hygienic milking, it lowers the milk’s overall bacterial count and improves milk quality.

    How often should I use a strip cup?

    It should be a routine practice for every milking, for every cow, not just when you suspect an issue. Regular monitoring helps you establish a baseline and quickly catch subtle changes. Cows that are recovering from mastitis should be checked more frequently.

    What are the biggest contaminants in milk?

    The biggest biological contaminants are pathogenic bacteria like Salmonella, Listeria monocytogenes, E. coli, and Staphylococcus aureus. Chemical contaminants include antibiotics residues, pesticides, and cleaning agents. Physical contaminants (dirt, hair) can also occur if hygiene is poor.

    How can I tell if my beef is clean?

    Clean beef relies on prevention of contamination. Look for (or ensure) a hygienic slaughter environment, proper chilling, and intact packaging. At the consumer level, fresh beef should have a bright cherry-red color, no off-odors, and be firm to the touch. Properly processed beef will have undergone ante-mortem and post-mortem inspections.

    What is the ideal temperature for milk storage?

    Milk should be rapidly cooled to 4°C or below and maintained at that temperature to prevent bacterial growth. During transportation, bulk tanks must sustain that cold chain. For cheese or yogurt, specific storage conditions vary, but cold refrigeration is generally required.

    Can I sell milk directly to consumers without pasteurization?

    Raw milk sales are governed by state/country regulations. In many places, raw milk can be sold directly to consumers under strict licenses and safety warnings. It is important to check local laws and ensure extremely high hygiene to protect public health.

    How do I market cattle by-products effectively?

    Identify niche markets for each by-product. for instance, organic fertilizer can be sold to local gardeners, hides to leather craftsmen, and bones to artisans. Using online platforms and local word-of-mouth can help. Highlight the sustainable and natural aspects of your by-products.

    Conclusion

    Hygienic milking techniques and quality cattle handling aren’t optional extras; they are the backbone of a successful and ethical cattle operation. By implementing rigorous hygiene protocols, utilizing simple tools like the strip cup, and adhering to the principles of clean milk and meat production, you protect the health of your herd, the safety of your consumers, and the profitability of your business. Processing transforms raw products into appealing goods, while intelligent marketing ensures they reach the right customers. As consumer expectations rise and global standards tighten, every cattle farmer must be a steward of quality. Remember: the journey from cow to kitchen is a promise of purity—keep it sacred.

    By embracing these practices, you not only comply with regulations but also build a reputation for excellence that keeps customers coming back. The future of cattle farming lies in sustainable, hygienic, and market-aware approaches. Go ahead, apply these standards, and watch your farm prosper.

  • Routine Husbandry Practices: Identification, Dehorning and Castration

    Routine Husbandry Practices: Identification, Dehorning and Castration

    Cattle standing in a Ugandan zero-grazing unit while a farmer checks an ear tag
    A Ugandan zero-grazing unit, where cattle are identified and handled daily.

    Routine cattle husbandry practices are the regular, scheduled tasks a farmer performs on every animal to keep the herd identifiable, safe, productive and healthy. Three of them — identification, dehorning and castration — are taught together in the NCDC Senior 3 Agriculture syllabus because they follow one rule: do each one at the right age, with the right tools, and by a competent person.

    These notes explain each practice with numbered steps, comparison tables and exam guidance. They also cover the animal register and low-stress handling, because identification and safe restraint are what turn a good practice into a safe, welfare-friendly one.

    This article follows the NCDC Agriculture Syllabus (2019, ISBN 978-9970-00-120-0), Senior 3, Term 1, Topic “Cattle production” under the theme “Animal Production”, allocated 48 periods. Its competency states that the learner “selects desirable cattle for production and breeding and carries out all processes involved in their rearing.”

    Outcome (m) requires learners to “carry out identification, dehorning, and castration in cattle”, outcome (l) covers record keeping, and outcome (o) covers handling cattle products. These are part of our wider Senior 3 Agriculture notes on cattle production and the full Senior 3 Agriculture notes.

    Put simply, identification tells one animal from another, dehorning removes the horns, castration removes the testicles of a male, record keeping writes these events down, and handling moves and restrains cattle safely. These five routine cattle husbandry practices make up the practical half of cattle production.

    Every one of the three surgical practices is welfare-sensitive, which means it must be done at the correct age by a competent person — animal welfare matters as much as productivity.

    Cattle identification methods including tagging and microchips

    Cattle identification is the practice of marking each animal so it can be recognised, counted and traced through its whole life. In the Senior 3 syllabus it includes ear tags, ear notching, branding, tattoos and microchips, all tied back to the farm register. Identification is the first of the routine cattle husbandry practices to get right, because every other record hangs off the animal’s number.

    • Permanent identification means the mark lasts for the animal’s whole life, so a cow can be recognised from birth through to culling or sale.
    • Ear tags are numbered plastic or metal tags fixed through the ear; the number on the tag is the same number written in the farm register.
    • Ear notching cuts small V-shaped notches into the edge of the ear in a coded pattern, so the animal can be identified even if a tag is lost.
    • Hot-iron branding burns a number or symbol into the skin, leaving a permanent scar that is readable from a distance without catching the animal.
    • Freeze branding uses very cold irons to kill the pigment cells, so pale hair grows back in the shape of the brand.
    • Tattooing pierces the inside of the ear with ink numbers; the mark is permanent but must be read close up by an inspector.
    • Microchips are tiny electronic devices injected under the skin that carry a unique number read with a scanner and stored using ICT.
    • The farm register ties them together because every tag, notch, brand, tattoo or chip number is recorded against the animal’s name and history.
    • Tags suit zero-grazing units where animals are handled daily and the number is read during milking, treatment or feeding.
    • Brands suit large, extensively grazed herds because the mark cannot fall off and is seen even when the animal is far away on a communal grazing area.
    • Notching is low-cost and permanent, which suits a smallholder farmer who cannot afford tags or microchips for every single animal.
    • Microchips suit registered breeding stock because the electronic number cannot be copied and links to pedigree and production records.
    • Cost and durability are traded off: tags and microchips cost more but are quick to read, while brands and notches cost less and last for life.
    • The syllabus treats identification as a skill, with its record-keeping activity naming “tagging, identification marks, plus chips; using ICT where applicable”.
    MethodDurabilityRelative costTypical use in Uganda
    Ear tagLost unless applied wellModerateStandard on zero-grazing dairy units; the number links to the register
    Ear notchingPermanentLowSmallholder herds; survives even when a tag is lost
    Hot-iron brandingPermanentLowLarge extensively grazed and communal herds; readable at a distance
    Freeze brandingPermanentModerateRegistered herds wanting a clear mark with less tissue damage
    TattooPermanent but can fadeLowBreeding herds where an inspector reads the ear close up
    MicrochipLong-lasting deviceHighRegistered pedigree and breeding stock kept with ICT records

    Exam tip: when a question asks for methods of identifying cattle, name the method and then one reason you would choose it. For example, “ear tags — because the number links the animal to the farm register.”

    Before you mark an animal, you need to be able to describe its breed and build, so start from our notes on breeds and physical selection of production cattle.

    Practical steps for dehorning cattle

    Dehorning is the removal of a calf’s horn buds, or a grown animal’s horns, to protect handlers and other cattle from injury. Dehorning is one of the routine cattle husbandry practices that must be done early, while the horn bud is still free under the skin and before it fuses to the skull. The NCDC syllabus lists dehorning as a skill learners must carry out safely and humanely.

    Cattle with horns injure each other at the feed trough and injure the people who milk, treat and move them. Horned animals also need more space in a crush or zero-grazing unit, and they can bruise or gore valuable animals. Removing horns early makes handling calmer and safer for the animal and the farmer alike.

    A calf held safely in a wooden crush pen on a Ugandan farm for dehorning
    A wooden crush pen of the kind used to restrain a calf safely during dehorning.
    StepActionSafety or welfare point
    1Check the ageConfirm the calf is within its first few weeks of life while the horn bud is still free under the skin; doing it at the right age causes less pain and avoids a bigger operation later.
    2Prepare the toolsClean and ready the disbudding iron or caustic paste, plus antiseptic and clean water; a hot iron must reach working temperature before use.
    3Restrain the calfHold the calf in a calf crush or have a second person hold it firmly but calmly; correct restraint protects both the calf and the handler from sudden movement.
    4Give pain reliefApply local anaesthetic or sedation as a veterinarian advises; pain relief is a welfare requirement, not an optional extra.
    5Locate the budFeel for the small round horn bud under the skin; take care not to burn or paste surrounding skin or the eyes.
    6Apply the iron or pastePlace the hot iron over the bud, or apply caustic paste only to the bud itself; over-application damages skin and delays healing.
    7Remove the budIf the iron is used, lift the bud ring off cleanly; a clean removal reduces the chance of horn regrowth.
    8Protect the woundApply antiseptic and, if needed, a fly repellent; flies carry infection and an open wound invites them.
    9Release and watchLet the calf back to its pen and observe it for signs of distress; early spotting of a problem prevents serious illness.
    10Keep the wound cleanCheck the site daily and clean any discharge; a clean wound heals in days while a dirty one becomes a swelling.
    11Watch for infectionLook for heat, swelling, pus or loss of appetite; infection or fly strike needs treatment straight away.
    12Record the procedureWrite the date and method in the animal register or treatment record; the record proves the calf was done and shows when.
    13Never dehorn an adult without careGrown horns need a veterinarian, sedation and sterile cutting; removing mature horn is a surgical act and must not be improvised.

    Animal welfare has legal backing in Uganda through the Animals (Prevention of Cruelty) Act, Cap. 39, which the Ministry of Agriculture inspection procedures list alongside the disease laws. A calf dehorned gently, at the right age and with pain relief, recovers fast and keeps growing. A calf done roughly, with dirty tools or no restraint, suffers pain and infection and may even die of the wound.

    Common mistake: writing that dehorning is only about human safety. It also protects other cattle and makes management easier. In an exam, give at least two reasons — safety of handlers, and prevention of injuries between animals.

    Methods and safety in cattle castration

    Castration is the removal or destruction of a male animal’s testicles so it cannot breed. It is done to control breeding, to make male cattle calmer and easier to manage, and to improve the quality of meat. Of all routine cattle husbandry practices, castration carries the highest welfare stakes, because an open wound in a warm climate can become infected or fly-struck very quickly.

    • The Burdizzo (bloodless) method crushes the spermatic cord with a clamp, cutting off the blood supply so the testicles shrink inside the scrotum.
    • Rubber ring castration stretches a tight rubber ring over the scrotum of a very young calf, so the testicles wither and drop off.
    • Surgical (open) castration cuts open the scrotum with a clean blade and removes the testicles, and needs sterile tools and pain relief.
    • Age matters for each method: the rubber ring suits calves in their first week or two of life, the Burdizzo suits young bulls of a few months, and surgery suits older bulls.
    • The Burdizzo is bloodless because it leaves the skin intact, which lowers the risk of bleeding and fly strike compared with an open wound.
    • The rubber ring is simple but must be used early, because older animals feel more pain and the ring may not cut off the blood supply cleanly.
    • Surgery must be done by a competent person under clean conditions, with a sharp sterile knife and proper restraint, or infection and bleeding can kill the animal.
    • Pain relief and anaesthesia are welfare essentials for every method, and especially for surgical castration and for older animals.
    • Tetanus protection matters where the skin is cut or the wound is open, so the risk of tetanus infection is considered around the procedure.
    • Fly strike is a real risk in Uganda’s warm climate, so open wounds are treated and watched closely until they heal.
    • Restraint comes first because a struggling animal can injure itself or the operator; use a crush or a firm helper.
    • Sterile technique prevents infection, so every blade, clamp and the operator’s hands are cleaned before the procedure begins.
    • Castration changes behaviour and growth, making males calmer, easier to keep with females and better for beef finishing.
    • The animal register records the event — date, method and any treatment — so the farm can show the animal was managed correctly.
    StepActionSafety or welfare point
    1Choose the method by ageRubber ring for very young calves, Burdizzo for young bulls, surgery for older animals; using the wrong method for the age causes unnecessary pain and risk.
    2Assemble clean toolsSterilise the Burdizzo, ring applicator or scalpel and have antiseptic ready; sterile tools are the first defence against infection and tetanus.
    3Restrain the animalHold it in a crush or cradle so the rear legs cannot kick the operator; restraint protects the animal and the person doing the job.
    4Give pain reliefUse anaesthetic or sedation as a veterinarian advises; pain relief is a welfare duty, not an afterthought.
    5Clean the scrotumWash and disinfect the area before any cutting or clamping; a dirty site pushes bacteria into the wound.
    6Burdizzo: clamp each cordClamp each spermatic cord in turn for the correct time; clamping one cord at a time is safer than clamping both at once.
    7Rubber ring: seat the ringStretch the ring over the scrotum above both testicles; both testicles must sit below the ring or the job is incomplete.
    8Surgical: open and removeMake a clean cut and remove each testicle with sterile handling; torn tissue bleeds more and heals slowly.
    9Control bleedingApply pressure or a clean dressing if bleeding continues; uncontrolled bleeding is an emergency.
    10Apply antisepticDress the wound and apply fly repellent where the skin is open; flies and dirt cause infection in warm weather.
    11Release and observeWatch the animal for swelling, bleeding or distress in the following hours; early care prevents most complications.
    12Check daily until healedInspect for heat, swelling, discharge or maggots; fly strike on a fresh wound can be fatal if missed.
    13Record the castrationWrite date, method and aftercare in the treatment record; the record proves correct management and guides future care.
    MethodHow it worksTypical ageBloodless?Main safety / welfare point
    BurdizzoCrushes the spermatic cords with a clampYoung bulls, a few months oldYesNo open wound, so less bleeding and fly risk; needs correct clamp technique
    Rubber ringTight ring cuts off blood to the scrotumCalves in their first week or twoYesSimple but only for very young calves; place both testicles below the ring
    Surgical (open)Incision removes the testiclesOlder bullsNoFull pain relief and sterile technique are essential; done by a competent person

    Exam tip: name the method, the age it suits, and one safety point in the same sentence. For example, “the rubber ring is used on calves in their first week or two of life, and the operator must make sure both testicles sit below the ring.”

    Keeping animal registers and production record cards

    Record keeping is writing down the identification, breeding, production and treatment details of every animal on the farm. The NCDC syllabus names the animal register, record cards and record sheets, and expects these to be linked to tagging and identification marks, with ICT used where available. Record keeping turns the other routine cattle husbandry practices into decisions, because a written record, not memory, shows which animal is productive, sick or due to calve.

    • The animal register is the master book of every animal, with its number, breed, sex, date of birth, parentage and movement on and off the farm.
    • The production record card tracks the output of each animal — milk yield, growth, weight and other production data over time.
    • Breeding records show service dates, the sire used, pregnancy checks and calving dates so the farmer can plan matings.
    • Treatment records list every disease, vaccination, deworming, dehorning and castration, with the date and the medicine used.
    • Milk production records record daily or weekly yield per cow, which shows which animals pay for their feed and which do not.
    • Feed records link what each animal eats to what it produces, so the farmer can judge whether a ration is worth its cost.
    • Identification links every record, because the tag, notch, brand or chip number is the same number written on every card for that animal.
    • Records use ICT where available, with spreadsheets or farm apps replacing paper cards and reducing arithmetic errors.
    • Record sheets are the day-to-day working pages, such as a milking sheet or a vaccination list, later summarised into the register.
    • Accuracy is everything, because a wrong date or number makes the whole record useless for decisions.
    • Records support profit decisions by showing which cows to keep, cull, breed or treat rather than guessing.
    • Records support traceability, so an animal’s history can be shown to a buyer or a veterinary officer when asked.
    • The syllabus requires records under outcome (l), “keep records of breeding, management, and production”.
    • Common mistake: keeping records in the memory. Memory fails; the register and cards do not.
    Record typeFields each record must carry
    Animal registerAnimal number, tag/notch/brand/chip number, breed, sex, date of birth, parentage, date of entry, date of exit or death
    Production record cardAnimal number, milk yield or weight per period, feed given, production trends
    Breeding recordDam and sire, service date, sire used, pregnancy check, expected and actual calving date
    Treatment recordAnimal number, date, disease or procedure, medicine or method, dose, name of person treating, outcome
    Milk production recordCow number, date, morning and evening yield, total, notes on milk quality
    Feed recordDate, animal or group, feed type, quantity, cost, and the production that resulted

    Exam tip: when asked “what is an animal register?”, write its purpose and two of its fields. For example, “the animal register is the master record of every animal; it carries the animal number and its breed, sex and date of birth.”

    A treatment record is where husbandry meets health, so it sits naturally beside our notes on the prevention and control of cattle diseases.

    Practical livestock handling techniques

    Livestock handling is the way a farmer moves, restrains and works with cattle so that neither the animal nor the person is hurt. The two ideas that make it work are the crush or race, which holds the animal safely, and the flight zone, which tells you how close you can get before the animal moves away.

    Of all the routine cattle husbandry practices, safe handling is the one that protects every other task on this page.

    A farmer moving cattle quietly through a wooden race on a Ugandan farm
    Cattle moved calmly through a race, using the flight zone rather than force.
    • A crush (or race) is a narrow pen that holds one animal still for treatment, tagging, dehorning or castration, with walls that stop it from turning.
    • A crush pen is part of the Ugandan zero-grazing unit, with a floor of well-firmed murram soil mixture and walls of wooden poles, according to the ILRI/NDDP specification.
    • The flight zone is the invisible space around an animal; step inside it and the animal moves away, stay outside it and it stays calm.
    • The point of balance sits at the animal’s shoulder; stand behind it and the animal moves forward, stand in front and it stops or backs up.
    • Low-stress movement uses the flight zone and point of balance to ask the animal to move, instead of shouting, hitting or chasing.
    • Calm cattle are safer cattle, because a frightened animal kicks, charges and hurts itself or the handler.
    • Move slowly and quietly, avoiding sudden noise, because cattle see and hear far better than many learners expect.
    • Use visual barriers such as solid sides on a race, because cattle balk at shadows, gaps and movement they can see.
    • Never rush a cow into a crush; give it time to look and step in, because forcing it causes a fight that wastes time.
    • Approach from the side, not directly behind, because the blind spot behind an animal is where a kick is most dangerous.
    • A firm but calm helper is safer than a crowd; one person at the head and one at the gate is usually enough.
    • The crush is where the earlier practices happen, because tagging, dehorning, castration and treatment all need a still, safely held animal.
    • Handling is a syllabus skill, listed under outcome (o), “show skills in handling cattle products and bi-products”.
    • Common mistake: thinking speed is skill. Skilled handling is quiet and slow, and it finishes the job sooner.

    Exam tip: describe a crush by its purpose and one design feature. For example, “a crush is a narrow pen that holds one animal still for safe treatment; its solid sides keep the animal calm by blocking what it can see.”

    Calm, clean handling flows straight into hygienic milking techniques and quality cattle handling, because a stressed cow gives less milk and is harder to milk safely.

    Frequently asked questions about routine husbandry practices

    Why do farmers identify their cattle?

    Identification lets a farmer tell each animal apart, count the herd, and link every record to the right cow. The NCDC Senior 3 syllabus includes ear tags, ear notching, branding, tattoos and microchips for this. In Uganda, identification also helps prove ownership and trace an animal from birth to sale.

    At what age should a calf be dehorned?

    A calf should be dehorned, or disbudded, in its first few weeks of life while the horn bud is still free under the skin and before it fuses to the skull. Doing it early is quicker, less painful and safer than cutting a grown horn, which is a surgical job for a veterinarian.

    What is the difference between the Burdizzo method and surgical castration?

    The Burdizzo is a bloodless method that crushes each spermatic cord with a clamp, leaving the skin unopened, so there is less bleeding and fly risk. Surgical castration cuts the scrotum open and removes the testicles, so it needs full pain relief, sterile tools and a competent operator.

    What is a flight zone in cattle handling?

    The flight zone is the invisible space around a cow. When a person steps inside it, the animal moves away; when the person stays outside it, the animal stays calm. Skilled handlers use the flight zone and the point of balance to move cattle quietly instead of chasing them.

    What records must a cattle farmer keep?

    The NCDC syllabus names the animal register, record cards and record sheets. A good farm also keeps production, breeding, treatment, milk and feed records, all linked by the animal’s tag or identification number. These records show which animals are productive, which are sick and which are due to calve.

    Why are identification, dehorning and castration called welfare-sensitive practices?

    All three are routine cattle husbandry practices carried out on a live animal, and each can cause pain or infection if done at the wrong age, with dirty tools or by an unskilled person. Uganda’s Animals (Prevention of Cruelty) Act, Cap. 39, backs animal welfare. Doing each practice humanely protects the animal and keeps it productive.

    Key terms and revision summary

    Glossary

    TermMeaning
    Animal registerThe master record of every animal on the farm, carrying its number, breed, sex and dates of entry and exit.
    Ear tagA numbered plastic or metal tag fixed through the ear, linking the animal to its register entry.
    Ear notchingCutting coded V-shaped notches in the ear edge to identify an animal permanently.
    MicrochipA tiny electronic device injected under the skin, carrying a unique number read with a scanner.
    DisbuddingRemoving the horn bud of a young calf before the horn grows and fuses to the skull.
    DehorningRemoving a grown horn, a surgical procedure done by a competent person with pain relief.
    CastrationRemoving or destroying the testicles so a male animal cannot breed.
    BurdizzoA bloodless clamp that crushes the spermatic cords without opening the skin.
    Rubber ringA tight ring placed over the scrotum of a very young calf so the testicles wither and drop.
    Flight zoneThe space around an animal that, when entered, makes it move away.
    CrushA narrow pen that holds one animal still for safe treatment and handling.
    Production record cardA card tracking the output of one animal, such as milk yield or weight, over time.

    Exam-style questions

    1. Outline four methods of identifying cattle and state one reason for choosing each. Answer outline: ear tag (links to the register); ear notching (permanent and low cost); branding (readable at a distance); microchip (electronic, for registered stock).
    2. Describe the steps you would follow to dehorn a young calf safely. Answer outline: check the age; prepare clean tools; restrain; give pain relief; locate the bud; apply the iron or paste; protect the wound; observe and record.
    3. Compare the Burdizzo method and the rubber ring as methods of castrating cattle. Answer outline: Burdizzo is a bloodless clamp for young bulls that crushes the cords; the rubber ring is a tight ring for calves in their first week or two that cuts off blood; both avoid an open wound.
    4. Explain why records are kept on a cattle farm. Answer outline: to identify productive animals; to plan breeding; to track treatment; to support profit and traceability.
    5. What is a flight zone and how is it used in low-stress cattle handling? Answer outline: it is the invisible space around an animal that makes it move away when entered; a handler uses it with the point of balance at the shoulder, moving slowly and quietly.

    Revising these routine cattle husbandry practices is fastest when you can name each practice, its purpose and one safety point in a single sentence.

  • Cattle Management Systems: Extensive, Semi-Intensive & Intensive – A Complete Guide

    Cattle Management Systems: Extensive, Semi-Intensive & Intensive – A Complete Guide

    Cattle management is the practice of overseeing and caring for cattle to optimize their productivity, health, and well-being. The choice of management system determines how animals are housed, fed, bred, and handled, and directly impacts economic returns and environmental sustainability. Broadly, cattle management systems fall into three categories: extensive, semi-intensive, and intensive. These systems represent a spectrum of input intensity, land use, and capital investment. In this comprehensive guide, we will delve into each system, evaluate their features, and discuss their suitability for dairy and beef production. Whether you are a smallholder farmer or a large commercial operator, understanding the distinctions among these systems is crucial for making informed decisions.

    Distinction between cattle management systems

    The fundamental difference between extensive, semi-intensive, and intensive cattle management lies in the amount of external inputs (feed, labor, capital, technology) and land used per animal. Extensive systems rely on vast land areas with minimal inputs; intensive systems concentrate animals in small spaces with high inputs; semi-intensive systems fall somewhere in between. To clarify the distinction, the table below compares key parameters across the three systems.

    Parameter Extensive Semi-Intensive Intensive
    Land per animal Very high (5–20 ha per head) Moderate (0.5–2 ha per head) Very low (0.1 ha or less)
    Inputs (feed, fertilizer, etc.) Minimal Moderate High
    Labor requirement Low Medium High
    Capital investment Low Medium High
    Stocking density Very low (e.g., 1 animal per 10 ha) Medium (5–10 animals per ha) High (>100 animals per ha)
    Housing None or minimal shelters Simple shelters or night pens Complete barns/feedlots
    Feeding Natural pasture grazing Grazing + supplementation Total mixed ration (TMR) or concentrate-based
    Health management Limited veterinary intervention Regular vaccination & treatment Proactive herd health programs
    Productivity per animal Low Medium High

    Extensive systems are common in areas with abundant land and low rainfall, such as the ranchlands of the Americas or African savannas. Intensive systems dominate in regions with scarce land and high demand for beef and milk, like the Netherlands and Israel. Semi-intensive systems are widespread among medium-scale farms in developing countries, offering a balance between productivity and cost.

    Key takeaway: The distinction isn’t binary but a continuum—farms often adopt practices from more than one system to suit their unique conditions.

    Evaluation of extensive cattle management

    Extensive cattle management is the most traditional and land-dependent system. It relies on large grazing areas, often with native pastures, and minimal external inputs. This system is widely used in rangelands, savannas, and mountainous regions where land is cheap and abundant but pasture quality is variable.

    Characteristics of Extensive Systems

    • Low input reliance: Cattle feed almost exclusively on natural forage; no or little supplemental feeding is provided.
    • Low labor and capital requirement: Because animals are free-roaming, fencing and handling infrastructure are minimal.
    • Seasonal variation: Weight gain and milk production closely follow rainfall and grass growth patterns, leading to a “boom and bust” cycle.
    • Minimal veterinary intervention: Health care is often reactive rather than preventive, and animals may go untreated unless severe illness occurs.
    • Breeding is generally uncontrolled: Bulls run with cows throughout the year, leading to calving seasons spread over long periods.

    Advantages of Extensive Systems

    1. Low financial investment: No expensive housing or feed requirements; the primary cost is land, and if land is family-owned, cash expenditure is minimal.
    2. Animal welfare: Animals exhibit natural behaviors—grazing, moving, socializing—which reduces stress-related diseases.
    3. Sustainable on proper stocking rates: When managed correctly, extensive systems can maintain grassland biodiversity and soil health.
    4. Resilience to price fluctuations: With low input costs, farmers can withstand periods of low beef or milk prices more easily than intensive producers.

    Disadvantages of Extensive Systems

    1. Low productivity: Growth rates and yields are low, often 150–250 g/day for beef and 5–10 kg/day for dairy, compared to 1–1.5 kg/day and 30–40 kg/day respectively, in intensive systems.
    2. Vulnerability to drought and climate change: Excessive reliance on rainfall makes herds susceptible to poor nutrition and die-offs.
    3. Inefficient land use: Huge area per animal, which may be economically unviable in regions with high land value.
    4. Difficulty in health management: Farmers rarely see animals, making early disease detection nearly impossible.
    5. Overgrazing risk: Without careful paddock rotation, overgrazing leads to land degradation and reduced future carrying capacity.

    Economic and Environmental Assessment

    From an economic perspective, extensive systems offer low margins per hectare but also low capital exposure. This makes them attractive for investors seeking low-risk, low-return assets. Environmentally, they can be neutral or positive if managed under holistic planned grazing, which mimics natural herd movements. but, poorly managed extensive ranching is a leading cause of deforestation and desertification in places like the Amazon and Sub-Saharan Africa.

    Evaluation of Extensive Systems for Smallholders

    For smallholders, an extensive system is often the only feasible option due to limited capital. but, they can improve outcomes by introducing improved pasture, providing mineral licks, and dividing land into paddocks to control grazing. These practices move them toward semi-intensification without heavy investment.

    Verdict: Extensive systems are best suited for beef cattle in expansive, low-cost land areas and for subsistence farming. They aren’t suitable for high-yield dairy production.

    Features of semi-extensive cattle rearing

    Semi-extensive cattle rearing is a pragmatic compromise between extensive and intensive systems. It allows cattle to graze naturally but adds inputs to boost productivity and manage risks. This system is popular among medium-scale farmers in emerging economies, where land is limited but not extremely costly.

    Key Features of Semi-Intensive Systems

    • Controlled grazing: Fields are fenced and divided into paddocks; rotational grazing is often practiced to maintain pasture quality.
    • Supplemental feeding: During dry seasons or when pasture is scarce, farmers provide hay, silage, crop residues, or concentrates.
    • Basic housing: Animals have access to simple shelters or night enclosures to protect them from extreme weather and predators. These structures may be made of locally available materials.
    • Improved pasture: Farmers may introduce leguminous forages like Leucaena or Desmodium to enhance fodder quality.
    • Health care: Regular vaccination and deworming are practiced, and farmers have access to veterinary services.
    • Defined breeding periods: Controlled mating (e.g., seasonal calving) allows for better resource planning.
    • Moderate stocking density: Typically 1–2 animals per hectare, which is higher than extensive but lower than intensive.

    Advantages and Disadvantages

    Advantages Disadvantages
    Better productivity than extensive (150–400 kg beef gain/year or 8–15 kg milk/day) Requires more labor and management skills
    Lower capital requirement compared to intensive Still dependent on weather and pasture growth
    Improved animal welfare due to freedom and space Investment needed for fencing and shelters
    Flexible to scale up with available resources May not achieve high enough yields for commercial markets
    Sustainable if grazing is properly managed Need for regular pasture renewal and maintenance

    Management Practices in Semi-Extensive Systems

    To maximize efficiency, semi-extensive farmers often implement rotational grazing, where animals are moved to a new paddock every few days, allowing pasture regrowth. This practice increases forage yield by up to 30% and reduces parasite burden. Additionally, farmers may plant fodder crops like maize or Napier grass specifically for the dry season. This system also encourages the integration of livestock with crop production, as animal manure can be used to fertilize crops.

    A good example is the zero-grazing semi-intensive models in Kenya, where dairy cows are kept in a zero-grazing unit during the night but graze on a small fodder plot during the day, receiving concentrates at milking.

    Key takeaway: Semi-extensive systems offer a middle ground that is both economically and environmentally viable for many farms, especially where labor is available but capital is limited.

    Intensive cattle management systems

    Intensive cattle management involves the confinement of animals in high-density facilities where every aspect of their environment (feed, water, climate, health) is controlled to maximize output. This system is designed for maximum efficiency and is widely used in developed countries and for dairy cattle worldwide.

    Components of Intensive Systems

    1. Housing and Infrastructure

    Animals are kept in barns, sheds, or feedlots with concrete or slatted floors. The design ensures easy cleaning, good drainage, and adequate ventilation to prevent respiratory diseases. For dairy herds, the farm typically has a milking parlor, which can be rotary or herringbone, equipped with automatic milk harvesters.

    2. Feeding and Nutrition

    Nutrition is scientifically formulated. Dairy cattle receive a Total Mixed Ration (TMR) composed of silage, hay, grains, oilseed meals, vitamins, and minerals. Beef cattle in feedlots are fed high-energy grain diets to achieve rapid weight gain. Water is supplied ad libitum via automatic drinkers. This precision feeding allows daily gains of 1.5–2 kg for beef and milk yields exceeding 35 kg/day for dairy.

    3. Health and Biosecurity

    Intensive systems implement strict biosecurity protocols, including vaccination schedules, quarantine for new arrivals, and regular footbaths for disinfection. With animals in close quarters, diseases like mastitis (dairy) and bovine respiratory disease (feedlot) can spread quickly, so vigilant monitoring is essential.

    4. Breeding and Genetics

    Artificial insemination (AI) and embryo transfer are commonly used. These technologies allow rapid genetic improvement, selecting for high milk yield, feed conversion, or marbling.

    5. Animal Welfare Considerations

    While intensive systems provide consistent nutrition and protection from weather, they often raise welfare concerns. Confinement restricts natural behaviors, leading to issues like lameness in dairy cows and tail biting in feedlot cattle. but, modern intensive systems have improved by providing enriched environments, comfortable bedding (cubicles), and precision monitoring for early detection of health problems.

    Advantages and Disadvantages of Intensive Systems

    Advantages Disadvantages
    Highest productivity per animal and per unit area High initial capital and operating costs
    Year-round consistent production, irrespective of season Dependence on external feed and energy supplies
    Efficient management and collection of animal waste Waste management challenges (nitrogen, phosphorus runoff, ammonia)
    Reduced pressure on land, allowing farms near urban centers Skilled labor and technical know-how required
    Better control of diseases through biosecurity Risk of rapid disease spread due to high density
    Animal welfare can be maintained with good design Potential for negative public perception regarding animal confinement

    Examples of Intensive Systems

    • Dairy zero-grazing: Cows are housed all year, with no access to pasture. Common in Israel, Netherlands, and parts of the US.
    • Beef feedlots: Concentrated Animal Feeding Operations (CAFOs) where cattle are fed high-grain diets for the last 90–120 days before slaughter. Mainly used in the US, Australia, and Canada.
    • Stall-fed smallholder dairying: In many Asian and African cities, urban farmers keep cows in stalls and bring chopped fodder to them. This is a low-capital but intensive system due to the lack of grazing.

    Verdict: Intensive systems are essential for meeting the protein demands of a growing global population. but, they must be adopted with a focus on sustainability and animal welfare.

    Suitability of management systems for dairy and beef cattle

    The choice of management system significantly impacts the profitability, animal health, and environmental footprint of cattle farming. Different classes of cattle—dairy versus beef—have different metabolic and behavioral needs. Let’s examine which system is most suitable for each.

    Suitability for Dairy Cattle

    Intensive systems are the most suitable for high-yielding dairy breeds such as Holsteins and Jerseys. These animals produce large quantities of milk (30–50 kg per day), requiring an energy-dense diet that can only be provided through TMR feeding. Intensive housing also protects the udder from environmental pathogens and facilitates milking. Countries like Israel and Germany rely almost exclusively on intensive dairy systems.

    Semi-extensive systems can work in smallholder dairy farming, especially for indigenous or crossbred cattle that produce 5–15 kg per day. for instance, in the Kenyan Highlands, cows graze on Napier grass for a few hours and receive supplements at milking. This system reduces feed costs and maintains some cow comfort.

    Extensive systems are generally not suitable for dairy because low and fluctuating nutrition results in unacceptably low milk yields, and long distances to gathering points make daily milking impractical. but, in some pastoral communities, zebu cattle are milked after grazing, but yields are often below 3 kg/day.

    Suitability for Beef Cattle

    Extensive systems are ideal for cow-calf operations and backgrounding. The vast rangelands of Brazil, Australia, and Argentina produce beef at very low cost, with animals gaining weight slowly on grass. These systems are suitable for mature bulls, heifers, and steers not intended for high-grade markets. They are also more environmentally sustainable in terms of carbon footprint.

    Semi-intensive systems are recommended for finishing cattle where grain supplements are available. For instance, a farmer might graze cattle for 18 months and then feed them concentrates for the final 3–4 months to achieve desirable carcass weight and marbling. This is common in Southern Africa and parts of Europe.

    Intensive feedlots are best for producing high-quality, marbled beef quickly. In the US, cattle in feedlots gain 1.5–2 kg/day and are marketed at 12–14 months. This system is preferred for high-end restaurant markets where texture and flavor are prized.

    Comparative Table: Which System Suits Whom?

    System Dairy (Production Level) Beef (Production Level) Suitable Producer Profile
    Extensive Low (5 kg/day) – only indigenous breeds Low (0.2 kg ADG) – pasture-fed beef Pastoralists, ranchers with large low-cost land
    Semi-Intensive Medium (10–15 kg/day) – crossbreds Medium (0.6 kg ADG) – finished on supplements Small to medium farmers with manageable capital
    Intensive High (30+ kg/day) – Holsteins High (1.5 kg ADG) – feedlot marbled beef Commercial operations with high investment ability

    Factors Influencing the Choice of System

    • Land availability and quality: More land favors extensive; limited land pushes towards intensive.
    • Climate and rainfall: Arid areas can’t support intensive pastures, so extensive systems dominate.
    • Capital and access to credit: Intensive systems require substantial loans for building and feed.
    • Labor cost: In developing countries, low labor costs make semi-intensive attractive.
    • Market demands: Processors often require consistent, high-quality products, favoring intensive systems.
    • Government policies: Subsidies, environmental regulations, and land tenure can influence the system.

    Bottom line: There is no one-size-fits-all. Dairy producers seeking maximum yield should opt for intensive systems, while beef producers with abundant land should consider extensive. Semi-intensive remains the most flexible compromise.

    Conclusion

    Cattle management systems exist on a continuum from extensive to intensive. Although each system has its strengths and weaknesses, the choice should be guided by available resources, environmental conditions, production goals, and market context. Extensive systems offer low-cost, low-input production but yield low output per animal and per hectare. Semi-intensive systems provide a balanced approach, increasing productivity without exorbitant costs or welfare compromise. Intensive systems achieve the highest efficiency but demand high investment and careful management to mitigate risks like disease and environmental pollution.

    The global push for sustainable food production is driving a convergence: extensive systems are adopting improved pasture management and rotational grazing to boost productivity, while intensive systems are investing in technology to reduce waste and improve animal comfort. Understanding the distinctions—and evaluating which system works best for your specific cattle type—is the first step toward successful cattle farming. Whether you raise dairy or beef, the ultimate goal is to produce healthy animals, protect the environment, and maintain a profitable enterprise.

    Frequently Asked Questions

    What is the difference between extensive and intensive cattle management?

    Extensive cattle management relies on large land areas with low animal density and minimal feed, labor, and infrastructure. Intensive cattle management confines animals in small spaces with high inputs (feed, labor, capital) to maximize productivity. Extensive systems are land-extensive and input-extensive, while intensive systems are land-saving but input-intensive.

    Which cattle management system is best for dairy farming?

    Intensive systems are generally best for high-yielding dairy farming because they allow precise nutrition, milking, and health control, resulting in higher milk yields (30–50 kg/day). Semi-intensive can be suitable for smallholder dairy with crossbred cows (10–15 kg/day). Extensive is only viable for low-yield indigenous breeds.

    What are the advantages of semi-extensive cattle rearing?

    Semi-extensive systems combine grazing with supplementation and basic housing. Advantages include lower capital costs than intensive, better animal welfare than intensive, higher productivity than extensive, and reduced pressure on land. It’s a flexible system that can be improved gradually as resources allow.

    How does intensive cattle management affect animal welfare?

    Intensive systems can compromise welfare if animals are overcrowded or kept on hard floors, leading to lameness, stress, and disease. but, modern intensive systems with comfortable cubicles, proper ventilation, and enrichment can offer good welfare, and they provide consistent feeding and protection from harsh weather. Concern remains about the lack of natural grazing, but with proper design, welfare can be maintained.

    Can extensive systems be sustainable in modern agriculture?

    Yes, extensive systems can be sustainable if grazing is managed to prevent overexploitation. Practices like rotational grazing, herding, and maintaining native vegetation can preserve ecosystems and soil health. The low carbon footprint and high animal welfare make them attractive, but land fragmentation and climate change pose challenges.

  • Breeds and Physical Selection of Production Cattle: A Comprehensive Guide to Profitable Rearing

    Breeds and Physical Selection of Production Cattle: A Comprehensive Guide to Profitable Rearing

    Introduction

    Cattle production is a cornerstone of global agriculture, providing milk, meat, leather, and draught power. The success of a cattle enterprise hinges on two critical decisions: selecting the right breed and choosing animals with optimal physical characteristics. This guide delves deep into the breeds of cattle and their characteristics, the physical characteristics of cattle for profitable rearing, and provides detailed profiles of key breeds such as Ankole, Sanga, Zebu, Boran, Friesian, Jersey, and Guernsey. By the end, you will be equipped to make informed choices when selecting the best cattle breed for rearing. This resource is ideal for students, farmers, and agricultural professionals seeking academic-level understanding.

    Topic 1: Physical Characteristics of Cattle for Profitable Rearing

    Physical conformation is a reliable indicator of an animal’s health, productivity, and longevity. When evaluating cattle, focus on traits that directly influence profitability—milk yield, growth rate, fertility, and resistance to environmental stress. Below are the key physical features to assess.

    1. Body Frame and Size

    • Height and Length: Larger frames generally support higher feed intake and growth potential. For dairy breeds, a deep, long barrel indicates capacity for rumen development and milk production. For beef breeds, blocky, deep bodies yield higher carcass weight.
    • Skeletal Strength: Strong, straight legs with well-formed hooves are essential for mobility and grazing. Weak pasterns or crooked legs increase lameness risk, reducing productivity.
    • Thorax Depth: A deep chest (measured from withers to sternum) correlates with heart and lung capacity, vital for heat dissipation and exercise tolerance in tropical environments.

    2. Udder and Teat Structure (Dairy Emphasis)

    • Udder Attachment: A firmly attached, high rear udder prevents sagging and injury. A well-balanced udder with equal quarters ensures efficient milking and reduces mastitis incidence.
    • Teat Placement and Size: Teats should be evenly placed, of moderate length (5–7 cm), and cylindrical. Funnel-shaped or excessively long teats hamper machine milking and increase infection risk.
    • Milk Veins: Prominent, tortuous milk veins (subcutaneous abdominal veins) indicate high blood flow to the udder and correlate with higher milk yield.

    3. Muscle and Fat Distribution (Beef Emphasis)

    • Loin and Rump Width: Wide, thick loins and a well-developed rump indicate superior muscle development, yielding high-value cuts (striploin, sirloin).
    • Shoulder and Gimlet: Smooth shoulders with even muscling reduce waste; sharp shoulders indicate low muscle mass. The “gimlet” area (between hind legs) should be full but not overly fat.
    • Backfat Thickness: Moderate backfat (2–5 mm) is ideal for carcass grading. Excess fat increases feed costs; too little reduces meat quality and shelf life.

    4. Reproductive Traits

    • Scrotal Circumference (Bulls): A circumference >32 cm at weaning correlates with high semen quality and early puberty in offspring.
    • Vulva and Pelvic Area (Cows): A large, well-formed vulva and a wide pelvic opening reduce calving difficulties. Narrow pelves increase dystocia risk.
    • Body Condition Score (BCS): Maintain BCS of 3–3.5 (1–5 scale) for optimal fertility. Too thin (BCS <2) causes anestrus; too fat (BCS >4) leads to metabolic disorders and reduced conception.

    5. Temperament and Adaptability Traits

    • Docility: Calm animals are easier to handle, reducing labor costs and injury risk. Temperament can be assessed by response to human approach (flight zone).
    • Heat Tolerance: In hot climates, cattle with sleek, short hair coats, large dewlaps, and folded skin (e.g., Zebu) dissipate heat better. Darker pigmentation protects against UV radiation.
    • Parasite Resistance: Animals with a naturally high immune response show fewer signs of tick infestation (less tick load, smooth coat) and require fewer acaricide treatments.

    Topic 2: Characteristics of Ankole, Sanga, Zebu, and Boran Breeds

    These breeds are predominantly found in Africa and are well-adapted to harsh tropical conditions. They are often used for beef, milk, and as a genetic resource for crossbreeding.

    2.1 Ankole Cattle

    The Ankole breed, native to East Africa (especially Uganda, Rwanda, and Kenya), is renowned for its massive, sweeping horns and ancient lineage.

    • Physical Appearance: Large frame; cows weigh 450–550 kg, bulls 600–700 kg. They have a short, tight coat (red, brown, black, or white). Horns can reach up to 2.5 m in length, used for thermoregulation and defense.
    • Production Traits: Milk yield: 2–5 liters/day (low but rich in butterfat ~5–6%). Beef: lean meat with low marbling. Excellent draft capacity.
    • Adaptability: Tolerates high temperatures, humidity, and poor forage. Shows resistance to ticks and many diseases (e.g., trypanotolerance in some strains).
    • Disadvantages: Late maturity (first calving at 4–5 years), low milk production, and aggressive temperament due to horn threat.

    2.2 Sanga Cattle

    Sanga is a general term for African zebuine-humped cattle found from Sudan to South Africa. Examples include the Afrikaner and Tuli.

    • Physical Appearance: Medium size with a small thoracic hump (fat reserve). Coat colors vary (red, brown, gray). They have a moderate head length and drooping ears.
    • Production Traits: Dual-purpose (milk and beef). Milk yield: 3–6 liters/day with 4–5% butterfat. Beef: well-marbled, tender. Good fertility and calving ease.
    • Adaptability: Hardy; thrives on low-quality roughage, resists internal parasites and tick-borne diseases. Tolerates heat and drought.
    • Disadvantages: Lower growth rates compared to exotic breeds; milk yield is modest for commercial dairying.

    2.3 Zebu (Bos indicus)

    Zebu is a breed group characterized by a prominent hump over the shoulders, large dewlap, and upright ears. Common in Asia and Africa.

    • Physical Appearance: Wide variability. Hump stores fat for energy. Skin is loose, folded, and pigmented. Short hair. Colors: white, gray, red, or mixed. Horns are often lyre-shaped.
    • Production Traits: Dairy zebu (e.g., Sahiwal) yield 6–12 liters/day with 4–5% fat. Beef zebu (e.g., Brahman) gain weight on poor pastures. Excellent maternal traits.
    • Adaptability: Superior heat tolerance due to sweat glands and low metabolic rate. Resistant to many tropical diseases (e.g., anaplasmosis). Efficiency in converting low-quality feed.
    • Disadvantages: Later maturity, less tender meat than Bos taurus, and variable milk yield. Temperament can be nervous.

    2.4 Boran Cattle

    Developed from crosses of Zebu and Shorthorn, the Boran is a popular beef breed in East Africa, especially Kenya and Ethiopia.

    • Physical Appearance: Compact, muscular body with a small hump. Colors: white, fawn, red, or roan. Short horns. Weight: cows 450–550 kg, bulls 700–900 kg.
    • Production Traits: High growth rate (average daily gain 0.8–1.2 kg), excellent carcass yield (58–62%), and good marbling. Milk yield: 3–5 liters/day (sufficient for calf-rearing).
    • Adaptability: Very hardy; performs well under harsh rangeland conditions. Resistant to ticks and worms. Good mothering ability and early puberty (bulls at 15 months, heifers at 18–24 months).
    • Disadvantages: Requires improved pasture to reach genetic potential; not as docile as some European breeds.

    Topic 3: Characteristics of Friesian, Jersey, and Guernsey Breeds

    These are European dairy breeds known for high milk production. They require superior feed and management but reward with high yields.

    3.1 Friesian (Holstein-Friesian)

    The Friesian (Holstein) is the world’s highest milk-yielding dairy breed.

    • Physical Appearance: Large frame: cows 600–700 kg, bulls 900–1000 kg. Distinct black-and-white patches (or red-and-white). Long, deep body. Udder is large and attached high.
    • Production Traits: Milk yield: 25–40 liters/day (over 10,000 liters per lactation). Butterfat: 3.5–4.0%, protein 3.2–3.5%. Excellent feed conversion to milk.
    • Adaptability: Prefers temperate climates; heat stress reduces production. Requires high-quality diets and intensive management. Susceptible to mastitis and lameness.
    • Disadvantages: High metabolic demands, lower fertility in tropics, and short productive life (3–4 lactations on average).

    3.2 Jersey

    Jersey cows are small but efficient, producing rich milk well-suited for cheese and butter.

    • Physical Appearance: Small to medium: cows 350–450 kg. Colour ranges from light fawn to dark brown, often with a darker muzzle and dorsal stripe. Docile and alert.
    • Production Traits: Milk yield: 15–25 liters/day (5,000–6,000 liters per lactation). Butterfat: 5–6%, protein 4–5% (highest among dairy breeds). Smaller calves born easily.
    • Adaptability: Better heat tolerance than Holsteins. Efficient grazers—can thrive on lower-quality feed. Low incidence of metabolic diseases.
    • Disadvantages: Milk yield per cow is lower; more susceptible to twin births (though usually not problematic). Some lines have weak legs.

    3.3 Guernsey

    Guernsey cattle originated from the Channel Islands and produce golden-colored milk rich in beta-carotene.

    • Physical Appearance: Medium size: cows 450–550 kg. Color: rich golden fawn or reddish-brown with white patches (especially on face, belly, and legs). Muzzle is buff (not black).
    • Production Traits: Milk yield: 20–30 liters/day (6,000–7,000 liters per lactation). Butterfat: 4.5–5.0%, protein 3.8–4.0%. Characteristic golden color due to high carotenoid content.
    • Adaptability: Known for efficient conversion of feed into milk solids. Hardy, with fewer health problems than Holsteins. Calves are vigorous.
    • Disadvantages: Slightly lower total milk volume; more sensitive to heat than Jerseys. Their color can make them harder to market in some beef systems.

    Topic 4: Selecting the Best Cattle Breed for Rearing

    Choosing a breed depends on your production goals, environment, and resources. Follow these steps:

    Step 1: Define Objectives

    • Dairy: If milk sales are primary, prioritize yield, butterfat, and udder health. In temperate zones, Holstein is popular; in tropics, consider Sahiwal (Zebu) or crossbreeds.
    • Beef: For meat, focus on growth rate, carcass quality, and adaptability. Boran, Angus, or Charolais work for different climates.
    • Dual-Purpose: Breeds like Jersey, Sanga, or Simmental provide both milk and beef.

    Step 2: Assess Environmental Condition

    • Climate: Hot and humid → try Zebu, Boran, Sanga. Cold temperate → Holstein, Jersey, Angus.
    • Feed Availability: High-quality pastures → European breeds. Low-quality roughage → Zebu, Ankole.
    • Disease Pressure: Tick-borne diseases → choose resistant breeds (e.g., Boran, Zebu).

    Step 3: Evaluate Management Capacity

    • Labor: Intense management required for high-yielding breeds. If labor is scarce, opt for hardy, low-maintenance breeds.
    • Infrastructure: Dairy breeds need milking parlors, cooling, and veterinary support. Beef breeds require handling facilities.

    Step 4: Compare Economics

    Use a breed comparison table to weigh traits.

    Breed Milk Yield (L/day) BF% ADG (kg) Heat Tolerance Feed Efficiency Calving Ease
    Ankole 2–5 5–6 0.2–0.4 Excellent Poor Good
    Sanga 3–6 4–5 0.4–0.6 Good Moderate Excellent
    Zebu 4–12 4–5 0.5–0.8 Excellent Good Good
    Boran 3–5 4–5 0.8–1.2 Excellent Good Good
    Friesian 25–40 3.5–4 0.7–1.0 Poor High Moderate
    Jersey 15–25 5–6 0.5–0.7 Good High Excellent
    Guernsey 20–30 4.5–5 0.6–0.8 Moderate High Good

    Step 5: Crossbreeding Options

    If no single breed meets all needs, consider crossbreeding to combine strengths. for instance, crossing Holstein with Boran yields improved heat tolerance while maintaining moderate milk production. Always test local adaptation first.

    Conclusion

    Selecting the right cattle breed and applying rigorous physical selection are fundamental to a profitable operation. Understanding the breeds of cattle and their characteristics—from the horned Ankole to the high-yielding Friesian—enables you to match genetic potential with your environment and market. Assessing physical characteristics of cattle for profitable rearing ensures you invest in animals that will thrive and produce efficiently. Whether you lean toward the resilient Ankole, Sanga, Zebu, or Boran breeds for tropical settings, or the high-output Friesian, Jersey, and Guernsey breeds for temperate dairying, your choices must be informed by data. Use the comparison table and steps outlined here as a guide when selecting the best cattle breed for rearing. Remember, good management amplifies genetic potential; even the best breed can’t overcome inadequate feeding or health care. Integrate physical appraisal, breed knowledge, and sound management for a successful cattle enterprise.

    Frequently Asked Questions

    Q: What is the most profitable cattle breed for milk production?

    For intensive systems in temperate climates, the Friesian (Holstein) yields the highest volume (25–40 L/day). but, in tropical or low-input systems, the Sahiwal (Zebu) or crossbreds like the Jersey × Sahiwal are more profitable due to lower mortality and feed costs. The best breed must match the local environment and market for milk solids (Jersey for high butterfat) or volume.

    Q: How do I assess the physical conformation of a dairy cow?

    Focus on udder attachment (high, tight rear udder), teat size and placement (medium length, evenly spaced), body length and depth (capacity for digestion), and leg structure (strong pasterns). Also check for signs of mastitis, such as hardness or swelling. A scoring chart (e.g., linear type traits) can standardize evaluation.

    Q: Which beef breed has the highest weight gain on pasture?

    Among tropical breeds, the Boran achieves an average daily gain of 0.8–1.2 kg on good pasture. In temperate zones, Charolais and Simmental reach 1.0–1.5 kg/day. but, growth rate must be balanced with feed efficiency and carcass quality. The breed also needs to suit your climatic and management conditions.

    Q: Can I crossbreed Ankole with Friesian?

    Yes, crossbreeding Ankole (tick-resistant, heat-tolerant) with Friesian (high milk yield) can produce F1 animals with moderate milk production (10–15 L/day) and improved adaptation. but, the resulting calves will have intermediate traits; careful selection for desired characteristics (e.g., horn size, udder shape) is necessary.

    Q: What physical traits indicate a cow will have good fertility?

    Key indicators include a body condition score of 3–3.5 (1–5 scale), a wide pelvic opening, well-developed vulva, and regular cycling. In bulls, a scrotal circumference >34 cm at 12–15 months is a strong predictor of fertility. Also observe the cow’s energy levels and hoof health, as lameness reduces heat expression.

    Q: How does the milk of Guernsey compare to Jersey?

    Guernsey milk is known for its golden color due to high beta-carotene, with butterfat around 4.5–5% and protein 3.8–4%. Jersey milk has higher butterfat (5–6%) and protein (4–5%), making it slightly richer for cheese and butter. Both are excellent for dairy products, but Jersey is preferred for premium butterfat content.

  • Growing Profitable Guavas: The Ultimate Guide for High-Yield Orchards

    Growing Profitable Guavas: The Ultimate Guide for High-Yield Orchards

    Guavas are a tropical fruit with huge profit potential. They are easy to grow and yield high returns. This guide will show you how to turn your guava orchard into a money-making venture. You will learn everything from choosing the right variety to selling your fruit. Let’s dive in.

    Why Guavas Are a Profitable Crop

    Guavas are in high demand worldwide. They are rich in vitamin C and antioxidants. People love them fresh, in juices, and in desserts. The global market for guavas is growing fast. Farmers can earn good money with proper management.

    The guava tree is hardy and adapts to many soils. It starts bearing fruit early, often in 2-3 years. With good care, a single tree can produce 100-200 kg per year. That means high income per acre.

    Guavas also have a long harvest season. Some varieties produce year-round. This gives you a steady cash flow. Plus, the fruit stores well and can be processed into value-added products.

    Choosing the Right Guava Variety

    Selecting the right variety is crucial for profit. Different varieties have different yields and market preferences. Here are some top choices.

    Allahabad Safeda

    This is the most popular variety in India. It has white flesh and excellent taste. The fruit is large and sweet. It yields up to 200 kg per tree. It is great for fresh markets.

    Lucknow-49 (Sardar)

    This variety is known for its high yield. It produces medium to large fruits. The flesh is white and firm. It is good for both table and processing. It can bear fruit twice a year.

    Red Fleshed Varieties

    Red guavas are becoming popular due to their color. They are rich in lycopene. Varieties like ‘Apple Color’ and ‘Red Fleshed’ fetch higher prices. They are excellent for juice and pulp.

    Consider your local market demand. Also, check the climate suitability. Consult with local agricultural experts.

    Climate and Soil Requirements

    Guavas thrive in tropical and subtropical climates. They need warm temperatures between 20-30°C. They can tolerate some drought but not frost. Protect young trees from cold winds.

    Guavas grow well in a wide range of soils. but, well-drained sandy loam is best. The ideal soil pH is 5.5 to 7.0. Avoid waterlogged areas as roots can rot.

    Before planting, test your soil. Add organic matter to improve fertility. If the soil is too acidic, add lime. Good soil preparation ensures strong growth.

    Land Preparation and Planting

    Prepare the land by clearing weeds and rocks. Plow the field to a fine tilth. Dig pits of 1 meter width and depth. Fill pits with topsoil and well-rotted manure.

    The best planting time is during the rainy season. Space trees 5-6 meters apart. This gives them room to grow. You can plant 70-80 trees per acre.

    Water the plants immediately after planting. Mulch around the base to retain moisture. Use drip irrigation for efficient water use.

    Irrigation and Water Management

    Guavas need regular watering, especially during dry spells. Young trees need water every 2-3 days. Mature trees need weekly watering. Overwatering can cause root diseases.

    Drip irrigation is the best method. It saves water and reduces weeds. It also delivers nutrients directly to the roots. This boosts growth and yield.

    Use mulch to conserve soil moisture. Organic mulches like straw or grass clippings work well. They also add nutrients as they decompose.

    Fertilization and Nutrient Management

    Guavas are heavy feeders. They need balanced nutrition for high yields. Apply well-rotted farmyard manure at planting. Then, apply chemical fertilizers as needed.

    A typical fertilizer schedule: Apply 100g N, 50g P, and 100g K per tree per year. Split into two doses. Apply after harvest and before flowering. Adjust based on soil test.

    Foliar sprays of micronutrients like zinc and boron can improve fruit quality. Spray before flowering and fruit set. This prevents nutrient deficiencies.

    Pruning and Training for High Yields

    Pruning helps shape the tree and improve air circulation. It also encourages new growth. Start pruning after the first harvest. Remove dead, diseased, or crossing branches.

    Maintain a single trunk with 3-4 main branches. This is the open-center system. It allows sunlight to reach all parts. This results in more and better fruits.

    Prune after each harvest to stimulate new flushes. This can lead to multiple crops per year. Be careful not to over-prune, as it reduces yield.

    Pest and Disease Management

    Common pests include fruit flies, aphids, and scales. Use sticky traps for fruit flies. Spray neem oil for aphids. For scales, use horticultural oil.

    Diseases like wilt and anthracnose can affect guavas. Use disease-resistant varieties. Ensure good drainage to prevent root rot. Apply fungicides as a preventive measure.

    Practice integrated pest management (IPM). Monitor regularly and take action early. This reduces chemical use and costs.

    Harvesting and Post-Harvest Handling

    Guavas are ready to harvest when they turn color and soften slightly. For local markets, harvest when fully ripe. For distant markets, harvest when mature but still firm.

    Use pruning shears to cut the fruit. Leave a small stem to prevent damage. Handle gently to avoid bruises. Sort fruits by size and quality.

    Store guavas in a cool, ventilated place. They can be kept for 2-3 weeks at 8-10°C. For longer storage, use controlled atmosphere storage.

    Value Addition and Processing

    Processing guavas can increase profits. You can make juice, pulp, jam, and jelly. Dried guava slices are also popular. These products have a longer shelf life.

    Start a small processing unit. It requires basic equipment like a pulper and a boiler. You can sell to local stores or online. This adds value to your crop.

    Value-added products can fetch 2-3 times the price of fresh fruit. They also reduce post-harvest losses. It’s a smart way to increase income.

    Marketing Your Guavas

    Develop a marketing plan before harvest. Identify potential buyers like wholesalers, retailers, and exporters. Build relationships with them.

    Use social media to promote your farm. Share photos and videos of your guavas. Offer samples to local businesses. Participate in farmers’ markets.

    Consider organic certification. Organic guavas command premium prices. They appeal to health-conscious consumers. This can boost your profits significantly.

    Cost and Profit Analysis

    Item Cost (per acre per year)
    Land preparation $500
    Plants (80 trees @ $2 each) $160
    Fertilizers and manure $300
    Irrigation system $400
    Labor $800
    Pest control $200
    Total cost $2,360

    Revenue per acre: Average yield 8,000 kg at $1/kg = $8,000. Net profit: $5,640 per acre. This is a good return on investment.

    With value addition, profits can be even higher. for instance, guava juice sells for $3 per liter. Processing can double your revenue.

    Common Mistakes to Avoid

    One mistake is planting too close. This leads to competition and low yields. Another is overwatering, which causes root rot. Always use well-drained soil.

    Ignoring pest control can ruin your crop. Monitor regularly and act fast. Also, don’t neglect pruning. It is essential for fruit production.

    Finally, don’t skip marketing. Even the best fruit needs buyers. Start marketing early to get the best prices.

    Success Stories from Guava Farmers

    Rajesh from Maharashtra started with 2 acres. He planted Allahabad Safeda and used drip irrigation. In three years, he was earning $10,000 per acre.

    Maria in Kenya grows red guavas for export. She processes the rest into juice. Her farm now employs 10 people. She says guavas changed her life.

    These stories show that guava farming can be profitable. With hard work and smart practices, you can succeed too.

    Future Trends in Guava Farming

    The demand for organic guavas is rising. Consumers want healthy, chemical-free fruit. This is a great opportunity for farmers.

    Technology is also changing farming. Drones, sensors, and data analytics help optimize yields. Precision farming can reduce costs and increase profits.

    New guava varieties with better shelf life are being developed. These will open up export markets. Stay updated with the latest research.

    Frequently Asked Questions

    How long does it take for a guava tree to bear fruit?

    Guava trees start bearing fruit in 2-3 years. Some varieties may take 4 years. With proper care, they can produce for up to 40 years.

    What is the best fertilizer for guava trees?

    A balanced NPK fertilizer like 10-10-10 is good. Apply 100g N, 50g P, and 100g K per tree per year. Also, add organic manure.

    How often should I water guava trees?

    Water young trees every 2-3 days. Mature trees need weekly watering. Adjust based on rainfall and soil type. Drip irrigation is recommended.

    Can guavas grow in pots?

    Yes, dwarf varieties can grow in large pots. Use a pot at least 50 cm in diameter. Ensure good drainage and regular fertilizing.

    How do I control fruit flies on guavas?

    Use pheromone traps and sticky traps. Also, practice good sanitation. Remove fallen fruits from the ground. Cover fruits with paper bags if possible.

    What is the yield per guava tree?

    Average yield is 100-200 kg per tree per year. High-yielding varieties can produce up to 300 kg. Proper care increases yield.

    Is guava farming profitable?

    Yes, guava farming is very profitable. With a net profit of $5,000-$6,000 per acre, it’s a good investment. Value addition can double profits.

    How do I market my guavas?

    Sell to local markets, wholesalers, or exporters. Use online platforms and social media. Consider organic certification for premium prices.

    Growing profitable guavas is achievable with the right knowledge and effort. Start small, learn, and scale up. Your guava orchard can become a thriving business. Take action today and enjoy the sweet taste of success.

    Organic Guava Farming for Premium Prices

    Organic guava farming is gaining popularity. Consumers pay more for organic fruit. They believe it is healthier and better for the environment. This creates a profitable niche for farmers.

    To get organic certification, follow strict guidelines. Use only natural fertilizers like compost and manure. Avoid synthetic pesticides and herbicides. Instead, use neem oil, garlic spray, and beneficial insects.

    Organic farming requires more labor but yields higher prices. You can earn 20-30% more than conventional guavas. Build a brand around your organic farm. Share your story with customers.

    High-Density Planting for Maximum Yield

    High-density planting (HDP) is a modern technique. It involves planting more trees per acre. For guavas, you can plant 200-300 trees per acre. This increases early yields and total production.

    HDP requires careful management. Use dwarf or semi-dwarf varieties. Prune regularly to control size. Provide adequate irrigation and nutrients. Drip irrigation is essential.

    The initial investment is higher. But the returns are also higher. In the first year, you can harvest 5-10 kg per tree. By year three, yields can reach 30-40 kg per tree. Total yield per acre can exceed 10,000 kg.

    Intercropping for Extra Income

    Intercropping means growing other crops between guava trees. This uses land efficiently and provides extra income. Suitable intercrops include vegetables, legumes, and herbs.

    for instance, grow beans or peas in the first year. They fix nitrogen and improve soil. Also, grow leafy greens like spinach or coriander. These have short cycles and sell well.

    Intercropping also reduces weed growth. It provides ground cover and conserves moisture. Choose crops that don’t compete heavily for nutrients. This strategy can add 20-30% to your income.

    Water-Saving Techniques for Dry Areas

    In dry regions, water is scarce. Use water-saving techniques to grow guavas profitably. Drip irrigation is the most efficient. It delivers water directly to the roots and reduces evaporation.

    Another technique is mulching. Apply a thick layer of organic mulch around trees. This retains soil moisture and cools the roots. It also adds organic matter as it decomposes.

    Rainwater harvesting can also help. Collect rainwater from rooftops and store it. Use it for irrigation during dry spells. This reduces dependence on groundwater.

    Using Growth Regulators for Better Fruit Set

    Plant growth regulators (PGRs) can improve fruit set and quality. for instance, spraying gibberellic acid (GA3) can increase fruit size. It also reduces seediness in some varieties.

    Another PGR is naphthalene acetic acid (NAA). It prevents fruit drop and promotes uniform ripening. Use these chemicals carefully and follow recommended doses.

    PGRs aren’t a substitute for good management. Use them as a supplement. Always test on a few trees first. Consult with an agricultural expert.

    Managing Guava Wilt Disease

    Guava wilt is a serious disease. It is caused by the fungus Fusarium oxysporum. It causes leaves to wilt and trees to die. There is no chemical cure, so prevention is key.

    Use resistant varieties like ‘Allahabad Safeda’ and ‘Lucknow-49’. Plant in well-drained soil. Avoid waterlogging. Rotate crops with non-host plants like cereals.

    If you see wilt symptoms, remove and destroy affected trees. Disinfect tools and equipment. Apply biocontrol agents like Trichoderma to the soil. This helps suppress the fungus.

    Post-Harvest Handling for Longer Shelf Life

    Proper post-harvest handling extends shelf life. It also maintains fruit quality. Harvest guavas early in the morning when it is cool. Use clean, sanitized containers.

    Sort and grade fruits by size and color. Remove any damaged or diseased fruits. Wash them with clean water to remove dirt. Dry them gently with a soft cloth.

    Store guavas at 8-10°C with high humidity. Use perforated plastic bags to reduce moisture loss. For export, use controlled atmosphere storage. This can keep fruits fresh for up to 4 weeks.

    Exporting Guavas: Opportunities and Challenges

    Exporting guavas can be very profitable. International demand is high, especially in the US, Europe, and the Middle East. but, there are strict quality standards.

    You need to meet phytosanitary requirements. Fruits must be free from pests and diseases. They must also have uniform size and appearance. Work with an export agent who knows the regulations.

    Logistics is another challenge. Guavas are perishable. They need quick transportation and cold chain management. Air freight is expensive but fast. Sea freight is cheaper but takes longer.

    Building a Brand for Your Guava Farm

    A strong brand can set you apart. It builds customer loyalty and allows premium pricing. Start by naming your farm. Create a logo and use it on packaging.

    Tell your farm’s story. Share why you grow guavas and your farming practices. Use social media to connect with customers. Post photos, recipes, and behind-the-scenes content.

    Offer farm tours and tastings. This builds trust and creates memorable experiences. Consider a subscription box for regular customers. Branding takes time but pays off in the long run.

    Financial Planning and Risk Management

    Guava farming requires upfront investment. Create a detailed business plan. Estimate costs for land, plants, irrigation, labor, and marketing. Include a contingency fund for emergencies.

    Diversify your income sources. Besides fresh fruit, consider value-added products. Also, consider agritourism. This reduces risk if one market fails.

    Get crop insurance if available. It protects against natural disasters. Also, join a farmer cooperative. This gives you bargaining power and access to better markets.

    Technology in Guava Farming

    Technology can boost efficiency and profits. Use soil sensors to monitor moisture and nutrients. Drones can survey large orchards quickly. They detect pest outbreaks early.

    Farm management software helps track expenses and yields. It also helps plan tasks. Use mobile apps for market prices and weather forecasts. This information helps you make better decisions.

    Automation is also possible. Automated irrigation systems save labor. Grading machines sort fruits faster. Investing in technology can increase your profit margin.

    Sustainable Practices for Long-Term Profit

    Sustainable farming ensures long-term profitability. It protects the environment and natural resources. Use organic methods to improve soil health. Rotate cover crops to prevent erosion.

    Conserve water with efficient irrigation. Plant trees to create windbreaks and shade. This reduces water loss and protects crops. Also, recycle farm waste into compost.

    Sustainable practices also appeal to consumers. They are willing to pay more for eco-friendly products. This can boost your brand and profits.

    Growing profitable guavas is a journey. It requires knowledge, hard work, and smart strategies. But the rewards are sweet. Start today, and you can build a successful guava business. Remember, every expert was once a beginner. Take the first step and never stop learning.

  • Maximizing Profits in Banana Plantations on an Acre in Uganda: A Comprehensive Guide

    Maximizing Profits in Banana Plantations on an Acre in Uganda: A Comprehensive Guide

    Introduction

    Banana farming is a cornerstone of Uganda’s agricultural economy, with the country being one of the largest banana producers in Africa. For smallholder farmers, a single acre of bananas can be a significant source of income, but profitability depends on careful planning, efficient management, and market access. This guide provides a comprehensive analysis of the potential profits from a banana plantation on one acre in Uganda, covering all aspects from establishment costs to revenue streams. Whether you are a new entrant or an experienced farmer, understanding the economics of banana production will help you maximize returns and ensure sustainability.

    Understanding Banana Varieties and Their Profit Potential

    Uganda grows several banana varieties, each with different yield potentials, market prices, and input requirements. The most common types are East African Highland bananas (cooking bananas) and dessert bananas like the ‘Gros Michel’ and ‘Cavendish’. Cooking bananas, such as ‘Mbwazirume’ and ‘Nakitembe’, are staple foods and have a steady demand. Dessert bananas fetch higher prices but require more care. For maximum profit, consider intercropping or selecting high-yielding, disease-resistant hybrids like ‘FHIA-17’ or ‘FHIA-25’. These can produce up to 60 tons per hectare (24 tons per acre) under good management.

    Establishment Costs for One Acre

    Initial investment is critical. Costs include land preparation, suckers, planting, and first-year inputs. Land preparation (plowing, harrowing) costs about UGX 150,000–200,000. High-quality tissue culture suckers cost UGX 1,500–3,000 each; you need about 1,110 plants per acre (spacing 3m x 3m). That’s UGX 1.7–3.3 million. Planting labor adds UGX 200,000–300,000. Organic manure (10 tons) costs UGX 500,000–1,000,000. Drip irrigation (optional) costs UGX 1–2 million. Total establishment: UGX 3–5 million.

    Recurring Operational Costs

    Annual costs include weeding, mulching, fertilizers, pest control, and labor. Weeding (4–6 times/year) costs UGX 400,000–600,000. Mulching with dry banana leaves or grass costs UGX 300,000–500,000. Fertilizers (NPK, urea, DAP) cost UGX 600,000–1,000,000 per year. Pest and disease control (nematodes, weevils, black sigatoka) costs UGX 300,000–500,000. Labor for harvesting and bunch management: UGX 500,000–800,000. Total annual operational costs: UGX 2–3 million.

    Yield Expectations per Acre

    With good management, an acre can yield 15–25 tons per year. Tissue culture plants produce heavier bunches (20–30 kg each). First harvest occurs 12–15 months after planting, then every 3–4 months. Average bunch weight: 15 kg for cooking, 20 kg for dessert. Annual yield: 1,110 bunches x 15 kg = 16,650 kg (16.6 tons). With optimal inputs, up to 25 tons.

    Revenue Streams from Banana Sales

    Bananas are sold as green bunches, ripe fruit, or processed products. Green cooking bananas fetch UGX 500–1,000 per kg at farm gate. Dessert bananas: UGX 1,500–2,500 per kg. At 16 tons and UGX 700/kg, gross revenue: UGX 11.2 million. With 25 tons and UGX 1,000/kg, gross: UGX 25 million. Additional income from banana leaves (for wrapping) and pseudostems (for fiber or compost).

    Profit Calculation: A Detailed Example

    Assume 16 tons yield, UGX 700/kg price. Gross revenue: UGX 11.2 million. Total costs (establishment amortized over 3 years + annual ops): Year 1: UGX 5 million (establishment) + UGX 2.5 million (ops) = UGX 7.5 million; net loss? Actually, first harvest at month 12, so revenue in year 2. Better to use annualized costs: Establishment cost spread over 3 years = UGX 1.7 million/year. Annual ops UGX 2.5 million. Total annual cost: UGX 4.2 million. Net profit: UGX 11.2 – 4.2 = UGX 7 million. With higher yield and price, net profit can exceed UGX 15 million.

    Factors Affecting Profitability

    Several factors influence net returns: soil fertility, water availability, pest and disease pressure, labor efficiency, market prices, and post-harvest handling. Soil testing and proper fertilization can boost yields by 30%. Irrigation during dry spells prevents yield loss. Integrated pest management reduces chemical costs. Access to reliable markets (e.g., Kampala, regional towns) ensures better prices. Reducing post-harvest losses (10–20%) through careful handling and transportation increases net profit.

    Market Access and Price Trends

    Banana prices fluctuate seasonally. Peak prices occur during dry seasons (January–February, June–July) when supply is low. Prices can double. Farmers who can store or have irrigation can target these periods. Selling directly to retailers or processors yields higher margins than farm-gate sales. Collective marketing through farmer groups can reduce transaction costs and improve bargaining power. Export potential to neighboring countries (South Sudan, DRC) exists but requires phytosanitary certification.

    Value Addition for Increased Profits

    Processing bananas into chips, flour, wine, or beer can significantly increase profits. Banana flour sells for UGX 5,000–10,000 per kg. A small-scale processing unit (UGX 2–5 million) can process surplus fruit. Dried banana chips are popular snacks. Ripening rooms (using ethylene) allow farmers to sell ripe bananas at premium prices. Value addition reduces post-harvest losses and creates employment.

    Cost-Benefit Analysis Table

    Item Year 1 (UGX) Year 2+ (UGX)
    Establishment 4,000,000 0
    Annual Operations 2,500,000 2,500,000
    Total Costs 6,500,000 2,500,000
    Revenue (16 tons @ UGX 700/kg) 0 (first harvest at month 12) 11,200,000
    Net Profit -6,500,000 8,700,000

    Note: In year 2, profit is higher because establishment costs are already covered. Over 3 years, average annual profit is about UGX 5 million.

    Risk Management Strategies

    Banana farming faces risks from diseases (Banana Xanthomonas Wilt, Fusarium Wilt), pests (banana weevil, nematodes), drought, and price volatility. Mitigation: use disease-free tissue culture plants, practice crop rotation, maintain soil health, install irrigation, and diversify markets. Insurance products for agriculture are emerging. Forming farmer cooperatives can provide collective risk management and access to credit.

    Best Practices for High Yields

    Soil and Water Management

    Bananas require deep, well-drained loam soil with pH 5.5–6.5. Apply organic manure (20–30 tons/ha) annually. Mulching conserves moisture and adds organic matter. Drip irrigation during dry spells increases yields by 40%. Install a simple drip system for UGX 1.5 million per acre.

    Pest and Disease Control

    Use clean planting material. Monitor for weevils (set traps), nematodes (use resistant varieties), and Black Sigatoka (remove affected leaves). Apply fungicides only when necessary. Biological control using Trichoderma is effective against soil-borne diseases.

    Pruning and De-suckering

    Maintain one mother plant, one follower, and one sword sucker per mat. Remove excess suckers to reduce competition. Prune dead leaves to improve air circulation and reduce disease.

    Labor Management

    Banana farming is labor-intensive. One acre requires about 200 person-days per year. Labor costs can be reduced by using family labor or hiring on a task basis. Training workers on proper harvesting and handling reduces losses. Mechanization (e.g., brush cutters for weeding) can improve efficiency.

    Financing and Support Services

    Initial capital can be obtained from microfinance institutions, savings groups, or government programs like the Uganda Development Bank’s agricultural loans. The National Agricultural Advisory Services (NAADS) provides extension services and subsidized inputs. Access to credit at reasonable interest rates (12–18% per annum) is crucial for expansion.

    Environmental Sustainability

    Sustainable banana farming ensures long-term profitability. Practices include: intercropping with legumes (beans, groundnuts) to fix nitrogen, using organic fertilizers, and recycling banana residues as mulch. Avoid overuse of chemical pesticides. Implement contour planting on slopes to prevent erosion. Sustainable practices also attract premium prices from eco-conscious buyers.

    Case Study: Successful Banana Farmer in Central Uganda

    Mr. Ssempijja, a farmer in Kayunga, manages one acre of FHIA-17 bananas. He invested UGX 4.5 million initially (tissue culture suckers, drip irrigation, manure). Annual costs: UGX 2 million. Yield: 22 tons. Price: UGX 800/kg. Gross revenue: UGX 17.6 million. Net profit: UGX 15.6 million in year 2. He sells to Kampala market through a cooperative. Key lessons: quality inputs, irrigation, and market linkage.

    Common Mistakes to Avoid

    1. Using poor-quality suckers from unknown sources.
    2. Inadequate spacing leading to competition and low yields.
    3. Neglecting soil fertility management.
    4. Poor weed control, especially during early growth.
    5. Harvesting bunches too early or too late.
    6. Selling at farm gate without exploring better markets.
    7. Ignoring disease symptoms until it’s too late.

    Future Outlook and Trends

    Demand for bananas in Uganda is projected to grow due to population increase and urbanization. There is also growing interest in banana flour and other processed products for export. Climate change may affect production, but drought-tolerant varieties are being developed. Precision agriculture technologies (e.g., soil sensors, drone monitoring) are becoming accessible. Farmers who adopt modern practices will be more profitable.

    Conclusion

    Banana farming on one acre in Uganda offers substantial profit potential, with net returns ranging from UGX 5 million to over UGX 15 million annually depending on management and market conditions. Success requires careful planning, investment in quality inputs, efficient labor management, and strategic marketing. By adopting best practices and mitigating risks, farmers can turn a single acre into a sustainable and lucrative enterprise. This guide provides a roadmap, but continuous learning and adaptation are key to long-term profitability.

    Frequently Asked Questions

    What is the best banana variety for profit in Uganda?

    High-yielding hybrids like FHIA-17 and FHIA-25 are recommended for their disease resistance and large bunches. Cooking varieties like ‘Mbwazirume’ have steady demand. Dessert varieties like ‘Cavendish’ fetch higher prices but require more care.

    How much does it cost to start a banana plantation on one acre?

    Initial establishment costs range from UGX 3 to 5 million, including land preparation, suckers, planting, manure, and irrigation if needed. Tissue culture suckers are more expensive but offer higher yields.

    What is the expected yield per acre?

    With good management, yields of 15 to 25 tons per acre per year are achievable. Tissue culture plants can produce up to 25 tons, while traditional varieties yield 10–15 tons.

    How can I maximize profits from banana farming?

    Focus on high-yielding varieties, use drip irrigation, apply balanced fertilizers, control pests and diseases, reduce post-harvest losses, add value through processing, and access premium markets.

    What are the main risks in banana farming?

    Key risks include diseases (BXW, Fusarium wilt), pests (weevils, nematodes), drought, and price fluctuations. Mitigate through resistant varieties, irrigation, integrated pest management, and market diversification.

    Is banana farming profitable on a small scale?

    Yes, even one acre can generate significant income. With proper management, net profits of UGX 5–15 million per year are possible, making it a viable livelihood for smallholder farmers.

    Additional Considerations for Maximizing Profits

    Use of Technology in Banana Farming

    Technology adoption can significantly boost efficiency and profits. for instance, using soil moisture sensors helps optimize irrigation scheduling, reducing water waste and ensuring plants receive adequate water during critical growth stages. Mobile apps like ‘FarmDrive’ provide real-time market prices, connecting farmers directly to buyers and eliminating middlemen. Drones can monitor large plantations for early detection of pests and diseases, allowing targeted interventions. Investing in a simple mobile phone with internet access can open up these opportunities.

    Intercropping and Diversification

    Intercropping bananas with short-term crops like beans, groundnuts, or vegetables can generate additional income while the bananas are maturing. for instance, planting beans between banana rows can yield up to 500 kg per acre, fetching UGX 2,000 per kg, adding UGX 1 million in revenue. This practice also improves soil fertility through nitrogen fixation and reduces weed pressure. Diversification into other enterprises like poultry or fish farming can provide a buffer against banana price fluctuations.

    Post-Harvest Handling and Storage

    Proper post-harvest handling is crucial to minimize losses. Bananas should be harvested when the fingers are full but still green, using a curved knife to cut the bunch with a portion of the pseudostem. Bunches should be transported in padded vehicles to avoid bruising. For storage, bananas can be kept in a cool, well-ventilated area for up to a week. Ripening rooms using ethylene gas can accelerate ripening for market, but careful control is needed to avoid spoilage. Investing in a simple ripening room (UGX 1–2 million) can allow farmers to sell ripe bananas at a premium.

    Organic Certification and Premium Markets

    There is growing demand for organic bananas in urban markets and for export. Obtaining organic certification (cost around UGX 1 million) can open access to premium prices. Organic farming relies on natural fertilizers (compost, manure) and biological pest control. While yields may be slightly lower (10–15% less), the price premium (30–50% higher) can result in higher net profits. In Kampala, organic bananas sell for UGX 1,500–2,000 per kg compared to UGX 700 for conventional.

    Climate-Smart Agriculture

    Climate change poses risks to banana production through erratic rainfall and increased pest pressure. Climate-smart practices include: using drought-tolerant varieties, rainwater harvesting (e.g., constructing ponds), and agroforestry (planting shade trees like grevillea to reduce heat stress). These practices enhance resilience and ensure consistent yields, thereby protecting profits.

    Record Keeping and Financial Management

    Keeping detailed records of all costs and revenues is essential for tracking profitability. Simple ledger books or mobile apps can help. Analyzing records allows farmers to identify inefficiencies, such as high labor costs or low-yielding areas, and make informed decisions. Budgeting for future seasons ensures adequate funds for inputs. Many successful farmers set aside a portion of profits for reinvestment and savings.

    Networking and Continuous Learning

    Joining farmer associations, attending agricultural shows, and participating in training programs keep farmers updated on best practices and market trends. for instance, the Uganda Banana Farmers Association offers workshops on pest management and marketing. Networking with other farmers can lead to bulk purchasing of inputs at lower costs and collective marketing. Continuous learning is key to adapting to changing conditions and maximizing profits.

    Government Policies and Incentives

    The Ugandan government supports banana farming through various programs. The National Agricultural Research Organisation (NARO) develops improved varieties. The Agricultural Credit Facility provides loans at subsidized rates. Farmers should stay informed about available subsidies for inputs like fertilizers and irrigation equipment. Engaging with local agricultural extension officers can provide access to these benefits, reducing costs and boosting profits.

    Final Thoughts

    Banana farming on one acre in Uganda is a viable and profitable venture when approached with knowledge and dedication. The potential for high returns exists, but it requires careful management of inputs, market intelligence, and a willingness to adopt new technologies and practices. By following the guidelines in this comprehensive guide, farmers can transform a single acre into a thriving enterprise that supports their families and contributes to Uganda’s agricultural prosperity.

  • Sweet Potato Profits in Uganda: A Complete Guide for Farmers

    Sweet Potato Profits in Uganda: A Complete Guide for Farmers

    Sweet potato farming in Uganda is a goldmine. Many farmers have transformed their lives. You can too. This guide covers everything. From planting to selling. Let’s dive in.

    Why Sweet Potatoes Are Profitable in Uganda

    Uganda has ideal conditions for sweet potatoes. The climate is perfect. The soil is fertile. Demand is high. Local markets love them. Export opportunities are growing. Profit margins are impressive. A small plot can yield big returns. Farmers earn millions per acre. It’s a sustainable crop. It requires low inputs. You can harvest multiple times. This makes it a reliable income source.

    High Demand and Market Potential

    Sweet potatoes are a staple in Uganda. People eat them daily. Urban populations are rising. This increases demand. Processors need them for chips and flour. Export markets in Europe and Asia are opening. Prices are stable. You can sell fresh or processed. The market is never saturated. There’s room for everyone.

    Climate and Soil Advantages

    Uganda receives plenty of rain. The temperature is warm. Sweet potatoes thrive in these conditions. They grow in many soil types. Sandy loam is best. But they tolerate poor soils. This reduces your risk. You don’t need expensive fertilizers. Organic matter is enough. This keeps costs low.

    Startup Costs and Investment

    Starting sweet potato farming is cheap. You need land, vines, and tools. Land preparation costs little. Vines are affordable. A bag of cuttings costs 50,000 UGX. Labor is available. Total startup for one acre is about 500,000 UGX. This includes planting and weeding. You can start small. Expand as you profit.

    Land Preparation Costs

    Clear the land first. Remove weeds and rocks. Plow or dig ridges. Ridges improve drainage. This costs around 100,000 UGX per acre. You can do it manually. Hiring a tractor is faster. But it costs more. Choose based on your budget.

    Vine Cuttings and Planting

    Buy disease-free vines. Local varieties are best. Examples are NASPOT and Kabode. Plant on ridges. Spacing is 1 meter by 0.3 meters. One acre needs 10,000 cuttings. Each cutting costs 50 UGX. Total vine cost is 500,000 UGX. But you can reuse cuttings. Save money next season.

    Labor and Other Inputs

    Weeding is crucial. Do it twice. First after planting. Second after one month. Labor costs 200,000 UGX per acre. Pests are rare. Use organic pesticides if needed. Harvesting costs 100,000 UGX. Total inputs are low. Your main investment is time.

    Yields and Revenue Potential

    Sweet potatoes yield high. One acre produces 10 to 15 tons. That’s 10,000 to 15,000 kg. Market price is 1,000 UGX per kg. Revenue is 10 to 15 million UGX. Costs are about 1 million. Profit is 9 to 14 million UGX. That’s per harvest. You can harvest twice a year. Double your income.

    Expected Yield per Acre

    Yield depends on variety and care. Improved varieties give more. NASPOT 13 yields 20 tons per acre. Local varieties yield 8 tons. Use good agronomy. Water if dry. Control weeds. Harvest at 4 months. Don’t delay. Quality matters.

    Revenue Calculation

    Let’s calculate. Average yield: 12 tons. Price: 1,000 UGX/kg. Revenue: 12,000,000 UGX. Costs: 1,000,000 UGX. Profit: 11,000,000 UGX. That’s per acre. If you have 5 acres, profit is 55 million. Sweet potatoes are profitable.

    Item Cost (UGX)
    Land preparation 100,000
    Vine cuttings 500,000
    Labor (weeding, harvest) 300,000
    Other inputs 100,000
    Total cost 1,000,000
    Revenue (12 tons) 12,000,000
    Profit 11,000,000

    Best Sweet Potato Varieties for Profit

    Choose high-yielding varieties. They resist diseases. They taste good. Market prefers certain types. Here are top varieties.

    NASPOT Varieties

    NASPOT 1 to 13 are bred in Uganda. They yield 15-20 tons per acre. They resist weevils and viruses. They have high beta-carotene. This adds nutrition. Farmers love them. Buy from certified sources.

    Kabode

    Kabode is a local favorite. It has orange flesh. It’s sweet and moist. It cooks fast. Market demand is high. Yield is 12 tons per acre. It’s easy to grow. Good for beginners.

    Other Varieties

    There are many others. New Kawogo is popular. It has purple skin. It stores well. Tanzania is another. It’s drought tolerant. Choose based on your area. Ask local experts.

    Step-by-Step Planting Guide

    Follow these steps for success. Preparation is key. Do it right.

    Land Selection and Preparation

    Choose well-drained soil. Avoid waterlogged areas. Sweet potatoes hate standing water. Prepare ridges. Ridges are 1 meter apart. They improve aeration. Add compost if possible. This boosts yield.

    Planting Vines

    Cut vines into 30 cm pieces. Each piece should have nodes. Plant on top of ridges. Spacing is 30 cm between plants. Bury half the vine. Water immediately. This helps rooting.

    Weeding and Mulching

    Weed after two weeks. Remove all weeds. They compete for nutrients. Mulch with grass. This conserves moisture. It also suppresses weeds. Do this once.

    Pest and Disease Management

    Sweet potato weevil is the main pest. It damages roots. Use clean vines. Rotate crops. Avoid planting near old fields. Use pheromone traps. Diseases like viruses are rare. Use resistant varieties.

    Harvesting and Post-Harvest Handling

    Harvest at the right time. This ensures quality. Handle carefully to avoid damage.

    When to Harvest

    Sweet potatoes mature in 3-5 months. Leaves turn yellow. Soil cracks. Harvest before rains. Wet soil causes rot. Test a few plants. If roots are big, harvest all.

    How to Harvest

    Use a fork or hoe. Loosen soil around plants. Pull vines gently. Remove roots by hand. Avoid bruising. Sort by size. Remove damaged ones. Cure them in shade for a week. This heals wounds.

    Storage Tips

    Store in a cool, dry place. Temperature should be 15-20°C. Humidity around 80%. Don’t store with onions or potatoes. They cause spoilage. Use baskets or crates. Check regularly. Remove rotten ones.

    Marketing and Selling Strategies

    Selling is easy. But you need a plan. Get the best price.

    Local Market Channels

    Sell to local traders. They come to farms. Or take to nearby markets. Kampala markets pay more. But transport costs. Form groups to negotiate. Bulk selling gets better prices.

    Value Addition Options

    Process sweet potatoes. Make chips, flour, or crisps. This increases value. Flour sells for 5,000 UGX per kg. Chips are popular. You can also make animal feed. This reduces waste.

    Export Opportunities

    Export to Europe and Asia. Requirements are strict. Need certification. Work with exporters. Join cooperatives. They help with logistics. Quality is key. Use improved varieties.

    Success Stories from Ugandan Farmers

    Real examples inspire. Here are two farmers who succeeded.

    Sarah’s Story

    Sarah started with half an acre. She used NASPOT 13. She harvested 6 tons. She sold for 6 million UGX. She reinvested. Now she has 5 acres. She earns 50 million per year. She supports her family.

    John’s Experience

    John grows Kabode. He sells to a processor. He gets 1,200 UGX per kg. He adds value by making flour. His profit doubled. He employs 10 workers. He plans to export.

    Challenges and How to Overcome Them

    Farming has challenges. But you can solve them.

    Pest and Disease Issues

    Weevils and viruses reduce yield. Use resistant varieties. Practice crop rotation. Remove infected plants. Use clean planting material. Monitor regularly.

    Market Price Fluctuations

    Prices drop during harvest season. Store your harvest. Sell when prices rise. Add value to stabilize income. Diversify markets. Don’t rely on one buyer.

    Climate Change Effects

    Droughts and floods affect yields. Use drought-tolerant varieties. Mulch to conserve water. Build drainage channels. Plant at the right time. Follow weather forecasts.

    Financial Management Tips

    Keep records. Track costs and income. This helps you profit.

    Record Keeping

    Write everything down. Use a notebook or app. Record expenses. Record sales. Analyze at end of season. Identify areas to improve. This is key for growth.

    Budgeting for Next Season

    Set aside money for next planting. Save 20% of profit. This covers inputs. Expand gradually. Don’t reinvest all. Keep emergency fund.

    Government and NGO Support

    There are programs to help farmers. Access them.

    NAADS and Operation Wealth Creation

    These provide vines and training. Contact local offices. They offer subsidized inputs. Also extension services. Use them to improve yields.

    Research Organizations

    NaCRRI develops new varieties. They provide information. Attend field days. Learn best practices. They also offer disease-free vines.

    Environmental Sustainability

    Sweet potato farming is eco-friendly. It improves soil health. Use organic methods. Avoid chemicals. Rotate with legumes. This fixes nitrogen. Practice conservation agriculture.

    Frequently Asked Questions

    How much profit can I make from one acre of sweet potatoes?

    You can make 9 to 14 million UGX per acre. This depends on yield and price. Average profit is 11 million UGX.

    What is the best variety for high yield in Uganda?

    NASPOT 13 yields up to 20 tons per acre. It is disease resistant. It is very profitable.

    How long does it take to grow sweet potatoes?

    It takes 3 to 5 months. Some varieties mature faster. Harvest when leaves turn yellow.

    Can I grow sweet potatoes without chemicals?

    Yes. Use organic methods. Use resistant varieties. Practice crop rotation. Use compost. This is sustainable.

    Where can I sell sweet potatoes in Uganda?

    Sell at local markets. Sell to traders. Sell to processors. Export if possible. Kampala has high demand.

    What are the main challenges in sweet potato farming?

    Pests like weevils. Price fluctuations. Climate change. But you can overcome them with good practices.

    How do I start sweet potato farming with little capital?

    Start small. Use half an acre. Buy vines from neighbors. Use family labor. Reinvest profits. Expand gradually.

    Conclusion

    Sweet potato farming in Uganda is highly profitable. It requires low investment. It yields high returns. You can start small. Grow your business. Use improved varieties. Follow best practices. Market smartly. Overcome challenges. Join the success stories. Start today. Your financial freedom awaits.

    Scaling Up Your Sweet Potato Farm

    Once you master one acre, expand. Scaling up increases profits. But do it wisely. Start with two acres. Use profits from the first. Hire more labor. Buy better tools. Invest in irrigation. This reduces risk. Plan your expansion. Don’t rush.

    From One Acre to Ten Acres

    Moving from one to ten acres is big. You need more capital. Save for two seasons. Then expand. Use a business plan. Estimate costs. Estimate revenue. Get a loan if needed. Microfinance institutions offer loans. Interest rates are low. Repay from harvests.

    Mechanization for Larger Farms

    Manual labor is slow for large farms. Use tractors for plowing. Use planters for planting. Use harvesters. This saves time. It reduces labor costs. But machines are expensive. Rent them first. Buy when you have cash.

    Hiring and Managing Workers

    Good workers are key. Hire locals. Train them. Pay them well. Treat them fairly. This reduces turnover. Supervise work. Set daily targets. Reward good performance. Happy workers increase yields.

    Value Addition: Turning Sweet Potatoes into Cash

    Value addition boosts profits. Process sweet potatoes into products. They sell for more. You control the price. Let’s explore options.

    Making Sweet Potato Flour

    Flour is versatile. Use it for baking. Mix with wheat flour. It’s gluten-free. Market is growing. Process: wash, peel, slice, dry, grind. Drying takes 3 days. Use a solar dryer. Grind with a hammer mill. Package in 1 kg bags. Sell for 5,000 UGX per kg. Profit margin is high.

    Producing Sweet Potato Chips

    Chips are a popular snack. They are crispy. They are healthy. Process: wash, peel, slice thin, fry or bake. Season with salt or spices. Package in airtight bags. Sell to schools, shops, and supermarkets. Price: 2,000 UGX per 100g bag. Cost is low. Profit is good.

    Sweet Potato Starch and Animal Feed

    Starch is used in industries. Make it from low-quality roots. Process: grate, wash, settle, dry. Sell to textile or paper factories. Animal feed is another option. Dry and grind whole roots. Mix with other ingredients. Sell to livestock farmers. This reduces waste.

    Building a Strong Brand and Customer Base

    Branding sets you apart. Customers trust brands. Build a reputation for quality. Use a logo. Use consistent packaging. Tell your story. People love local products.

    Creating a Brand Identity

    Choose a name. Example: ‘Green Gold Sweet Potatoes’. Design a simple logo. Use green and orange colors. Print on bags and labels. Include your contact. Share your mission. ‘Healthy food from Uganda’. This attracts customers.

    Marketing Through Social Media

    Use Facebook and WhatsApp. Post pictures of your farm. Share harvest videos. Offer discounts. Engage with customers. Join farming groups. Advertise your products. This reaches many people. It’s free or cheap.

    Building Loyalty with Customers

    Deliver on time. Provide consistent quality. Offer samples. Listen to feedback. Give bonuses for repeat orders. Create a referral program. Happy customers bring more.

    Financial Planning and Risk Management

    Farming has risks. Plan for them. Protect your investment.

    Diversifying Income Streams

    Don’t rely only on sweet potatoes. Grow other crops. Like beans or maize. Raise livestock. Chickens or goats. This spreads risk. If one fails, others succeed. Also, offer services. Like tractor hiring. This adds income.

    Insurance for Farmers

    Agricultural insurance is available. It covers crop failure. Due to drought or pests. Premiums are affordable. Contact insurance companies. They assess your farm. They pay if disaster strikes. This gives peace of mind.

    Emergency Fund

    Save money for emergencies. At least 3 months of expenses. This covers unexpected costs. Like medical bills. Or equipment repair. Don’t use it for regular expenses. Replenish after using.

    Leveraging Technology for Better Yields

    Technology improves farming. Use simple tools. Use apps. Stay informed.

    Weather Apps and Forecasts

    Know when to plant. Use apps like AccuWeather. They predict rain. Plan activities accordingly. Avoid planting before heavy rain. This prevents erosion. Also, know when to harvest. Avoid wet periods.

    Soil Testing Kits

    Test your soil. Know nutrient levels. Use simple kits. They are cheap. Adjust fertilizer use. This saves money. It improves yield. Healthy soil grows healthy plants.

    Mobile Money for Transactions

    Use mobile money. Receive payments from buyers. Pay workers. It’s fast and safe. No need for cash. Keep records digitally. This helps with accounting.

    Networking and Collaboration

    Connect with other farmers. Share knowledge. Buy inputs together. Sell together. This strengthens your business.

    Joining Farmer Cooperatives

    Cooperatives offer many benefits. They bulk buy inputs. They negotiate better prices. They provide training. They access markets. Join one in your area. If none exists, start one.

    Participating in Agricultural Shows

    Attend shows like the Uganda National Agricultural Show. Showcase your products. Network with buyers. Learn new techniques. Win awards. This boosts your reputation.

    Learning from Extension Officers

    Extension officers are government experts. They visit farms. They advise on best practices. Invite them. Follow their recommendations. They also link you to resources.

    Exporting Sweet Potatoes: A Lucrative Opportunity

    Export markets pay more. But requirements are strict. Meet them to succeed.

    Requirements for Export

    You need phytosanitary certificate. This proves your crop is pest-free. Get from the Ministry of Agriculture. Also, meet quality standards. Size, shape, and color matter. Use export varieties. Like NASPOT 13. Pack in clean boxes. Label correctly.

    Finding Export Buyers

    Search online. Use platforms like Alibaba. Attend trade fairs. Contact export companies. They will guide you. Start with small quantities. Build trust. Then increase.

    Logistics and Shipping

    Transport to port. Use refrigerated trucks. This keeps produce fresh. Ship by air or sea. Air is fast but expensive. Sea is cheaper but slower. Choose based on destination. Work with a freight forwarder.

    Environmental Stewardship and Sustainability

    Protect the environment. It sustains your farm. Use sustainable practices.

    Water Conservation

    Use drip irrigation. It saves water. Mulch to reduce evaporation. Collect rainwater. Use it during dry spells. Don’t waste water. It’s precious.

    Soil Conservation

    Prevent erosion. Plant cover crops. Use contour ridges. Add organic matter. This improves soil structure. Healthy soil holds water. It resists erosion.

    Biodiversity on the Farm

    Plant trees. They provide shade. They attract beneficial insects. Keep some wild areas. This supports pollinators. They improve yields. A diverse farm is resilient.

    Conclusion: Your Path to Sweet Potato Wealth

    Sweet potato farming in Uganda is a proven path to wealth. It requires hard work. But the rewards are great. Start small. Learn continuously. Scale up wisely. Add value. Market effectively. Manage risks. Protect the environment. You can achieve financial freedom. Thousands have done it. You can too. Take the first step today. Plant your first ridge. Your future self will thank you.

  • Maximizing Profits in Fish Farming: A Comprehensive Guide to Aquaculture Economics

    Maximizing Profits in Fish Farming: A Comprehensive Guide to Aquaculture Economics

    Fish farming, or aquaculture, is one of the fastest-growing sectors in global food production. With the increasing demand for seafood and declining wild fish stocks, fish farming presents a lucrative opportunity for entrepreneurs and investors. This comprehensive guide explores the key aspects of making money through fish farming, from species selection to marketing and financial management. Whether you’re a beginner or an experienced farmer, this article provides actionable insights to maximize your profits.

    Introduction to Fish Farming Profitability

    Fish farming can be highly profitable when managed correctly. The global aquaculture market is projected to reach $242 billion by 2027, driven by rising seafood consumption and sustainability concerns. but, success requires careful planning, knowledge of best practices, and efficient resource management. This section outlines the foundational principles of profitable fish farming.

    Choosing the Right Fish Species for Profit

    The choice of fish species significantly impacts profitability. Factors to consider include market demand, growth rate, feed conversion ratio (FCR), disease resistance, and environmental adaptability. Below are some of the most profitable species for commercial farming.

    High-Value Species

    • Tilapia: Fast-growing, hardy, and in high demand globally. Tilapia has a low FCR (1.5-1.8) and can be farmed in various systems.
    • Catfish: Popular in the US and Africa, catfish have a high market value and are relatively easy to farm.
    • Salmon: High market price but requires sophisticated farming techniques and cold water conditions.
    • Shrimp: Very high market value, especially for export, but requires careful management of water quality.
    • Barramundi: A premium fish with high growth rate and adaptability to different farming systems.

    Comparison of Popular Species

    Species Growth Rate FCR Market Price (per kg) Suitability for Beginners
    Tilapia Fast (6-8 months) 1.5-1.8 $3-5 High
    Catfish Moderate (8-12 months) 1.6-2.0 $4-6 High
    Salmon Slow (18-24 months) 1.2-1.5 $10-15 Low
    Shrimp Fast (4-6 months) 1.5-2.0 $10-20 Medium
    Barramundi Fast (6-9 months) 1.5-1.8 $8-12 Medium

    Farming Systems and Their Cost Implications

    The choice of farming system affects capital expenditure, operating costs, and potential yields. The three main systems are pond culture, recirculating aquaculture systems (RAS), and cage culture.

    Pond Culture

    Ponds are the most traditional and cost-effective system for many species. Initial construction costs range from $5,000 to $20,000 per hectare, depending on land preparation and water supply. Operating costs include feed, labor, and water management. Yields can reach 5-10 tons per hectare per year for tilapia.

    Recirculating Aquaculture Systems (RAS)

    RAS allows intensive production in a controlled environment with high water reuse. Initial investment is high ($50,000-$200,000 per ton of production capacity) but offers consistent yields and reduced disease risk. Operating costs are lower for water but higher for energy and filtration.

    Cage Culture

    Cages are placed in natural water bodies like lakes or oceans. This system has lower capital costs ($10,000-$30,000 per cage) but requires permits and environmental management. Yields can be high, but risks include water quality fluctuations and escapes.

    Cost Comparison Table

    System Initial Investment (per ton capacity) Operating Cost (per kg) Yield per Cycle Risk Level
    Pond $2,000-$5,000 $1.50-$2.50 5-10 tons/ha Medium
    RAS $20,000-$50,000 $2.00-$3.50 20-50 tons/m³ Low
    Cage $3,000-$10,000 $1.00-$2.00 10-30 tons/cage High

    Feed Management: The Largest Variable Cost

    Feed accounts for 40-60% of total operating costs in fish farming. Efficient feed management is crucial for profitability. Key factors include feed quality, feeding frequency, and feed conversion ratio (FCR).

    Feed Quality and Formulation

    High-quality feed with optimal protein content (28-32% for tilapia, 35-40% for salmon) ensures rapid growth and low FCR. Commercial feeds are available, but some farmers produce their own to reduce costs. but, homemade feed requires careful formulation to avoid nutritional deficiencies.

    Feeding Strategies

    • Hand feeding: Allows observation of fish behavior but is labor-intensive.
    • Automatic feeders: Reduce labor and provide consistent feeding schedules.
    • Demand feeders: Allow fish to feed on demand, reducing waste.
    • Restricted feeding: Feeding at 80-90% of satiation improves FCR.

    Adopting a feeding strategy that minimizes waste can reduce feed costs by 10-20%. Additionally, using feed additives like probiotics can improve digestion and reduce mortality.

    Water Quality Management

    Water quality directly affects fish health, growth, and survival. Key parameters include dissolved oxygen (DO), pH, ammonia, nitrite, and temperature. Poor water quality leads to stress, disease, and mortality, reducing profitability.

    Monitoring and Control

    Regular monitoring of water parameters is essential. Use test kits or sensors to measure DO, pH, and ammonia levels. Aeration systems, such as paddlewheels or diffusers, maintain DO levels above 5 mg/L. Water exchange rates should be adjusted based on system type and stocking density.

    Cost of Water Treatment

    In RAS, water treatment costs include filtration, UV sterilization, and biofiltration. Initial investment for a small RAS (10 tons capacity) can be $10,000-$30,000 for water treatment equipment. Operating costs include electricity for pumps and replacement of filter media.

    Disease Prevention and Health Management

    Disease outbreaks can wipe out entire stocks, leading to significant financial losses. Prevention is more cost-effective than treatment. Biosecurity measures include quarantine of new fish, disinfection of equipment, and vaccination.

    Common Diseases and Treatment Costs

    Disease Symptoms Treatment Cost per Treatment
    Columnaris Frayed fins, lesions Antibiotics, salt baths $50-$200 per pond
    Ichthyophthirius (Ich) White spots, flashing Formalin, copper sulfate $100-$500 per system
    Streptococcus Exophthalmia, erratic swimming Antibiotics, vaccination $200-$1,000 per cycle

    Investing in high-quality fingerlings from certified hatcheries reduces disease risk. Routine health checks and maintaining optimal water quality are essential preventive measures.

    Harvesting and Post-Harvest Handling

    Proper harvesting techniques ensure high-quality product and minimize stress. Harvesting methods include seining, draining, or using pumps. After harvest, fish should be immediately chilled to preserve freshness. Processing options include gutting, filleting, or whole fish sales.

    Value Addition

    Processing fish into fillets, smoked products, or ready-to-cook meals can increase profit margins by 30-50%. but, it requires additional investment in processing equipment and compliance with food safety regulations.

    Marketing and Distribution Channels

    Effective marketing is key to selling fish at premium prices. Options include direct sales to consumers, supplying restaurants and supermarkets, or exporting. Building a brand and using online platforms can expand reach.

    Pricing Strategies

    Price your fish based on production costs, market demand, and competitor prices. for instance, tilapia sold directly to consumers can fetch $5-7 per kg, while wholesale prices are $3-4 per kg. Consider value-added products to capture higher margins.

    Financial Planning and Profitability Analysis

    A sound financial plan includes startup costs, operating expenses, revenue projections, and break-even analysis. Below is a sample budget for a small tilapia pond farm (1 hectare).

    Sample Budget for Tilapia Pond Farm (1 ha)

    Item Cost (USD)
    Land preparation $5,000
    Pond construction $10,000
    Water supply system $3,000
    Fingerlings (10,000 @ $0.10) $1,000
    Feed (10 tons @ $500/ton) $5,000
    Labor (6 months) $4,000
    Electricity and water $2,000
    Miscellaneous (nets, chemicals) $1,000
    Total Operating Cost $31,000

    Assuming a yield of 8 tons (8,000 kg) at a selling price of $4/kg, revenue is $32,000. Net profit = $32,000 – $31,000 = $1,000 (3.2% margin). but, with better management and higher prices, margins can exceed 20%.

    Scaling Up: From Small Farm to Commercial Operation

    Scaling up requires additional capital, infrastructure, and management skills. Consider forming cooperatives or partnerships to share costs. Access to credit through agricultural loans or government grants can facilitate expansion.

    Risk Management and Insurance

    Fish farming faces risks such as disease, weather events, and market fluctuations. Mitigation strategies include diversification (multiple species or systems), insurance policies, and emergency funds. Aquaculture insurance is available in many countries, covering stock loss and property damage.

    Environmental Sustainability and Certification

    Sustainable practices improve long-term profitability and market access. Certifications like ASC (Aquaculture Stewardship Council) or GlobalG.A.P. can command premium prices. Implement waste management, reduce water usage, and avoid antibiotics to enhance sustainability.

    Technology in Fish Farming

    Modern technologies such as IoT sensors, automated feeding systems, and data analytics can optimize production and reduce costs. Investment in technology can improve FCR, reduce labor, and enhance monitoring. for instance, smart feeding systems can reduce feed waste by 15%.

    Case Studies of Profitable Fish Farms

    Examining successful farms provides valuable insights. For instance, a tilapia farm in Ghana using RAS achieved a 25% profit margin by targeting high-end restaurants. Another example is a catfish farm in Nigeria that integrated processing and direct sales, doubling its revenue.

    Frequently Asked Questions (FAQs)

    How much money can I make from fish farming?

    Profitability varies widely. A small 1-hectare tilapia pond can yield a net profit of $1,000-$5,000 per cycle, while larger commercial operations can generate hundreds of thousands of dollars. Factors include species, scale, and market access.

    What is the most profitable fish to farm?

    High-value species like salmon, shrimp, and barramundi offer higher profit margins but require more investment and expertise. Tilapia and catfish are more accessible for beginners with moderate profit potential.

    Do I need a lot of land for fish farming?

    Not necessarily. RAS allows intensive production in small spaces. A small backyard system can produce 500 kg of fish per year. but, larger operations require more land.

    What are the main costs in fish farming?

    Feed is the largest cost (40-60%), followed by fingerlings, labor, and utilities. Initial investment includes pond construction or RAS setup.

    How can I reduce feed costs?

    Optimize feeding strategies, use high-quality feed with low FCR, consider homemade feed, and incorporate feed additives to improve conversion.

    Is fish farming environmentally friendly?

    When done sustainably, fish farming can have a lower environmental impact than wild fishing. but, poor management can cause pollution and habitat damage. Certifications and best practices mitigate these issues.

    Can I get a loan to start fish farming?

    Yes, many banks and agricultural lenders offer loans for aquaculture. You will need a business plan, collateral, and technical expertise. Government grants may also be available.

    How long does it take to see a profit?

    From startup to first harvest typically takes 6-12 months for fast-growing species like tilapia. Profitability may take 2-3 cycles due to initial investment.

    What permits do I need?

    Permits vary by location and system. Common requirements include water use permits, environmental impact assessments, and business licenses. Consult local authorities.

    How do I market my fish?

    Options include direct sales at farmers’ markets, supplying local restaurants and grocery stores, selling online, or exporting. Building relationships with buyers and branding can increase sales.

    Conclusion

    Making money through fish farming is achievable with careful planning, efficient management, and a focus on profitability. Key factors include selecting the right species, optimizing feed and water management, preventing diseases, and effective marketing. While initial investment can be high, the growing demand for seafood offers substantial opportunities. By adopting sustainable practices and leveraging technology, fish farmers can build profitable and resilient businesses. Start small, learn from experience, and scale up gradually to maximize returns.

  • Pineapple Paradise: Expert Interview on Growing Pineapples in Uganda

    Pineapple Paradise: Expert Interview on Growing Pineapples in Uganda

    Introduction: Why Pineapples in Uganda?

    Uganda has ideal conditions for pineapple farming. The climate is warm and humid. Many farmers now grow pineapples for profit. But success requires knowledge. We spoke with Dr. Grace Nakato, a leading horticulturist. She has 20 years of experience. Her insights will help you start or improve your pineapple farm.

    Pineapples are a high-value crop. They can be sold fresh or processed. Uganda exports to regional markets. Demand is growing. But farmers face challenges. Pests, diseases, and poor soil can reduce yields. Our expert explains how to overcome these.

    This interview covers everything. From land preparation to harvesting. You will get practical advice. Let’s dive into the conversation with Dr. Nakato.

    Getting Started: Land and Climate

    What is the best climate for pineapples in Uganda?

    Dr. Nakato: Pineapples love warm weather. Temperatures between 20-30°C are ideal. They need about 1000-1500 mm of rain per year. Too much rain causes rot. Too little slows growth. Uganda’s central and eastern regions are perfect. Areas like Kayunga, Luwero, and Mukono do well.

    Altitude matters too. Pineapples grow best below 1500 meters. Higher areas are cooler. This delays fruiting. But you can still grow them. Just expect longer cycles. For commercial farming, choose lowland areas.

    Wind can damage leaves. Plant windbreaks like bananas or trees. This protects your crop. Also, ensure good drainage. Pineapples hate waterlogged soil. Raised beds help in heavy rain areas.

    What soil type works best?

    Dr. Nakato: Sandy loam soil is perfect. It drains well and warms quickly. Soil pH should be 4.5-5.5. Acidic soil prevents nutrient deficiencies. Test your soil before planting. Add organic matter like compost. This improves fertility.

    Avoid heavy clay soils. They hold water and cause root rot. If you have clay, mix in sand and organic matter. Raised beds also help. Pineapples have shallow roots. They need loose soil for spreading.

    Nutrient requirements: Nitrogen, potassium, and magnesium are key. Phosphorus is needed early. Use a balanced fertilizer like NPK 10-10-10. Apply every 2-3 months. Foliar sprays with micronutrients boost growth.

    Choosing the Right Variety

    Which pineapple varieties are best for Uganda?

    Dr. Nakato: Smooth Cayenne is the most common. It has large fruits and good yield. It is sweet and juicy. But it is susceptible to diseases. MD2 is a hybrid variety. It is sweeter and has a longer shelf life. It is popular for export. but, it needs more care.

    Other varieties: Queen Victoria is small but very sweet. It is good for local markets. Red Spanish is less common. It has a strong flavor and fibrous flesh. Choose based on your market. For fresh consumption, MD2 or Smooth Cayenne. For processing, any variety works.

    Planting material: Use suckers or crowns. Suckers from healthy plants are best. They fruit earlier. Crowns take longer. Always buy from certified sources. Avoid using fruit tops from unknown origins. They may carry diseases.

    Planting and Spacing

    When is the best time to plant?

    Dr. Nakato: Plant at the start of the rainy season. March-April or September-October. This gives plants enough water. Avoid planting in dry months. You will need irrigation then. Pineapples are drought-tolerant but need water for establishment.

    Plant in the afternoon or evening. This reduces transplant shock. Water immediately after planting. Mulch around plants to retain moisture. Use dry grass or leaves. Mulch also suppresses weeds.

    Spacing: Double-row system is common. Space rows 90 cm apart. Within rows, 30-45 cm between plants. This gives about 30,000 plants per acre. Closer spacing increases yield but requires more fertilizer. Wider spacing gives larger fruits.

    Caring for Your Pineapple Plants

    How do you manage weeds?

    Dr. Nakato: Weeds compete for nutrients and water. Use mulch to control them. Hand-weed around plants. Avoid deep cultivation. Pineapple roots are shallow. Herbicides can be used. But apply carefully to avoid damage.

    Mulching with black plastic is effective. It warms soil and suppresses weeds. But it is costly. Organic mulch is cheaper. Use rice husks, coffee husks, or dry grass. Apply a thick layer of 10-15 cm.

    Weed every 2-3 weeks during rainy season. In dry season, weeding is less frequent. Keep the field clean. This reduces pest hiding places.

    How do you fertilize pineapples?

    Dr. Nakato: Fertilize every 2-3 months. Use a complete fertilizer like NPK 17-17-17. Apply 10-15 grams per plant. Increase to 20 grams as plants grow. Foliar spray with micronutrients monthly. Zinc and boron are important for fruit quality.

    Organic fertilizers work too. Compost or well-rotted manure. Apply 5-10 kg per plant yearly. This improves soil structure. Avoid fresh manure. It can burn roots or introduce pests.

    Fertigation is efficient. Inject fertilizer through drip irrigation. This saves labor and ensures even distribution. But it requires investment. For small farms, hand application is fine.

    Watch for deficiency signs. Yellow leaves mean nitrogen lack. Purple leaves indicate phosphorus deficiency. Brown leaf tips suggest potassium shortage. Adjust fertilizer accordingly.

    How do you water pineapples?

    Dr. Nakato: Pineapples need 1-2 inches of water per week. In dry periods, irrigate. Drip irrigation is best. It conserves water and reduces disease. Overhead sprinklers can cause leaf rot. Water in the morning to allow leaves to dry.

    During fruit development, water consistently. Inconsistent watering leads to cracking or poor flavor. Reduce water after harvest. This forces plants to produce suckers.

    Mulch helps retain moisture. In very dry areas, use shade nets. They reduce evaporation. But pineapples need full sun for best growth. Balance is key.

    Pest and Disease Management

    What are the common pests?

    Dr. Nakato: Mealybugs are the worst. They spread wilt disease. They hide in leaf bases. Control with systemic insecticides or biological predators. Ants protect mealybugs. Control ants too. Use bait stations.

    Scale insects and thrips also attack. They cause yellowing and stunted growth. Spray with neem oil or insecticidal soap. Regular monitoring is essential. Check under leaves weekly.

    Nematodes are microscopic worms. They damage roots. Use nematode-resistant varieties. Solarize soil before planting. Cover with clear plastic for 4-6 weeks. This kills nematodes.

    What diseases affect pineapples?

    Dr. Nakato: Fusarium wilt is deadly. It turns leaves pink and kills plants. Remove and burn infected plants. Avoid planting in infected soil. Use disease-free suckers. Fungicides can prevent but not cure.

    Heart rot and root rot are caused by fungi. They thrive in wet conditions. Ensure good drainage. Avoid overhead watering. Treat with copper fungicides.

    Pineapple black rot affects fruit after harvest. Handle fruits carefully. Store in cool, dry conditions. Dip in fungicide solution before storage. Good hygiene prevents many diseases.

    Flowering and Fruit Development

    How do you induce flowering?

    Dr. Nakato: Pineapples flower naturally after 12-18 months. But you can force flowering. Use calcium carbide or ethylene. Apply at night when temperatures are cool. This synchronizes harvest. Apply 2-3 months before desired harvest.

    Forcing is common in commercial farms. It ensures uniform fruit size. But it stresses plants. Only force healthy plants. Weak plants may not respond. Follow recommended doses.

    Natural flowering is fine for small farms. Just wait longer. Fruits will be smaller but sweeter. Forcing gives larger fruits. Choose based on your market.

    How long does fruit take to mature?

    Dr. Nakato: From flowering to harvest takes 5-6 months. Fruit color changes from green to yellow. Harvest when 1/3 to 1/2 yellow. Overripe fruits spoil quickly. Underripe fruits aren’t sweet.

    Harvest in the morning. Use a sharp knife. Cut the fruit with a small piece of stem. Handle carefully. Bruises reduce shelf life. Place in crates lined with leaves.

    After harvest, plants produce ratoon crops. The second crop takes less time. About 12 months from first harvest. You can get 2-3 crops from one planting. Then replant.

    Harvesting and Post-Harvest Handling

    What are the best practices for harvesting?

    Dr. Nakato: Harvest at the right maturity. Test by tapping the fruit. A dull sound means ripe. A metallic sound means not ripe. Also check sugar content. Use a refractometer. Brix levels should be 12-14 for local market, 14-16 for export.

    Wear gloves to avoid sharp leaves. Cut fruit with a clean knife. Leave a 2-3 cm stem. This prevents rot. Place fruits in shade immediately. Sun heats them and reduces quality.

    Grade fruits by size and color. Export markets require uniform fruits. Local markets accept mixed sizes. Remove damaged fruits. They can be processed into juice or dried.

    How do you store and transport pineapples?

    Dr. Nakato: Store at 7-10°C with high humidity. don’t refrigerate below 7°C. This causes chilling injury. Fruits turn brown and lose flavor. Transport in ventilated containers. Avoid stacking too high. Use cushioning materials.

    For local markets, harvest one day before selling. Keep in cool place. For export, use cold chain. Pre-cool fruits after harvest. This extends shelf life to 2-3 weeks.

    Process surplus fruits. Make dried pineapple, juice, or jam. This adds value and reduces waste. Many farmers sell fresh only. But processing increases income.

    Market and Selling

    Where can you sell pineapples in Uganda?

    Dr. Nakato: Local markets are everywhere. Kampala, Jinja, and Gulu. Also sell to schools, hotels, and supermarkets. Pineapples are popular for fresh consumption. You can also supply juice processors. Companies like Britannia and Mukwano buy in bulk.

    Export markets include Kenya, South Sudan, and Europe. But export requires certification. GlobalGAP is common. You need good agricultural practices. Start with local markets. Then expand.

    Price fluctuates. During peak season, prices drop. Off-season, prices rise. Use forcing to harvest off-season. This gives better prices. Also sell directly to consumers. Use social media to advertise.

    How do you calculate profit?

    Dr. Nakato: Cost per acre: land preparation, suckers, fertilizer, labor, and pest control. Total about 5-7 million UGX. Yield per acre: 20-30 tons. Price per kg: 1000-2000 UGX. Gross revenue: 20-60 million UGX. Net profit: 13-53 million UGX.

    Profit depends on management. Good practices increase yield. Reduce costs by using organic inputs. Also, intercropping with beans or vegetables gives extra income. But avoid competition.

    Keep records of expenses and sales. This helps you track profitability. Many farmers fail because they don’t record. Use a simple notebook or app.

    Challenges and Solutions

    What are the biggest challenges?

    Dr. Nakato: Pest and disease pressure. Mealybugs and Fusarium wilt are major. Also, price volatility. Market prices can drop suddenly. Climate change causes unpredictable rains. Drought or floods affect yields.

    Lack of quality planting material. Many suckers are diseased. Use certified sources. Government programs provide clean material. Also, join farmer groups for bulk buying.

    Access to credit is hard. Banks require collateral. Some microfinance institutions offer loans. But interest rates are high. Save money from previous harvests. Reinvest in your farm.

    How can farmers overcome these?

    Dr. Nakato: Practice integrated pest management. Combine biological, cultural, and chemical controls. Use resistant varieties. Rotate crops with legumes. This breaks pest cycles.

    Diversify income. Grow other crops like bananas or coffee. Also, add value to pineapples. Make juice, dried slices, or vinegar. This reduces reliance on fresh sales.

    Form cooperatives. They help with marketing and bulk inputs. Also, share knowledge. Attend training from extension officers. Use mobile apps for weather and market info.

    Future of Pineapple Farming in Uganda

    What are the trends?

    Dr. Nakato: Demand for organic pineapples is growing. Export markets pay premium. Organic farming uses natural inputs. It is better for soil health. Start transitioning to organic. Get certification.

    Technology is changing farming. Drip irrigation, solar pumps, and drones are used. They improve efficiency. But they require investment. Start small and scale up.

    Climate-smart agriculture is key. Use drought-tolerant varieties. Practice rainwater harvesting. Plant trees for shade. This reduces heat stress.

    What is your prediction for the next 5 years?

    Dr. Nakato: Pineapple farming will grow. More farmers will adopt improved varieties. Export will increase. But competition will also rise. Quality and consistency will matter. Farmers who follow best practices will succeed.

    Processing will become more common. Small-scale solar dryers and juicers will be affordable. This will reduce post-harvest losses. Government support will improve. More training and subsidies will be available.

    Climate change will pose risks. But with adaptation, pineapple farming remains profitable. I am optimistic. Uganda can become a top pineapple exporter in Africa.

    Final Advice

    What is your message to new farmers?

    Dr. Nakato: Start small. Learn the basics. don’t invest all your money at once. Test on a quarter acre. Gain experience. Then expand.

    Seek knowledge. Visit successful farms. Attend field days. Read books and online resources. Join farmer groups. Share experiences.

    Be patient. Pineapples take time. The first harvest may be small. But with care, yields increase. Farming is a business. Treat it as such. Keep records and plan.

    Finally, love what you do. Farming is hard work. But it is rewarding. Seeing your pineapples grow and sell is satisfying. Good luck!

    Quick Tips Table

    Aspect Recommendation
    Soil pH 4.5-5.5
    Spacing 90 cm between rows, 30-45 cm within
    Fertilizer NPK 10-10-10 every 2-3 months
    Watering 1-2 inches per week
    Harvest maturity 1/3 to 1/2 yellow
    Storage temp 7-10°C

    Common Mistakes to Avoid

    • Planting in waterlogged soil
    • Using diseased suckers
    • Over-fertilizing with nitrogen
    • Harvesting too early or late
    • Ignoring pest control

    “Pineapple farming requires patience and care. But the rewards are sweet.” – Dr. Grace Nakato

    Thank you for reading. We hope this interview helps you. Start your pineapple journey today. With the right knowledge, you can succeed.

  • Silage for Livestock: Making and Storing Quality Feed

    Silage for Livestock: Making and Storing Quality Feed

    Silage for livestock is fermented fodder made by packing fresh chopped crops, usually maize or grass, into airtight storage so natural bacteria turn the plant sugars into lactic acid. The acid preserves the feed, letting a farmer keep wet-season fodder and feed it during the dry months when pasture is scarce. Dairy farmers in Mbarara, Kiruhura, Luwero and Masaka rely on this practice to keep cows milking when grass dries out.

    These notes cover what silage is, the crops to use, and how to make, store and feed it safely. It is one topic in the wider Senior 3 Agriculture notes .

    Ugandan farmer compacting chopped maize into a lined pit silo on a small dairy farm
    A smallholder presses chopped maize into a lined pit before sealing it to ferment for the dry season.

    What silage is and why it matters

    Silage is animal feed preserved by anaerobic fermentation, which means fermentation without air. Fresh chopped fodder is packed tightly and sealed so the little air left is used up and lactic-acid bacteria take over. The lactic acid they produce stops the feed from rotting, much as souring preserves food. That is why silage keeps feeding value that ordinary drying loses.

    • Definition: Silage for livestock is fermented animal feed made by storing fresh crops such as maize or grass in airtight conditions.
    • Anaerobic fermentation: The process runs without oxygen as natural bacteria turn plant sugars into lactic acid, which preserves the feed.
    • Preserves nutrients: Gentle fermentation keeps more energy and protein than sun-drying, so the feed stays valuable for months.
    • Dry-season insurance: Silage carries wet-season surplus into the dry season, which is why it counts among dry-season livestock feeds in the syllabus.
    • Milk production: Dairy farmers who make silage report higher milk yields and healthier animals when pasture dries out.
    • Lower feeding cost: Home-made silage costs less than bought concentrate, so a farmer feeds the herd well for less money.
    • Whole-crop use: Nearly the entire maize or grass crop enters the silo, stems, leaves and grain together, cutting waste.
    • Good-silage signs: Good silage is light green to golden brown, smells pleasantly sour, and shows no mould or slime.
    • Silage versus hay: Unlike hay, which is first dried in the sun, silage is stored moist and fermented, suiting Uganda’s wet seasons. Compare the two methods in our notes on preparing hay for livestock, which sit alongside the rest of the Senior 3 Agriculture notes.
    • Ugandan example: In Mbarara and Kiruhura, a farmer cuts maize in the wet season and opens the pit months later when pasture is gone.
    • Curriculum link: The NCDC Agriculture syllabus includes livestock feed making, and silage is the practical dry-season feed a learner must prepare, covered in the Senior 3 Agriculture notes on livestock feed making.
    • Animal health: Feeding mould-free fermented fodder keeps the gut healthy, because spoiled feed upsets digestion and appetite.
    • Farm profitability: Reliable year-round feeding smooths milk flow and weight gain, so the farm earns more evenly across the year.
    FeatureSilageHay
    What it isFresh chopped fodder preserved by fermentation without airDried forage preserved by removing moisture in the sun
    Moisture at makingKept moist and packed straight into airtight storageDried in the field before baling and stacking
    StorageAirtight pit, bunker, bag or tubeDry, ventilated store or covered stack
    Feeding valueKeeps more energy and protein; often more palatableGood fibre; can lose leaves during drying and turning
    Risk of spoilageMould if air enters or the seal breaksMould if baled too wet or stored damp

    Common mistake: writing that silage is “dried and stored feed”. Silage is not dried; it is stored moist and fermented. Hay is the dried one, and examiners test this contrast most years.

    Crops used for making silage in Uganda

    Almost any leafy crop that ferments well can be ensiled, and the crops used for making silage for livestock in Uganda are few and proven. Maize leads because its grain and stalk together carry high energy, while Napier grass, legumes and sweet potato vines add fibre and protein. The right choice depends on the animals being fed and on what grows well on the farm.

    • Maize silage: Maize is the most popular Ugandan silage crop because grain and stalk together pack high energy for dairy cows.
    • Napier grass: Napier grows widely on Ugandan farms and makes a medium-energy, medium-protein silage for beef cattle.
    • Legume silage: Legumes such as lablab and desmodium are high in protein, suiting calves and mixing well with grass.
    • Grass protein band: Grasses generally hold about 5–19% crude protein while legumes run 15–34%, so mixing the two balances a silage.
    • Napier quality: Napier cut young is richer than tall grass; crude protein falls from about 9.2% at 30 cm to about 5% above 2 m.
    • Maize grain value: Whole maize grain analyses at about 11.2% crude protein on a dry-matter basis, making maize energy feed.
    • Maize stover: Dry maize stover is only about 3.7% crude protein on a dry-matter basis, so it is roughage, not good silage.
    • Sweet potato vines: Sweet potato vines hold about 19.2% crude protein on a dry-matter basis and lift protein in grass silage.
    • Forage sorghum: Sorghum and Columbus grass suit drier areas, though young sorghum must be avoided for prussic-acid risk.
    • Harvest stage: Maize is cut at the milk-to-dough stage, when nutrients peak and the stalk still holds moisture to ferment.
    • Calliandra leaves: Calliandra leaves, about 26.3% crude protein on a dry-matter basis, enrich a grass silage in small amounts.
    • Local seed supply: Napier, Rhodes grass, lablab, desmodium, Brachiaria and calliandra are all sold commercially in Uganda.
    • Ugandan example: On a zero-grazing unit near Kampala, a farmer ensiles maize and napier, then top-dresses with calliandra.
    CropEnergyProteinBest fed to
    MaizeHighLowDairy cows
    Napier grassMediumMediumBeef cattle
    Legumes (lablab, desmodium)LowHighCalves and growing stock
    Sweet potato vinesMediumHighMixed with grass silage

    Common mistake: calling maize silage a “protein feed”. Maize is energy feed at about 11.2% crude protein on a dry-matter basis. Mix in legumes or add a supplement to raise protein.

    Steps in making quality silage

    Making silage for livestock follows a fixed sequence, and each step must be done quickly. The aim at every stage is to remove air and let lactic-acid bacteria work on moist, chopped fodder. Any air left in, or any delay between cutting and sealing, invites mould and a sour, rotten result.

    1. Choose the crop: Pick a high-yield crop that ferments well, with maize preferred for energy and Napier for bulk.
    2. Harvest at the right stage: Cut maize at the milk-to-dough stage, when nutrients peak and moisture is still enough to ferment.
    3. Wilt the material: Wilt cut fodder briefly to shed surface water, but do not dry it out, as silage must stay moist.
    4. Chop finely: Chop into pieces of about 1–2 cm so the crop packs tightly, releasing sugars and leaving few air pockets.
    5. Check moisture: Squeeze a handful hard; it should ball up and leave the palm damp but not dripping juice.
    6. Fill the silo quickly: Pack the chopped material into the pit, drum or bag fast, ideally the same day, before it heats.
    7. Compact tightly: Press the material down hard, layer by layer, because oxygen is what lets spoilage organisms grow.
    8. Exclude air: Keep pressing as you fill so the heap is dense, since any pocket of air becomes a pocket of rot.
    9. Seal airtight: Cover with polythene and weigh it down with soil or sandbags so no air creeps in at the edges.
    10. Allow fermentation: Leave the silage sealed for about 21–30 days while lactic-acid bacteria turn sugars into acid.
    11. Store undisturbed: Do not open or poke the silo during fermentation, because breaking the seal spoils the batch.
    12. Open carefully: After 21–30 days, open one end and take feed from a clean face, then reseal what remains.
    13. Feed gradually: Introduce silage a little at a time over several days so the rumen adjusts without digestive upset.
    StepWhat goes wrong at this step
    1. Harvest at the right stageToo early loses yield; too late, the stalk is woody and low in sugar, so it ferments poorly.
    2. WiltOver-wilting dries the crop so bacteria cannot work; under-wilting leaves free water that leaks out.
    3. ChopLong, uneven pieces trap air and refuse to compact, leaving pockets where mould grows.
    4. CompactLight pressing leaves oxygen in the heap, so the top and edges heat and rot instead of fermenting.
    5. Exclude airRemaining air lets yeasts and moulds consume the sugars the lactic bacteria need.
    6. SealA torn or poorly weighted cover lets rain and air in, the commonest cause of surface mould.
    7. FermentOpening too early stops the cure, leaving the feed half-sour and unstable.
    8. StoreOnce opened, an untidy face exposed to air begins to heat and spoil within days.
    Chopped green fodder being packed into a heavy plastic silage tube by a Ugandan farmer
    Short, evenly chopped fodder packs tightly into a plastic tube, leaving few air pockets for the lactic-acid bacteria to work in.

    Exam tip: the moisture squeeze test is a favourite practical question. Name both parts: the material balls up without crumbling, and the palm is damp with no dripping juice.

    Storage structures for silage

    A silo has one job: to keep air and rain out while the crop ferments. The storage structures used for silage for livestock in Uganda weigh cost against the amount stored, and a low-cost pit serves most school and small farm needs.

    • Pit silo: A lined pit dug in the ground is the cheapest and most common Ugandan silage store for small farmers.
    • Bunker silo: A bunker is a larger, partly above-ground trench with walls, suiting medium to large dairy farms.
    • Tower silo: A tall, sealed upright tower keeps feed well but costs much more, so it is rare on smallholdings.
    • Above-ground clamp: A clamp is a heap built on the ground and covered, suiting a one-off batch where digging is hard.
    • Bag or tube silage: Chopped fodder in heavy plastic bags or tubes gives flexible, portable storage for small and urban farmers.
    • Drum silage: Clean metal or plastic drums make cheap, small silos for urban keepers with few animals.
    • Site choice: Put the silo on drained, raised ground near the feeding point so water cannot flood in.
    • Drainage: A pit needs a slight floor slope and a channel, because standing water ruins the bottom layers.
    • Wall and floor: Line earth pits with polythene or plaster, since bare soil lets air and moisture spoil the edges.
    • Capacity match: Size the silo to daily use so the open face is removed quickly and never heats or moulds.
    • Sealing material: Polythene weighted with soil, tyres or sandbags is the standard seal, and tears must be repaired.
    • Cost versus scale: Pits, drums and bags cost least and fit smallholders; bunkers and towers pay off only at scale.
    • Ugandan example: A school farm can dig a pit for maize and use plastic tubes for napier, then compare which keeps better.
    StructureCostScaleSuitability for a Ugandan smallholder
    Pit siloLowSmall to mediumBest first choice; cheap, common and easy to dig and seal
    Bunker siloMediumLargeSuited to bigger dairy herds and farms with machinery
    Tower siloHighLargeRare; high cost makes it impractical for most smallholders
    Above-ground clampLow to mediumOne-off large batchUseful where digging is hard or the water table is high
    Plastic bag or tubeLow, flexibleSmall, portableExcellent for small and urban farmers; needs careful sealing
    Sealed pit silo covered with polythene and soil beside a Ugandan zero-grazing unit
    A covered pit silo keeps air and rain out while the ensiled crop cures over 21 to 30 days.

    Common mistake: building the silo away from the feeding area. A silo beside the trough is used promptly, while a distant one is opened late and spoils.

    Feeding silage and common problems

    Feeding silage for livestock means giving it as a bulk roughage, usually alongside a protein supplement and clean water. Dairy cows can take 20–30 kg a day and beef cattle 15–25 kg, but the amounts only help if the feed is clean and introduced slowly. Most feeding problems trace back to a fault made at ensiling.

    • Dairy cows: Feed a milking cow about 20–30 kg of silage daily with a protein supplement and clean water.
    • Beef cattle: Give beef animals about 15–25 kg each day, combined with concentrates for fast weight gain.
    • Introduce gradually: Bring silage in over several days, because a sudden change upsets the rumen and causes problems.
    • Protein balance: Silage, especially maize silage, is low in protein, so mix legumes or a protein supplement.
    • Clean water: Silage is moist but no substitute for water; a cow still needs daily drinking water to digest fibre.
    • Fresh feed daily: Take out only what animals finish that day, because silage exposed to air heats and sours quickly.
    • Mould fault: Mould, seen as grey or black patches, comes from poor compaction or a broken seal; press and reseal.
    • Butyric smell: A sharp, unpleasant smell means poor fermentation from a too-wet or dirty crop; discard affected feed.
    • Overheating: A silo that feels hot has air entering, so reseal it and press exposed faces firmly.
    • Seepage: Brown liquid oozing out shows excess moisture; wilt the crop more before the next batch.
    • Test before feeding: Check colour, smell and texture; good silage is greenish-golden, sour and free of slime.
    • Nutrient value: Silage supplies energy, protein, fibre and some vitamins and minerals, supporting milk and growth.
    • Ugandan example: A dairy keeper in Luwero opens one bag at a time and feeds it within two days to keep milk steady.
    FaultCauseRemedy
    MouldAir entering through poor compaction or a broken sealCompact harder, reseal torn covers and discard mouldy feed
    Butyric smellPoor fermentation from a too-wet or dirty cropWilt more, keep soil out and feed only clean material
    OverheatingAir entering the silo or an exposed feed faceSeal firmly, press the face and feed out faster
    SeepageExcess moisture in the ensiled cropWilt longer before chopping and drain the silo base

    Exam tip: link each fault to its step. Mould and overheating mean air entered; seepage means the crop was too wet; a butyric smell means fermentation failed.

    Frequently asked questions about silage for livestock

    1. What is silage for livestock? Silage is fermented animal feed made by packing fresh chopped crops such as maize or grass into airtight storage. Natural bacteria turn the plant sugars into lactic acid, which preserves the feed. Farmers keep it for the dry season, when fresh pasture is scarce and expensive.
    2. Which crop is best for making silage in Uganda? Maize is the best because of its high energy content, which suits dairy cows. Napier grass gives medium energy and protein for beef cattle, while legumes such as lablab add protein for calves. Mixing a grass with a legume balances the ration.
    3. How long does silage take to be ready? Silage is ready after about 21 to 30 days of fermentation. The sealed silo must stay undisturbed for that whole period while the lactic-acid bacteria work. Opening it early stops the cure and leaves the feed half-sour.
    4. Can a small farmer make silage in Uganda? Yes. A smallholder can use a low-cost pit silo, a clean drum, or plastic bags and tubes, none of which needs machinery. The key steps of chopping, compacting and sealing are done by hand, so any farmer can make silage.
    5. How do you know if silage has gone bad? Check the colour, smell and feel. Good silage is light green to golden brown with a pleasant sour smell and no mould. Bad silage shows grey or black patches, smells sharp, feels slimy, or feels hot where air has entered.
    6. How much silage do you feed a dairy cow per day? A dairy cow takes about 20 to 30 kg a day, given with a protein supplement and clean water. Beef cattle take about 15 to 25 kg daily. Introduce silage gradually over several days so the rumen adjusts.

    Key terms and revision summary

    TermMeaning
    SilageFermented animal feed made by storing fresh chopped crops airtight
    EnsilingThe whole process of making silage, from chopping through to sealing
    AnaerobicWithout air; the oxygen-free condition silage needs to ferment
    Lactic acidThe acid bacteria produce from plant sugars that preserves the feed
    WiltingLetting cut fodder dry slightly to shed surface water before ensiling
    CompactionPressing the chopped crop down hard to squeeze out trapped air
    SiloAny airtight structure, pit, bunker, tower, clamp, bag or tube, that stores silage
    SeepageBrown liquid oozing from too-wet silage, which carries away nutrients
    Butyric smellA sharp, unpleasant smell showing that fermentation went wrong
    Milk-to-dough stageThe grain stage when maize is cut for silage, at peak nutrient value
    1. Define silage for livestock and explain why it is a dry-season feed. Outline: define silage as feed preserved by anaerobic fermentation through lactic acid; it is made in the wet season and stored for the dry months, linking to the Senior 3 dry-season feeds outcome.
    2. Describe the steps of making quality silage from maize. Outline: harvest at the milk-to-dough stage, wilt, chop into 1–2 cm pieces, test moisture by squeezing, fill fast, compact, seal, and ferment for 21–30 days.
    3. Compare silage and hay as fodder conservation methods. Outline: silage is stored moist and fermented without air; hay is dried then stored dry; use the five-feature table to set them side by side.
    4. A farmer’s silage grows mould on top. State the cause and two remedies. Outline: air entered through poor compaction or a broken seal; compact harder and reseal the torn cover, then discard the mouldy feed.
    5. Give the moisture test used before ensiling and what each result means. Outline: squeeze a handful of chopped material; a ball with a damp, non-dripping palm is right, crumbling means too dry, and dripping means too wet.
    6. Why introduce silage to cattle gradually? Outline: a sudden change upsets the rumen microbes and causes digestive problems; introduce the feed over several days.
  • The Complete Guide to Brooding Local Chickens: Essential Techniques for Success

    The Complete Guide to Brooding Local Chickens: Essential Techniques for Success

    Brooding is the critical period in a chicken’s life from hatch to the time they no longer need supplemental heat. For local chicken breeds, which are often hardier but still require careful management, proper brooding sets the foundation for a healthy, productive flock. This guide covers everything from pre-brooding preparation to weaning, focusing on best practices for local chickens.

    Understanding Brooding Basics for Local Chickens

    Brooding mimics the natural warmth and protection a hen provides her chicks. For local chickens, which may be more resilient but also more prone to predation and environmental stress, a controlled brooding environment is essential. The goal is to provide consistent heat, clean water, nutritious feed, and protection from disease.

    Key Environmental Requirements

    Temperature is the most critical factor. For the first week, maintain 95°F (35°C) at chick level, reducing by 5°F each week until reaching ambient temperature. Use a brooder lamp or heat plate. Local chickens may tolerate slightly lower temperatures, but it’s safer to follow standard guidelines.

    Space and Ventilation

    Provide at least 0.5 square feet per chick initially, increasing to 1 square foot by week 4. Good ventilation prevents ammonia buildup but avoid drafts. Local chickens are often raised in semi-open housing; ensure the brooder area is draft-free.

    Lighting Schedule

    Continuous light for the first 48 hours helps chicks find feed and water. Then, reduce to 16 hours light per day. For local chickens raised for meat or eggs, adjust lighting based on production goals.

    Pre-Brooding Preparation: Setting Up for Success

    Before chicks arrive, thoroughly clean and disinfect the brooder. Use a 10% bleach solution or commercial disinfectant. Set up heat source, feeders, and drinkers. Test temperature and adjust height of heat lamp to achieve correct brooder temperature.

    Choosing the Right Brooder Type

    Options include box brooders, battery brooders, or floor pens. For local chickens, floor pens with a heat lamp are common. Ensure sides are high enough to prevent drafts but allow ventilation.

    Bedding Selection

    Use pine shavings, rice hulls, or chopped straw. Avoid newspaper as it can cause leg problems. Depth of 2-4 inches provides insulation and absorbs moisture.

    Equipment Checklist

    • Heat source (250-watt infrared heat lamp or heat plate)
    • Thermometer (placed at chick level)
    • Chick feeders (one per 25 chicks)
    • Chick drinkers (one per 50 chicks)
    • Bedding material
    • Supplemental vitamins/electrolytes (optional)

    Brooding Temperature Management

    Temperature management is the most critical aspect of brooding. Chicks that are too cold will huddle under the heat source and may die; chicks too hot will pant and move away from heat. Observe chick behavior: evenly distributed chicks indicate correct temperature.

    Temperature Table

    Week Temperature (°F) Temperature (°C)
    1 95 35
    2 90 32
    3 85 29
    4 80 27
    5 75 24
    6 70 21

    Adjusting Heat Source Height

    For a 250-watt heat lamp, start at 18 inches from the litter. Raise 2 inches per week. Use a thermometer to verify. For heat plates, follow manufacturer instructions.

    Monitoring Chick Behavior

    Chicks that are comfortable will be active, eating, drinking, and resting spread out. If they chirp loudly and huddle, increase heat. If they pant and avoid the heat source, decrease heat.

    Nutrition and Feeding for Local Chicks

    Start with a high-quality chick starter feed (20-22% protein). For local chickens, which may be slower growing, ensure feed is fresh and free from mold. Provide feed in shallow trays for the first week, then switch to tube feeders.

    Feeding Schedule

    Offer feed ad libitum (free choice) for the first 8 weeks. After that, you can limit feed if raising for layers. Local chickens are good foragers; you can introduce greens after week 2.

    Water Requirements

    Provide clean, fresh water at all times. Use chick-sized drinkers to prevent drowning. Add 1 tablespoon of sugar per gallon for the first 24 hours to reduce stress. Clean drinkers daily.

    Supplemental Nutrients

    Consider adding probiotics or apple cider vinegar (1 tbsp per gallon) to support gut health. Avoid antibiotics unless prescribed.

    Health Management During Brooding

    Preventive health measures are crucial. Vaccinate against Marek’s disease at hatch (if not done by hatchery). Monitor for coccidiosis, a common problem in damp litter.

    Common Diseases and Prevention

    • Coccidiosis: Prevent with anticoccidial feed or clean dry litter.
    • Pasty Butt: Clean vent area with warm water and apply petroleum jelly.
    • Respiratory infections: Avoid drafts and maintain ventilation.

    Biosecurity Measures

    Limit visitors, use footbaths, and quarantine new birds. Local chickens are often raised in free-range systems; ensure brooder area is isolated from older birds.

    Brooding Environment: Light, Ventilation, and Space

    Lighting affects activity and growth. For local chickens, natural daylight supplemented with artificial light can work. Ensure 16 hours of light for the first 2 weeks, then reduce to 8-10 hours if raising for layers.

    Ventilation

    Proper ventilation removes moisture and ammonia. Use vents or fans but avoid direct drafts on chicks. Ammonia levels should be below 25 ppm.

    Space Requirements

    As chicks grow, expand space. At 4 weeks, provide 1 square foot per chick. Overcrowding leads to stress and disease.

    Weaning Chicks Off Heat

    Weaning is gradual. Start at week 4 by reducing temperature 5°F per week. By week 6-8, chicks should be fully feathered and able to regulate body temperature. Observe for signs of cold (huddling) and if needed, keep heat source available at night.

    Signs Chicks Are Ready to Wean

    • Full feather coverage
    • No huddling under heat source
    • Active during cooler parts of day

    Brooding Local Chickens for Meat Production

    If raising local chickens for meat (e.g., broilers), brooding practices are similar but with higher protein feed (22-24%) and shorter brooding period (4-5 weeks). Ensure rapid growth by providing constant access to feed and water.

    Brooding Local Chickens for Egg Production

    For layers, focus on skeleton development. Use a starter feed with 20% protein and adequate calcium (1% for starters). Avoid overfeeding to prevent obesity. Provide oyster shell after 16 weeks.

    Common Mistakes in Brooding Local Chickens

    Many beginners make errors that affect chick survival. Avoid these:

    • Incorrect temperature – too hot or too cold
    • Poor ventilation leading to respiratory issues
    • Inadequate sanitation causing disease
    • Using incorrect feeder/drinker sizes

    Advanced Brooding Techniques for Local Chickens

    For experienced farmers, consider using heat plates instead of lamps to reduce fire risk and provide more natural warmth. Also, using infrared thermometers to monitor surface temperature.

    Seasonal Considerations in Brooding

    Brooding in winter requires more heat and insulation; summer may require cooling (fans, shade). For local chickens, which are adapted to local climates, adjust accordingly.

    Brooding and Vaccination Schedule

    Vaccinate at hatch for Marek’s disease. For Newcastle and bronchitis, consult local vet. Administer via drinking water or spray.

    Record Keeping During Brooding

    Track mortality, feed intake, weight gain, and temperature. This data helps improve future batches.

    Transitioning to the Field or Grow-Out House

    After brooding, gradually acclimate chicks to outdoor temperatures. For local chickens, this can start at 6-8 weeks. Provide shelter and protection from predators.

    Frequently Asked Questions

    How long do chicks need a heat lamp?

    Typically 6-8 weeks, until fully feathered. Reduce temperature gradually.

    Can I brood local chickens without a heat lamp?

    Only if ambient temperature is above 90°F for the first week. Otherwise, heat source is necessary.

    What is the best feed for local chicken chicks?

    A starter feed with 20-22% protein, preferably medicated (for coccidiosis prevention) or non-medicated with clean litter.

    How often should I clean the brooder?

    Remove wet bedding daily. Full clean weekly.

    What is pasty butt and how to treat it?

    Pasty butt is feces sticking to vent. Clean with warm water and apply petroleum jelly.

    Conclusion

    Successful brooding of local chickens requires attention to temperature, nutrition, health, and environment. By following the guidelines in this comprehensive guide, you can raise healthy chicks that will grow into productive members of your flock. Remember that local chickens are resilient, but they still need proper care during the vulnerable brooding period. Implement these practices to ensure high survival rates and strong, thriving birds.

  • Complete Guide to Feeding Local Chickens: Nutrition, Feed Formulation, and Management

    Complete Guide to Feeding Local Chickens: Nutrition, Feed Formulation, and Management

    Introduction

    Feeding local chickens (also known as indigenous, village, or backyard chickens) is a critical aspect of poultry farming that directly impacts productivity, health, and profitability. Unlike commercial hybrid breeds that have been selected for high feed conversion efficiency, local chickens are hardy, adaptable, and require a more balanced approach to nutrition. This guide provides comprehensive class subject notes on feeding local chickens, covering nutritional requirements, feed ingredients, ration formulation, feeding management, and common challenges. Whether you are a smallholder farmer, a student, or an extension officer, this resource will equip you with the knowledge to optimize the feeding of local chickens.

    Understanding the Nutritional Requirements of Local Chickens

    Local chickens have specific nutritional needs that vary with age, production stage, and environment. Unlike commercial layers or broilers, local chickens are often scavengers and may not consume formulated feeds exclusively. but, to achieve optimal growth and egg production, supplemental feeding is essential.

    Energy Requirements

    Energy is the primary dietary component, derived mainly from carbohydrates and fats. Local chickens require energy for maintenance, growth, egg production, and thermoregulation. The energy requirement is expressed in metabolizable energy (ME) per kilogram of feed. For growing local chickens, the recommended energy level is 2,800–3,000 kcal ME/kg, while for layers, it is 2,700–2,900 kcal ME/kg. Insufficient energy leads to poor growth, reduced egg production, and increased susceptibility to diseases.

    Protein Requirements

    Protein is crucial for muscle development, feathering, and egg formation. Local chickens have lower protein requirements than commercial breeds but still need adequate levels. For chicks (0–8 weeks), a diet with 18–20% crude protein is ideal. Growers (8–20 weeks) require 14–16% crude protein, and layers need 16–18% crude protein. Protein quality is important; the feed must contain essential amino acids like methionine, lysine, and tryptophan. Local ingredients such as soybean meal, fish meal, and groundnut cake are excellent sources.

    Vitamin and Mineral Requirements

    Vitamins and minerals are vital for metabolic functions, bone development, and eggshell quality. Local chickens often obtain these from scavenging, but supplementation is necessary for optimal performance. Key vitamins include A, D3, E, B-complex, and choline. Minerals such as calcium, phosphorus, sodium, and trace elements (zinc, copper, manganese) must be balanced. Calcium is especially critical for layers; a deficiency leads to thin-shelled eggs and osteoporosis. A typical layer diet should contain 3.5–4% calcium.

    Feed Ingredients for Local Chickens

    Local chickens can be fed a variety of ingredients, including grains, protein sources, and supplements. The choice of ingredients depends on availability, cost, and nutritional value. Below is a table comparing common feed ingredients.

    Ingredient Crude Protein (%) Metabolizable Energy (kcal/kg) Calcium (%) Phosphorus (%)
    Maize 9 3,350 0.02 0.25
    Sorghum 11 3,200 0.03 0.30
    Wheat bran 15 1,900 0.10 1.20
    Soybean meal 44 2,500 0.30 0.65
    Fish meal 60 2,800 5.00 3.00
    Groundnut cake 40 2,600 0.20 0.50
    Oyster shell 0 0 38 0

    Energy Sources

    The primary energy source is maize (corn), which is highly palatable and digestible. Sorghum and millet are alternatives in drier regions. Wheat bran is a byproduct with moderate energy and higher fiber, suitable for growers. Fats and oils (e.g., vegetable oil) can be added to increase energy density, especially during cold weather or for layers in production.

    Protein Sources

    Plant-based proteins like soybean meal and groundnut cake are widely used. Animal proteins such as fish meal and meat meal provide essential amino acids and are more digestible. but, they are more expensive. Local chickens can also benefit from insects, earthworms, and kitchen waste, but these shouldn’t replace balanced feed.

    Mineral and Vitamin Supplements

    Calcium is supplied through oyster shells, limestone, or bone meal. Phosphorus comes from dicalcium phosphate or bone meal. A premix containing vitamins and trace minerals should be added to ensure adequacy. Salt (sodium chloride) is also required at 0.25–0.5% of the diet.

    Formulating Rations for Local Chickens

    Ration formulation involves combining ingredients to meet the nutritional requirements of the birds at different stages. For local chickens, simple methods like the Pearson square or trial and error can be used. but, computer software or online calculators provide more precision. Below is a sample ration formulation for growing local chickens (8–20 weeks) and layers.

    Sample Grower Ration (Crude Protein 16%, ME 2,800 kcal/kg)

    • Maize: 60%
    • Soybean meal: 20%
    • Wheat bran: 15%
    • Fish meal: 3%
    • Limestone: 1%
    • Premix: 0.5%
    • Salt: 0.25%
    • Methionine: 0.1%

    Sample Layer Ration (Crude Protein 17%, ME 2,750 kcal/kg, Calcium 3.5%)

    • Maize: 55%
    • Soybean meal: 22%
    • Wheat bran: 8%
    • Fish meal: 5%
    • Oyster shell: 8%
    • Premix: 0.5%
    • Salt: 0.25%
    • Methionine: 0.1%

    Note: Adjust feed formulation based on ingredient availability and bird performance. Always provide clean water and grit for digestion.

    Feeding Management Practices

    Proper feeding management ensures that birds consume adequate nutrients without wastage. Local chickens are often allowed to scavenge, but supplemental feeding is necessary.

    Feeding Frequency and Amount

    Chicks should be fed ad libitum (free access) for the first 8 weeks. Growers and layers can be fed twice daily (morning and afternoon) with measured amounts. A general guideline is to provide 100–120 grams of feed per bird per day for layers and 80–100 grams for growers. Adjust based on body condition and production.

    Feeding Systems

    Common systems include:

    • Scavenging + Supplementation: Birds forage during the day and receive a balanced feed in the morning and evening. This reduces feed costs but may lead to variable intake.
    • Confined Feeding: Birds are kept in pens and fed complete rations. This ensures controlled intake but increases costs.
    • Mixed System: Birds are confined at night and released during the day. Supplementation is provided in the morning.

    Water Management

    Clean, fresh water must be available at all times. Water consumption is about 2–3 times feed intake. In hot climates, provide shade and cool water. Use drinkers that minimize spillage and contamination.

    Common Feeding Problems and Solutions

    Feeding local chickens can present challenges such as nutrient deficiencies, feed wastage, and toxicity. Below are common problems and their solutions.

    Nutrient Deficiencies

    Deficiencies in protein, vitamins, or minerals lead to poor growth, feather pecking, and reduced egg production. Solution: Provide a balanced ration with a premix. Include green forage for vitamins.

    Feed Wastage

    Wastage occurs due to poor feeder design, overfilling, or spoilage. Solution: Use trough feeders with lips, fill only one-third full, and store feed in dry, ventilated containers.

    Mycotoxin Contamination

    Moldy grains contain mycotoxins that cause immunosuppression and mortality. Solution: Use clean, dry grains; add mycotoxin binders (e.g., bentonite) to feed.

    High Feed Costs

    Feed accounts for 60–70% of production costs. Solution: Use local ingredients, grow your own fodder, and practice feed restriction for non-productive birds.

    Feeding for Specific Production Goals

    Feeding strategies differ based on whether the goal is meat, eggs, or breeding.

    Feeding for Meat Production

    For broiler-type local chickens, a high-energy, high-protein diet (20% CP, 3,000 kcal/kg) promotes rapid growth. Feed ad libitum for the first 6 weeks, then restrict slightly to prevent obesity. Use a finisher diet (18% CP) from 6 weeks to slaughter.

    Feeding for Egg Production

    Layers require a diet with 16–18% CP and 3.5% calcium. Increase feed intake during peak production (up to 120 g/bird/day). Provide oyster shell separately for additional calcium. Ensure adequate vitamin D3 for calcium absorption.

    Feeding Breeding Stock

    Breeders (cocks and hens) need a diet with 16% CP and balanced amino acids. Add extra vitamin E and selenium for fertility. Avoid overfeeding to maintain body condition.

    Use of Alternative Feed Ingredients

    To reduce costs, farmers can use alternative ingredients such as kitchen waste, insects, and forage. but, these must be balanced.

    Kitchen Waste

    Vegetable peels, leftover rice, and bread can be fed, but they are low in protein and high in moisture. Supplement with protein sources. Avoid salty or spoiled waste.

    Insects and Larvae

    Black soldier fly larvae, earthworms, and termites are rich in protein (40–50%) and can replace fish meal. They can be reared on farm waste.

    Forage and Greens

    Green leaves (e.g., amaranth, moringa, cassava leaves) provide vitamins and minerals. Chop and mix with feed or hang in bunches for birds to peck.

    Economic Considerations in Feeding

    Feed cost is the major expense in local chicken production. To maximize profitability, farmers should calculate feed conversion ratio (FCR) and cost per kilogram of egg or meat. Local chickens have higher FCR (3.5–4.5) than commercial breeds, but they fetch premium prices. Use cost-benefit analysis to determine optimal feeding levels.

    Feed Conversion Ratio (FCR)

    FCR = Feed intake (kg) / Weight gain (kg). For local chickens, an FCR of 4 means 4 kg of feed produces 1 kg of weight gain. Improving FCR through balanced nutrition reduces costs.

    Cost-Saving Strategies

    • Formulate feed using local ingredients.
    • Use feed additives like enzymes to improve digestibility.
    • Practice rotational grazing to utilize forage.
    • Reduce feed waste with proper feeders.

    Frequently Asked Questions (FAQs)

    What is the best feed for local chickens?

    The best feed is a balanced ration that meets the birds’ nutritional requirements at their specific stage of life. For chicks, use a starter mash with 18–20% protein. For growers, a grower mash with 14–16% protein. For layers, a layer mash with 16–18% protein and 3.5% calcium. Supplement with greens and grit.

    Can local chickens survive on scavenging alone?

    While local chickens can survive on scavenging, they won’t achieve optimal growth or egg production. Scavenging provides only about 30–50% of their nutritional needs. Supplemental feeding is essential for good performance.

    How much feed does a local chicken eat per day?

    On average, a local chicken consumes 80–120 grams of feed per day, depending on age, body weight, and production stage. Layers eat more than growers. Provide water ad libitum.

    What are the signs of protein deficiency in local chickens?

    Signs include poor feathering, reduced growth, low egg production, and cannibalism (feather pecking). In severe cases, birds may become lethargic and susceptible to diseases.

    Can I feed kitchen waste to my chickens?

    Yes, but kitchen waste should be fresh, free from salt, oil, and spoiled items. It should only be a supplement to a balanced ration, not the main feed. Ensure it is chopped and mixed with other ingredients.

    How do I prevent feed wastage?

    Use feeders with lips to prevent scattering, fill feeders only one-third full, and adjust feeder height as birds grow. Store feed in airtight containers to protect from pests and moisture.

    What is the ideal calcium level for laying local chickens?

    Laying hens require 3.5–4% calcium in their diet. Provide oyster shell or limestone separately to allow birds to adjust intake as needed. Vitamin D3 is necessary for calcium absorption.

    Can I use antibiotics in chicken feed?

    Antibiotics shouldn’t be used routinely as growth promoters due to resistance concerns. Use only under veterinary guidance for disease treatment. Instead, use probiotics and organic acids to improve gut health.

    How do I formulate feed for local chickens?

    Use the Pearson square method or a simple spreadsheet. Determine the desired protein level, then mix ingredients to achieve that level. Include a premix for vitamins and minerals. Test the feed by observing bird performance.

    What is the role of grit in feeding local chickens?

    Grit (small stones or insoluble material) aids in grinding feed in the gizzard. Local chickens that scavenge may get grit naturally, but confined birds need a supply. Provide insoluble grit like granite chips.

    Conclusion

    Feeding local chickens is a science and an art. Understanding their nutritional requirements, selecting appropriate ingredients, and implementing proper feeding management are key to successful production. While local chickens are hardy and can utilize scavenged feed, supplemental feeding with a balanced ration significantly improves growth, egg production, and overall health. Farmers should aim to reduce feed costs without compromising nutrition by using local ingredients and minimizing waste. Regular monitoring of bird condition and feed intake allows for timely adjustments. With the knowledge provided in this guide, you can optimize the feeding of local chickens and achieve sustainable, profitable poultry farming.

  • The Ultimate Guide to Preparing Hay for Livestock

    The Ultimate Guide to Preparing Hay for Livestock

    Hay is the backbone of livestock nutrition. It keeps animals healthy and productive. But preparing hay isn’t simple. You must do it right. Poor hay can cause health issues. It can also waste money. This guide covers everything. You will learn the best methods. We will talk about cutting, drying, baling, and storage. You will also learn about feeding. Let’s dive in.

    Why Hay Preparation Matters

    Hay provides essential nutrients. It is a primary food source for many animals. Proper preparation preserves those nutrients. It also prevents spoilage. Good hay reduces feed costs. It improves animal health. Poor hay can lead to diseases. for instance, moldy hay causes respiratory problems. It can also cause colic in horses. So, quality matters.

    Hay preparation involves several steps. Each step affects the final product. You must time each step well. Weather plays a big role. You need the right equipment. Knowledge is also key. This guide will help you master each step.

    Understanding Hay Types

    Different animals need different hay. Common types include timothy, alfalfa, and orchard grass. Timothy is good for horses. Alfalfa has more protein. It is great for dairy cows. Orchard grass is palatable. It works for sheep and goats. Choose based on your livestock needs.

    Hay Type Protein % Best For
    Alfalfa 15-20% Dairy cows, growing animals
    Timothy 8-10% Horses, adult ruminants
    Orchard Grass 10-12% Sheep, goats, horses
    Bermuda Grass 6-10% Cattle, horses

    Each type has different growth cycles. Alfalfa grows in multiple cuttings. Timothy is a cool-season grass. Know your region’s climate. Then choose the right type.

    Step 1: Cutting Hay at the Right Time

    Timing is crucial. Cut hay when nutrients are highest. For grasses, cut at early heading stage. For legumes, cut at early bloom. This maximizes protein and energy. Cutting too early reduces yield. Cutting too late lowers quality.

    Check the weather forecast. You need several dry days. Rain can damage cut hay. It leaches nutrients. It also promotes mold. Plan your cutting accordingly.

    Use a sharp mower conditioner. This cuts cleanly and crimps stems. Crimping speeds drying. It also reduces leaf loss. Set the cutting height properly. Leave 2-3 inches of stubble. This protects the plant crown. It also helps regrowth.

    Mower Types

    • Sickle bar mower: Good for small fields. Leaves clean stubble.
    • Disc mower: Fast and efficient. Handles heavy crops well.
    • Rotary mower: Best for large areas. Can handle tough conditions.

    Choose based on your field size and budget. A well-maintained mower ensures a good cut.

    Step 2: Drying Hay Properly

    Drying reduces moisture content. Hay should have 15-20% moisture for baling. Higher moisture leads to mold. Lower moisture causes leaf loss. Drying time varies. It depends on weather and crop density.

    Spread the cut hay in wide swaths. This increases sun exposure. Use a tedder to fluff the hay. It speeds drying. Turn the hay if needed. But avoid overworking. Too much handling causes leaf shatter.

    Check moisture regularly. Use a moisture tester. Or use the “feel” method. Squeeze a handful. If it feels dry and crisp, it’s ready. If it feels damp, wait longer.

    “Proper drying is the most critical step. It determines hay quality.” – Experienced farmer

    Tips for Faster Drying

    1. Cut in the morning after dew dries.
    2. Use wide swaths (at least 70% of cut width).
    3. Condition the hay to crack stems.
    4. Ted within 24 hours of cutting.
    5. Rake only when necessary.

    Step 3: Raking and Windrowing

    Raking gathers hay into windrows. This makes baling easier. It also allows further drying. Use a wheel rake or parallel bar rake. Wheel rakes are gentle. They reduce leaf loss. Parallel bar rakes work in heavy crops.

    Rake when hay is at 30-40% moisture. This prevents leaf shatter. Rake gently to avoid soil contamination. Soil can introduce mold spores. It also reduces feed value.

    Windrow shape matters. A narrow windrow dries slower. A wide windrow dries faster. For large bales, make a single windrow. For small bales, use multiple windrows.

    Step 4: Baling Methods

    Baling compresses hay for storage. There are two main types: square bales and round bales. Square bales are easier to handle. They stack well. Round bales are larger. They require less labor but more equipment.

    Bale Type Weight Storage Best For
    Small Square 40-60 lbs Indoor stacking Small operations, horses
    Large Square 800-1500 lbs Indoor/outdoor Large farms, dairy
    Round 500-2000 lbs Outdoor with cover Beef cattle, sheep

    Bale at the right moisture. For square bales, aim for 15-18%. For round bales, 18-20% is okay. Use net wrap or twine. Net wrap sheds water better. It also reduces spoilage.

    Baler Maintenance

    Keep balers in good condition. Check belts and chains. Lubricate moving parts. Adjust tension for consistent bale density. A well-maintained baler produces uniform bales. This improves storage efficiency.

    Step 5: Hay Storage Best Practices

    Storage protects hay from weather. It also prevents nutrient loss. Store hay in a dry, well-ventilated area. A barn is ideal. If using outdoor storage, cover the top. Use tarps or plastic sheeting. But leave sides open for airflow.

    Stack bales off the ground. Use pallets or gravel. This prevents moisture wicking. Leave space between stacks. This allows air circulation. It also reduces fire risk. Hay fires occur when moisture is too high.

    “Good storage can extend hay life by years. It also preserves quality.” – Hay specialist

    Storage Checklist

    • Choose a dry location.
    • Elevate bales from ground.
    • Provide ventilation.
    • Cover outdoor stacks.
    • Monitor temperature.
    • Rotate older hay first.

    Step 6: Testing Hay Quality

    Testing tells you nutrient content. It helps balance rations. Send a sample to a lab. They analyze protein, fiber, and minerals. Use a hay probe to sample. Take cores from multiple bales. Mix them for a representative sample.

    Key metrics include:

    • Crude Protein: Essential for growth and milk.
    • Acid Detergent Fiber (ADF): Indicates digestibility.
    • Neutral Detergent Fiber (NDF): Affects intake.
    • Relative Feed Value (RFV): Overall quality index.

    Use results to adjust feeding. for instance, add grain if protein is low. Or supplement minerals if deficient.

    Step 7: Feeding Hay to Livestock

    Feeding methods affect waste. Use hay feeders to reduce spoilage. For round bales, use a ring feeder. For square bales, use a rack. Place feeders in dry areas. Move them regularly to avoid mud.

    Feed hay according to animal needs. Horses need 1.5-2% of body weight per day. Cattle need 2-3%. Sheep and goats need 3-4%. Adjust based on activity and life stage.

    Monitor hay intake. Overfeeding wastes hay. Underfeeding causes weight loss. Use body condition scoring. It helps assess if animals are getting enough.

    Avoiding Common Feeding Mistakes

    1. Don’t feed moldy hay.
    2. Don’t feed hay with weeds.
    3. Don’t change hay suddenly.
    4. Don’t feed on the ground.
    5. Don’t overfeed.

    Special Considerations for Different Livestock

    Horses

    Horses need high-fiber hay. Timothy is a top choice. Avoid alfalfa for easy keepers. It can cause obesity. For performance horses, alfalfa provides extra energy. Always provide clean water.

    Dairy Cows

    Dairy cows need high-protein hay. Alfalfa is excellent. It boosts milk production. Feed in combination with silage. Balance with grains for energy. Ensure consistent quality.

    Beef Cattle

    Beef cattle can eat lower-quality hay. They are less picky. But still need adequate protein. Supplement with protein blocks if needed. Use round bales for efficiency.

    Sheep and Goats

    Sheep and goats prefer fine-stemmed hay. Orchard grass is good. Avoid coarse hay. It can cause choking. Use hay nets to reduce waste. Provide minerals separately.

    Troubleshooting Hay Problems

    Hay problems include mold, dust, and weeds. Mold occurs when hay is too wet. It appears as white or gray powder. Dust comes from over-dried hay. It causes respiratory issues. Weeds reduce feed value.

    To prevent mold, bale at correct moisture. Store in dry conditions. If hay gets wet, discard it. For dust, add a little water before feeding. But not too much. For weeds, control them in the field. Use herbicides if necessary.

    Another common issue is heating. Hay can heat if moisture is high. This can lead to fire. Monitor bale temperature. If it exceeds 130°F, take action. Spread bales apart. Cool them down.

    Economic Considerations

    Hay production costs money. You need equipment, fuel, and labor. But good hay saves money on supplements. It also improves animal performance. Calculate cost per ton. Compare to buying hay. Often, making your own is cheaper.

    Consider selling excess hay. It can generate income. But ensure quality. Market demands high-quality hay. Test and advertise accordingly.

    Environmental Impact

    Hay fields provide habitat. They reduce erosion. They also sequester carbon. Sustainable practices improve soil health. Rotate fields to prevent nutrient depletion. Use cover crops when possible.

    Minimize waste. Spoiled hay contributes to methane. Proper storage and feeding reduce waste. It’s good for your wallet and the planet.

    Advanced Techniques

    Some farmers use haylage. It is fermented hay. It has higher moisture. It is stored in bales wrapped in plastic. This preserves nutrients. It works well in wet climates.

    Another method is hay compression. It reduces volume for transport. But it requires special equipment. It isn’t common for small farms.

    Conclusion

    Preparing hay is both an art and a science. It requires attention to detail. But the rewards are great. You get high-quality feed. Your animals stay healthy. Your farm becomes more efficient.

    Remember the key steps: cut at the right time, dry properly, bale correctly, store well, and feed wisely. Test your hay to know its value. Adjust your methods based on results.

    With practice, you will improve. Your hay will get better every year. Start applying these tips today. Your livestock will thank you.

  • Growing Avocado in Uganda: A Complete Guide for Farmers

    Growing Avocado in Uganda: A Complete Guide for Farmers

    Avocado farming in Uganda is booming. Farmers are discovering its huge potential. The fruit is nutritious and profitable. But growing avocado requires knowledge. You need the right techniques. This guide covers everything. From planting to selling. Let’s dive in.

    Why Grow Avocado in Uganda?

    Uganda has ideal conditions for avocados. The climate is warm. The soil is fertile. Avocado trees thrive here. Demand is high locally and internationally. Supermarkets want them. Exporters need them. You can make good money. But you must do it right.

    Avocados are healthy. They contain good fats. People love them. Uganda’s population is growing. So is the middle class. They buy more avocados. Hotels and restaurants use them. Processors make oil and cosmetics. The market is expanding fast.

    Best Avocado Varieties for Uganda

    Choose the right variety. It matters a lot. Some grow better in Uganda. Others have better yields. Here are top choices.

    Hass Avocado

    Hass is the most popular. It has a dark, bumpy skin. The flesh is creamy. It ships well. Exporters love it. It grows in many areas. But it needs care. It is a hybrid. It produces well from year three.

    Fuerte Avocado

    Fuerte is a green variety. It has smooth skin. The taste is mild. It is hardy. It resists cold better. It fruits earlier than Hass. But it doesn’t store long. Sell it quickly.

    Booth 8 and Reed

    These are less common. But they do well. Booth 8 is large. Reed is round. Both have good flavor. They are good for local markets. Try them if you have space.

    Climate and Soil Requirements

    Avocados need specific conditions. First, temperature. They like 20-30°C. Too hot or cold stresses them. Second, rainfall. They need 1000-2000 mm per year. Too much rain causes root rot. Too little reduces yield. Irrigate if needed.

    Soil is critical. Avocados need well-drained soil. Sandy loam is best. Heavy clay holds water. That kills roots. Soil pH should be 5.5-6.5. Test your soil first. Add lime if too acidic. Add organic matter for fertility.

    Land Preparation and Planting

    Prepare land early. Clear bushes and weeds. Plow deeply. Remove stones. Mark planting holes. Space them 8-10 meters apart. That gives room for growth. Dig holes 60 cm wide and 60 cm deep. Mix topsoil with manure. Fill the hole partly.

    Plant at the start of rains. That gives trees time to establish. Remove the seedling from its pot. Place it in the hole. The graft union should be above soil. Fill with soil. Firm it gently. Water well. Mulch around the tree. This keeps moisture.

    Caring for Young Trees

    Young trees need attention. Water them regularly. Especially in dry spells. But don’t overwater. Weeds compete for nutrients. Remove them by hand or mulch. Apply fertilizer after three months. Use a balanced one like NPK 17-17-17. Apply again after six months.

    Prune young trees lightly. Remove dead branches. Shape the tree. This helps air circulation. Stake the tree if it leans. Protect from animals. Use fencing if needed. Check for pests often.

    Fertilization and Irrigation

    Avocados need nutrients. Nitrogen is key for growth. Phosphorus for roots. Potassium for fruit. Use organic manure yearly. Apply 20-30 kg per tree. Supplement with chemical fertilizer. Follow soil test advice. Apply in two splits per year.

    Irrigation boosts yield. Drip irrigation is efficient. It saves water. Water deeply once a week. Increase during fruiting. Reduce after harvest. Mulching reduces evaporation. Use grass or leaves.

    Pest and Disease Management

    Pests attack avocados. Common ones include thrips. They damage leaves and fruit. Use neem oil or insecticidal soap. Mites cause yellowing. Spray sulfur. Fruit flies lay eggs in fruit. Hang traps. Use bait sprays.

    Diseases are serious. Root rot is deadly. It comes from poor drainage. Plant on mounds. Use resistant rootstocks. Anthracnose causes fruit spots. Prune for air flow. Spray copper fungicide. Cercospora causes leaf spots. Remove infected leaves. Apply fungicide.

    Pruning and Training

    Pruning shapes the tree. It also improves yield. Prune during dry season. Remove low branches. They touch the ground. Cut crossing branches. Thin the canopy. Let light in. This reduces disease. Use sharp tools. Disinfect them. Seal large cuts with paint.

    Training young trees is key. Choose a central leader. Let it grow tall. Remove competing branches. This gives a strong structure. It supports heavy fruit. It also makes harvesting easier.

    Pollination and Fruit Set

    Avocado flowers are tricky. They open twice. First as female. Then as male. This prevents self-pollination. Plant different varieties together. They cross-pollinate. Bees help. Keep beehives nearby. Good pollination means more fruit.

    Fruit set can be low. Stress reduces it. Water and feed well. Avoid heavy pruning during flowering. Thin fruit if too many. It improves size. Remove misshapen fruits.

    Harvesting Avocados

    Avocados don’t ripen on tree. They mature but stay hard. Harvest when they reach size. Color changes for some varieties. For Hass, skin turns from green to purplish-black. For Fuerte, it stays green but becomes dull. Pick one and test. It should be firm but yield slightly.

    Harvest carefully. Use a picking pole. Or climb with a bag. Don’t drop fruit. They bruise easily. Cut the stem short. Leave a small piece. This prevents rot. Place in crates. Don’t pile too high.

    Post-Harvest Handling

    Handle avocados gently. Sort by size and quality. Remove damaged ones. Wash if dirty. Dry them. Store at 5-7°C. This slows ripening. Keep humidity high. Use plastic liners. Ethylene gas ripens them. Sell or ripen as needed.

    For export, follow standards. Wash with chlorine. Grade for export. Pack in boxes. Label properly. Ship quickly. Air freight is best. Sea freight needs controlled atmosphere.

    Marketing Your Avocados

    Find buyers early. Local markets need fresh fruit. Supermarkets want consistent supply. Hotels and restaurants buy regularly. Processors need large quantities. Exporters look for quality. Join a farmers’ group. They can negotiate better prices.

    Price fluctuates. Harvest season brings lower prices. Off-season is higher. Store fruit to sell later. But that requires cold storage. Build relationships with buyers. Deliver on time. Maintain quality. Your reputation matters.

    Costs and Profits

    Starting costs are high. You need land, seedlings, and equipment. Each tree costs about 10,000 UGX. Prepare land, dig holes, buy fertilizer. Total for one acre is around 3-5 million UGX. But trees produce for decades. Annual costs are lower. Pruning, fertilizing, pest control, harvesting. About 2 million per acre.

    Income is good. A mature tree yields 100-200 fruits per year. At 1000 UGX each, that’s 100,000 per tree. An acre has 60 trees. That’s 6 million gross. Profits can be 3-4 million per acre. With good management, you earn more.

    Common Challenges

    Avocado farming has risks. Pests and diseases are major. Climate change brings unpredictable weather. Droughts and floods harm trees. Poor soil fertility reduces yield. Lack of knowledge leads to mistakes. Market prices can drop. But you can overcome these. Learn continuously. Consult experts. Invest in good practices.

    Success Stories

    Many Ugandans succeed. John from Mukono started with 50 trees. Now he has 200. He exports to Kenya. He earns 10 million per year. Grace from Mbarara grows Hass. She supplies supermarkets. Her farm is model. She trains other women. They form a cooperative. They get better prices.

    These stories show potential. With hard work, you can too. Start small. Learn as you grow. Expand gradually. Avocado farming is a journey. But it rewards patience.

    Conclusion

    Avocado farming in Uganda is promising. It offers good income. It improves nutrition. It creates jobs. But success requires knowledge. Choose the right variety. Prepare land well. Care for trees. Manage pests. Harvest correctly. Market wisely. Follow this guide. You will succeed. Start your avocado farm today. The future is green.

  • Dairy Farming in Uganda: Breeds, Feeding and Profitability

    Dairy Farming in Uganda: Breeds, Feeding and Profitability

    Dairy farming in Uganda means keeping cattle that are milked for sale or for home use, and it is one of the most practical Senior 3 Agriculture topics because its numbers are easy to compare. Uganda kept 14.5 million cattle in the 2021 national livestock census and produced about 3.7 billion litres of milk that year (UBOS, National Livestock Census Report 2021 ).

    The gap between a pure Ankole cow and a Friesian cross explains most of what a learner must understand about breeds, feeding and profit. These notes follow the NCDC syllabus and pair with the wider Senior 3 Agriculture notes hub.

    Friesian-cross dairy cow standing in a shaded zero-grazing unit on a Ugandan smallholder farm
    A dairy cow in a Ugandan zero-grazing unit, the intensive system that protects animals, concentrates manure and keeps milking close to the parlour.

    Breeds of dairy cattle used in Uganda

    Uganda’s dairy herd rests on two groups: indigenous cattle and exotic or cross-bred cattle. The NCDC Senior 3 Agriculture syllabus names seven breeds a learner must distinguish — Ankole, Sanga, Zebu, Boran, Friesian, Jersey and Guernsey. The exotic and cross-bred animals carry almost all commercial milk because they yield far more per cow.

    Indigenous cattle made up 11.2 million of Uganda’s 14.5 million cattle, or 77 percent, in 2021; exotic and cross-bred cattle made up 3.3 million, or 23 percent (UBOS, 2021). Within the indigenous herd, 78.2 percent are Zebu or Nganda and 21.8 percent Ankole long-horned, while about 90 percent of exotic cattle are kept for dairy.

    The economics of dairy farming in Uganda rest on this breed divide, because yield per cow sets the revenue side of every profit sum.

    Breed or typeGroupCharacteristics documented for Uganda
    Ankole (long-horned Sanga)IndigenousLong horns, small hump, large body, long legs; about 2.4 litres a day on Kiruhura farms.
    SangaGroup nameThe long-horned group; in Uganda the Sanga is the Ankole long-horned cow.
    East African short-horn ZebuIndigenousShort horns, large thoracic hump, small body, short legs.
    NgandaIndigenousIntermediate horns, hump and body; found in central Uganda.
    Zebu (Nkedi / Karamojong)IndigenousSmall, stocky short-horned Zebu of the north and east.
    BoranExotic (beef)Kenyan-born; listed as a beef breed in NAGRC&DB’s 2023 catalogue.
    Friesian (Holstein)Exotic (dairy)High-yielding dairy breed; crossed with Ankole to raise milk yield.
    JerseyExotic (dairy)Dairy breed; Kenyan-born bulls in NAGRC&DB’s 2023 catalogue.
    GuernseyExotic (dairy)Dairy breed; the only Uganda-bred bull (BRIGHT) in the 2023 catalogue.
    SahiwalExoticNamed on the NAGRC&DB 2023 catalogue cover with Friesian, Ayrshire and Boran.
    AyrshireExotic (dairy)Named on the NAGRC&DB 2023 catalogue cover.
    Friesian-Ankole (HF50%)Cross-bredAbout 11.2 litres a day on Kiruhura farms; the more suited cross.
    Friesian-Ankole (HF>50%)Cross-bredAbout 10.4 litres a day on Kiruhura farms.
    • Sanga and Ankole are one: The syllabus lists both, but Sanga is the group name, and in Uganda the Sanga is the Ankole long-horned cow.
    • Adaptability: Indigenous breeds are heat-tolerant, partly disease-resistant, and survive long feed and water shortages (FAO AGRI 15).
    • Why farmers keep Ankole: For cultural reasons, as a drought and disease buffer, and for income from selling live animals.
    • Crossbreeding is fast and haphazard: Land is being fenced off and Ankole crossed with Friesian to raise yields, often without a plan.
    • Guernsey is bred in Uganda: The only Uganda-bred bull in NAGRC&DB’s 2023 catalogue is the Guernsey BRIGHT.
    • Boran is beef: Boran bulls in the national catalogue are Kenyan-born and beef, so Boran is not an indigenous dairy breed.

    For how a farmer picks a good dairy animal by eye, read the companion notes on breeds and physical selection of production cattle. This topic sits inside the Senior 3 Agriculture cattle production notes pillar.

    Common mistake: writing “Ankole cattle are 50 percent of Uganda’s herd.” That is 1990s data. UBOS 2021 puts Ankole long-horned at 21.8 percent of indigenous cattle — about 2.4 million of 11.2 million.

    Feeding dairy cattle for milk yield

    Feeding is the lever that most directly controls milk yield in dairy farming in Uganda, and the evidence is dramatic. On Kiruhura farms a pure Ankole cow gave about 2.4 litres a day, a Friesian-Ankole cross (HF50%) about 11.2 litres, and a higher-grade cross 10.4 litres (Galukande et al., Tropentag 2008). The gap is feed and management, not luck. For the ration maths, see the notes on cattle nutrition and feed rations.

    Young napier grass fodder being cut in a dairy farm plot in Uganda
    Napier grass, Uganda’s main fodder grass, is richest in protein when cut young at about one metre tall.
    1. Balanced ration: A milking cow needs roughage for the rumen plus concentrate for energy and protein, never one feed alone.
    2. Roughage first: Grasses supply 5-19 percent crude protein while legumes supply 15-34 percent, so a legume mixed into grass lifts the diet’s protein (ILRI/EADD, 2012).
    3. Napier cutting height: Napier cut at 30 cm is about 9.2 percent crude protein, but over 2 m it drops to about 5.0 percent, so harvest at 1 m or every 6-8 weeks.
    4. Protein concentrates: Cottonseed cake carries about 33.0 percent crude protein and wheat bran about 17.8 percent, on a dry-matter basis (ILRI/EADD, 2012).
    5. Energy feeds: Molasses is an energy feed, not a protein feed, and works best as a carrier for urea and minerals.
    6. Local ingredients: MAAIF’s 2004 Animal Feeds Policy names maize, sorghum, cassava, sweet potatoes, cottonseed cake, soybean and fish as feed ingredients.
    7. Dairy meal standard: A basic dairy meal needs at least 15.5 percent crude protein and calf booster at least 17.5 percent (ILRI Manual 59, 2022).
    8. Calf feeding: A calf needs the richer 17.5 percent-protein booster, while a lactating cow is kept on the 15.5 percent dairy meal.
    9. Water: UBOS’s 2021 census found keepers give cattle an average of only 8.3 litres a day — survey practice, not a full requirement.
    10. Mineral lick: A zero-grazing unit includes a mineral lick box, because salt and trace minerals are part of the feeding plan.
    11. Legume supplements: Calliandra leaves carry about 26.3 percent and sesbania about 28.2 percent crude protein, so fodder trees are planted.
    12. Sweet potato vines: These supply about 19.2 percent crude protein and can be fed up to about 15 kg fresh per cow per day (ILRI/EADD, 2012).
    13. Adulteration risk: Maize bran is commonly adulterated with sawdust, husks and cassava, so check feed quality rather than trust appearance (ILRI Manual 59).
    Stage of productionMain feed needsVerified anchor
    Calf (pre-weaning)Milk plus a starter and calf booster feedCalf booster minimum 17.5% crude protein (ILRI Manual 59, 2022).
    Weaned calf / heiferGood roughage plus a legumeLegumes are 15-34% crude protein, grasses 5-19%.
    Dry cowQuality roughage plus a mineral lickA mineral lick box is a standard unit component.
    Early lactationConcentrate plus young napierNapier at 1 m is about 7.0% crude protein; over 2 m about 5.0%.
    Mid to late lactationNapier plus a legume plus branMaize bran 9.4% and cottonseed cake 33.0% crude protein.
    Milking cow (daily)Roughage plus concentrate plus waterBasic dairy meal minimum 15.5% crude protein.
    All stagesClean water every dayUBOS 2021: keepers give an average 8.3 litres a day.

    Exam tip: In a Pearson-square question you are usually balancing protein, so state every crude-protein value on the same basis — dry matter — before you calculate. Mixing “as fed” and “% DM” numbers is the commonest S3 feed error.

    Housing and milking hygiene

    Housing and milking hygiene decide whether the milk a cow produces is safe to sell, and most Ugandan dairy cattle lack even basic shelter. Only 32.5 percent of cattle-keeping households had a shelter or enclosure for their cattle in 2021 (UBOS). The standard answer is the zero-grazing unit Uganda’s National Dairy Development Project designed. Clean handling is covered in the notes on hygienic milking techniques.

    Iron-roofed zero-grazing cattle unit with a feed trough on a Ugandan farm
    A partly roofed zero-grazing unit, with a roofed sleeping area and an open walking area that slopes to drain.
    1. Zero-grazing unit: A typical unit has a sleeping area, walking area, feed, water and mineral-lick troughs, a milking area and a manure pit (NDDP/ILRI).
    2. Partly roofed: The sleeping area, milking parlour and calf pens must be roofed; the walking area need not be, so a unit is partly roofed.
    3. Roofing materials: Iron sheets or thatch (grass or makuti) are both accepted; galvanised sheets are made to Uganda Standard US EAS 11:2013.
    4. Floor choice: The sleeping area may be soft earth or concrete with bedding, while the walking area, milking place and calf pen should be concrete.
    5. Concrete ratio: Uganda’s specification mixes 1 bag cement with 2 wheelbarrows sand and 3 wheelbarrows ballast, and the floor needs two weeks to cure.
    6. Slope and grip: The walking floor slopes away from the troughs and sleeping area, and its surface is roughened so cows do not slip.
    7. Ventilation: A unit is well ventilated but protected from wind, rain and direct sunshine, which prevents coughs, colds and stress.
    8. Termite protection: All timber in the unit is treated against termites using anti-termite chemicals or old engine oil.
    9. Movable neck-pole: The sleeping pen’s length is adjusted with a movable neck-pole, so one structure fits cows of different sizes.
    10. Strip cup: The syllabus requires detecting milk abnormalities using a strip cup, so checking milk is a skill, not an option.
    11. Clean milk production: Milking techniques and clean-milk production are their own syllabus outcome, because clean handling keeps milk saleable.
    12. Dairy law: The Dairy Development Authority Act 1998 licenses milk processors, exporters, importers and collection centres and regulates dairy quality.
    13. Milking frequency: On Ugandan farms all Ankole are milked once a day, while crossbreds are milked once or twice (Tropentag 2008).

    Common mistake: quoting “a cow needs 10 square metres of barn space” in an exam. No Ugandan source verifies a per-animal floor area for cattle — the NDDP specification gives the five-cubicle unit and its adjustable neck-pole, so describe those instead.

    Common dairy cattle diseases and control

    Disease is the biggest controllable cost in dairy farming in Uganda, and ticks lead the list. East Coast fever, spread by the brown ear tick, is the most prevalent and economically important tick-borne disease, and Uganda loses over USD 1.1 billion a year to ticks and tick-borne diseases (Kasaija et al., 2021). The syllabus fixes the diseases to know: red water, heartwater, foot and mouth disease, anthrax, roundworm and ticks.

    DiseaseCause or spreadControl in Uganda
    East Coast feverProtozoan Theileria parva, spread by the brown ear tickAcaricide tick control, ECF vaccination, integrated control.
    Red water (babesiosis)Tick-borne blood parasiteAcaricide tick control.
    Heartwater (cowdriosis)Tick-borne diseaseAcaricide tick control.
    AnaplasmosisTick-borne diseaseAcaricide tick control.
    Foot and mouth diseaseVirus; direct contact, aerosols and open marketsCompulsory twice-yearly vaccination, quarantine, movement control.
    AnthraxBacterium; infected carcassesLivestock vaccination, report deaths, never eat dead cattle.
    Roundworm (gut worms)Worm eggs and larvae on pastureStrategic deworming and grazing management.
    Ticks (brown ear tick)Parasite and disease vectorAcaricides, but resistance is spreading; only 11.3% of households own a spray pump.
    BrucellosisDeclared disease (SI 38-2); also a human riskTesting, culling and careful handling.
    Lumpy skin diseaseDeclared disease (SI 38-2)Reporting and movement control under the law.
    Acaricide resistanceSelected by intensive sprayingIntegrated tick control, vaccination, resistant breeds.
    Notifiable diseasesDeclared under the Animal Diseases Act, Cap. 38Owners must report any diseased animal to the nearest veterinary officer.
    Movement-spread diseaseInfected animals moved between districtsPermits, quarantine, and no movement of live animals at night.
    • Tick control is primary: The main Ugandan method to control tick-borne diseases, especially East Coast fever, is intensive tick control with acaricides.
    • Resistance problem: Intensive acaricide pressure has selected resistant ticks, so vaccination and integrated control are also needed (Kasaija et al., 2021).
    • FMD is endemic: Uganda has been an endemic foot-and-mouth-disease country since 1953, with serotypes O, A, SAT 1 and SAT 2 recorded from 2001 to 2024.
    • Vaccination is compulsory: About 44.5 million susceptible animals are to be vaccinated twice a year against FMD, and farmers pay per animal.
    • Quarantine is district-wide: During an FMD outbreak, quarantine in Uganda covers the entire district, not just the affected farm.
    • Report every death: Under the Animal Diseases Act (Cap. 38), owners must report any diseased animal, and moving live animals at night is prohibited.
    • Deworming reinfection: A Ugandan calf study found worm egg counts rose within three weeks of deworming, because calves ingest larvae while grazing.

    Exam tip: The syllabus asks for “red water” and “heart water” as two separate words. Red water is babesiosis and heartwater is cowdriosis. Both are tick-borne, so the control answer is the same — acaricide tick control — but name both diseases separately.

    Costs and profitability of dairy farming

    Profitability in dairy farming in Uganda is the difference between what a cow earns in milk and what it costs to feed, house and protect her, and the breed choice sets the size of both numbers. A Kiruhura Ankole at about 2.4 litres a day earns far less per litre than a Friesian cross at about 11.2 litres, but the cross costs more to feed and protect.

    No published shilling price list exists, so the cost table is illustrative.

    Cost itemWhat it coversWhy it is counted
    Breeding stockBuying a heifer or cow, or semen and AI serviceThe breed choice fixes the yield ceiling.
    Feed — roughageNapier, hay, silage, pastureThe largest running cost on most dairy units.
    Feed — concentrateDairy meal, bran, cottonseed cakeNeeded to lift yield above a roughage-only level.
    MineralsMineral lick and saltPart of the balanced ration.
    WaterTrough water, especially in the dry seasonMilk is mostly water, so supply is a cost.
    HousingPoles, iron sheets or thatch, cement, sand, ballastA five-cubicle unit lists quantities, not prices.
    Veterinary careVaccines, acaricides, dewormers, vet feesDisease is the biggest preventable loss.
    LabourFeeding, milking, cleaningZero grazing has a high labour requirement.
    EquipmentSpray pump, troughs, strip cupOnly 11.3% of households own a spray pump.
    Transport and marketingMoving milk to buyers, cooling itQuality and distance change the price received.
    Record-keepingRegisters, tags, record cardsNeeded to know which cow pays for itself.
    Finance costLoan interest, e.g. the ACF at 12% fixedBorrowing for stock or housing adds a cost.
    InsuranceLivestock cover, e.g. the UAISInsures against death and disease loss.
    • Feed dominates: Feed is the biggest expense, so growing your own napier and legumes cuts the largest single cost.
    • Yield gap is the profit story: The 2.4-to-11.2 litres-a-day gap between Ankole and Friesian-cross cows is the clearest argument for careful crossbreeding.
    • Affordable credit exists: The Agricultural Credit Facility lends at up to 12 percent a year fixed, with a Block Allocation line for groups and SACCOs.
    • Insurance is subsidised: The Uganda Agricultural Insurance Scheme covers cattle, with a capped 6 percent premium and about 2.5 percent effective after subsidy.
    • Tax incentives: Animal feeds and processed milk are VAT-exempt, while seeds, fertilisers, pesticides and hoes are zero-rated (URA, FY 2025/26).
    • Record-keeping pays: Records keep input costs visible and support deductions, and the syllabus lists record-keeping as an outcome.

    Common mistake: presenting a made-up shilling price as a market fact. Uganda’s official data gives quantities and index numbers, not shilling prices per bag or per sheet, so label every budget line “illustrative” and price it from a named market and date.

    Frequently asked questions about dairy farming in Uganda

    Which dairy cattle breed gives the most milk in Uganda?

    Friesian-Ankole crosses give the most. On 18 Kiruhura farms, a pure Ankole cow gave about 2.4 litres a day, a 50 percent Friesian cross about 11.2 litres, and a higher-grade cross 10.4 litres (Galukande et al., 2008). The 50 percent cross suits the local environment best.

    How much milk does Uganda produce in a year?

    Uganda produced about 3.7 billion litres of milk in 2021, or 71.7 million litres a week, up from 667.5 million litres in 2008 — a five-fold increase (UBOS, National Livestock Census 2021). Ankole sub-region alone contributed about 1.2 billion litres.

    What do I feed a dairy cow to increase milk?

    Feed roughage such as napier cut at one metre, plus a concentrate like dairy meal and a protein source such as cottonseed cake. Napier at 30 cm is 9.2 percent crude protein but over 2 m falls to 5.0 percent, so cut young. Add clean water and a mineral lick.

    Why do dairy cows get sick from ticks?

    Ticks carry East Coast fever, the most economically important tick-borne disease in Uganda, plus red water, heartwater and anaplasmosis. Uganda loses over USD 1.1 billion a year to ticks and tick-borne diseases (Kasaija et al., 2021). Acaricides are the main control.

    Is dairy farming profitable in Uganda?

    It can be, if a farmer closes the yield gap with crossbred cows and controls feed and disease costs. Feed is the biggest expense, so growing napier and legumes helps. Credit is available at up to 12 percent a year through the Agricultural Credit Facility.

    Which syllabus topic covers dairy farming?

    Dairy farming sits in the Senior 3 Agriculture “Cattle production” topic, worth 48 periods in Term 1 of the NCDC syllabus. It covers breeds, feeding, housing, disease control and milking, with outcomes on records, strip-cup checks and clean-milk production.

    Key terms and revision summary

    Use this glossary to lock the terms, then attempt the exam-style questions that follow.

    TermMeaning
    Zero grazingKeeping cattle in a unit where feed is brought to them instead of roaming to graze.
    CrossbreedingMating two breeds, such as Ankole and Friesian, to combine hardiness and yield.
    Crude proteinA feed’s nitrogen content expressed as protein, measured on a dry-matter basis.
    RoughageBulky, fibrous feed such as napier, hay and silage that keeps the rumen working.
    ConcentrateAn energy- or protein-rich feed such as dairy meal, bran or cottonseed cake.
    Strip cupA cup used to detect milk abnormalities before and during milking.
    Notifiable diseaseA disease an owner must report to a veterinary officer under the law.
    QuarantineA restriction on moving animals and products out of an infected area.
    AcaricideA chemical applied to control ticks on cattle.

    Exam-style questions

    1. Distinguish between Ankole and Friesian cattle, and explain why farmers cross them. Outline: Ankole is indigenous, long-horned and heat-tolerant but yields about 2.4 litres a day; Friesian is an exotic dairy breed with a much higher yield. Crossbreeding gives hardiness plus higher milk — about 11.2 litres a day for a 50 percent cross.

    2. State four diseases of cattle in Uganda and one control measure for each. Outline: East Coast fever (acaricide and vaccination), foot and mouth disease (twice-yearly vaccination), anthrax (vaccination and reporting deaths), roundworm (strategic deworming).

    3. A farmer feeds napier grass cut at 2 m. Explain the effect on milk yield and how to improve it. Outline: 2 m napier is only about 5.0 percent crude protein against 9.2 percent at 30 cm, so low protein limits milk.

    Harvest at 1 m or every 6-8 weeks and add a legume.

    4. Why is record-keeping important in a dairy unit? Outline: Records track yield, feed, disease and cost, so a farmer can cull unprofitable cows and plan. It is syllabus outcome 3.1(l) and supports tax deductions.

    Get these five sections right and you can answer any Senior 3 question on dairy farming in Uganda.

  • Carrot Farming in Uganda: A Guide to Profitable Growth

    Carrot Farming in Uganda: A Guide to Profitable Growth

    Carrot Farming in Uganda: A Guide to Profitable Growth

    Carrots are a popular vegetable in Uganda. They add color and nutrition to meals. Farmers across the country are discovering their profit potential. But is growing carrots really profitable? The answer is yes, with the right approach. This guide will show you how.

    Why Carrots Are a Great Crop for Ugandan Farmers

    Carrots have a short growing cycle. You can harvest them in just 3 to 4 months. This means you can have multiple harvests per year. They also have a steady demand. Hotels, restaurants, and families all need carrots. The market is always there.

    Carrots grow well in many parts of Uganda. The cool highlands are ideal. But with proper care, they can thrive in warmer areas too. They are also a high-value crop. A small plot can earn you good money. Many farmers are now switching to carrots from traditional crops.

    Understanding the Costs of Carrot Farming

    To make profit, you must know your costs. Let’s break them down. First is land preparation. You need to till the soil well. This costs about 50,000 to 100,000 UGX per acre. Next is seeds. Good carrot seeds cost around 20,000 UGX per acre. You also need fertilizer. Organic manure is cheap and effective. It costs about 30,000 UGX per acre.

    Labor is another cost. Planting, weeding, and harvesting require workers. You might spend 100,000 UGX per acre on labor. Irrigation is important in dry seasons. A simple drip system can cost 200,000 UGX. But you can use watering cans for small plots. Pesticides may be needed for pests like aphids. Budget 20,000 UGX for pest control.

    Total startup costs for one acre are around 420,000 UGX. This is a rough estimate. Actual costs vary by location and scale. But it gives you an idea. Remember, you can reduce costs by using family labor. Also, make your own compost to save money.

    Potential Yields and Revenue

    Carrot yields depend on variety and care. With good practices, you can get 10 to 15 tons per acre. That’s 10,000 to 15,000 kilograms. The market price for carrots varies. In Kampala, a kilo sells for 1,000 to 2,000 UGX. In rural areas, it’s lower. Let’s use an average of 1,500 UGX per kilo.

    If you harvest 12 tons per acre, your revenue is 18 million UGX. That’s 12,000 kg x 1,500 UGX. Subtract your costs of 420,000 UGX. Your profit is over 17 million UGX per acre. That’s a huge return! But remember, prices can drop. Also, you may have losses from pests or diseases. Still, the potential is clear.

    Choosing the Right Carrot Varieties

    Not all carrot varieties are the same. For Uganda, choose varieties that suit the climate. Nantes varieties are popular. They are sweet and grow well in cool areas. Chantenay varieties are also good. They do well in heavier soils. Imperator varieties have long roots. They need deep, sandy soil.

    Local varieties like ‘Uganda Local’ are also available. They are hardy and disease-resistant. But they may have lower yields. Hybrid varieties like ‘Brasilia’ give high yields. They are resistant to diseases. Talk to your local agricultural officer. Get advice on the best variety for your area.

    Preparing Your Land for Carrots

    Carrots need loose, well-drained soil. Heavy clay soil causes stunted roots. Prepare your land early. Plow and harrow to break clods. Remove stones and weeds. Add well-rotted manure or compost. Mix it into the soil two weeks before planting.

    Make raised beds if your area has heavy rain. This improves drainage. Beds should be 1 meter wide. Leave paths between beds for walking. This prevents soil compaction. Carrots need full sun. Choose a site with at least 6 hours of direct sunlight daily.

    Planting Carrots the Right Way

    Plant carrots directly in the field. They do not transplant well. Sow seeds in shallow furrows. The furrows should be 1 cm deep. Space rows 20 cm apart. Cover seeds lightly with soil. Water gently to avoid washing seeds away.

    Carrot seeds are tiny. Mix them with sand for even sowing. This prevents overcrowding. After germination, thin the seedlings. Leave 5 cm between plants. Thinning is important. It gives roots room to grow. Crowded carrots become small and twisted.

    Watering and Irrigation Tips

    Carrots need consistent moisture. Dry soil causes tough roots. Water regularly, especially during germination. Use drip irrigation if possible. It saves water and reduces disease. If using a watering can, water deeply. Aim for 1 inch of water per week.

    In dry seasons, water more often. Mulching helps retain moisture. Use grass or straw around plants. This also suppresses weeds. Avoid overwatering. It can cause root rot. Check soil moisture by feeling it. If it’s dry an inch below the surface, water.

    Fertilizing for Maximum Yield

    Carrots are heavy feeders. They need nutrients for healthy roots. Apply a balanced fertilizer like NPK 10-10-10. Use 200 kg per acre. Apply half at planting and half after 4 weeks. Organic farmers can use compost tea. Apply every 2 weeks during growth.

    Avoid too much nitrogen. It causes lush leaves but small roots. Potassium and phosphorus are key for root development. Bone meal is a good source of phosphorus. Wood ash provides potassium. Test your soil to know its needs. This saves money and improves yields.

    Weed Control in Carrot Fields

    Weeds compete with carrots for nutrients. They also harbor pests. Keep your field weed-free. Hand weeding is effective. Do it carefully to avoid damaging roots. Mulching also controls weeds. Use a thick layer of organic mulch.

    You can use pre-emergence herbicides. But follow instructions carefully. Carrots are sensitive to chemicals. Always test on a small area first. Crop rotation helps reduce weeds. Plant carrots after maize or beans. These crops suppress different weeds.

    Pest and Disease Management

    Common pests include aphids and carrot flies. Aphids suck sap from leaves. They spread viruses. Use neem oil or insecticidal soap. Carrot flies lay eggs near roots. Their larvae tunnel into roots. Use row covers to protect young plants. Rotate crops to break pest cycles.

    Diseases like leaf blight and root rot can occur. Leaf blight causes yellow spots. Use fungicides if severe. Root rot happens in wet soil. Improve drainage and avoid overwatering. Plant resistant varieties. Remove infected plants immediately.

    Harvesting and Post-Harvest Handling

    Carrots are ready 3 to 4 months after planting. Look for bright orange color and good size. Loosen soil around roots before pulling. Harvest in the morning when it’s cool. Remove tops immediately to prevent moisture loss.

    Wash carrots gently to remove soil. Sort them by size and quality. Grade A carrots are straight and uniform. They fetch higher prices. Grade B carrots are smaller or misshapen. Sell them at lower prices or process them. Store in a cool, shaded place. Carrots keep for weeks if stored properly.

    Marketing Your Carrots for Profit

    Know your market before planting. Contact local traders and supermarkets. Join farmer groups to bulk sell. This gives you bargaining power. Sell directly to consumers at farmers’ markets. You get higher prices this way.

    Consider value addition. Process carrots into juice or chips. This increases shelf life and profit. Package attractively. Use clean bags with labels. Build relationships with buyers. Consistent quality brings repeat customers. Use social media to advertise.

    Real Farmer Success Stories

    Sarah from Mbale started with half an acre. She used organic methods. Her first harvest was 6 tons. She earned 9 million UGX. Now she farms 2 acres. Her profit is over 30 million UGX per season. She supplies hotels in Kampala.

    John in Kabale grows carrots on 1 acre. He uses drip irrigation. His yield is 15 tons per acre. He sells to exporters. His profit is 20 million UGX per season. He plans to expand to 5 acres. These stories show the potential.

    Common Mistakes to Avoid

    Many beginners plant too many seeds. This leads to overcrowding. Always thin seedlings. Another mistake is poor soil preparation. Carrots need loose soil. Ignoring pests can ruin your crop. Monitor your field regularly. Also, don’t harvest too late. Overmature carrots become woody.

    Some farmers skip marketing research. They grow without a buyer. This leads to low prices. Always have a market plan. Finally, don’t ignore soil health. Test your soil and amend it. Healthy soil gives healthy carrots.

    Scaling Up Your Carrot Farm

    Start small and learn. Master the basics on a quarter acre. Then expand gradually. Invest in irrigation for dry seasons. Use machinery for land preparation. This saves labor costs. Hire a farm manager if you have large acreage. Keep records of costs and yields. This helps you make better decisions.

    Consider contract farming. Some companies offer seeds and buy the harvest. This reduces risk. Also, explore export markets. Uganda exports carrots to neighboring countries. Meet quality standards to access these markets.

    Conclusion: Is Carrot Farming Profitable in Uganda?

    Yes, carrot farming is very profitable in Uganda. With low startup costs and high returns, it offers great opportunities. But success requires planning and hard work. You need good land, quality seeds, and proper care. Marketing is also key. Find buyers before you plant.

    Start small and learn as you grow. Use the tips in this guide. Learn from successful farmers. With dedication, you can earn a good income from carrots. The demand for carrots is growing. Get started today and reap the benefits.

  • Mango Growing in Uganda: A Guide to Profitable Production

    Mango Growing in Uganda: A Guide to Profitable Production

    Mango is Uganda’s best-known fruit, and mango growing in Uganda is a practical, long-term enterprise for any O-level Agriculture learner to study. A mango is a tropical perennial fruit crop that keeps producing for over twenty years once established, unlike annual crops such as maize or beans. Grafted trees begin bearing in about three to four years, so a well-planned orchard becomes an asset that outlives the person who planted it.

    These notes explain varieties, site selection, planting, orchard care, pest control and marketing, and every section ties the theory to a real Ugandan farm example.

    Mature mango trees heavy with green and ripening fruit in a Ugandan orchard
    Mature mango trees setting fruit in a Ugandan orchard, the long-lived perennial crop these notes cover.

    Mango varieties grown in Uganda

    Mango growing in Uganda uses two broad kinds of trees: local seedling types and improved grafted types. Local types grow easily from seed and are hardy, but their fruit is often small and fibrous. Improved grafted types are joined onto strong rootstock, bear earlier, and produce larger, less fibrous fruit. Choosing the right kind, and the right season of fruiting, is the first management decision a grower makes.

    Because mango is a perennial fruit crop, it sits under perennial crop production in the NCDC lower-secondary Agriculture syllabus, which you can download from the National Curriculum Development Centre. Learning mango as a worked perennial-crop example makes the wider syllabus topic concrete.

    • Local seedling mangoes: Many homestead trees in Uganda grow from discarded seed, and these trees are hardy and long-lived but bear variable, often fibrous fruit.
    • Improved grafted mangoes: Scion wood from a selected tree is grafted onto rootstock, so the new tree reproduces the parent’s fruit exactly.
    • Shorter maturity: Grafted trees begin bearing about three to four years after planting, while a seedling tree raised from seed takes longer to fruit.
    • Early-season types: Fruit matures when few other mangoes are on sale, which helps a grower win attention and better terms at market.
    • Late-season types: These extend the harvest window so an orchard does not dump all of its fruit at once.
    • Local versus improved: Local types are cheap to establish and tough, but improved grafted types fetch steadier demand for larger, less fibrous fruit.
    • Fibre content: Local mangoes often have stringy, fibrous flesh, whereas improved selections are bred for smoother, juicier flesh that markets prefer.
    • Colour at ripeness: Skin colour ranges from green to yellow, orange and red, and colour alone does not tell you whether the fruit is sweet.
    • Fruit size: Improved grafted types are selected for larger, more uniform fruit, which grades and packs better for a commercial buyer.
    • Buying planting material: Buy grafted seedlings from a reputable nursery rather than raising seedlings from any seed you happen to find.
    • Rootstock: A grafted seedling is joined onto hardy rootstock, which supplies a strong root system and better tolerance of soil pests.
    • Adaptation: Different types suit different rainfall and altitude zones, so a grower should pick types known to perform well in their own district.
    • Dual-purpose trees: Some local types are valued for shade and timber as much as for fruit, so farmers keep them around the homestead.
    • Season planning: Combining early, mid and late-season types spreads both income and harvest labour across more months of the year.
    FeatureLocal seedling mangoesImproved grafted mangoes
    How propagatedGrown from seedScion grafted onto rootstock
    Time to first fruitLonger, often five years or moreAbout three to four years
    Fruit size and uniformitySmaller and variableLarger and uniform
    Fibre in the fleshOften fibrousSmoother, juicier
    Cost to establishLow, seed is freeHigher, seedlings must be bought
    Market demandLocal and informalSteadier, suits supermarkets and export

    Common mistake: judging ripeness by colour alone. A green-skinned mango can be fully ripe and sweet inside, while a brightly coloured one can still be hard and sour. Squeeze the fruit gently and smell the stem end instead.

    Site selection and planting

    Successful mango growing in Uganda begins with the right site and careful planting. Mangoes need deep, well-drained soil, full sunlight, and enough spacing for the tree’s wide canopy. Planting is done in a prepared hole at the start of the rains. Get these first steps right and the orchard needs less costly correction later.

    • Sunlight: Choose a sunny, open site, because mango is a full-sun crop and shaded trees grow tall while bearing poorly.
    • Drainage: Mango roots rot in waterlogged soil, so avoid valley bottoms and clay pans that hold water after heavy rain.
    • Soil depth: Deep soil lets the taproot go down, which anchors the tree and reaches moisture during dry spells.
    • Soil type: Sandy-loam and well-drained loam are ideal, while very heavy clay and very shallow soils are poor choices for mango.
    • Wind exposure: A gentle windbreak protects young trees, but a crowded, shaded corner is worse than an open, exposed position.
    • Spacing: Space grafted trees 8 to 10 metres apart so each canopy gets full light and air when the tree is mature.
    • Planting time: Plant at the onset of the rains so the young tree establishes without needing heavy, costly watering.
    • Hole size: Dig a planting hole about one metre wide and one metre deep, and keep the topsoil separate from the subsoil.
    • Hole preparation: Mix the topsoil with well-rotted compost or manure and return the mixture to the hole before planting.
    • Seedling handling: Plant grafted seedlings, and set each one so the graft union stays above the soil line.
    • Firming and watering: Firm the soil gently around the roots and water in well to remove air pockets that would dry out the roots.
    • Mulching: Spread mulch around each young tree, but keep it away from the stem to prevent rot and termites.
    • Staking: Stake young trees on windy sites so the root ball is not rocked loose while the tree is still establishing.
    • Record keeping: Record each tree’s type and planting date so management and harvest planning stay accurate.
    Young grafted mango seedling in a prepared planting hole with a mulch ring
    A young grafted mango seedling in a prepared hole, mulched and staked in a Ugandan orchard.

    Orchard management practices

    Once trees are planted, steady returns in mango growing in Uganda come from routine care. Young trees need watering, weeding and protection, while mature trees need pruning, feeding and sanitation. A simple seasonal calendar keeps every operation on time, which is what the table below provides.

    • Watering young trees: Water young trees regularly, especially in the first dry season, because their roots have not yet gone deep.
    • Watering mature trees: Mature trees need less frequent watering, but dry-season water at flowering and fruit-fill improves fruit size and retention.
    • Mulching: Renew the mulch yearly to conserve soil moisture and to smother weeds around the base of each tree.
    • Weeding: Keep the root zone weed-free, because weeds compete for water and nutrients and give pests a hiding place.
    • Organic manure: Apply well-rotted organic manure annually to feed the tree and improve the structure of the soil.
    • Fertiliser: Apply a balanced NPK fertiliser as the tree begins to bear, but follow the recommended rate rather than guessing.
    • Pruning: Prune to open the centre of the canopy so sunlight and air reach the inside and fruit is set all over the tree.
    • Training: Train a young tree to a single main stem and three or four well-spaced branches that form a strong frame.
    • Thinning: Remove dead, diseased and crossing branches so the tree does not waste energy and pests have fewer hiding places.
    • Orchard sanitation: Collect and destroy fallen fruit and prunings, because they carry pests and disease into the next season.
    • Monitoring: Walk the orchard regularly to spot pests, disease and nutrient problems while they are still small and cheap to fix.
    • Integrated pest management: Combine traps, cultural control and only necessary sprays so pests are controlled without overusing chemicals.
    • Record keeping: Record operations, yields and costs so you can compare seasons and learn what actually pays on the farm.
    OperationWhen in the yearWhat it involves
    PlantingOnset of rains (around March–April or August–September)Dig prepared holes, set grafted seedlings, water in
    Watering young treesThroughout the first two dry seasonsWater regularly at the root zone
    MulchingAfter planting, renewed yearlySpread mulch, keep it away from the stem
    WeedingContinuous, heavier in the rainy seasonClear the root zone and between rows
    Manure applicationOnce a year, before the rainsSpread well-rotted manure around the drip line
    NPK fertiliserStart of each rainy season once bearingApply balanced NPK at the recommended rate
    PruningAfter harvest, in the dry seasonOpen the centre, remove dead and crossing wood
    Training young treesFirst two to three yearsSelect the main stem and frame branches
    Orchard sanitationAfter harvest and before floweringRemove and destroy fallen fruit and prunings
    Pest monitoringWeekly, more often in the fruiting seasonCheck leaves, shoots and fruit for pests
    Fruit fly controlFrom flowering to harvestHang bait or pheromone traps, bag fruit if needed
    Anthracnose controlRainy season and at floweringPrune for airflow, remove infected parts
    Dry-season irrigationDry spell at flowering and fruit-fillWater to support flowering and fruit growth
    HarvestingWhen fruit mature, per type and seasonPick firm, mature fruit and handle gently

    Exam tip: In a UNEB question, “orchard sanitation” means more than sweeping the farm. It means collecting and destroying fallen fruit and prunings, because these carry fruit flies, anthracnose and other pests into the next season. Always name the practice, then give the reason it works.

    Pests and diseases of mango

    Pests and diseases are the biggest threat to mango growing in Uganda, and they attack at specific stages. The main pests are fruit flies, mango weevils and aphids, while the main diseases are anthracnose and powdery mildew. Each has recognisable symptoms and a control method, so a learner can act before fruit is ruined.

    • Fruit flies: Adult flies lay eggs under the skin, and the maggots tunnel through the flesh, causing the fruit to rot from the inside.
    • Mango weevil (seed weevil): The weevil’s larva bores into the seed, and infested fruit can look perfect outside while being ruined inside.
    • Aphids: These small sap-sucking insects cluster on young shoots and flower stalks, curling the leaves and weakening the tree.
    • Anthracnose: This fungus causes black, sunken spots on leaves, flowers and fruit, and it spreads fastest in wet, humid weather.
    • Powdery mildew: A white powdery coating forms on young leaves and flower clusters, causing flowers to drop and fruit set to fail.
    • Regular monitoring: Inspect leaves, shoots and young fruit weekly so a new infestation is caught before it can spread.
    • Sanitation: Collect and bury or burn fallen fruit and prunings, because these shelter fruit flies and mango weevils.
    • Pheromone and bait traps: Hang fruit-fly bait or pheromone traps to lure and kill adult flies before they lay their eggs.
    • Biological control: Encourage natural enemies such as ladybirds, which feed on aphids and other soft-bodied pests.
    • Neem-based sprays: Neem-based organic pesticides can suppress pests while being gentler on beneficial insects than broad chemicals.
    • Pruning for airflow: Keep the canopy open so leaves dry quickly, which slows the spread of anthracnose and powdery mildew.
    • Timed spraying: Apply a fungicide only when disease appears or when the weather stays persistently wet, not on a fixed calendar.
    • Record keeping: Note what appeared, when it appeared and what worked, so next season’s control is planned and not improvised.
    Pest or diseaseSymptomsControl
    Fruit flySmall puncture marks; maggots in the flesh; fruit rots and dropsCollect fallen fruit; hang bait or pheromone traps; bag fruit; keep orchard clean
    Mango weevilFruit looks normal but the seed is tunnelled and hollowDestroy infested fruit; sanitise; use clean planting material
    AphidsCurled, distorted young leaves; sticky honeydew on shootsEncourage ladybirds; use neem-based spray when severe
    AnthracnoseBlack, sunken spots on leaves, flowers and fruit; die-back of shootsPrune for airflow; remove infected parts; timed fungicide in wet weather
    Powdery mildewWhite powdery coating on young leaves and flowers; poor fruit setPrune for airflow; remove infected parts; apply sulphur or a recommended fungicide

    Common mistake: confusing anthracnose with powdery mildew. Anthracnose makes black, sunken spots on fruit and leaves, while powdery mildew is a white powdery coating on young leaves and flowers. Naming the correct symptom is what earns the mark in an exam.

    Harvesting and marketing mangoes

    Harvesting and marketing are where mango growing in Uganda turns effort into income. Fruit must be picked mature but firm, handled gently, and sorted before sale. A grower who grades carefully and chooses the right marketing channel keeps more of the value than one who dumps mixed fruit at the farm gate.

    • Maturity: Harvest when the fruit is mature but still firm, because overripe fruit bruises easily and does not travel well.
    • Ripeness signs: Look for a colour change, rounded full cheeks and a slight give when squeezed, and never rely on colour alone.
    • Picking method: Cut or twist the fruit off with a short stalk, and avoid pulling so that you do not tear the skin.
    • No dropping: Never let fruit drop to the ground, because bruising starts rot and lowers the grade the fruit will fetch.
    • Time of day: Harvest in the cooler morning hours and keep picked fruit out of direct sun to slow down ripening.
    • Sorting and grading: Sort by size, ripeness and freedom from blemishes so that each grade matches a different kind of buyer.
    • Cleaning: Wipe or wash fruit gently to remove sap and dust without scratching or bruising the skin.
    • Packaging: Pack in shallow crates or boxes lined with soft material, and avoid deep piles that crush the bottom layer.
    • Storage: Store fruit in a cool, dry, shaded place, because heat and moisture speed up ripening and spoilage.
    • Transport: Move fruit in padded, secure crates so the boxes do not slide and crush one another on the journey.
    • Local market: Selling directly to market vendors or consumers brings quick cash and puts the grower in touch with buyers.
    • Cooperatives: Joining a farmer cooperative lets growers pool fruit and bargain collectively, which cuts out low-paying middlemen.
    • Value addition: Turning lower-grade fruit into juice, dried slices, pulp or jam means very little of the harvest is wasted.
    • Regional export: Clean, well-graded Ugandan mangoes are sold to neighbouring markets such as Kenya, South Sudan and Rwanda.
    StageIndicator or actionReason or detail
    Skin colourBegins to change from green to yellow or orangeOne sign of maturity, but not the only test
    Cheek fullnessShoulders and cheeks look rounded and fullShows the fruit has filled out to size
    FeelSlight give when gently squeezedMeans the flesh has matured
    Stem-end smellSweet smell near the stem endIndicates ripeness developing
    SapSap runs clear and thin when the stalk is cutThick milky sap means the fruit is still immature
    Harvest timingPick mature but firm fruitAvoids bruising and overripeness
    Harvest methodCut or twist with a short stalkPrevents tearing the skin
    HandlingNever drop the fruitBruising starts rot and lowers grade
    Sorting and gradingBy size, ripeness and blemishesMatches each grade to a suitable buyer
    PackingShallow, padded cratesPrevents the bottom layer being crushed
    StorageCool, dry and shadedSlows spoilage and ripening
    TransportPadded, secure cratesAvoids crushing and sliding on the road
    Marketing channelWhat the grower doesAdvantage or consideration
    Local open marketSells direct to market vendors or consumersQuick cash, little grading pressure
    Urban wholesaleSupplies traders serving Kampala, Mbarara and GuluLarger volumes and steadier demand
    SupermarketsGrades and packs to a set standardBetter price but strict quality rules
    Juice processorsSells sound fruit of any sizeAbsorbs large volumes, accepts lower grades
    Export buyersMeets size, quality and plant-health rulesHighest value but the strictest standards
    Farmer cooperativePools fruit with other growersCollective bargaining cuts out middlemen
    Own value-added salesProcesses juice, dried mango or jamHigher margin but more work and equipment
    InstitutionsDirect supply to schools, hotels and caterersRepeat orders and reliable income
    Ripe mangoes sorted into a shallow crate at a Ugandan farm
    Harvested mangoes sorted and packed in a shallow crate, ready for grading and sale.

    Frequently asked questions about mango growing in Uganda

    How long does a mango tree take to bear fruit in Uganda? A grafted mango tree usually starts bearing about three to four years after planting. A seedling tree grown from seed takes longer, sometimes five years or more, and its fruit is more variable. Buying grafted seedlings is the fastest way to reach a first harvest.

    What is the best spacing for mango trees in Uganda? Space grafted mango trees 8 to 10 metres apart. This gives each tree enough light and air when its canopy is full-grown, and it stops the roots from competing. Close spacing forces trees to grow tall and bear poorly, so resist the temptation to squeeze in extra trees.

    Which mango variety should I plant in Uganda? Choose improved grafted types rather than local seedling trees if you are selling the fruit. Grafted types bear earlier and give larger, less fibrous fruit that markets prefer. Pick early, mid and late-season types so your harvest is spread across more months instead of arriving all at once.

    How do I control fruit flies in my mango orchard? Combine several methods: collect and destroy fallen fruit, hang bait or pheromone traps to catch adult flies, and keep the orchard clean. You can also bag individual fruit and use neem-based sprays. Relying on one method alone rarely works, because fruit flies breed in fallen fruit.

    What causes black spots on mango fruit? Black, sunken spots on fruit and leaves are usually anthracnose, a fungal disease that spreads in wet, humid weather. Improve airflow by pruning, remove infected parts, and avoid overhead watering. A white powdery coating on young leaves and flowers is a different disease, powdery mildew.

    When is a mango ready to harvest? Harvest when the fruit is mature but still firm. Look for rounded, full cheeks, a slight give when squeezed, and a colour change from green. Never drop the fruit, and handle it gently, because bruising starts rot and lowers the grade a buyer will pay for.

    Can I grow mangoes profitably on a small plot? Yes. Even a few well-spaced grafted trees can earn, especially if you grade the fruit, join a cooperative, and add value by drying or juicing the lower grades. Start small, manage the trees properly, and expand once the orchard is established and paying.

    Key terms and revision summary

    TermDefinition
    Perennial cropA crop that lives and produces for more than two years, such as a mango tree
    GraftingJoining a selected scion onto rootstock so the new tree copies the parent
    RootstockThe rooted lower part onto which a scion is grafted; it supplies roots and vigour
    ScionThe shoot of a chosen variety that is grafted onto the rootstock
    SeedlingA plant raised from seed rather than grafted
    OrchardA planted area of fruit trees managed for fruit production
    Orchard sanitationRemoving and destroying fallen fruit and prunings to cut pest and disease carryover
    Integrated pest management (IPM)Combining traps, cultural, biological and careful chemical control
    AnthracnoseA fungal disease causing black, sunken spots, worst in wet weather
    Powdery mildewA fungal disease forming a white coating on young leaves and flowers
    Fruit flyA pest whose maggots tunnel through ripening fruit
    Mango weevilA pest whose larva bores into the mango seed
    MulchingCovering soil with plant material to conserve moisture and suppress weeds
    Graft unionThe point where scion and rootstock join; keep it above the soil line

    Test yourself with these exam-style questions, then check the answer outlines.

    1. State four practices a farmer should carry out when planting mango seedlings. Outline: dig a one-metre-by-one-metre hole; mix topsoil with well-rotted manure; plant a grafted seedling at the onset of rains; keep the graft union above the soil; firm and water in; mulch away from the stem.
    2. Describe how a mango grower can control fruit flies without relying only on chemicals. Outline: collect and destroy fallen fruit; hang bait or pheromone traps; bag individual fruit; keep the orchard clean; encourage natural enemies.
    3. Explain the difference between a local seedling mango and an improved grafted mango. Outline: a seedling grows from seed, fruits later and gives variable, fibrous fruit; a grafted tree copies the parent, fruits in three to four years and gives larger, less fibrous fruit.
    4. Outline the steps of harvesting and handling mangoes for a supermarket market. Outline: pick mature but firm fruit; never drop it; sort and grade by size and blemishes; clean gently; pack in shallow padded crates; store cool and dry; transport carefully.
    5. Why is orchard sanitation important in controlling anthracnose? Outline: the fungus survives on infected fallen fruit and leaves; removing and destroying them cuts the source of infection; pruning for airflow keeps leaves dry and slows spread.

    Mango growing in Uganda also pairs naturally with other fruit-crop notes. If you are studying growing guavas profitably, compare the two crops side by side, then anchor both back to the Senior 3 Agriculture notes and the past papers for exam practice.

×
Listen to Remedial Radio

Listen to Remedial Radio

Enjoy the rhythm of knowledge. where books sing!
Learn More
🚀 Stuck in School? Catch Up and Stand Out!

🚀 Stuck in School? Catch Up and Stand Out!

Don't let difficult topics hold you back. Our fast-track Remedial Courses are designed to bridge the gap and boost your confidence instantly.

What We Offer:

  • Speak Kiswahili From Day One: Master conversational Swahili with zero stress.

  • English for Locals: Perfect your grammar and speak English with absolute confidence.

  • Targeted Remedial Support: Easily catch up on core subjects you find challenging.

Stop struggling. Start mastering.


Learn More