Category: General

  • Cattle Disease Control: A Case Study on Prevention, Legislation, and Parasite Management

    Cattle Disease Control: A Case Study on Prevention, Legislation, and Parasite Management

    Introduction

    Cattle diseases and parasites cause huge economic losses. They affect animal welfare and farm productivity. This case study explores prevention, control, and legislation. We focus on real-world implementation and results.

    Background

    Dairy and beef farms face constant disease threats. Symptoms and causes of red water and heart water are common concerns. Symptoms and causes of foot and mouth disease and anthrax require immediate action. Parasites like roundworms and ticks worsen the situation. Legislation on animal diseases and notifiable diseases provides a framework. Regulations on animal movements and quarantine help stop spread.

    Our case study involves a 500-head cattle farm in Kenya. The farm had high mortality and low productivity. They needed a comprehensive disease control plan.

    Challenges

    • Lack of awareness about disease symptoms.
    • Poor tick control leading to red water and heart water.
    • Frequent outbreaks of foot and mouth disease.
    • Anthrax cases during dry seasons.
    • Roundworm infestations reducing growth.
    • Weak enforcement of legislation on animal diseases.
    • Illegal animal movements bypassing quarantine.

    Symptoms and Causes of Red Water and Heart Water

    Red water is caused by Babesia parasites transmitted by ticks. Symptoms include fever, anemia, and red urine. Heart water is caused by Ehrlichia ruminantium. Ticks also transmit it. Symptoms are nervous signs, fluid in lungs, and sudden death.

    Symptoms and Causes of Foot and Mouth Disease and Anthrax

    Foot and mouth disease causes blisters on mouth and feet. It spreads via direct contact. Anthrax is caused by Bacillus anthracis. Symptoms include sudden death with bleeding from orifices. Both aren’tifiable diseases.

    Solution

    The farm adopted an integrated disease control program. It included vaccination, biosecurity, and parasite management. They followed local legislation on animal diseases and notifiable diseases. They enforced regulations on animal movements and quarantine.

    Control of Roundworms and Ticks in Cattle

    Control of roundworms involves regular deworming with broad-spectrum drugs. Rotational grazing helps break life cycles. Control of ticks uses acaricides and pasture management. Dipping and spraying every two weeks reduced tick loads.

    Vaccination Strategy

    They vaccinated against foot and mouth disease every six months. Anthrax vaccination was annual. They used bivalent vaccines for red water and heart water. This reduced disease incidence by 80%.

    Legislation Compliance

    They trained staff on legislation on animal diseases. Notifiable diseases like foot and mouth and anthrax must be reported within 24 hours. Regulations on animal movements and quarantine require permits and health certificates. The farm established a quarantine unit for new animals.

    Implementation

    Implementation took six months. It involved four phases: assessment, planning, action, and monitoring.

    Phase 1: Assessment

    A veterinarian assessed disease risks. They identified tick-infested areas and roundworm prevalence. They reviewed current legislation compliance.

    Phase 2: Planning

    They created a calendar for vaccinations and deworming. They designed biosecurity protocols. They wrote standard operating procedures (SOPs) for disease reporting.

    Phase 3: Action

    They hired a biosecurity officer. They built a quarantine pen. They trained all staff on symptom recognition. They conducted mass vaccinations and deworming.

    Phase 4: Monitoring

    They tracked disease outbreaks monthly. They measured tick counts and fecal egg counts. They audited compliance with movement regulations.

    Results with Metrics

    Indicator Before After 12 Months
    Mortality rate 12% 3%
    Foot and mouth outbreaks 2 per year 0
    Red water cases 15 per year 2 per year
    Heart water cases 10 per year 1 per year
    Roundworm infection rate 60% 10%
    Tick counts (per animal) 50 5
    Compliance with movement regulations 30% 95%

    “Disease control isn’t a one-time effort. It requires constant vigilance and legal support.” – Farm Manager

    Key Takeaways

    1. Know the symptoms. Early detection saves lives.
    2. Vaccinate regularly against notifiable diseases.
    3. Control ticks to prevent red water and heart water.
    4. Deworm strategically to control roundworms.
    5. Follow legislation – it protects your herd and market access.
    6. Quarantine new animals to prevent disease introduction.
    7. Train staff on disease recognition and reporting.
    8. Use data to monitor progress and adjust plans.

    Lessons Learned

    • Community engagement improves compliance with movement regulations.
    • Regular dipping is cheaper than treating disease outbreaks.
    • Legislation enforcement requires local government support.
    • Vaccination alone isn’t enough; biosecurity is critical.
    • Record-keeping helps prove compliance for trade.

    Conclusion

    This case study shows that integrated disease control works. Understanding symptoms and causes of red water and heart water and symptoms and causes of foot and mouth disease and anthrax is essential. Control of roundworms and ticks in cattle requires consistent action. Legislation on animal diseases and notifiable diseases provides the legal backbone. Regulations on animal movements and quarantine prevent disease spread. With commitment, farms can reduce losses and improve animal health.

    Frequently Asked Questions

    What are the main symptoms of red water in cattle?

    Fever, red urine, anemia, and lethargy. Ticks transmit the parasite.

    How is heart water transmitted?

    Through tick bites. The bacteria cause fluid in the chest and brain.

    What causes foot and mouth disease?

    A virus. It spreads via contact, saliva, and equipment.

    How do you control roundworms in cattle?

    Use broad-spectrum dewormers. Rotate pastures. Reduce stocking density.

    What is the best tick control method?

    Regular dipping or spraying with acaricides. Maintain proper intervals.

    Which cattle diseases aren’tifiable?

    Foot and mouth disease, anthrax, and often red water and heart water. Check local regulations.

    Why are animal movement regulations important?

    They prevent disease spread between farms. Quarantine ensures new animals are healthy.

    Can anthrax be prevented?

    Yes, annual vaccination. Also dispose of dead animals properly.

    What legislation applies to cattle diseases?

    Local animal health acts, disease control orders, and livestock movement laws.

    How do you implement quarantine on a farm?

    Separate new animals for 30 days. Test for diseases. Observe symptoms.

  • Prevention, Control, and Legislation of Cattle Diseases and Parasites: A Comprehensive Guide

    Prevention, Control, and Legislation of Cattle Diseases and Parasites: A Comprehensive Guide

    In the world of livestock management, the health and well-being of cattle are paramount not only for the economic success of farms but also for public health and food security. Diseases and parasites can devastate herds, reduce productivity, and in some cases, transmit to humans. Effective prevention and control strategies are essential, and they are underpinned by robust legislation that ensures coordinated action at local, national, and international levels. This comprehensive guide delves into the intricacies of cattle disease and parasite management, focusing on key diseases, control measures, and the legal frameworks that govern animal health. Whether you are a student, a farmer, or a veterinarian, this resource offers deep academic insights to enhance your understanding and practice.

    Understanding Cattle Diseases and Parasites: An Overview

    Cattle are susceptible to a wide array of infectious diseases and parasitic infestations that can cause significant morbidity, mortality, and economic losses. Diseases can be caused by viruses, bacteria, protozoa, and parasites, each with unique transmission cycles and pathological effects. Effective management requires a holistic approach that integrates prevention, early detection, and control measures. This section provides a foundational understanding of the major categories and their impact on cattle health.

    • Infectious Diseases: These are caused by pathogenic microorganisms such as viruses (e.g., Foot and Mouth Disease), bacteria (e.g., Anthrax), and protozoa (e.g., Babesia causing Red Water). They can spread rapidly through direct contact, vectors, or contaminated environments.
    • Parasitic Diseases: Caused by internal parasites like roundworms and external parasites like ticks. Parasites can cause chronic weight loss, reduced milk yield, and also act as vectors for other diseases.
    • Vector-Borne Diseases: Many cattle diseases are transmitted by arthropod vectors, especially ticks. Understanding these vectors is crucial for effective prevention.
    • Zoonotic Potential: Some cattle diseases, like anthrax, are zoonotic, meaning they can be transmitted to humans, emphasizing the importance of strict control and legislation.

    Symptoms and Causes of Red Water and Heart Water

    Red water (babesiosis) and heart water (cowdriosis) are two severe tick-borne diseases that pose significant threats to cattle in many regions. Both conditions are transmitted by ticks but are caused by different pathogens and present distinct clinical pictures. Early recognition of symptoms and understanding the causes are critical for effective treatment and prevention.

    Red Water (Babesiosis)

    Red water is a protozoal disease caused by Babesia bovis or Babesia bigemina, which infect and destroy red blood cells. The disease is named after the reddish-brown urine that affected cattle often pass. It is primarily transmitted by the cattle tick Rhipicephalus (Boophilus) microplus and R. decoloratus.

    Symptoms of Red Water

    • High fever (40-42°C)
    • Anemia and pale mucous membranes
    • Hemoglobinuria (red or brown urine)
    • Jaundice (yellowing of the eyes and mucous membranes)
    • Depression, weakness, and loss of appetite
    • Increased respiratory and heart rate
    • In severe cases, neurological signs, recumbency, and death

    Causes of Red Water

    • Infection with Babesia species following a tick bite
    • Transmission through contaminated needles or blood transfusion (less common)
    • Stress factors such as moving cattle to new areas where ticks are present
    • Splenectomy or immunosuppression can exacerbate the disease

    Heart Water

    Heart water is a rickettsial disease caused by Ehrlichia ruminantium (formerly Cowdria ruminantium). It is transmitted by ticks of the genus Amblyomma, particularly Amblyomma hebraeum and A. variegatum. The disease primarily affects the central nervous system and cardiovascular system.

    Symptoms of Heart Water

    • Sudden death (especially in acute cases) without prior signs
    • Fever (40-41°C)
    • Inappetence, dullness, and depression
    • Nervous signs: twitching of the eyelids and lips, chewing movements, circling, incoordination, and convulsions
    • In some cases, severe respiratory distress and coughing
    • Accumulation of fluid in the chest and abdomen, leading to heart failure and the characteristic ‘heart water’ appearance

    Causes of Heart Water

    • Infection with Ehrlichia ruminantium via the bite of infected bont ticks (Amblyomma species)
    • Movement of susceptible cattle into areas where the vector is endemic
    • Presence of wildlife reservoirs (e.g., antelopes) that maintain the tick and pathogen cycle

    Comparison Table: Red Water vs. Heart Water

    Feature Red Water (Babesiosis) Heart Water
    Pathogen Babesia bovis / bigemina Ehrlichia ruminantium
    Primary Vector Rhipicephalus (Boophilus) ticks Amblyomma ticks
    Target Organs Red blood cells Endothelial cells of blood vessels (brain, heart, lungs)
    Key Symptom Haemoglobinuria (red urine) Nervous signs and fluid accumulation
    Onset Acute (1-3 weeks incubation) Peracute to chronic (2-4 weeks incubation)
    Mortality High (especially in adults) Variable, can be high in susceptible herds

    Early diagnosis and treatment with appropriate antiprotozoal or antibacterial agents, alongside tick control, are essential to reduce mortality from these devastating diseases.

    Symptoms and Causes of Foot and Mouth Disease and Anthrax

    Foot and Mouth Disease (FMD) and Anthrax are two highly contagious and economically devastating diseases with significant public health implications. FMD is a viral infection affecting cloven-hoofed animals, while Anthrax is a bacterial disease that is zoonotic. Understanding their symptoms and causes is vital for early detection and response.

    Foot and Mouth Disease (FMD)

    FMD is caused by a picornavirus of the genus Aphthovirus with seven serotypes (A, O, C, SAT1, SAT2, SAT3, Asia1). It spreads rapidly through direct contact, aerosols, contaminated feeds, and fomites. It is a notifiable disease globally due to its severe impact on livestock trade.

    Symptoms of FMD

    • High fever (40-41°C) and shivering
    • Loss of appetite and depression
    • Vesicles (blisters) on the tongue, dental pad, lips, and gums
    • Vesicles on the coronary bands of the feet and interdigital spaces, leading to lameness
    • Excessive salivation and drooling
    • Reduced milk yield and lameness in dairy cows
    • Recovery in 2-3 weeks, but secondary infections can occur

    Causes of FMD

    • Infection with any of the seven serotypes of FMD virus
    • Contact with infected animals, their saliva, feces, or urine
    • Contaminated feed, water, and equipment
    • Inhalation of airborne virus particles (especially in high-density populations)
    • Introduction of new animals without quarantine

    Anthrax

    Anthrax is caused by the bacterium Bacillus anthracis, a spore-forming rod. The disease primarily affects herbivores, including cattle. Spores are extremely resistant and can survive in soil for decades. Outbreaks often occur after heavy rains or flooding when spores are brought to the surface and ingested by grazing animals.

    Symptoms of Anthrax

    • Peracute death: animals may be found dead without showing clinical signs
    • High fever, trembling, and excitement
    • Labored breathing, cyanosis (blue mucous membranes)
    • Bloody discharges from natural openings (nose, mouth, anus)
    • Subcutaneous swellings (edema) in the neck, thorax, and perineum
    • Blood doesn’t clot properly, leading to dark, tarry blood at necropsy

    Causes of Anthrax

    • Ingestion of Bacillus anthracis spores from contaminated soil, feed, or water
    • Inhalation of spores (less common in cattle)
    • Mechanical transmission by biting flies or vultures
    • Improper disposal of infected carcasses, which allows spore formation

    Comparison Table: FMD vs. Anthrax

    Feature Foot and Mouth Disease Anthrax
    Causative Agent Picornavirus (FMDV) Bacillus anthracis (bacterium)
    Primary Mode of Transmission Direct contact, aerosol, fomites Ingestion of spores from soil
    Zoonotic Potential Rare, but mild infection in humans High – can cause severe disease in humans
    Clinical Signs Vesicles and erosions in mouth and feet Peracute death, bloody discharges
    Notifiable in Most Countries Yes Yes

    Vaccination, strict quarantine, and prompt disposal of carcasses are critical for controlling both FMD and anthrax, while protecting the human population from potential zoonotic transmission.

    Control of Roundworms and Ticks in Cattle

    Parasites are a constant threat to cattle health, with internal parasites (roundworms) and external parasites (ticks) being the most economically significant. Control programs must be strategic, sustainable, and integrated to prevent drug resistance and environmental contamination. This section outlines effective methods for managing these parasites.

    Control of Roundworms in Cattle

    Roundworms (nematodes) such as Ostertagia ostertagi (brown stomach worm), Cooperia spp., and Haemonchus spp. live in the gastrointestinal tract and cause substantial production losses. They are typically controlled through anthelmintic drugs and grazing management.

    Effective Control Strategies

    • Strategic Anthelmintic Treatment: Administering dewormers at strategic times (e.g., at turn-out to pasture, mid-summer, and before housing) to suppress pasture contamination.
    • Refugia-Based Approaches: Leaving a proportion of the parasite population unexposed to drugs (refugia) to reduce selection for resistance. This involves targeted selective treatment (e.g., treating only animals with high fecal egg counts).
    • Pasture Management: Rotational grazing, alternating cattle with sheep or other livestock, and grazing safe pastures (e.g., newly sown or hay aftermath) to reduce larval exposure.
    • Fecal Egg Count Monitoring: Regular testing of fecal samples to determine the level of infection and guide treatment decisions.
    • Biological Control: Use of nematophagous fungi (e.g., Duddingtonia flagrans) in feed to reduce larval survival in dung.
    • Nutritional Management: Providing adequate nutrition to enhance immune response and resilience to infections.

    Control of Ticks in Cattle

    Ticks aren’t only parasites themselves but also vectors of diseases such as red water, heart water, and anaplasmosis. Control aims to reduce tick populations to below the economic threshold while maintaining some immunity (endemic stability) in endemic areas.

    Effective Control Strategies

    • Acaricide Application: Use of pour-on, injectable, dip, or spray formulations containing acaricides (e.g., synthetic pyrethroids, organophosphates, amidines). Rotation of acaricide classes is essential to prevent resistance.
    • Strategic Timing: Treating cattle at critical times of tick activity (e.g., during peak larval or adult activity) to break the life cycle.
    • Pasture Management: Briquette or slash pasture to expose ticks to sunlight and desiccation, and rest pastures to reduce tick numbers.
    • Breeding Ticks (Selected for Resistance): Some cattle breeds (e.g., N’Dama, Kenana) show higher resistance to ticks. Selecting for Brazilian or South African breeds like Boran can also help.
    • Use of Technology: Geographic Information Systems (GIS) and satellite data to predict tick outbreaks and plan control measures.
    • Integrated Pest Management: Combining chemical, biological (e.g., entomopathogenic fungi), and cultural methods for sustainable control.

    Integrated Parasite Control Table

    Parasite Control Method Implementation Tip
    Roundworms Targeted selective treatment Use FEC (Fecal Egg Count) thresholds to treat only high shedders.
    Roundworms Rotational grazing Rotate pastures every 2-3 weeks to prevent larval buildup.
    Ticks Multi-class acaricide rotation Alternate classes every 1-2 years to avoid resistance.
    Ticks Quarantine and treatment of new arrivals Treat incoming cattle with a long-acting acaricide before introducing to herd.

    A sustainable parasite control program should be based on local epidemiological knowledge, regular monitoring, and adaptive strategies to minimize chemical use and maximize animal health.

    Legislation on Animal Diseases and Notifiable Diseases

    Legislation is the cornerstone of animal disease control. Countries worldwide have established legal frameworks to prevent the introduction and spread of infectious animal diseases, including those transmissible to humans. These laws often designate specific diseases as ‘notifiable,’ meaning that any suspicion or confirmation must be reported to governmental authorities without delay. This legal obligation allows for rapid response and containment.

    Legislation typically covers:

    • Case Definition: Clear clinical and laboratory criteria for diagnosing each notifiable disease.
    • Reporting Requirements: Duties of veterinarians, farmers, and laboratory personnel to report suspected cases within a specified time (e.g., 24 hours).
    • Disease Contingency Plans: Outline of actions to be taken in the event of an outbreak, including culling, vaccination, and movement bans.
    • Compensation Schemes: Financial compensation for farmers whose animals are culled to encourage prompt reporting and compliance.
    • Enforcement and Penalties: Legal consequences for failure to comply, such as fines or imprisonment.

    Importance of Notifiable Diseases

    Notifiable diseases are those with significant economic, trade, or public health impact. The World Organization for Animal Health (OIE) publishes a list of notifiable terrestrial animal diseases (e.g., Foot and Mouth Disease, Anthrax, Bovine Spongiform Encephalopathy). Individual countries may add diseases of national importance. Examples of common notifiable diseases in cattle include:

    • Foot and Mouth Disease (FMD)
    • Anthrax
    • Bovine Tuberculosis (bTB)
    • Brucellosis
    • Enzootic Bovine Leukosis (EBL)
    • Bluetongue

    International Legislation and Trade

    International trade in cattle and cattle products is heavily regulated to prevent disease spread. The OIE’s Terrestrial Animal Health Code sets international standards. The World Trade Organization’s (WTO) Sanitary and Phytosanitary (SPS) Agreement permits countries to impose measures necessary to protect animal health, provided they aren’t arbitrary restrictions. as a result, countries may require import permits, health certificates, and quarantine periods, and they can refuse imports from countries with ongoing outbreaks of notifiable diseases.

    Regulations on Animal Movements and Quarantine

    Controlling the movement of cattle is a critical component of disease prevention. Regulations help prevent the introduction of infected animals into disease-free areas and limit the spread of infection during outbreaks. Quarantine is a state of isolation for animals that have been exposed to, or are suspected of being infected with, a contagious disease. Together, movement control and quarantine form a crucial line of defense.

    Animal Movement Regulations

    • Standstill Rules: Following the introduction of new animals, existing animals on the holding must not be moved for a minimum period (e.g., 21 days for cattle in some regions) to ensure they aren’t incubating a disease.
    • Pre-Movement Testing: Animals must test negative for certain diseases (e.g., bovine TB) before being moved to a new farm, market, or abattoir.
    • Licensing and Permits: Movement of cattle out of a disease control zone requires a license or permit issued by the veterinary authority.
    • Movement Records: Farmers must maintain detailed records of all animal movements (including births, deaths, sales, and purchases) to enable traceability in case of an outbreak.
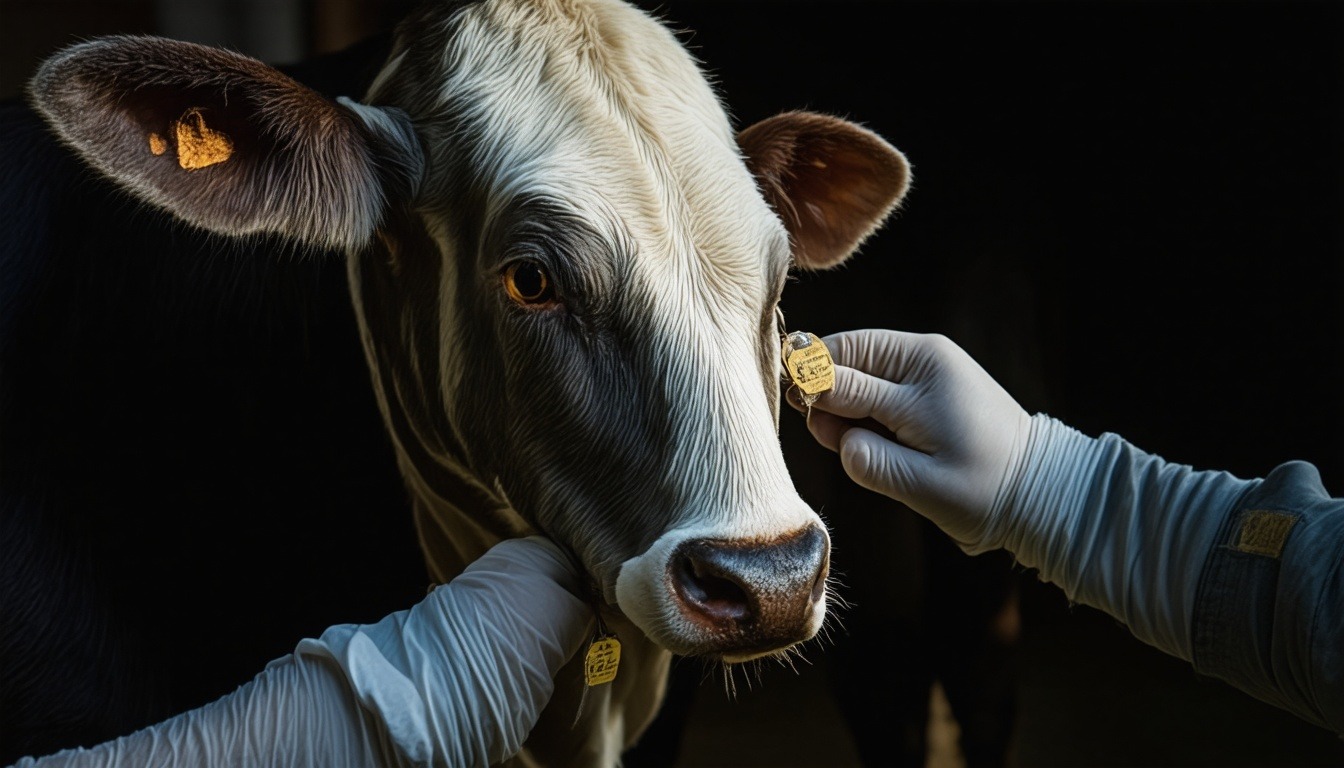
    • Identification: Distinct identification of each animal (e.g., ear tags, electronic microchips) is mandatory in many countries to track individual movement.

    Quarantine Procedures

    • Isolation Facilities: Designated areas geographically and physically separated from other livestock, with separate handling equipment and personnel.
    • Duration: Quarantine periods vary depending on the incubation period of the disease (e.g., 14-30 days for FMD, 7-14 days for anthrax).
    • Surveillance: Regular clinical examination and laboratory testing of quarantined animals to detect infection early.
    • Restricted Movements: No animals, people, or equipment may leave the quarantine facility without proper disinfection and authorization.
    • Contingency Plans: In the event of a notifiable disease outbreak, quarantine zones (e.g., infected zone, protection zone, surveillance zone) are established, and animal movements are restricted accordingly.

    Case Study: Movement Control during an FMD Outbreak

    During an FMD outbreak, the primary objective is to halt virus spread. A 3 km infected zone (cordon sanitaire) around the infected farm is established, with a 10 km protection zone and a 15 km surveillance zone. All animal movements within these zones are banned except under strict permit. Animals in the infected zone may be culled and disposed of on-site. Post-outbreak, the zones remain in place for 30 days after the last case, and only then are movements gradually allowed with testing.

    Effective movement restrictions and quarantine aren’t merely bureaucratic hurdles; they are evidence-based, life-saving measures that protect the entire national herd and the livelihoods of many farmers.

    Comprehensive Conclusion

    In summary, the prevention and control of cattle diseases and parasites require a multi-layered approach that integrates sound husbandry practices, use of veterinary medicines, and strict compliance with legislation. Understanding the specific symptoms and causes of major diseases such as red water, heart water, foot-and-mouth disease, and anthrax is essential for early diagnosis and intervention. Equally important is the strategic control of parasites, particularly roundworms and ticks, to reduce economic losses and disease transmission.

    The legal framework, encompassing notifiable disease reporting, animal movement regulations, and quarantine protocols, provides the essential infrastructure for national disease control efforts. By adhering to these regulations and adopting best practices, farmers and veterinary professionals can together protect animal welfare, public health, and the sustainability of the livestock industry. Ultimately, vigilance, education, and cooperation are the pillars of a successful cattle health program.

    Frequently Asked Questions

    What is the difference between red water and heart water in cattle?

    Red water (babesiosis) is caused by Babesia protozoa, transmitted by Rhipicephalus ticks, and primarily destroys red blood cells, leading to hemoglobinuria. Heart water is caused by Ehrlichia ruminantium, transmitted by Amblyomma ticks, and affects vascular endothelial cells, primarily causing neurological signs and fluid accumulation in the chest.

    How can farmers prevent foot and mouth disease?

    Prevention includes strict biosecurity (e.g., disinfection of vehicles and visitor controls), movement restrictions of animals from affected areas, and routine vaccination (in endemic regions). Additionally, maintaining high standards of cleanliness and NOT feeding animal products containing infected meat are crucial.

    What should be done if anthrax is suspected in cattle?

    Immediately isolate the animal and avoid contact with blood or discharges. Report the suspicion to the local veterinary authority without delay. The carcass shouldn’t be opened, as exposure to oxygen can sporulate the bacteria. The veterinarian will confirm the diagnosis and guide safe disposal (e.g., incineration, deep burial with lime) and disinfection.

    Why is roundworm control important for cattle productivity?

    Roundworm infections can cause poor weight gain, reduced milk production, and increased susceptibility to other diseases. Control helps maintain optimal performance and reduces pasture contamination for future grazing seasons.

    What is a notifiable disease and who reports it?

    A notifiable disease is a legally required report to the government animal health authority upon suspicion or confirmation. Both veterinarians and livestock keepers are typically obligated to report. Failure to do so can result in penalties and exacerbate outbreak control.

    How long should a new cow be quarantined before joining the herd?

    Quarantine duration depends on the diseases of concern but generally ranges from 14 to 30 days. It is advisable to consult a veterinarian to determine appropriate testing and quarantine length based on local disease risks.

    What are the main regulations on animal movements in the UK?

    In the UK, cattle movements must be recorded in the Cattle Tracing System (CTS) within 5 days. Animals must have ear tags (two) and passports. Pre-movement TB testing is required for certain regions. Standstill rules apply: cattle moved to a holding must remain for at least 6 days, except when going to slaughter.

    Can ticks be controlled without chemicals?

    Yes, although chemicals are the most effective, biological and management methods help reduce reliance: rotational grazing, pasture burning, and genetic selection for tick-resistant cattle. Biological agents like entomopathogenic fungi and pheromone traps are emerging tools.

    We hope this guide has been informative. For more detailed information, always consult your local veterinary service and adhere to national legislation.

  • From Pasture to Feedlot: A Case Study on Extensive, Semi-Intensive, and Intensive Cattle Management Systems

    From Pasture to Feedlot: A Case Study on Extensive, Semi-Intensive, and Intensive Cattle Management Systems

    This case study explores three cattle management systems. We examine extensive, semi-intensive, and intensive methods. Our focus is a farm called Green Pastures Ranch. It started with extensive grazing. Then it moved to semi-intensive. Finally, it adopted intensive feedlot. We share challenges, solutions, and results. Each system has unique features. They affect animal health, costs, and productivity. Understanding the Distinction between cattle management systems is vital for success. Let’s dive in.

    Background of Cattle Management Systems

    Cattle management systems vary widely. Extensive systems let cattle roam large areas. They eat natural grass. This is common in arid regions. Semi-intensive systems combine grazing with supplements. Animals have smaller pastures. They get extra feed. Intensive systems keep cattle in confined spaces. They eat controlled diets. This maximizes growth and milk. Each system suits different goals. The Suitability of management systems for dairy and beef cattle differs. Dairy cows need constant feed. Beef cattle can grow on grass. Our case study shows this.

    Green Pastures Ranch Overview

    Green Pastures Ranch is in Texas. It has 5000 acres of land. The owner, John, wanted to improve profits. He had 200 cattle. They were mostly beef breeds. He also had 50 dairy cows. John faced many challenges. Land was getting expensive. Feed costs rose. Weather patterns changed. He needed a better system. He decided to test all three methods. This took five years. We recorded data monthly. Let’s see each stage.

    Stage 1: Extensive System (Year 1-2)

    John started with extensive grazing. Cattle roamed 4000 acres. They ate native grasses. Water came from ponds. No supplements were given. This is a low-cost method. But growth was slow. Calves took 24 months to mature. Milk production was low. Dairy cows gave only 10 liters daily. Mortality was 5% per year. We call this the Evaluation of extensive cattle management. It had low input but low output. Land use was high. Each cow needed 20 acres. This is inefficient for small farms. John realized he needed change.

    Challenges Faced

    Each system had unique problems. Let’s list them clearly. We use bullet points for quick reading.

    • Extensive: Slow growth, high land use, weather dependent.
    • Semi-Intensive: Higher feed costs, more labor needed.
    • Intensive: High capital, disease risk, waste management.

    John faced all these. His extensive system had low profits. Cattle took too long to sell. Dairy yield was too low. He needed more efficiency. So he tried semi-intensive.

    Detailed Issues with Extensive System

    Extensive grazing is simple. But it has drawbacks. Grass quality varies by season. In drought, cattle lose weight. Predators can attack. Fencing costs are low but land is huge. John’s ranch saw erosion. Overgrazing damaged soil. Only 60% of grass was usable. That is a key finding from the Evaluation of extensive cattle management. Productivity per acre is very low. This system works only with cheap land.

    Solution: Transition to Semi-Intensive System

    John decided to switch. He reduced pasture to 2000 acres. He added feed supplements. Cattle got hay and grain in winter. He built shade structures. Water was provided in troughs. This is a Features of semi-extensive cattle rearing approach. It mixes grazing with care. John also rotated pastures. This improved grass growth. He used 10 paddocks. Cattle moved every 7 days. This is called rotational grazing. It boosts pasture yield by 30%. John saw immediate changes.

    Implementation of Semi-Intensive

    John made careful plans. First, he divided his land. He installed electric fences. Water lines were laid. He built a feed storage barn. He bought a mixer wagon. Labor increased from 1 to 3 workers. Training was needed. John learned about nutrition. He balanced protein and energy. He used a feed chart. This helped dairy cows produce more. The Distinction between cattle management systems became clear. Semi-intensive requires more management. But it offers better control.

    Metrics After Semi-Intensive

    Results improved quickly. Let’s use a table to compare.

    Metric Extensive Semi-Intensive
    Average daily gain (kg) 0.5 0.9
    Milk yield (L/day) 10 15
    Mortality rate (%) 5 2
    Land used per cow (acres) 20 10
    Feed cost per cow ($/year) 100 400

    John was happy. But he wanted more. He heard about intensive systems. These are common in feedlots. They maximize growth. John decided to try it on 50 beef cattle.

    Stage 3: Intensive System (Year 4-5)

    John built a small feedlot. It had concrete pens. Each pen held 10 cattle. He installed automatic feeders. They dispensed a total mixed ration (TMR). This diet was high in grain. It also had vitamins and minerals. Cattle were monitored daily. Veterinarians visited weekly. This is a true Intensive cattle management system. It requires high investment. But it yields fast growth. The Suitability of management systems for dairy and beef cattle is clear here. Beef cattle thrive in feedlots. Dairy cows need more space. John kept dairy in semi-intensive. He used intensive only for beef.

    Challenges in Intensive System

    Intensive systems aren’t easy. Disease spreads quickly. John had a pneumonia outbreak. He treated it with antibiotics. Costs rose. Waste management was hard. Manure accumulated. He built a lagoon for storage. Feed costs were high. Each cow ate $2.50 of feed daily. But growth was amazing. Average daily gain reached 1.8 kg. This is triple the extensive rate. Feed conversion improved. It took only 4 kg of feed per kg of gain. In extensive, it was 10 kg. That shows efficiency.

    Implementation Details for Intensive

    John hired a nutritionist. He designed a balanced diet. Corn silage was base. Added soybean meal and minerals. Cattle were fed three times daily. Water was always available. He used a computerized system. It tracked each animal’s intake. He also implemented biosecurity. Vehicles were disinfected. Visitors wore boots. This reduced disease risk. The Features of semi-extensive cattle rearing are simpler. But intensive needs high tech. John spent $100,000 on infrastructure. But returns were high.

    Results of Intensive System

    Let’s see the data in a table.

    Metric Semi-Intensive Intensive
    Average daily gain (kg) 0.9 1.8
    Days to market (500 kg) 500 280
    Feed cost per kg gain ($) 1.20 0.90
    Mortality rate (%) 2 3
    Labor hours per cow per year 5 15

    Intensive had faster growth. But it needed more labor. Feed cost per gain was lower. That is important. John’s profits rose. He sold beef earlier. Cash flow improved. But he worried about animal welfare. He added enrichment: brushes and toys. This reduced stress. The Intensive cattle management systems can be humane if designed well.

    Key Takeaways

    Now we summarize lessons. Use numbered list for clarity.

    1. Distinction between cattle management systems is crucial. Each has trade-offs.
    2. Evaluation of extensive cattle management shows low cost but low output.
    3. Features of semi-extensive cattle rearing balance productivity and land use.
    4. Intensive cattle management systems maximize growth but need capital.
    5. Suitability of management systems for dairy and beef cattle differs. Dairy needs more space, beef can be confined.
    6. Rotational grazing improves pastures. It reduces erosion.
    7. Feed costs are the biggest expense. Control them.
    8. Health management is key. Vaccinate and monitor.
    9. Data collection helps decisions. Track every metric.
    10. Start small. Test before scaling up.
    11. Animal welfare affects productivity. Provide comfort.
    12. Mixed systems can be optimal. Use semi-intensive for dairy, intensive for beef.

    Lessons Learned

    John learned many lessons. First, no single system is best. It depends on resources. Extensive works with cheap land. But it isn’t sustainable. Semi-intensive is a good middle ground. It improves output without huge cost. Intensive is for high-value markets. John’s profits increased by 40% overall. He reduced land use by 60%. His carbon footprint lowered. He shared his knowledge with neighbors. Many adopted similar methods. The Distinction between cattle management systems became a topic in local workshops. John now teaches other farmers.

    Environmental Impact

    Each system affects the environment differently. Extensive can cause overgrazing. But it preserves biodiversity if managed. Semi-intensive uses less land. It can integrate crops. Intensive concentrates waste. It needs proper disposal. John built a biogas plant. It converted manure into energy. This reduced emissions. He also planted trees. They provided shade and carbon sequestration. The Evaluation of extensive cattle management showed high land footprint. Intensive had lower land use but higher energy input. Overall, semi-intensive had best balance.

    Economic Analysis

    Let’s look at costs and returns. We present a financial table.

    System Initial Investment ($) Annual Profit per Cow ($) Payback Period (years)
    Extensive 5,000 200 25
    Semi-Intensive 30,000 500 4
    Intensive 100,000 1,200 3

    Intensive gave best profit per cow. But it needed high capital. John used loans for intensive. He paid them in 3 years. Semi-intensive was more accessible. He recommends it for beginners. The Suitability of management systems for dairy and beef cattle also affects profit. Dairy cows under intensive had health issues. So John kept them semi-intensive. That shows flexibility.

    Conclusion

    This case study shows real-world data. The Distinction between cattle management systems isn’t just academic. It impacts farm success. Evaluation of extensive cattle management reveals its limitations. Features of semi-extensive cattle rearing offer a balanced approach. Intensive cattle management systems can boost productivity. But they require expertise. Suitability of management systems for dairy and beef cattle must be considered. John’s ranch now runs a hybrid model. He uses semi-intensive for dairy. He uses intensive for beef. This gives him the best results. He plans to expand further. He will teach his methods to others. Cattle management is an evolving science. Always learn and adapt.

    Frequently Asked Questions

    What is the distinction between cattle management systems?

    The three main systems are extensive, semi-intensive, and intensive. Extensive uses large pastures and minimal inputs. Semi-intensive combines grazing with supplements. Intensive confines cattle and uses controlled diets. Each differs in land, labor, and capital needs.

    How do you evaluate extensive cattle management?

    Evaluate by looking at land use per animal. Check growth rates and milk yields. Measure costs and profits. Extensive has low input but low output. It is best for cheap land and low labor. But it can cause overgrazing. Sustainability is a concern.

    What are the features of semi-extensive cattle rearing?

    Semi-extensive uses rotational grazing. It provides supplemental feed. This system has moderate land use. It requires more management than extensive. It improves animal health and productivity. It is a good balance for medium-sized farms.

    What are intensive cattle management systems?

    Intensive systems house cattle in confined spaces. They use total mixed rations. Growth and milk yield are maximized. But capital investment is high. Disease risk is higher. Waste management is crucial. This system suits large-scale operations.

    Which management system is suitable for dairy and beef cattle?

    Dairy cows need constant feed and comfort. Semi-intensive works well for dairy. Beef cattle can grow quickly in intensive feedlots. But they also thrive on good pasture. The choice depends on resources and market. A hybrid system often works best.

    How did the case study farm improve profitability?

    Green Pastures Ranch switched from extensive to semi-intensive. Then added intensive for beef. Profits rose 40%. Land use dropped 60%. Feed efficiency improved. Mortality decreased. The key was matching system to cattle type and goals.

    What are the main challenges of each system?

    Extensive: slow growth, high land use, weather risks. Semi-intensive: higher feed cost, more labor. Intensive: high capital, disease, waste. Each requires different skills. Planning helps overcome challenges.

    What metrics matter for cattle management?

    Key metrics: average daily gain, feed conversion ratio, milk yield, mortality rate, land use per cow, cost per kg of gain. Track these monthly. Use data to make decisions. This improves efficiency.

    How can I start transitioning my farm?

    Begin with a small pilot group. Choose one system to test. Measure results for a year. Compare with current system. Learn from experts. Invest in infrastructure gradually. Scale up slowly. John started with 50 beef cattle in intensive.

    What role does animal welfare play?

    Welfare affects productivity. Stressed cattle grow slower. Provide shade, space, and enrichment. Use low-stress handling. Good welfare reduces disease. It also improves public image. Many consumers prefer humanely raised meat.

  • 10 Smart Ways to Catch Up on Missed Lessons | Remedial Corner

    10 Smart Ways to Catch Up on Missed Lessons | Remedial Corner

    Missing a lesson at school can happen to anyone. It might be due to illness, family trips, or other reasons. But falling behind can increase stress and hurt your grades. The good news is that you can catch up effectively. Here are 10 proven ways to help you get back on track quickly.

    1. Talk to your teacher first

    Your teacher is your best resource. Approach them soon after your return. Explain your situation clearly. Ask about the topics you missed. Request any worksheets or assignments. Your teacher might offer extra help. This simple step builds a positive impression.

    “Teachers are more willing to help when you ask early.” — Study tip

    • Ask for a summary of missed lessons.
    • Get deadlines for pending work.
    • Check if you can submit late without penalty.

    Example: If you missed a science class, ask your teacher to show you the experiment.

    2. Create a catch-up plan

    A plan gives you direction. Start by listing all missed subjects. Write down specific topics or chapters. Next, decide how much time you can study daily. Use a calendar to plan your sessions. Break tasks into manageable steps. Consistency is key.

    Day Time Subject Task
    Monday 4–5 PM Math Solve 10 problems
    Tuesday 4–5 PM Science Read chapter 5
    Wednesday 4–5 PM English Write an essay
    Thursday 3–4 PM History Summarize notes
    • Set realistic goals for each day.
    • Review your plan every evening.
    • Adjust for unexpected events.

    3. Use a study buddy

    Studying with a friend makes catching up easier. Choose someone who takes good notes. Meet for 30 minutes to review. Ask each other questions. Take turns explaining ideas. This helps you understand faster.

    Example: Your buddy can help you practice a foreign language dialog.

    “Two heads are better than one when you’re behind.”

    4. Prioritize key concepts

    Not all topics are equally important. Focus on major ideas that appear in exams. Check the syllabus for learning objectives. Ask your teacher about must-know topics. Spend more time on difficult areas. Skip minor details for now.

    • Use the syllabus as a guide.
    • Listen to teacher’s hints about exam focus.
    • Review past papers to measure importance.

    5. Review the syllabus

    The syllabus shows what was taught each week. Find the exact lessons you missed. Use learning outcomes to guide your study. This prevents wasted effort. It helps you allocate time accurately.

    Example: If you missed a chapter on algebra, the syllabus tells you the key formulas.

    6. Use online resources

    The internet offers endless study materials. Watch video lessons on platforms like Khan Academy. Download flashcards from Quizlet. Take online quizzes to test yourself. Use apps for spaced repetition. These tools make learning interactive.

    Resource Type Benefit
    Khan Academy Video tutorials Clear explanations
    Quizlet Flashcards Quick vocabulary review
    YouTube Educational channels Visual examples
    Duolingo Language lessons For foreign language catch-up

    7. Ask for notes from classmates

    Good notes are gold. Request notes from a diligent student. Copy them in your own handwriting. This improves memory. Or use their notes to fill gaps. Make sure to thank them.

    Example: You can offer to trade notes or share snacks.

    8. Break it into small chunks

    Studying for hours is not effective. Use short, focused sessions. Try the Pomodoro technique: 25 minutes study, 5 minutes break. Divide large topics into mini-lessons. One chapter per session is enough.

    “Small steps every day beat big steps once in a while.”

    9. Use active learning techniques

    Passive reading is not enough. Write summaries in your own words. Create flashcards for key terms. Teach a topic to your friend or parent. Answer practice questions. Make mind maps to connect ideas.

    • Active recall boosts memory.
    • Explaining strengthens understanding.
    • Practice tests reveal weak areas.

    10. Stay consistent and track progress

    Regular study beats last-minute cramming. Set a fixed time for studying daily. Keep a checklist of completed topics. Tick off tasks as you finish. If something doesn’t work, change your approach. Celebrate your wins.

    Example: After a week, answer a mock test to see improvement.

    Final Thoughts

    Catching up on missed lessons takes effort but is very doable. Talk to your teacher, make a plan, and use the right tools. Stay positive and don’t give up. You’ll be back on track soon.

    Frequently Asked Questions

    How fast should I catch up on missed lessons?

    Aim to catch up within one week for every two weeks missed. That way, you don’t fall further behind. Consistency matters more than speed.

    What should I do if I missed a whole term?

    Talk to your teacher immediately. Request a complete list of topics. Consider hiring a tutor or joining a study group. Prioritize the

    most important topics first. Focus on core concepts that are foundational for future lessons. This will help you build momentum and avoid getting overwhelmed.

    How can I stay motivated while catching up?

    Set small rewards for each goal you complete. Remind yourself why school matters. Keep a positive mindset and remember that every bit of effort counts. Track your progress with a chart or app to see how far you’ve come.

    What if I don’t understand the missed material?

    Break the lesson into smaller parts. Use online tutorials. Ask a classmate to explain it. If you still struggle, visit your teacher during office hours. There’s no shame in asking for help.

    Should I tell my parents about missing school?

    Yes, they need to know. They can provide support and encouragement. They may also help you create a study routine at home. Being honest about your situation helps everyone work together.

    How do I avoid falling behind again?

    Stay organized from the start. Keep a planner for all your assignments. Develop a daily study habit. Don’t miss classes unless you truly have to. If you do miss, catch up immediately.

    Can I use apps to track my study schedule?

    Absolutely. Apps like My Study Life, Todoist, or Google Calendar can help you manage your time. You can set reminders for each topic and even track the hours you study. This keeps you accountable and organized.

    How do I catch up on multiple subjects at once?

    Don’t expect to finish everything in one night. Rotate subjects to avoid burnout. For example, study math for 30 minutes, then switch to history. Use the Pomodoro technique. Make sure to review the material you learned earlier to keep it fresh.

    Quick Summary

    • Talk to your teacher first.
    • Make a realistic plan.
    • Find a study buddy.
    • Focus on key concepts.
    • Use the syllabus as a map.
    • Leverage online resources.
    • Borrow notes from classmates.
    • Study in short bursts.
    • Use active recall.
    • Stay consistent and celebrate progress.

    Catching up is a challenge, but you are more than capable. With the right strategies and a positive attitude, you can close the gap and even excel. Start today—your future self will thank you.

  • 12 School Time Management Tips for Busy Students | Remedial Corner

    12 School Time Management Tips for Busy Students | Remedial Corner

    School life is full of classes, homework, exams, and activities. It feels like there are never enough hours in the day. But you can take control. Good time management helps you finish work on time and reduce stress. You will have more time for friends and hobbies. Use these 12 simple tips to manage your time better at school.

    1. Prioritize Your Tasks

    Not all tasks are equal. Some are more important than others. Start by making a list of everything you need to do. Then rank each item from most to least important. Focus on the top two or three first. For example, a science project due tomorrow is more urgent than reading a chapter for next week. Use the Eisenhower Matrix to decide what to do first. This simple tool sorts tasks by urgency and importance.

    “The key is not to prioritize what’s on your schedule, but to schedule your priorities.” – Stephen Covey

    How to Use the Eisenhower Matrix

    • Urgent and Important: Do these right away. Example: Study for tomorrow’s test.
    • Important but Not Urgent: Schedule these. Example: Start a long-term project.
    • Urgent but Not Important: Delegate or shorten. Example: Answer a quick text.
    • Neither: Skip or do later. Example: Scroll through social media.

    2. Use a Planner or Digital Calendar

    Write down all your deadlines and commitments. Keep it in one place. You can use a paper planner or an app like Google Calendar. Enter every class, assignment, and test. Check your planner every morning and night. This helps you remember what is coming up. For example, mark your math homework for Monday and history essay for Friday. Set reminders on your phone. You will never forget a deadline again.

    3. Break Big Tasks into Small Steps

    Large assignments feel overwhelming. Break them into smaller pieces. Instead of “write a 10-page paper,” plan to “choose a topic” first. Then “research for 30 minutes.” Then “create an outline.” Each small step feels easy. You will make steady progress. For instance, if you have a book report due in two weeks, read one chapter a day. Write one paragraph each evening. Soon you will finish without stress.

    4. Set Specific Goals

    Vague goals lead to vague results. Set clear and specific goals. Instead of “study more,” say “study math for 30 minutes tonight.” Make your goal measurable. For example, “finish 10 algebra problems before dinner.” Write your goals down. Put them where you can see them. When you achieve a goal, reward yourself. This keeps you motivated. Specific goals give your time direction.

    5. Eliminate Distractions

    Distractions steal your time. These include your phone, TV, and noisy friends. Find a quiet place to study. Turn off your phone notifications. Use apps like Forest or Freedom to block distracting websites. Let your family know your study hours. When you study, focus only on work. Take a break to check your phone later. You will finish faster and remember more.

    Distraction Solution
    Phone notifications Turn on “Do Not Disturb” mode
    Social media Use a website blocker
    TV in background Move to a different room
    Messaging friends Temporarily mute the chat

    6. Use the Pomodoro Technique

    The Pomodoro Technique helps you study in short bursts. Set a timer for 25 minutes. Work on one task without stopping. When the timer rings, take a 5-minute break. After four pomodoros, take a longer break of 15–30 minutes. This method keeps your brain fresh. It also makes starting easier. For example, tell yourself you will write notes for just 25 minutes. After that, you can stop. Often, you will keep going because you are in the flow.

    7. Study at Your Peak Hours

    Everyone has times of day when they are most alert. Some are morning people. Others focus better at night. Identify your peak hours. Do your hardest homework during that time. For instance, if you are sharp after breakfast, study math in the morning. Save easier tasks, like reading, for low-energy hours. Do not force yourself to study when you are tired. You waste time and learn less. Work with your natural rhythm.

    8. Learn to Say No

    You cannot do everything. Saying yes to every event and invitation leaves no time for work. While this is nice, it is not wise. Politely decline activities that are not important. For example, skip a movie night if you have a big test. Explain that you need to study. True friends will understand. You can also offer to meet after the exam. Saying no today creates more free time later.

    9. Batch Similar Tasks

    Switching between different tasks wastes time. Try batching, which means grouping similar activities. Answer all emails at once. Finish all reading assignments in one sitting. Solve all math problems together. Your brain gets into a rhythm. For example, reply to all messages after studying, not every few minutes. Batch errands like printing and buying supplies. This reduces context switching and saves energy.

    10. Take Regular Breaks

    Studying for hours without breaks reduces focus. Your brain needs rest to store information. Follow the 50/10 rule. Study for 50 minutes, then rest for 10. Stand up, stretch, or get a glass of water. Look away from the screen. Do not check social media during breaks. That can turn into hours. Short breaks boost your productivity. They also prevent burnout.

    11. Review and Reflect Weekly

    Great time managers review their week. Set aside 15 minutes every Sunday. Look at your planner. Ask what worked and what did not. Did you procrastinate on any task? Did something take longer than expected? Adjust your method for next week. For example, if you missed a deadline, plan to start earlier. Celebrate your wins, too. This weekly habit turns you into a better planner.

    12. Get Enough Sleep

    Sleep is not a waste of time. It is vital for learning and memory. Teens need 8–10 hours of sleep each night. Without enough sleep, you focus poorly and feel stressed. Set a regular wake-up and bedtime. Avoid screens before bed. Finish homework early enough to rest. For example, put your phone away at 9 PM and read a book. Tomorrow, you will study more effectively. Good sleep is the secret to good time management.

    Frequently Asked Questions

    What is the best time management method for students?

    The best method depends on your personality. The Pomodoro Technique works well for many. It breaks work into short sessions. The Eisenhower Matrix helps you prioritize. Some students prefer time blocking. That means assigning specific hours to each task. Try a few methods to find what fits you.

    How can I stop procrastinating at school?

    Start with a tiny task. Just open your book and write one sentence. Use a timer to work for 5 minutes. Remove distractions from your space. Break big tasks into small steps. Remind yourself why the work matters. Also, reward yourself after finishing. The key is to make starting easy.

    Should I use a paper planner or a digital calendar?

    Both work well. Paper planners are simple and do not need batteries. Digital calendars send reminders and sync across devices. Choose what you will actually use. Some students like both. Use a digital calendar for events and a paper journal for reflection. The best tool is the one you check daily.

    How many hours should I study each day?

    Quality matters more than quantity. In high school, 2–3 focused hours often work well. In college, you may need more. Listen to your body and mind. If you finish homework in one hour, do not force extra. Use extra time to review or work ahead. Consistent daily study beats cramming all night.

  • Should Mathematics Be Compulsory in Secondary School? An Expert Interview

    Should Mathematics Be Compulsory in Secondary School? An Expert Interview

    Mathematics is a hot topic in education. Should it be compulsory in secondary school? Some say yes. Others say no. To get clarity, we spoke with Dr. Sarah Mitchell. She is an education researcher with 20 years of experience. She has studied math curricula worldwide. Her insights are fresh and practical. Read on for a deep dive.

    Meet the Expert: Dr. Sarah Mitchell

    Dr. Mitchell is a professor at a leading university. She has written many papers on math education. She also advises schools on curriculum design. Her approach is balanced. She sees both sides of the debate. She believes in evidence-based answers. Let’s hear what she has to say.

    Why Is Math So Debated?

    Question: Why do people argue about compulsory math?

    Dr. Mitchell: “Because math is powerful. It opens doors. But it also causes stress. Many students hate it.” She explains that the debate is about values. Some want practical skills. Others want academic rigor. The real question is: What is math for? “We must decide its purpose.”

    Some argue that algebra is useless. Others say it trains the brain. Dr. Mitchell thinks both are right. “Math has many benefits. But we need to teach the right math.” She adds, “The current curriculum is often outdated.”

    What Are the Benefits of Compulsory Math?

    Question: What are the strongest arguments for making math compulsory?

    Dr. Mitchell: “Math is everywhere. You need it for money, work, and daily life.” She lists key benefits:

    • Critical thinking: Math teaches logic and problem-solving.
    • Career readiness: Many jobs require math skills.
    • Financial literacy: Understanding interest, budgets, and taxes.
    • Equity: Compulsory math ensures all students get these skills.

    She also mentions that math builds resilience. “Students learn to try again. They learn from mistakes.” That’s a life skill. Not just a school skill.

    Here is a quick comparison table:

    Pros Cons
    Teaches logic Causes anxiety
    Required for STEM careers Not relevant to all jobs
    Builds problem-solving skills Can be taught poorly
    Ensures basic numeracy May discourage creative students

    The table shows the trade-offs. Dr. Mitchell adds, “The benefits depend on how math is taught.”

    What Are the Drawbacks?

    Question: What do critics say about compulsory math?

    Dr. Mitchell: “Forcing math can backfire. It can cause fear and hate.” Many students feel anxious in math class. This anxiety can last a lifetime. “They avoid anything with numbers.”

    Another criticism is time. “Students spend hours on algebra. They could learn other skills.” for instance, coding or financial planning. “Not every student needs calculus.” She mentions Finland. There, math is less intense. But students still do well. “It’s about balance.”

    Some experts say that math should be optional after age 14. That way, students can focus on their passions. Dr. Mitchell sees this view. But she also worries about equity. “If math is optional, some students will skip it. Then they miss out on future opportunities.”

    Should Math Be Optional After a Certain Age?

    Question: Do you think math should be optional? If so, when?

    Dr. Mitchell: “I think we should make it compulsory until age 16. That ensures basic skills.” After that, students can choose. But she adds a condition. “The math must be relevant. No abstract proofs. Instead, real-world applications.”

    She suggests offering different tracks. One track for STEM students. Another for arts and humanities. “Both tracks include math. But they use different examples.”

    In her view, the current system is too rigid. “We teach the same math to everyone. That is a mistake.” She wants personalized learning. “Every student can learn math. But at their own pace.”

    What Skills Do Students Actually Need?

    Question: What math skills are most important for life?

    Dr. Mitchell: “Mental arithmetic, percentages, and basic statistics.” These are used every day. “You need to understand interest rates.” You also need to read graphs. “Today, data is everywhere.” She suggests focusing on these core skills.

    She also mentions reasoning. “Math teaches you to think clearly.” That is more valuable than memorizing formulas. “The goal is to make informed decisions.”

    Practical advice: “Ask your child to calculate discounts.” Or “Discuss news statistics together.” These simple activities build skills.

    How Should Math Be Taught?

    Question: What teaching methods work best?

    Dr. Mitchell: “Active learning is key. Students must do, not just listen.” She recommends group work and projects. “for instance, plan a budget for a trip.” This makes math tangible.

    She also urges teachers to connect math to real life. “Show how geometry is used in art.” Or “How statistics are used in sports.” When students see relevance, they engage more.

    Technology can help. “Use apps and simulations.” But she warns: “Tech is a tool, not a substitute.” Good teaching still matters.

    She also highlights the importance of a growth mindset. “Praise effort, not just answers.” Students need to feel safe to make mistakes. “Mistakes are learning opportunities.”

    What About Students Who Struggle?

    Question: What can we do for students who find math hard?

    Dr. Mitchell: “First, identify the root cause.” Some students have dyscalculia. Others just have math anxiety. “Both need different support.”

    For anxiety, she suggests reducing pressure. “Allow extra time on tests.” “Offer alternative assessments.” for instance, oral presentations instead of written tests.

    For learning gaps, use interventions. “Small group tutoring works well.” Also, use visual and hands-on tools. “Manipulatives help abstract concepts.”

    The key is early intervention. “Don’t wait until high school.” Address issues in primary school. Kids who fall behind often stay behind.

    She also advises parents: “Be positive about math.” Don’t say ‘I was bad at math.’ That sends a negative message. Instead, say ‘Math takes practice.’

    What Is the Future of Math Education?

    Question: How will math education change in the next decade?

    Dr. Mitchell: “We will see more personalized learning.” AI will adapt lessons to each student. “No more one-size-fits-all.” Students will get instant feedback.

    She predicts more focus on data literacy. “Schools will teach how to interpret data.” This is already important. It will become essential.

    Also, new subjects like coding may merge with math. “Learning to code is logical thinking.” So computer science might be part of math class. “Or math might be part of computer science.”

    She cautions, though, that technology can’t replace human teachers. “The best teacher is still a person.” AI will assist, but not replace.

    Practical Advice for Parents and Educators

    Question: What should parents and teachers do now?

    Dr. Mitchell: “Show enthusiasm for math.” If you love it, your kids will too. “Find math in everyday life.” Cooking, shopping, and sports all use math.

    For teachers, she recommends project-based learning. “Let students explore big questions.” for instance, ‘How do we design a park?’ This uses geometry, area, and budget.

    She also says to reduce drill. “Repetition is boring.” Instead, use games and puzzles. “Make math playful.”

    For schools, she advises flexible timing. “Some students need more time.” Allow them to take math over a longer period. “That prevents burnout.”

    Finally, she reminds us: “The goal isn’t to create mathematicians.” It is to create capable citizens. “Math is a tool for life.”

    Conclusion

    So, should math be compulsory? Dr. Mitchell says yes. But only if we teach it well. She wants relevant, engaging, and personalized math. She wants less stress and more application. Her advice is clear: make math useful. Then it will be valued.

    Education is always evolving. We must adapt. The future of math is bright. But it requires change. Let’s listen to the experts. Let’s put students first.

    Frequently Asked Questions

    Is math really necessary for everyday life?

    Yes, math is everywhere. You use it for money, cooking, and time. Even simple tasks need math. for instance, comparing prices. Or measuring ingredients. Basic math is vital.

    What if a student struggles with math despite trying?

    Struggling doesn’t mean failure. It means the approach may need to change. Try different methods. Use visuals, games, or tutoring. Also check for learning disabilities. Early help is crucial.

    Should students be forced to take math if they hate it?

    Forcing can work if done kindly. The goal is to make math less scary. Show its relevance. Use real-world examples. If students see value, they may change their minds. But respect their feelings.

    What are the best math apps for secondary students?

    Many apps are great. Khan Academy, Photomath, and Prodigy are popular. They offer practice and explanations. Choose one that matches your child’s level. Use them as supplements, not substitutes.

    Will AI replace the need for math skills?

    AI can calculate fast. But you still need to understand concepts. for instance, you must know if an answer makes sense. AI can’t think for you. So math skills remain important.

    In short, math isn’t just a subject. It’s a life skill. The expert interview shows the need for change. But compulsory math is still the best choice. We just need to teach it better.

  • Do Secondary School Students Need Phones at School? Expert Interview

    Do Secondary School Students Need Phones at School? Expert Interview

    Should secondary school students need phones at school? Many parents wonder. Teachers and principals also disagree. To help you decide, we interviewed Dr. Sarah Mitchell. She is an educational psychologist. She has led two secondary schools. She advises districts on technology policies. Here are her insights.

    Meet the Expert

    Dr. Mitchell earned her doctorate in education. She spent 20 years in classrooms. She also served as a principal for 12 years. Today, she researches student technology use. Her work appears in major journals. In this interview, she shares her honest opinion. She hopes to help families understand this issue.

    “The debate isn’t about banning phones. It is about creating a good learning environment.” — Dr. Sarah Mitchell

    What Is the Current Debate?

    Question: What is the current debate about phones in secondary schools?

    “This debate is intense,” says Dr. Mitchell. “Some parents want their kids to stay reachable. Others worry about distractions. Many teachers see phones as learning tools. Others see them as obstacles. The result is a patchwork of policies. Some schools ban phones entirely. Others allow them with limits. Nobody has a perfect answer yet.”

    Many countries are experimenting with different rules. Some Australian and French schools have national bans. Others allow phones only in between classes. The debate also focuses on equity. Not every child owns a smartphone. This creates a divide at school.

    What Are the Arguments for Allowing Phones?

    Question: What are the main arguments for allowing phones in school?

    “Phones can be powerful learning devices,” she explains. “They offer instant access to information. Students can collaborate on projects. They can use educational apps. Parents can contact their children. And after an emergency, phones are vital.”

    Dr. Mitchell lists several specific benefits:

    • Learning tools: Calculators, dictionaries, and research apps.
    • Communication: Kids can text parents about schedule changes.
    • Safety: In a crisis, students can call home.
    • Organization: Calendars and reminders keep students on track.
    • Digital literacy: Phones teach responsible technology use.

    She points out that smartphones aren’t going away. Schools should teach children to handle them. That means allowing limited use. Otherwise, students may misuse phones outside class.

    What Are the Arguments Against Allowing Phones?

    Question: And what are the main arguments against?

    “The drawbacks are serious,” Dr. Mitchell says. “You can’t ignore the distraction factor. Notifications pull attention away from lessons. Research shows that phone presence lowers test scores. Even a silent phone reduces focus. Students also face cyberbullying. They can cheat easily. And social media feeds anxiety.”

    She mentions common teacher complaints:

    • Off-task behavior: Students text, game, or watch videos.
    • Sleep issues: Late-night phone use harms rest.
    • Social isolation: Kids miss face-to-face chats.
    • Cost burden: Expensive phones cause equity problems.
    • Security risks: Stolen devices or unsafe apps.

    “Many teachers feel like they are competing with a screen,” she says. “It is exhausting for them.”

    Quick Comparison

    For Against
    Access to learning tools Constant distractions
    Easy communication with parents Cyberbullying risks
    Emergency safety Sleep disruption
    Digital literacy Inequity and cost

    How Do Phones Affect Learning Outcomes?

    Question: Do phones help or hurt academic performance?

    “The evidence is clear,” Dr. Mitchell states. “Smartphones in classrooms harm academic performance. A major study found lower test scores. Even having a phone on the desk reduces memory. Students think they can multitask. But brains can’t focus on two things at once.”

    She adds: “When teachers control their use, phones can help. for instance, a quick poll works well. Or researching a topic in real time. but, those activities are rare. Most of the time, phones are off-task. That is a huge problem.”

    Many schools report that after a phone ban, test scores increase. Teachers also notice better participation. Students pay attention to each other. Lessons become more interactive.

    What About Student Mental Health and Social Interaction?

    Question: How do phones affect student well-being?

    “Phones affect young people deeply,” she says. “Social media usage links to depression. Teens compare themselves to others online. They fear missing out. They feel left out when friends gather. Meanwhile, face-to-face skills weaken. We see more lonely students now.”

    She suggests that schools without phones see better social dynamics. “Lunches become noisier. Conversations happen. Students actually talk to each other. That is a huge benefit.”

    Some parents worry about school shootings. They want their child to text them. Dr. Mitchell understands that fear. “But schools have emergency plans. Office phones are available. The risk is low,” she says.

    What Is the Role of Parents in This Decision?

    Question: How can parents influence phone policies?

    “Parents want constant contact with their kids,” Dr. Mitchell points out. “That is understandable. But schools need to establish boundaries. Parents can set expectations at home. They can use phone-free times. They can also support school policies.”

    She advises parents to talk with their kids. “Ask how phones affect their learning. Also ask about their social life at school. Then work with teachers to find a solution.”

    If parents agree with a ban, they should voice support. Schools need backing from families. This helps enforce rules without conflict.

    What Policies Are Schools Adopting?

    Question: What are the common phone policies today?

    “No single policy fits every school,” she says. “But some common patterns exist. Many schools use a ‘phone off and away’ rule. Others collect phones at the door. Some allow phones during breaks. Extremely few let phones throughout class.”

    The most popular approach is a full ban. Data suggests bans improve test scores. They also reduce bullying. Still, enforcement is tough. Some teachers don’t want to police phones.

    Here are the four main policy types:

    • Total ban: No phones permitted on campus.
    • Check-in: Phones are kept in lockers or boxes.
    • Periodic use: Allowed only in hallways or lunch.
    • Teacher discretion: Each class has its own rule.

    What Practical Advice Do You Have for Schools and Parents?

    Question: What recommendations would you give?

    Dr. Mitchell offers several actionable tips:

    1. Start with a clear purpose. Align policy with school goals.
    2. Involve students. Let them help craft the rules.
    3. Educate, don’t just punish. Teach digital citizenship.
    4. Provide alternatives. Ensure students can contact parents via office.
    5. Model good behavior. Teachers should limit their own phones.
    6. Be consistent. Apply rules fairly across all classes.

    For parents, she says: “don’t buy a phone for your child too early. If you do, set strict limits. Use parental controls. And encourage outdoor activities without screens.”

    She also reminds parents to practice what they preach. Put your own phone away during dinner. That sets a good example.

    What Predictions Do You Have for the Future?

    Question: What will phone policies look like in ten years?

    “I see more restrictions ahead,” Dr. Mitchell predicts. “School districts will move toward blanket bans. The evidence is just too strong. But we will also see better tech integration. Maybe a school-issued device that limits distractions. Or a central phone storage system. We might even see education-focused devices.”

    She adds: “Eventually, we will find a balance. Students will use technology in class. But only under strict guidance. Phones won’t disappear. They will just become less central.”

    She predicts that parents will also change. They will realize that constant texting isn’t needed. Schools will offer better communication channels. For instance, apps that send alerts directly to parents.

    Is There a Middle Ground?

    Question: Is there any way to enjoy the benefits of phones without the downsides?

    “Yes, absolutely,” she says. “I recommend a graduated approach. Younger students can have no phones at all. Middle schoolers can use them before or after school. High schoolers can have them during lunch. And for specific lessons, teachers can allow phone use.”

    She also suggests a “technology breaks” schedule. “Seven minutes every 40 might work. Or a ‘phone minute’ at the end of class. That way, students know they will get a chance.”

    This way, students learn self-regulation. They also understand when phone use is appropriate. The key is to teach them, not ignore them.

    Key Takeaways

    • Phones can both help and hurt learning.
    • Distraction is the biggest concern.
    • Emergencies matter, but schools can handle them.
    • Policy should involve students, parents, and teachers.
    • A complete ban works best for many schools.
    • Digital literacy still needs to be taught.

    “The future isn’t about banning, but about balance.” — Dr. Sarah Mitchell

    Frequently Asked Questions

    Should secondary school students have phones at school?

    It depends on the school culture. Generally, phones aren’t essential for learning. Most students can manage without them. but, some need them for communication after school. Check your school’s policy.

    What are the negative effects of phones at school?

    Phones cause major distractions. They reduce attention span and memory. They also increase cyberbullying and anxiety. also, they harm sleep if used at night.

    How can schools manage phone use?

    Schools can adopt clear policies. These include phone-free mornings or storage boxes. The best approach is consistent enforcement. Involve students in rule-making to gain buy-in.

    Do phones improve learning?

    Sometimes, yes. They allow quick research and collaboration. But unguided use often hurts learning. Teachers need structured activities to make phones effective.

    What should parents do about phones in school?

    Parents should talk to their children about expectations. Support the school’s phone policy. Also, avoid constant texting during class hours. Trust the school to keep kids safe.

  • 15 Essential Qualities of a Successful Secondary School Student

    15 Essential Qualities of a Successful Secondary School Student

    Secondary school is a time of growth, challenges, and discovery. To truly succeed, you need more than just good grades. You need a set of qualities that help you navigate academics, relationships, and personal development. This guide lists 15 essential qualities of a successful secondary school student, with practical tips to cultivate each one.

    1. Resilience: Bounce Back Stronger

    Resilience is the ability to recover from setbacks. Every student faces failures, like a bad test score or a missed opportunity. Resilient students see these as learning moments, not defeats.

    Example: Imagine you fail a math exam. A resilient student asks the teacher for help and studies harder. They don’t give up.

    Actionable Advice: When you face a setback, write down three things you learned from the experience. Then create a plan to improve. This shifts your mindset from failure to growth.

    2. Time Management: Master Your Schedule

    Secondary school brings many assignments, activities, and social obligations. Good time management helps you balance everything without stress.

    • Use a planner or digital calendar to track deadlines.
    • Break big tasks into smaller, manageable steps.
    • Prioritize tasks based on importance and urgency.

    Example: A student with a science project due Friday also has soccer practice. They plan 30 minutes each day to work on the project, avoiding last-minute panic.

    Actionable Advice: Start each Sunday by mapping out your week. Set time blocks for homework, studying, and fun. Stick to your plan as much as possible.

    3. Curiosity: Never Stop Asking Questions

    Curious students are eager to learn beyond the textbook. They ask “why” and “how” and seek deeper understanding. This quality fuels intellectual growth.

    Example: In history class, a curious student researches what led to a war, not just memorizing dates.

    Curiosity is the spark that turns lessons into lifelong learning.

    Actionable Advice: Whenever a topic interests you, spend 10 minutes researching it online. Watch a video, read an article, or ask your teacher. Feed your curiosity.

    4. Responsibility: Own Your Choices

    Responsibility means accepting the consequences of your actions, both good and bad. It shows maturity and builds trust with teachers and peers.

    Example: If you forget your homework, don’t make excuses. Apologize, hand it in late if possible, and set a reminder for next time.

    Actionable Advice: Keep a list of your commitments. Review it daily. If you miss something, ask yourself how to prevent it. This builds independence.

    5. Teamwork: Collaborate Wisely

    Group projects are common in secondary school. Teamwork involves listening, sharing ideas, and working toward a common goal. Successful students know how to contribute and support others.

    Teamwork Skill Why It Matters
    Active Listening Shows respect and helps avoid misunderstandings.
    Sharing Workload Ensures tasks are done efficiently and fairly.
    Giving Feedback Helps the group improve and grow.

    Actionable Advice: In your next group project, volunteer for a role that suits your strengths. Also, ask teammates for their opinions often.

    6. Communication: Express Yourself Clearly

    Good communication is about speaking and writing clearly, but also listening. It helps you ask for help, present ideas, and build friendships.

    Example: When you’re confused about a lesson, raise your hand and say, “Could you explain step two again?” This is clear and effective.

    Actionable Advice: Practice explaining a concept you learned today to a friend or family member. If they understand, you’re on the right track.

    7. Critical Thinking: Question Assumptions

    Critical thinking is the ability to analyze information and make logical decisions. In an age of fake news, this quality is vital.

    Example: When reading a social media post, a critical thinker checks the source and looks for evidence before believing it.

    Actionable Advice: When you encounter a new claim, ask three questions: Who said it? What evidence is there? Are there other explanations?

    8. Adaptability: Embrace Change

    Secondary school is full of changes: new teachers, different subjects, and shifting schedules. Adaptable students adjust quickly and stay positive.

    Example: When a teacher suddenly announces a pop quiz, an adaptable student takes a deep breath and uses their existing knowledge.

    Actionable Advice: Keep an open mind when routines change. Think of surprises as opportunities to test your flexibility. This reduces stress.

    9. Self-Motivation: Push Yourself Without External Rewards

    Self-motivated students study because they want to, not just for grades. They set personal goals and work towards them consistently.

    Example: A student wants to improve their writing, so they practice every day even without extra credit.

    Actionable Advice: Set a small goal for yourself, like reading one book a month. Track your progress and reward yourself. Internal rewards are powerful.

    10. Organization: Keep Track of Everything

    Organization goes beyond having a tidy desk. It’s about planning your materials, notes, and files so you can find things quickly.

    • Use binders with labeled sections for each subject.
    • Color-code your notes.
    • Keep a backpack clean and clutter-free.

    Example: An organized student never loses handouts because each subject has a designated folder.

    Actionable Advice: Spend five minutes at the end of each day organizing your notes and assignments. This small habit saves hours later.

    11. Empathy: Understand Others

    Empathy means understanding and sharing the feelings of others. It helps you build strong friendships and resolve conflicts peacefully.

    Example: When a classmate seems upset, you ask if they’re okay and listen without judging.

    Actionable Advice: Before you react to someone, take a moment to imagine how they feel. Then respond with kindness.

    12. Integrity: Do the Right Thing

    Integrity is about honesty and strong moral principles. It earns you respect and trust from everyone around you.

    Example: You see the answer key but choose not to look because you know cheating is wrong.

    Integrity is doing the right thing, even when no one is watching.

    Actionable Advice: When faced with an ethical dilemma, ask yourself if you would be proud to tell your parents about it. Let that guide you.

    13. Perseverance: Never Quit

    Perseverance is the determination to keep going despite obstacles. It’s closely linked to resilience but focuses on long-term effort.

    Example: Failing a road test doesn’t stop you from practicing again. You keep driving with your parents until you pass.

    Actionable Advice: Break your biggest goal into weekly milestones. Celebrate each small win. This keeps your motivation high.

    14. Open-Mindedness: Welcome New Ideas

    Open-minded students are willing to consider different perspectives. This quality enhances learning, creativity, and tolerance.

    Example: In a debate, you listen to the opposing side and try to understand their reasoning before arguing your point.

    Actionable Advice: Challenge yourself to read an article or watch a video with an opinion you disagree with. Try to see the other side.

    15. Digital Literacy: Use Technology Wisely

    Secondary school increasingly relies on technology. Digital literacy means using it for learning, communication, and problem-solving responsibly.

    Example: You know how to find reliable sources for a research project and how to cite them correctly.

    Actionable Advice: Learn keyboard shortcuts, use online collaboration tools, and always verify information before sharing. Be a smart digital user.

    Frequently Asked Questions

    How can I develop these qualities quickly?

    Start with one quality at a time. Focus on it for a week. Practice daily and reflect on your progress. Soon, it becomes a habit.

    Do these qualities matter more than grades?

    Both matter. Grades show knowledge, but qualities show your character. Universities and employers look for both. Qualities often make you stand out.

    Can I be successful if I lack some qualities?

    Yes. No one has all qualities from the start. You can build them over time with effort and self-awareness. Pick one to improve today.

    How can parents help their children develop these qualities?

    Parents can model these behaviours, encourage independence, and praise effort rather than just results. Open communication is key.

    Developing these 15 qualities will set you on a path to success in secondary school and beyond. Choose one quality to work on this week. Small steps make a big difference.

  • Ending Gender Based Violence in Schools: A Complete Guide

    Ending Gender Based Violence in Schools: A Complete Guide

    Gender based violence (GBV) in schools is a serious problem. It affects millions of children worldwide. This guide explains what is GBV, its forms, impact, and how to mitigate GBV in schools. Let’s work together to create safe learning spaces.

    What is GBV?

    GBV stands for gender based violence. It means harm directed at someone because of their gender. It includes physical, sexual, and psychological abuse. Schools should be safe, but they aren’t always.

    GBV can happen between students or from teachers to students. It can also happen from students to teachers. Anyone can experience GBV, but girls and LGBTQ+ students face higher risks.

    Understanding what is GBV is the first step. It helps us recognize the problem. Once we see it, we can act to stop it.

    Forms of Gender Based Violence in Schools

    GBV takes many forms. Here are the most common ones:

    • Physical violence: Hitting, slapping, pushing, or using weapons.
    • Sexual violence: Unwanted touching, rape, or sexual harassment.
    • Psychological violence: Threats, intimidation, or humiliation.
    • Verbal abuse: Name-calling, insults, or sexist jokes.
    • Cyber violence: Online bullying, sharing intimate images without consent.

    Each form causes deep harm. Many students suffer multiple forms at once. Schools must address all types of GBV.

    Physical Violence

    Physical GBV includes hitting, kicking, and using objects. Boys often face more physical violence. But girls are also targets. for instance, a teacher might beat a girl for refusing his advances. This is a crime.

    Physical violence leaves visible scars. It also causes internal injuries. Students may fear coming to school. Their grades drop. They may drop out entirely.

    Schools need strict rules against physical violence. All staff should be trained to report it. Students should know they can ask for help.

    Sexual Violence

    Sexual violence is a major problem. It includes rape, sexual assault, and harassment. Perpetrators are often classmates or teachers. Girls are most at risk, but boys can also be victims.

    for instance, a teacher might promise good grades in exchange for sex. This is called sexual exploitation. It is illegal and unethical. Students must be protected from such abuse.

    Schools should have clear reporting systems. Victims need support, not blame. Confidential counseling should be available.

    Psychological Violence

    Psychological violence is hard to see. It includes threats, insults, and exclusion. A student might be called weak for crying. Or a girl might be told she can’t do math because of her gender. This is harmful.

    Psychological violence damages self-esteem. Students may feel worthless. They may stop participating in class. Over time, this affects their future.

    Teachers should create inclusive classrooms. They should challenge stereotypes. Every student deserves respect.

    Verbal Abuse

    Verbal abuse includes name-calling and sexist jokes. Words can hurt deeply. Students may be called ‘slut’ or ‘gay’ as insults. This is GBV.

    Verbal abuse often happens in hallways or playgrounds. It can be dismissed as ‘teasing’. But it isn’t harmless. It creates a hostile environment.

    Schools should have a zero-tolerance policy for verbal abuse. Students should be taught to speak respectfully. Bystanders should intervene.

    Cyber Violence

    Cyber violence happens online. It includes bullying, threats, and sharing private images. Social media makes it easy to spread harm. Students can’t escape it, even at home.

    for instance, a student might post a classmate’s photo without permission. Or they might send threatening messages. This is a form of GBV.

    Schools should teach digital safety. Students should know how to block and report abusers. Parents should monitor online activity.

    Impact of Gender Based Violence on Students

    GBV has serious consequences. It affects students’ health, education, and future. Here is how:

    Physical Health Effects

    Victims may suffer injuries, sexually transmitted infections, or unwanted pregnancies. They may experience chronic pain. Their physical development can be harmed.

    for instance, a girl who is raped may become pregnant. She may miss school. She may face stigma. Her health is at risk.

    Schools should provide health services. Access to contraception and counseling is vital. Medical care should be confidential.

    Mental Health Effects

    GBV affects mental health deeply. Victims may develop depression, anxiety, or post-traumatic stress disorder. They may have nightmares or flashbacks. They may feel shame and guilt.

    Some students self-harm or attempt suicide. The pain can be unbearable. They need professional help.

    Schools should have counselors trained in trauma. They should create a safe space for students to talk. Peer support groups can also help.

    Educational Impact

    GBV makes it hard to learn. Victims may skip classes to avoid abusers. Their grades drop. They may drop out of school entirely.

    for instance, a boy who is bullied for being gay may stop coming to school. He may lose his chance for a better future. Education is a right, but GBV denies it.

    Schools must address GBV to keep students in school. Safe environments improve attendance and performance.

    Long-Term Consequences

    GBV affects victims for life. They may struggle in relationships. They may have lower income. They may perpetuate violence themselves. This cycle must be broken.

    for instance, a girl who experiences violence may accept abuse as normal. She may not report it. Her children may also suffer.

    Prevention is key. By stopping GBV now, we protect future generations. Every child deserves a safe childhood.

    How to Mitigate GBV in Schools

    Mitigation means reducing or preventing harm. Here are practical steps to mitigate GBV in schools:

    Create Clear Policies

    Schools need written policies against GBV. These should define what is GBV and list prohibited behaviors. They should outline reporting procedures and consequences.

    for instance, a policy might state: ‘Any form of sexual harassment will result in suspension.’ It should be shared with all students and staff.

    Policies should be enforced consistently. No one should be above the rules. This builds trust and safety.

    Train Teachers and Staff

    Teachers must understand what is GBV. They should be trained to recognize signs. They should know how to respond appropriately.

    Training should include how to support victims. Teachers should avoid blaming the victim. They should report abuse to authorities.

    Regular refresher courses are important. New staff should also be trained. This ensures everyone is prepared.

    Educate Students

    Students need to learn about GBV. They should understand consent, respect, and equality. They should know their rights.

    Curriculum can include lessons on healthy relationships. Role-playing can help students practice saying no. They should learn to intervene as bystanders.

    for instance, a student can say: ‘Stop, that isn’t funny.’ This simple act can prevent harm.

    Establish Reporting Mechanisms

    Victims need safe ways to report GBV. Schools should have anonymous reporting systems. Students can use a drop box or online form.

    Reports should be taken seriously. Investigations should be prompt and fair. Victims shouldn’t fear retaliation.

    Schools should also have a designated person to handle reports. This person should be trained and approachable.

    Provide Support Services

    Victims of GBV need support. Schools should have counselors, nurses, and social workers. They should provide medical care and mental health services.

    Support should be confidential. Victims shouldn’t be forced to talk to their parents if it is unsafe. Their safety is the priority.

    Schools can partner with local organizations. Shelters and hotlines can provide additional help.

    Engage Parents and Community

    Parents play a key role. They should be educated about GBV. They should talk to their children about respect and safety.

    Community leaders can also help. They can speak out against GBV. They can support school policies.

    for instance, a parent-teacher meeting can discuss GBV prevention. Everyone must work together.

    Promote Gender Equality

    GBV is rooted in inequality. Schools should promote gender equality in all activities. Girls and boys should have equal opportunities.

    Textbooks should avoid stereotypes. Sports and clubs should be inclusive. Teachers should encourage all students equally.

    for instance, a school can have a girls’ football team. This challenges norms and empowers girls.

    Create Safe Physical Environments

    School buildings should be safe. Bathrooms should be well-lit and locked. Hallways should be monitored. There should be no dark corners.

    Security guards can patrol the grounds. Visitors should sign in. Students should wear ID badges.

    Safe environments reduce opportunities for violence. They also make students feel secure.

    Monitor and Evaluate

    Schools should track GBV incidents. They should analyze data to identify patterns. This helps target interventions.

    for instance, if most incidents happen during recess, extra supervision can be added. Monitoring shows what works.

    Regular surveys can measure student safety. Feedback should be used to improve policies.

    Case Studies: Successful Mitigation

    Here are real examples of schools that reduced GBV:

    School A in Kenya

    School A introduced a peer education program. Students taught each other about GBV. Reports of violence dropped by 50% in one year.

    The program included role-playing and discussions. Students felt empowered to speak up. Teachers also received training.

    This shows that involving students works. They can be agents of change.

    School B in India

    School B installed CCTV cameras and improved lighting. They also set up a complaint box. Incidents of harassment decreased significantly.

    The school also had a gender club. Students discussed equality and respect. The environment became safer.

    Physical changes alone aren’t enough. But combined with education, they work.

    School C in Brazil

    School C implemented a restorative justice program. Instead of punishing perpetrators, they focused on healing. Victims felt heard and supported.

    The program reduced repeat offenses. It also improved relationships between students. This is a promising approach.

    Challenges in Mitigating GBV

    Despite efforts, challenges remain:

    • Lack of resources: Many schools lack funds for training or support services.
    • Cultural norms: Some communities tolerate violence. Changing attitudes takes time.
    • Fear of reporting: Victims may fear stigma or retaliation. They stay silent.
    • Weak enforcement: Even with policies, perpetrators may not be punished.

    These challenges require sustained effort. Governments must allocate funding. Communities must change norms. Schools must build trust.

    Role of Technology in Mitigation

    Technology can help. Apps allow anonymous reporting. Online courses teach about GBV. Social media campaigns raise awareness.

    for instance, a school can use a hotline via WhatsApp. Students can report incidents quickly. This is easy and private.

    but, technology can also be misused. Cyber violence is a form of GBV. Schools must teach digital citizenship.

    Legal Frameworks

    Many countries have laws against GBV. Schools must comply. They should know the legal age of consent and mandatory reporting laws.

    for instance, in the US, Title IX protects against sex discrimination. Schools must investigate complaints. Failure to do so can result in loss of funding.

    Schools should have a legal advisor. They should update policies as laws change.

    Conclusion

    Gender based violence in schools is a crisis. But it can be stopped. By understanding what is GBV, recognizing its forms, and taking action, we can mitigate GBV in schools. Every student deserves to learn in safety. Let’s make it happen.

    Remember: GBV isn’t inevitable. We have the tools to prevent it. Schools, parents, and communities must work together. The future of our children depends on it.

    Frequently Asked Questions

    What is gender based violence in schools?

    GBV in schools is harm directed at a student because of their gender. It includes physical, sexual, and psychological abuse. It can happen between students or from staff to students.

    What are the main forms of GBV in schools?

    The main forms are physical violence, sexual violence, psychological violence, verbal abuse, and cyber violence. Each form can cause serious harm.

    How does GBV affect students’ education?

    GBV leads to poor attendance, lower grades, and higher dropout rates. Victims find it hard to concentrate. They may avoid school to escape abusers.

    What can teachers do to prevent GBV?

    Teachers can create a respectful classroom. They can challenge stereotypes. They should report any signs of abuse. Training helps them respond appropriately.

    How can students report GBV safely?

    Students can use anonymous reporting systems like drop boxes or online forms. They can also talk to a trusted teacher or counselor. Schools should make reporting easy and safe.

    What is the role of parents in mitigating GBV?

    Parents should talk to their children about respect and safety. They should support school policies. They can also volunteer to monitor school activities.

    Are there successful examples of GBV mitigation?

    Yes. Schools in Kenya, India, and Brazil have reduced GBV through peer education, improved security, and restorative justice. These programs show that change is possible.

    What laws protect students from GBV?

    Many countries have laws against GBV. for instance, Title IX in the US protects against sex discrimination. Schools must follow these laws and investigate complaints.

    How can technology help reduce GBV?

    Technology allows anonymous reporting and online education. Apps and hotlines make it easy to seek help. but, schools must also address cyber violence.

    What is the first step to mitigate GBV in schools?

    The first step is to acknowledge the problem. Schools should assess the situation, create a policy, and train staff. Then they can implement prevention programs.

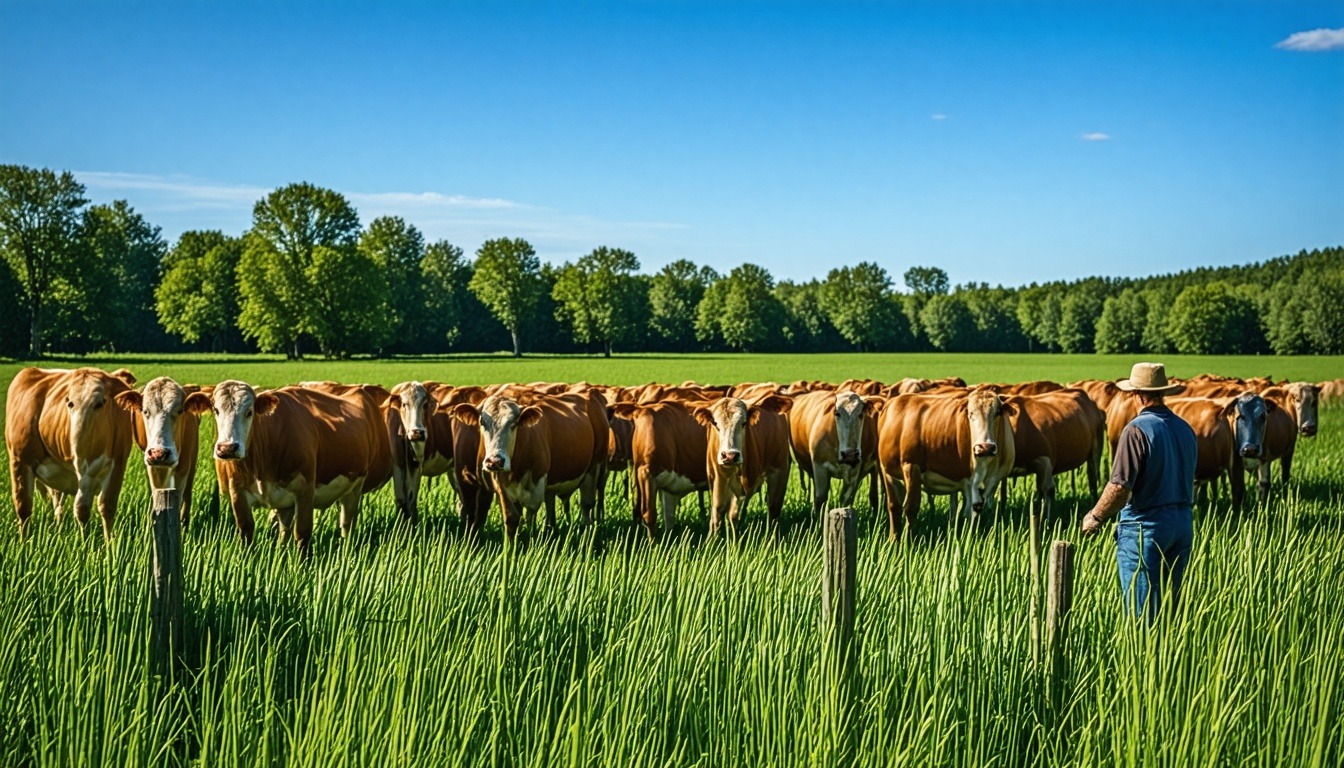
  • Growing Cabbage in Uganda: A Guide to High Profits

    Introduction

    Cabbage farming in Uganda is one of the most profitable agribusiness opportunities for both small-scale and commercial farmers. With increasing demand in urban markets like Kampala, Mbarara, and Gulu, many farmers are turning to cabbage growing as a reliable source of income. If done correctly, cabbage farming can generate consistent profits within a short period.

    This comprehensive guide will walk you through everything you need to know about how to grow cabbage in Uganda, from setting up a nursery bed to harvesting and marketing. We will also answer one of the most frequently asked questions: how much can you make from growing cabbage?

    Whether you are a beginner or an experienced farmer looking to improve yields, this guide will equip you with practical, easy-to-follow steps.


    Why Grow Cabbage in Uganda?

    Cabbage is a highly consumed vegetable across Uganda. It is used in homes, restaurants, schools, and hotels. This makes it one of the most marketable crops in the country.

    Here are key reasons why cabbage farming in Uganda is a smart investment:

    • High demand: Cabbage is consumed daily in many Ugandan households.
    • Short maturity period: Ready for harvest in 3–4 months.
    • Favorable climate: Uganda’s weather supports cabbage growth throughout the year.
    • Multiple harvest cycles: Farmers can grow cabbage several times annually.
    • Good market prices: Prices increase during dry seasons.

    Because of these factors, profits in cabbage farming can be very attractive when proper farming practices are followed.


    Best Conditions for Growing Cabbage in Uganda

    To succeed in cabbage farming, you need to understand the ideal growing conditions:

    • Temperature: 15°C to 25°C is ideal.
    • Rainfall: Moderate rainfall or irrigation is required.
    • Soil: Fertile, well-drained loamy soil.
    • Soil pH: Between 6.0 and 7.5.
    • Sunlight: Full sun exposure for healthy growth.

    Regions like Kabale, Mbale, Fort Portal, and parts of Central Uganda are especially suitable for cabbage production.


    Setting Up a Nursery Bed

    A strong start determines your success. Begin with a well-prepared nursery bed.

    Steps to prepare a nursery bed:

    • Choose a location with partial shade.
    • Clear the land and remove weeds.
    • Prepare raised beds about 1 meter wide.
    • Mix soil with compost or well-rotted manure.
    • Sow seeds in shallow rows.
    • Cover lightly with fine soil.
    • Water gently every day.

    Protect seedlings from heavy rain and direct sunlight using grass or a shade net. After 3–4 weeks, seedlings should have 4–5 leaves and be ready for transplanting.


    Preparing the Main Garden

    Proper land preparation is essential for high yields in cabbage farming.

    • Choose a sunny location with good drainage.
    • Plow the land thoroughly.
    • Remove weeds, stones, and debris.
    • Add organic manure to improve soil fertility.
    • Test soil pH and apply lime if necessary.

    Make planting beds about 1 meter wide. Apply basal fertilizer such as DAP during planting to boost root development.


    Transplanting Cabbage Seedlings

    Transplanting should be done carefully to avoid damaging young plants.

    • Water the nursery before uprooting seedlings.
    • Transplant in the evening or on a cloudy day.
    • Space plants 60 cm apart.
    • Plant seedlings up to the first leaves.
    • Firm the soil around the roots.
    • Water immediately after transplanting.

    Proper spacing ensures good air circulation and reduces disease spread.


    Cabbage Crop Management

    Watering

    Cabbage requires consistent moisture. Water regularly, especially during dry seasons. Avoid overwatering as it can cause root rot.

    Weeding

    Weeds compete for nutrients and water. Weed regularly using a hoe or by hand.

    Mulching

    Apply mulch to conserve moisture, control weeds, and improve soil health.

    Fertilization

    Apply nitrogen-rich fertilizers like CAN every 2–3 weeks to promote leaf growth.


    Pest and Disease Control in Cabbage Farming

    Pests and diseases can reduce yields significantly if not managed properly.

    Common Pests

    • Aphids
    • Caterpillars
    • Cutworms

    Control Measures

    • Use organic pesticides like neem extract.
    • Practice crop rotation.
    • Remove infected plants.

    Common Diseases

    • Black rot
    • Downy mildew

    Prevent diseases by maintaining field hygiene and avoiding overcrowding.


    How Much Can You Make from Growing Cabbage?

    This is the most important question for many farmers: how profitable is cabbage farming in Uganda?

    Let’s break it down:

    • Average yield per acre: 10–15 tons
    • Price per kg: 500–1500 UGX

    Example calculation:

    10,000 kg × 1,000 UGX = 10,000,000 UGX

    Estimated costs:

    • Seeds: 200,000 UGX
    • Fertilizers: 800,000 UGX
    • Labor: 1,000,000 UGX
    • Transport: 500,000 UGX

    Total costs: ~2.5 million UGX

    Estimated profit: 7–8 million UGX per acre

    This shows that cabbage farming profits in Uganda can be very high when managed properly.


    Harvesting and Post-Harvest Handling

    Cabbage is ready for harvest 3–4 months after transplanting.

    • Harvest when heads are firm and fully formed.
    • Use a sharp knife to cut the head.
    • Leave outer leaves for protection.
    • Harvest early in the morning.

    Post-harvest tips:

    • Handle carefully to avoid damage.
    • Sort and grade according to size.
    • Store in a cool, dry place.
    • Transport quickly to market.

    Marketing Your Cabbage

    Marketing is key to maximizing profits.

    • Sell to local markets and vendors.
    • Supply schools, hotels, and restaurants.
    • Join farmer cooperatives.
    • Explore export opportunities to neighboring countries.

    Building strong relationships with buyers ensures consistent income.


    Common Challenges in Cabbage Farming

    • Pests and diseases – Use integrated pest management.
    • Drought – Invest in irrigation.
    • Flooding – Ensure proper drainage.
    • Price fluctuations – Diversify markets.

    With proper planning, these challenges can be minimized.


    Conclusion

    Cabbage farming in Uganda is a highly rewarding venture when done correctly. From preparing a nursery bed to harvesting and marketing, every step plays a crucial role in determining your success.

    By following the best practices outlined in this guide, you can increase yields, reduce losses, and maximize profits. If you have been wondering how to start cabbage farming in Uganda or how much you can earn, now you have a clear roadmap.

    Start small, learn continuously, and scale your farming business over time. With dedication and proper management, cabbage farming can transform your income and livelihood.

  • 10 Ways to Master Project Based Learning in Your Classroom

    FAQ about PBL
    What is project-based learning (PBL)?
    Project-based learning is an instructional approach where students engage in hands-on projects that promote critical thinking, collaboration, and real-world problem-solving skills.

    How can I implement PBL in my classroom?
    To implement PBL effectively, start by selecting relevant, engaging topics that align with your curriculum, and provide students with clear guidelines and support throughout the project process.

    What are the benefits of using PBL?
    PBL fosters deeper understanding of subject matter, enhances student engagement, and develops essential skills such as teamwork and communication, preparing students for future academic and career challenges. What types of projects work best in PBL?
    Projects that encourage creativity and allow students to explore their interests are most effective. Examples include community service initiatives, scientific research, and interdisciplinary collaborations.

    How do I assess student learning in PBL?
    Assessment can be conducted through a combination of self-reflections, peer evaluations, and teacher observations, focusing on both the process and the final product.

    Can PBL be adapted for different age groups?
    Yes, PBL is versatile and can be tailored to
    suit students of all ages, with project complexity and expectations adjusted according to developmental stages.

    What resources are available for educators new to PBL?
    Numerous online platforms,
    workshops, and books offer guidance and examples for teachers looking to get started with project-based learning in their classrooms.

    Effective implementation of Project Based Learning (PBL) in the classroom requires careful planning and a strategic approach. Educators should focus on clearly defining learning objectives, facilitating student collaboration, and integrating real-world applications to enhance engagement. Additionally, ongoing assessment and feedback are crucial to guide student progress and refine projects. By adopting these practices, teachers can create a dynamic learning environment that fosters critical thinking and problem-solving skills.


    10 Ways to Master Project Based Learning in Your Classroom

    Project based learning transforms classrooms. It moves beyond textbooks and tests. Students tackle real-world problems. They develop critical skills for life. But starting can feel overwhelming. How do you design a great project? How do you manage the process? This guide breaks it down. Here are ten powerful ways to implement project based learning successfully.

    1. Start with a Driving Question

    Every great project needs a central question. This is your project’s North Star. It should be open-ended and complex. It can’t be answered with a simple yes or no. A good driving question sparks curiosity. It connects to the real world. It makes learning relevant and urgent.

    Example: “How can we design a sustainable garden for our school community?” This question covers science, math, and civic engagement.

    Actionable Advice: Craft your question with students. Use phrases like “How can we…” or “What should be done about…” Test it. Does it make you want to find an answer?

    2. Focus on Real-World Relevance

    Project based learning shines when it matters. Connect projects to local issues or global challenges. Students become problem-solvers, not just passive learners. They see the impact of their work. This builds motivation and ownership.

    Example: Instead of a report on local government, have students propose a solution to a town traffic issue. They can present to a local council member.

    Actionable Advice: Survey your community. What are local businesses or nonprofits concerned about? Partner with them. Make the audience for student work an authentic one.

    3. Plan for Sustained Inquiry

    True learning takes time. A good project based learning unit lasts weeks, not days. Students need to research, ask new questions, and revise. Inquiry is a cycle, not a single step. Build time for deep investigation into your timeline.

    Example: A history project on immigration shouldn’t end with a poster. Students can interview immigrants, analyze historical patterns, and create a documentary.

    Actionable Advice: Use a project calendar. Block out time for research, feedback, and revision. Teach students how to ask better questions as they go.

    4. Build in Student Voice and Choice

    Empower your students. Let them make meaningful decisions. They can choose their project’s final product. Or select their specific research focus within the larger theme. Choice increases engagement and responsibility.

    Example: The goal is to raise awareness about water conservation. Let teams choose their medium: a podcast, a social media campaign, or a community art installation.

    Actionable Advice: Offer structured choices. Provide a menu of options for products, topics, or team roles. Guide them, but don’t dictate every step.

    5. Encourage Critique and Revision

    High-quality work comes from feedback. Normalize the process of critique and revision. Teach students to give and receive constructive feedback. This mirrors real-world creative and professional processes.

    Example: Use “critical friends” protocols. One group presents their draft. Other groups ask clarifying questions and offer “I like…” and “I wonder…” statements.

    Actionable Advice: Schedule formal feedback checkpoints. Use rubrics as tools for feedback, not just grading. Model how to receive critique positively.

    6. Make it Public

    Work meant for more than the teacher has higher stakes. A public product adds purpose. Students present to experts, community members, or other classes. This celebrates their hard work. It also builds communication skills.

    Example: Host an exhibition night. Students showcase their projects on renewable energy to families and local engineers.

    Actionable Advice: Plan the public element early. Who is the authentic audience? Secure the venue or digital platform. Help students practice their presentations.

    7. Integrate Core Skills and Standards

    Project based learning isn’t an add-on. It’s how you teach the required curriculum. Weave math, literacy, and content standards directly into the project. The project becomes the vehicle for learning essential skills.

    Example: A project designing a new playground teaches area/perimeter (math), persuasive writing (ELA), and force/motion (science).

    Actionable Advice: Backward plan. Start with your key standards. Then, design a project that requires those skills to succeed. Map each standard to a project task.

    8. Facilitate, Don’t Just Instruct

    Your role shifts from lecturer to guide. You ask probing questions. You help find resources. You manage group dynamics. You are a coach on the sidelines, not the player on the field. This empowers student-led learning.

    Example: When a team is stuck, ask, “What have you tried?” and “Who could you ask for help?” instead of giving the answer.

    Actionable Advice: Use check-in meetings with each team. Prepare a list of open-ended questions. Resist the urge to solve problems for them.

    9. Use Effective Grouping Strategies

    Collaboration is key. But not all groups form effectively. Thoughtful grouping can make or break a project. Consider student strengths, work styles, and social dynamics. Provide clear roles to ensure everyone contributes.

    Example: Roles can include Project Manager, Research Lead, Creative Director, and Communications Specialist. Rotate roles in longer projects.

    Actionable Advice: Sometimes, let students choose groups. Sometimes, create heterogeneous groups yourself. Use team contracts where members agree on norms and responsibilities.

    10. Reflect Throughout the Process

    Learning happens in reflection. Build in moments for students to think about their progress. They should consider what they’re learning, how they’re working, and what they would change. Reflection turns experience into understanding.

    Example: Use daily exit tickets or weekly journal prompts. “What was our team’s biggest success today? What is our biggest challenge for tomorrow?”

    Actionable Advice: Schedule reflection time. Make it a routine. Use individual and group reflection prompts. Connect reflections to the project’s goals and skills.

    Putting It All Together

    Project based learning is a journey. Start small with one project. Use these ten tips as your roadmap. Remember, the goal is deeper learning. Students gain knowledge, skills, and confidence. They learn to think critically and work together. Your classroom becomes a vibrant hub of innovation. Embrace the messiness of the process. The results are worth it.

    Ready to begin? Choose one tip to focus on first. Perhaps start with a strong driving question. Or plan for a public audience. Each step you take brings project based learning to life. Your students will thank you for it.


  • Mimea na Mazao ya Mimea – Mwongozo

    Plants and Plant Products – A Complete Beginner’s Guide

    Mimea ni viumbe muhimu sana katika maisha ya binadamu, wanyama, na mazingira kwa ujumla. Katika lugha ya Kiswahili, kujua majina ya mimea na mazao yao husaidia wanafunzi kuelewa mada za chakula, kilimo, mazingira, na matumizi ya kila siku. Blog hii itakusaidia kujifunza kwa urahisi kwa kutumia mifano mingi, maelezo mafupi, na tafsiri za Kiingereza.


    1. Mimea ni nini? (What are plants?)

    Mimea ni viumbe hai vinavyoota ardhini na hutengeneza chakula chao kwa kutumia mwanga wa jua, maji, na hewa.
    Plants grow from the soil and make their own food using sunlight, water, and air.

    Mifano ya mimea (Examples of plants):

    1. Mti (tree)
    2. Maua (flowers)
    3. Nyasi (grass)
    4. Mgomba (banana plant)
    5. Mlonge (moringa)
    6. Mtumbu (sugarcane plant)
    7. Mchicha (amaranth)
    8. Spinachi (spinach)
    9. Mihogo (cassava plant)
    10. Kibaruawili / aloe vera
    11. Mnaradali (hibiscus)
    12. Mlozi (almond tree)
    13. Mpera (guava plant)
    14. Mchungwa (orange tree)
    15. Mkungu wa ndizi (banana bunch plant)

    Hii ni mwanzo tu. Tutatoa mifano zaidi ya 50 ya mimea na mazao yake kadiri tunavyoendelea.


    2. Mazao ya mimea ni nini? (What are plant products?)

    Mazao ya mimea ni vitu vinavyotokana na mimea ambavyo binadamu hutumia kwa chakula, biashara, dawa, nishati, au matumizi ya nyumbani.
    Plant products are items produced by plants and used for food, medicine, energy, or household purposes.

    Aina za mazao ya mimea (Types of plant products):

    • Mazao ya chakula (food crops)
    • Mazao ya biashara (cash crops)
    • Mazao ya matunda (fruits)
    • Mazao ya mboga (vegetables)
    • Mazao ya dawa (medicinal crops)
    • Mazao ya mafuta (oil crops)
    • Mazao ya kuni na mbao (wood & timber)

    3. Mifano ya mimea na mazao yake (50+ examples)

    Hapa chini ni orodha ndefu ya mimea na mazao yake yenye tafsiri za Kiingereza kwa wanafunzi wa kiwango cha chini:

    Mimea ya chakula (Food crops)

    1. Mahindi – maize / corn
    2. Mihogo – cassava
    3. Viazi vitamu – sweet potatoes
    4. Viazi mviringo – Irish potatoes
    5. Ndizi – bananas / plantains
    6. Mpunga – rice plant
    7. Mtama – sorghum
    8. Ulezi – finger millet
    9. Ngano – wheat
    10. Shayiri – barley

    Mimea ya matunda (Fruit plants)

    1. Mpapai – papaya
    2. Mpere / mpera – guava
    3. Mtomoko – jackfruit
    4. Mwembe – mango
    5. Mchungwa – orange
    6. Mdizi-mwitu – wild banana
    7. Mfenesi – breadfruit
    8. Mkomamanga – pomegranate
    9. Mzambarau – plum
    10. Mtufaha – apple

    Mimea ya mboga (Vegetable plants)

    1. Mchicha – amaranth
    2. Spinachi – spinach
    3. Kabeji – cabbage
    4. Nyanya – tomato
    5. Kitunguu maji – onion
    6. Kitunguu saumu – garlic
    7. Pilipili hoho – bell pepper
    8. Bilinganya – eggplant / aubergine
    9. Kunde – peas
    10. Maaharage – beans

    Mimea ya dawa (Medicinal plants)

    1. Mlonge – moringa
    2. Mwarobaini – neem
    3. Mrehani – basil
    4. Tangawizi – ginger
    5. Mdalasini – cinnamon tree
    6. Aloe vera – shubiri
    7. Ukwaju – tamarind
    8. Lemongrass – mbarika
    9. Mtunduru – castor plant
    10. Mchunga mwitu – wild bitter herb

    Mimea ya mafuta (Oil crops)

    1. Alizeti – sunflower
    2. Ufuta – sesame
    3. Karakana – canola / rapeseed
    4. Miwati / coconut palm – nazi
    5. Karanga – groundnuts / peanuts

    Mimea ya biashara (Cash crops)

    1. Pamba – cotton
    2. Kahawa – coffee
    3. Tumbaku – tobacco
    4. Chai – tea plant
    5. Mpira – rubber plant
    6. Miwa – sugarcane

    Mimea ya kuni na mbao (Trees used for wood)

    1. Mninga – mahogany
    2. Misindano – pine
    3. Mikaratusi – eucalyptus
    4. Mivule – mvule tree
    5. Mkonge – sisal plant

    Hii orodha ina zaidi ya mifano 50 ya mimea na mazao ya mimea.


    4. Umuhimu wa mazao ya mimea (Importance of plant products)

    Plant products are extremely important in daily life. Hapa chini ni faida kuu za mazao ya mimea.

    A. Chanzo cha Chakula (Source of food)

    Mazao kama mahindi, mpunga, ndizi, viazi na mboga hutumiwa kama chakula cha binadamu.
    Example:

    • Mahindi hutoa unga wa ugali – Maize gives flour for ugali.

    B. Chanzo cha Pesa na Uchumi (Income and economy)

    Mazao ya biashara huuzwa kupata kipato.
    Examples:

    • Kahawa (coffee)
    • Chai (tea)
    • Pamba (cotton)

    These are major cash crops in East Africa.

    C. Chanzo cha dawa (Medicine)

    Mimea mingi hutumiwa kutengeneza dawa za asili.
    Example:

    • Mwarobaini hutibu magonjwa mbalimbali.
      (Neem treats several conditions.)

    D. Kuzuia mmomonyoko wa udongo (Preventing soil erosion)

    Miti na nyasi hushikilia udongo na kuzuia kupeperushwa na maji.

    E. Kutengeneza mavazi na bidhaa (Clothing & products)

    • Pamba → nguo
    • Mkonge → kamba
    • Mpira → viatu, mipira ya michezo
    • Mbao → samani

    F. Kutoa hewa safi (Purifying the air)

    Mimea hutoa oksijeni na kusafisha mazingira.

    G. Chanzo cha nishati (Energy)

    • Mbao
    • Mkaa
    • Biofuel kutoka miwa

    5. Sentensi za kutumia (Useful sentences + English translation)

    1. Hii ni mimea ya chakula.

    These are food crops.

    2. Mazao haya hutumika kama dawa.

    These plant products are used as medicine.

    3. Miti hutupa hewa safi.

    Trees give us clean air.

    4. Wakulima hupanda alizeti kupata mafuta.

    Farmers plant sunflower for oil.

    5. Miwa hutumika kutengeneza sukari.

    Sugarcane is used to make sugar.

    6. Chai ni zao muhimu la biashara.

    Tea is an important cash crop.

    *7. Mahindi ni chakula cha msingi katika Afrika Mashariki.

    Maize is a staple food in East Africa.


    6. Maswali ya kujifunza (Learning questions)

    1. Taja mimea mitano ya chakula.
    2. Eleza faida za mwarobaini.
    3. Je, mazao ya biashara ni yapi?
    4. Mazao ya matunda hutumika vipi?
    5. Kwa nini miti ni muhimu kwa mazingira?
    6. Toa tofauti kati ya mimea ya mboga na mimea ya matunda.
    7. Taja mimea ya dawa inayopatikana nyumbani.

    Shairi:

    Read the poem below about crops and fruits in Kiswahili.

     🌿 Mimea na Matunda: Hazina ya Dunia

    Beti ya Kwanza (Maua na Mimea)

    Mimea ni hazina, dunia yetu pambo, Huwapa binadamu pumzi na mambo, Miti mirefu sana, imesimama wima, Na majani mabichi, yanatupatia kima. Hutoa kivuli, jua likiwa kali, Hutunza udongo, lisije nenda mbali.

    Beti ya Pili (Kazi ya Mimea)

    Mizizi chini yake, inashikilia ardhi, Husaidia mvua, isipotee haridhi, Matawi hutambaa, yakawa kama dari, Hupatikana dawa, inaponya kila siri. Mazingira safi, hewa ina pato, Hutufanya tupende kuishi duniani patu.

    Beti ya Tatu (Matunda Yenye Ladha)

    Na matunda ya mboga, yenye rangi na tunda, Embe na chungwa jekundu, ladha yake unda, Ndizi tamu sana, hujaa nguvu tele, Nanasi la Manzese, likatuvutia jele. Hufurahisha koo, na kupendezesha afya, Vitamini vingi, siyo tu kwa kafya.

    Beti ya Nne (Shukrani na Uhifadhi)

    Tutunze mimea, kwani ndiyo maisha, Tusiikate ovyo, tukajiletea ghisha, Tupande na kumwagilia, kwa upendo wote, Kupata matunda, yenye baraka zote. Asante Mwenyezi, kwa uumbaji huu wema, Utujalie hekima, ya kuyatunza daima.

    🌳 Mimea Mbalimbali: Hazina ya Uhai

    Mimea ni sehemu muhimu ya maisha duniani na hufanya kazi kubwa katika kudumisha ikolojia na afya ya sayari. Zinapatikana katika maumbo, saizi, na aina mbalimbali, kutoka kwa mwani mdogo sana hadi miti mikubwa ya Mvumo au Mikaratusi. Utajiri huu wa mimea huunda msingi wa mfumo mzima wa uhai.

    🍃 Aina na Kazi

    Kimsingi, mimea hugawanywa katika makundi makuu, ikiwemo mimea isiyo na maua (kama vile feni na mosses) na mimea yenye maua (ambayo hutoa matunda na mbegu). Mimea yote, bila kujali kundi, hutegemea mchakato wa fotosinthesisi ili kutengeneza chakula chake chenyewe kwa kutumia mwanga wa jua, maji, na hewa ya kaboni dioksidi.

    Shutterstock

    Kazi muhimu zaidi ya mimea ni kuzalisha oksijeni, ambayo ni muhimu kwa viumbe vyote vinavyopumua. Wakati wa fotosinthesisi, mimea hunyonya kaboni dioksidi kutoka hewani, kusaidia kupunguza gesi chafu na kudhibiti hali ya hewa duniani.

    🥕 Umuhimu wa Mimea kwa Binadamu

    Kwa binadamu, mimea ni muhimu sana. Kwanza, ndiyo chanzo kikuu cha chakula—maziwa, nafaka, mboga, na matunda vyote hutoka kwenye mimea. Pili, mimea mingi ni chanzo cha dawa za asili zinazotumika kutibu magonjwa mbalimbali. Tatu, mimea hutoa malighafi kwa ajili ya mahitaji mengine, kama vile mbao kwa ajili ya ujenzi na samani, na pamba kwa ajili ya nguo.

    Katika mazingira, mimea husaidia kuzuia mmomonyoko wa udongo kwa kushikilia ardhi kwa mizizi yao. Pia huunda makazi na chakula kwa wanyama na ndege wengi, na hivyo kudumisha utofauti wa viumbe.

    Kutokana na umuhimu wake, ni jukumu letu kulinda na kutunza mimea. Kupanda miti na kuzuia uharibifu wa misitu ni njia za kuhakikisha kwamba hazina hii ya uhai inaendelea kunufaisha vizazi vya sasa na vijavyo.


    Maswali na Majibu Kuhusu Mimea

    Haya hapa ni maswali matano (5) na majibu yake yaliyotokana na insha, yakiwa na viwango tofauti vya uelewa:

    NambariSwaliJibuViwango
    1.Ni nini kazi kuu mbili zinazofanywa na mimea kwa ajili ya viumbe hai?Kazi kuu mbili ni kuzalisha oksijeni na kutengeneza chakula chao wenyewe kupitia fotosinthesisi.Kuelewa (What)
    2.Kwa nini mimea ni muhimu katika kudhibiti hali ya hewa duniani?Mimea ni muhimu kwa sababu huvuta (hunyonya) hewa ya kaboni dioksidi wakati wa fotosinthesisi, na hivyo kupunguza gesi chafu angani.Kuchambua (Why)
    3.Tofauti gani ipo kati ya mimea isiyo na maua na mimea yenye maua?Mimea yenye maua hutoa matunda na mbegu kwa ajili ya uzazi, wakati mimea isiyo na maua (kama feni) huzaliana kwa kutumia spores (vumbi/mbegu ndogo sana).Kulinganisha (Compare)
    4.Mbali na kutoa chakula, ni faida gani nyingine tatu (3) tunazopata moja kwa moja kutoka kwa mimea?Faida nyingine ni: chanzo cha dawa za asili, malighafi kama mbao na pamba, na kusaidia kuzuia mmomonyoko wa udongo.Kutaja Faida (List)
    5.Unafikiri ni hatua gani bora tunazoweza kuchukua kulinda misitu ili kudumisha afya ya ikolojia ya mimea?Hatua bora ni kupanda miti mingi zaidi (upandaji miti) na kuzuia ukataji miti ovyo/uwindaji haramu (uhifadhi wa misitu) ili makazi ya wanyama yabaki salama.Kutathmini (Evaluate)

    Hitimisho (Conclusion)

    Mimea na mazao yake ni sehemu muhimu ya maisha. Kuelewa majina ya mimea, matumizi yake, na faida zake kunamsaidia mwanafunzi kujenga msamiati mpana na kuelewa mazingira yanayomzunguka. Huu mwongozo umeandaliwa kwa lugha rahisi yenye mifano mingi ili kusaidia wajifunzaji wa viwango mbalimbali.

  • Routine Husbandry Practices: Identification, Dehorning, and Castration – A Complete Guide

    Routine Husbandry Practices: Identification, Dehorning, and Castration – A Complete Guide

    Introduction

    Routine husbandry practices are the cornerstone of efficient and humane livestock management. These practices not only ensure the well-being of the animals but also enhance farm productivity and profitability. Among the most critical procedures are identification, dehorning, and castration. Each of these requires a thorough understanding of animal anatomy, behavior, and welfare standards. This guide provides detailed academic notes on these essential techniques, incorporating modern methods, safety protocols, and record-keeping practices. Whether you are a veterinary student, an aspiring farmer, or an experienced livestock keeper, this article will serve as a comprehensive reference.

    Cattle identification methods including tagging and microchips

    Identification is the foundation of any successful livestock operation. It enables farmers to track individual animals for health management, breeding decisions, performance evaluation, and legal compliance. Reliable identification systems also support traceability during disease outbreaks and enhance the market value of cattle. In this section, we explore the most common and effective identification methods, ranging from traditional visual tags to advanced electronic microchips.

    Importance of cattle identification

    Without a robust identification system, it is impossible to maintain accurate medical records, monitor growth rates, or plan genetic improvements. Identification helps in:

    • Maintaining individual health and vaccination schedules
    • Recording milk production and reproductive status
    • Preventing livestock theft and illegal movement
    • Ensuring food safety through traceability
    • Facilitating herd management and culling decisions

    In many countries, cattle identification is a legal requirement, especially for ear tags under national animal identification programs.

    Visual identification methods

    Visual methods are the oldest and simplest forms of identification. They include:

    Ear tags

    Ear tags are the most widely used visual identification. They come in plastic or metal variants and can be displayed in one or both ears. Tags carry individual numbers, barcodes, or logos. They are easy to apply, low-cost, and readable from a distance. but, they can get lost, torn, or cause ear infections if poorly applied.

    Tattoos

    Tattooing involves inking a unique code onto the inner surface of the ear using tattoo pliers and ink. This method is permanent, tamper-proof, and convenient for registration purposes. but, reading tattoos requires close contact, making it less practical for routine checks.

    Branding

    Hot iron branding is a traditional method that permanently marks the hide. Freeze branding, which uses extreme cold, is less painful and leaves a white hair pattern. Branding is still used for ownership identification but is increasingly discouraged due to welfare concerns and the advent of less painful methods.

    Electronic identification methods

    Electronic identification (EID) has revolutionized cattle management. It uses technology to automatically and accurately identify animals without visual inspection.

    Radio-frequency identification (RFID) ear tags

    RFID tags contain a microchip that transmits a unique identifier to a reader. These tags are read quickly and reliably, even in dusty or rainy conditions. They are ideal for automated data collection at weigh scales or milking parlors.

    Injectable microchips

    Microchips are small devices, about the size of a grain of rice, implanted subcutaneously (often in the ear or under the tail). They are read with a scanner and provide a lifetime, tamper-proof identification. Microchips are more expensive than ear tags but are increasingly used for high-value breeding stock and in cases where theft is a concern.

    Comparison of identification methods

    Method Cost Readability Permanence Welfare Impact Suitability
    Ear tags Low Easy visual Moderate (may be lost) Minimal Routine commercial herds
    Tattoos Low Requires close inspection High Mild discomfort Purebred registration
    Freeze branding Medium Good visual Very high Moderate Ownership proofs
    RFID tags Medium Electronic High Minimal Dairy herd management
    Microchips High Scanner-only Very high Minimal Valuable genetics

    Step-by-step application of ear tags and microchips

    1. Restraint: Safely restrain the animal in a crush or head gate to minimize movement.
    2. Site preparation: For ear tags, clean the middle of the ear with an antiseptic. For microchips, select the designated area (e.g., base of the ear) and swab with alcohol.
    3. Application: Use a sterile applicator to attach the tag; for microchips, insert the needle and depress the plunger.
    4. Verification: Scan the tag/microchip with a reader to ensure it is correctly functioning.
    5. Record: Immediately note the identification number in the animal’s record.

    Key safety tip: Always use disposable or sterilized needles for microchipping to prevent cross-contamination between animals.

    Practical steps for dehorning cattle

    Dehorning, also known as disbudding in young calves, is the removal of horns to reduce the risk of injury to animals and handlers. Horned cattle can cause severe damage during transport, mixing, or feeding. Dehorning is a painful procedure that must be performed responsibly, with due attention to age, anesthesia, and aftercare. This section outlines the practical steps, methods, and welfare considerations.

    Age considerations

    Disbudding is performed when horn buds are still not attached to the skull, usually under 2 months of age. At this stage, the procedure is less invasive and quicker to recover from. Dehorning of older cattle involves cutting fully developed horns and is more stressful. It should be done only when absolutely necessary and always under veterinary supervision.

    Methods of dehorning

    Caustic paste (chemical disbudding)

    This method uses substances like sodium hydroxide or calcium hydroxide to burn the horn bud. It is suitable for calves less than 2 weeks old. The paste is applied to the bud after clipping the surrounding hair. Care must be taken to avoid burning the skin or the dam.

    Hot iron disbudding

    A specially designed iron is heated to cherry red and applied over the horn bud for 10-15 seconds. This destroys the horn-producing cells. It is common in beef and dairy calves. It must be performed with adequate restraint and local anesthesia.

    Mechanical dehorning (scoop, saw, or wire)

    For older animals with attached horns, a dehorning scoop, guillotine, or saw is used to cut off the horn. This is a major operation that requires sedation, local anesthesia, and careful hemostasis. A rubber ring or torsion method may also be used but is less common.

    Step-by-step procedure for hot iron dehorning

    1. Confirm age and health: Ensure the calf is healthy and hasn’t been stressed recently.
    2. Restraint: Place the calf in a calf cradle to keep it immobile but comfortable.
    3. Analgesia: Administer a local anesthetic (cornual nerve block) if permitted by local regulations. In many countries, this is mandatory.
    4. Clip hair: Clip the hair around the horn bud to expose the area.
    5. Apply the iron: Heat the iron to the correct temperature (around 500°C). Press firmly over the bud for 5-10 seconds, then rotate slightly.
    6. Check for completeness: The area should have a copper-brown ring; repeat if needed.
    7. Post-procedure: Apply a fly-repellent spray and monitor the calf for complications.

    Pain management and safety

    Dehorning causes pain; so, the use of local anesthesia and non-steroidal anti-inflammatory drugs (NSAIDs) is strongly recommended. Meloxicam or ketoprofen can be given per the veterinarian’s advice. Safety for the handler includes proper training in the use of tools and understanding of calf restraint.

    Important: Never use caustic paste on calves older than 4 weeks, as the risk of sinus infection increases.

    Aftercare

    • Keep the calf in a clean, dry environment for at least a week.
    • Check the wound daily for signs of infection, such as swelling, discharge, or foul odor.
    • Provide soft feed and fresh water.
    • Administer antibiotics only if prescribed by a veterinarian.

    Methods and safety in cattle castration

    Castration is the removal or destruction of the testicles to make male cattle sterile and reduce aggressive behavior. It is a common practice in beef production to improve meat quality and manage herd dynamics. but, it is a painful procedure, and choosing the right method and adhering to safety protocols are crucial for animal welfare and operator safety.

    Reasons for castration

    • Reduces aggression and dominance-related injuries.
    • Eliminates unwanted breeding in mixed-sex grazing.
    • Improves carcass quality (marbling and tenderness).
    • Makes animals easier to handle and manage.
    • Enables successful rearing in group feeding systems.

    Age and timing

    Castration is best performed early in life, typically from 2 weeks to 3 months of age. Younger animals recover faster and have fewer complications. but, it shouldn’t be done during weaning, castration, or other stressful events simultaneously. In many production systems, castration is carried out at the same time as dehorning to minimize handling stress.

    Methods of castration

    Surgical castration

    This involves making an incision in the scrotum and removing the testicles. It is the most reliable method and can be performed at any age. It requires proper surgical technique, aseptic tools, and anesthesia. Complications include hemorrhage, infection, and in some cases, evisceration if the incision is too high.

    Burdizzo (bloodless) castration

    The Burdizzo emasculator crushes the spermatic cords without breaking the skin. It is a closed method that reduces the risk of infection. It is best for calves up to 3 months. but, if not applied correctly, the testicles may not atrophy completely, leaving the animal a “stagg”.

    Rubber ring (elastrator) castration

    A heavy rubber ring is placed around the scrotum to cut off blood supply. The testicles and scrotum eventually slough off in about 3-6 weeks. This method is best for very young calves (under 2 weeks) and is practically painless initially but can cause later pain. It is commonly used without anesthesia, but pain relief is increasingly recommended.

    Safety precautions

    Safety is paramount during castration, both for the animal and the operator. Use a proper restraint system, such as a crush or calf cradle. Never attempt surgical castration without training. Always use sterile instruments and maintain a clean environment. The use of pain relief, such as local anesthesia and NSAIDs, should be provided whenever possible.

    Postoperative care

    1. Monitor the animal for excessive bleeding or swelling.
    2. Keep the animal in a clean, shaded area.
    3. Apply fly repellent to the wound to prevent myiasis.
    4. don’t mix with other animals for a few days.
    5. Ensure access to clean water and good-quality feed.

    Veterinary advice: In many countries, castration without anesthesia is now considered illegal for older cattle. Always check local regulations and incorporate pain management into the protocol.

    Keeping animal registers and production record cards

    Accurate record keeping is the backbone of modern livestock farming. Animal registers and production record cards provide a systematic way to track each animal’s identity, health, reproduction, and performance. This information is invaluable for making informed management decisions and complying with food safety regulations.

    Types of records

    Individual animal register

    This is a legal requirement in many jurisdictions. It contains the animal’s identification number, date of birth, breed, sex, dam and sire, movements, and health treatments. It serves as a lifetime diary for each animal.

    Production record cards

    These cards are used for dairy and breeding animals. They record daily or monthly milk yields, calving dates, weights, and feed amounts. They enable performance analysis and genetic selection.

    Essential information to record

    • Identification number: Ear tag or microchip number.
    • Biographical data: Date of birth, breed, sex, and mother’s ID.
    • Health record: Vaccinations, diseases, treatments, and withdrawal periods.
    • Reproduction record: Heat dates, insemination dates, and calving results.
    • Production data: Milk yield, weight gain, and carcass measurements.

    Benefits of record keeping

    Record keeping helps farmers to:

    • Identify low-performing animals and improve culling decisions.
    • Monitor the impact of nutritional changes.
    • Plan breeding and calving seasons.
    • Ensure treatment withdrawal periods are respected.
    • Meet legal traceability requirements.

    Example of a production record card layout

    Animal ID Breed Date of Birth Dam ID Milk Yield (kg) Calving Date
    RF-0145 Holstein 12-03-2022 RF-0098 28.5 15-11-2023
    RF-0162 Jersey 25-07-2022 RF-0112 18.2 02-12-2023

    Digital vs. paper records

    While paper records are cheap and simple, they are prone to errors and loss. Digital herd management software and mobile apps allow real-time data entry, integration with electronic scales and milk meters, and easy generation of reports. Many countries now require electronic submission of cattle movements, so a digital system is more future-proof.

    Practical livestock handling techniques

    Efficient livestock handling reduces stress for both animals and handlers. Understanding the natural behavior of cattle is essential to move them safely and with minimal resistance. This section covers the principles and practical techniques for low-stress handling that are essential for any stockperson.

    Principles of safe and low-stress handling

    Cattle are flight animals and have a wide field of vision but poor depth perception. They prefer to follow a leader and will move forward if you work at the edge of their flight zone. Key principles include:

    • Flight zone: The amount of personal space the animal wants to keep. Respect it to encourage movement.
    • Point of balance: Located at the shoulder; moving ahead of it pulls the animal forward, moving behind it pushes the animal forward.
    • Pressure and release: Apply pressure to move the animal and release when it moves the correct way.
    • Calmness: Avoid shouting, running, or sudden movements.

    Handling facilities

    Good facilities are crucial for safe handling. Essential elements include:

    • Race (single-file alley): Width suited to cattle size to prevent turning.
    • Crowd pen: A curved pen that allows the handler to direct cattle into the race naturally.
    • Crush (squeeze chute): Restrains the animal for procedures like tagging, dehorning, or castration.
    • Head gate: Secures the animal by the neck for head procedures.
    • Non-slip flooring: To prevent falls and leg injuries.

    Low-stress handling techniques

    1. Use of flight zones: Stand at the edge of the flight zone and slowly move into it to start the animal moving.
    2. Approach from the front: Cattle tend to move backwards when approached head-on. Approach from the side or front-quarter.
    3. Speak softly: A low, steady voice is calming.
    4. Use objects: A plastic paddle or flag can be used to direct movement without prolonged contact.
    5. Remove distractions: Avoid shadows, reflections, and noises that cause balking.

    Golden rule: The human-animal relationship directly impacts production. Calm handling improves milk letdown, weight gain, and overall welfare.

    Safety tips for handlers

    • Always work with a partner when using a crush.
    • Ensure all gates and latches are secure before entering the enclosure.
    • Never wrap lead ropes around your hand or body.
    • Wear sturdy, non-slip boots and protective gear (gloves, safety glasses).
    • Be aware of the animal’s kick zone (directly behind) and head zone (swinging horn area).

    Conclusion

    Routine husbandry practices aren’t mere chores; they are skilled procedures that require knowledge, compassion, and precision. Identification systems such as ear tags and microchips provide the basis for individual care and farm management. Dehorning, when done humanely and correctly, protects herd mates and handlers from injury. Castration, if performed with proper pain relief, improves animal behavior and product quality. Detailed record keeping ensures that every animal is monitored and managed effectively. Above all, practical livestock handling techniques reduce stress and foster a safer environment for both cattle and people. By mastering these practices, farmers can elevate both animal welfare and farm profitability.

    Frequently Asked Questions

    What is the best age to dehorn cattle?

    The best age is within the first 2 months of life, ideally between 2 and 6 weeks. At this stage, the horn buds haven’t yet adhered to the skull, making calcium or hot iron disbudding quick and effective. For younger calves, local anesthesia may be optional but is always recommended for pain control.

    How long does it take for a microchip to be accepted in cattle?

    Microchips are permanent devices; they remain functional for the animal’s lifetime. Once implanted, the chip is usually read immediately with a scanner. There is no “acceptance” period, but the site may have a small reaction for a few days. Ensure the chip is registered in a national database.

    Is castration without anesthesia legal for cattle?

    Legislation varies by country and is evolving. In the European Union, surgical castration without anesthesia is banned for cattle over a certain age (usually 2 months). In the United States, it is still allowed but welfare guidelines increasingly require pain management. Always consult your local veterinary authority.

    What are the signs of infection after dehorning?

    Infection signs include redness, swelling, discharge (pus), a foul odor, fever, loss of appetite, and head shaking. If any of these appear, contact a veterinarian immediately. Early intervention with antibiotics and wound cleaning is essential to avoid severe complications.

    How can I make cattle handling less stressful?

    Use low-stress techniques such as moving at the animal’s pace, working in the flight zone, and avoiding shouting. Ensure facilities are clean, well-lit, and quiet. Regular gentle handling from a young age desensitizes cattle, making them easier to manage throughout their lives.

    Why is record keeping important in livestock farming?

    Record keeping helps farmers track individual animal performance, detect health issues early, ensure treatment safety, comply with traceability laws, and make informed decisions about breeding, feeding, and culling. Without records, it is impossible to assess the financial viability of the herd.

  • ICT Notes For Senior One: Complete Curriculum-Aligned Study Guide

    ICT Notes For Senior One: Complete Curriculum-Aligned Study Guide

    [deepseek_chatbot]

    Start here if you want clear, classroom-ready help that makes ICT simple and exam-friendly. This guide breaks down the essentials teachers and Senior One learners need, from basic computer parts to safe internet use. Along the way you will find ready-made notes, lesson ideas, study tips, and links to helpful resources.

    ICT is often easier than it looks when ideas are organised clearly, and with these notes you will save time preparing lessons or revising for class tests. Below you will find structured topics, quick summaries, practice tasks, and suggestions for using free or low-cost tools in Ugandan classrooms.

    ICT Notes For Senior One: Complete Curriculum-Aligned Study Guide

    What this pack covers and how to use it

    These notes follow common Senior One ICT themes found in East African secondary curricula. Use them as teacher lesson prompts, learner revision sheets, or as handouts. The main topics you should expect are:

    • Introduction to computers, hardware and software
    • Basic operating system skills and file management
    • Word processing and spreadsheets fundamentals
    • Internet basics, email and online safety
    • ICT in everyday life and simple digital citizenship

    Each topic below has a short explanation, classroom activities, and quick revision checks. If you want subject-specific blog posts and practical how-to guides, see the Computer and ICT category on Remedial Corner and a practical Excel accessibility post that supports inclusive learning.

    Photorealistic mid-content image showing a teacher demonstrating a spreadsheet on a projector while students follow on tab...

    Core topic notes and classroom activities

    1. What is a computer, and main parts

    Definition in simple language, then list: CPU, monitor, keyboard, mouse, printer, storage devices. Explain function of each part in one sentence. Activity: label a diagram and match parts to functions. Quick test: name two input and two output devices.

    2. Software versus hardware

    Explain that hardware is physical, software is programs and applications. Give examples: operating system, word processor, web browser. Activity: have students identify software on a shared computer, then open and close applications safely.

    3. Basic operating system skills and file management

    Teach how to start and shut down safely, open files, create folders, save and organise work. Practice: create a folder called Senior1_ICT and save a short document. Revision tip: emphasise consistent file naming like surname_firstname_topic.

    4. Word processing essentials

    Cover typing basics, formatting text, saving, printing, and simple document layout. Classroom activity: prepare a one-page report about a school subject, include title, two paragraphs and a bulleted list.

    5. Introduction to spreadsheets

    Explain cells, rows, columns, simple formulas like sum and average. Activity: build a small marks spreadsheet calculating total and average for five subjects. For accessibility and step-by-step examples, check a practical guide to navigating spreadsheets in the Computer and ICT section.

    6. Internet basics and email

    Teach what the internet is, safe browsing, recognising trustworthy websites, and how to compose a polite email. Activity: create a mock email to a teacher asking for help with homework. Discuss privacy and never sharing passwords.

    7. ICT in daily life and career pathways

    Show examples of how ICT supports education, agriculture, business and health. Short class discussion: how can ICT help a student in a rural school? Encourage practical, low-cost solutions like using shared devices or radio lessons.

    Revision strategy and exam tips for Senior One learners

    • Use short, active notes: one concept per page.
    • Practice practical tasks weekly, not just theory.
    • Teach keyboard shortcuts early, they save class time.
    • For written exams, practice clear definitions and short examples.
    • Use peer teaching: learners explain one topic to the class in five minutes.

    Resources and teacher support

    • Browse the Computer and ICT category for inclusive teaching ideas and practical guides. (link: Computer and ICT category on Remedial Corner)
    • Use the step-by-step article on navigating spreadsheets to support learners with visual impairments or low computer confidence. (link: Data selection: navigate excel with a screen reader)

    Frequently Asked Questions

    What are the most important topics to cover in Senior One ICT?

    Start with computer parts, operating system basics, word processing and simple spreadsheets. These build foundational skills you will use in later classes.

    How can teachers deliver ICT where devices are limited?

    Rotate students in small groups, use teacher demonstrations with projection or printed worksheets that mimic on-screen tasks, and pair learners so one practices while another observes and supports.

    Are there low-cost tools I can use for teaching ICT?

    Yes. Free office suites, offline learning resources, and mobile phones with simple apps can be effective. Focus on transferable skills like typing, file organisation, and safe internet habits.

    How should learners prepare for practical ICT tests?

    Practice the tasks until steps become routine. Use checklists for operations like opening an application, saving a file, and applying a formula in a spreadsheet.

    Can these notes be used for teacher training?

    Definitely. They are brief, curriculum-aligned and practical, making them suitable for short teacher training sessions and peer mentoring.

    How do I teach internet safety to Senior One learners?

    Explain privacy simply, use real classroom examples, role-play scenarios about stranger contact online, and set clear school rules for device use.

    What assessment formats work best for ICT at Senior One?

    Combination of short written tests for theory and supervised practical exercises for skills. Project work where learners produce a document or simple spreadsheet is ideal.

    Practical lesson plan example (one hour)

    • 10 minutes: warm-up questions and recap
    • 15 minutes: demonstration of opening applications and saving a file
    • 20 minutes: paired practice creating a short document
    • 10 minutes: quick formative quiz and feedback
    • 5 minutes: homework assignment and file naming practice

    Next steps, for teachers and learners

    If you want structured online lessons, downloadable notes and video explanations aligned to the East African curriculum, explore the courses and study materials available on the site. For hands-on examples and inclusion-focused guides, visit the Computer and ICT category and the spreadsheet accessibility post on Remedial Corner.

    Take action today

    Looking for ready-made lesson notes, printable summaries, and short video lessons for Senior One ICT? Visit Remedial Corner to browse resources, sign up for updates, and download curriculum-aligned materials that save planning time and support better learning.

    Visit Remedial Corner for courses, notes and video lessons

    Conclusion

    These ICT notes for Senior One keep things practical, exam-focused and classroom-ready. Start with short lessons, practice regularly, and use peer teaching to deepen understanding. Small, consistent steps will turn nervous beginners into confident users. Use the links above to find inclusive guides and extra practice materials that match classroom realities in Uganda and East Africa.

    Photorealistic supportive image of a student at home using a simple laptop to revise ICT, with a printed notes sheet besid...

  • Uganda Secondary School Curriculum Notes: Teacher & Student Guide

    Uganda Secondary School Curriculum Notes: Teacher & Student Guide

    Uganda’s secondary classrooms are changing, and good study notes make the difference between confusion and confidence. Whether you are a Senior 1 learner, a busy teacher planning lesson sequences, or a parent supporting revision, having clear, curriculum-aligned notes saves time and improves outcomes. In this guide you will find practical advice, structure, and links to reliable resources for creating, using, and teaching with Uganda secondary school curriculum notes.

    Photorealistic in-class scene of a teacher guiding a small group of secondary students working on a biology practical, clo...

    What are curriculum notes and why they matter

    Curriculum notes are concise, syllabus-aligned summaries of the topics teachers must cover in each term. They translate the official syllabus into usable lesson plans, study sheets, diagrams, practice questions, and revision checklists. For Uganda’s competence-focused lower secondary curriculum, good notes help you:

    • Map skills and competencies to classroom activities
    • Track project work and continuous assessment tasks
    • Prepare learners for UNEB formative checks and final UCE-style assessments
    • Support inclusive teaching with simple English explanations and visuals

    Here’s the thing, teachers: notes are not just for students. When structured well they are a lesson-planning shortcut and a record of what was taught for reporting and moderation.

    How the Uganda secondary curriculum affects your notes

    The Ministry of Education and Sports and the National Curriculum Development Centre set learning outcomes and subject menus for Senior 1 to Senior 4. Recent shifts toward competency-based learning mean notes should include practical activities, project guidelines, and assessment rubrics as well as theory. For official reference material, check the Ministry site and curriculum syllabuses which describe subject objectives and assessment approaches.

    Building effective notes: a step-by-step template

    1. Start with the syllabus map

    List the official learning outcomes for the term, then break them into weekly lessons. Use the syllabus as your north star.

    2. Use simple, learner-friendly language

    Explain concepts in plain English, add local examples, and include Kiswahili vocabulary where helpful for comprehension.

    3. Add practical tasks and project checklists

    Competency-based assessment values projects and continuous records. Include step-by-step instructions for school projects, expected evidence, and scoring rubrics.

    4. Include diagrams and revision charts

    Visuals speed comprehension. Add labeled diagrams for biology, chemistry, and agriculture; flow charts for ICT processes; and worked examples for mathematics.

    5. End with practice questions and quick checks

    Finish each unit with short quizzes, past-paper style questions, and one extended task. Encourage peer marking and teacher moderation notes.

    Subject-specific tips (selected priorities)

    Kiswahili and English

    • Provide vocabulary lists and sentence-building exercises.
    • Use bilingual explanations to support learners from diverse backgrounds.

    Biology and Chemistry

    • Include step-by-step experiment notes, safety concerns, and data-record templates.
    • Add labeled diagrams and flowcharts for processes like photosynthesis and acid-base reactions.

    ICT and Entrepreneurship

    • Provide project templates, sample business plans, and evaluation rubrics.
    • Include screen-by-screen instructions for common software tasks and assessment evidence requirements.

    Digital and printable formats

    Offer notes in both printable PDF format and editable digital files. PDFs are ideal for quick distribution and printing, while editable slides or documents let teachers adapt content for different classes or learners with special needs.

    Using notes for assessment and tracking progress

    • Keep a teacher log for each topic indicating date taught, activities completed, and learners who need remediation.
    • Record project marks and continuous assessment evidence in a shared class spreadsheet to make UNEB reporting easier.

    Where to find reliable resources

    • Official Ministry curriculum pages explain subject menus and learning goals. Visit the Ministry of Education and Sports website for guidance.
    • For historical syllabuses and reference PDFs, UNESCO IBE archives host older subject syllabuses that are useful for deep background reading.
    • For ready-made lessons, lesson structures, and Kiswahili support, see Remedial Corner’s resources and long-form guides.

    Practical example: a one-page revision note layout (use this template)

    • Topic title and learning outcomes
    • 4 key facts students must remember
    • One labeled diagram or chart
    • Two short practice questions and one extended task
    • Project checklist or homework instruction

    Frequently asked questions

    How do I make notes that match the new competence-based approach?

    Start from the learning outcomes and design activities that produce evidence of skill. Include project steps, rubrics, and short reflective tasks where learners explain what they did and why.

    Can students use notes in exams?

    Notes are study aids. For national exams, encourage learners to use notes during revision, then practice timed past papers without notes to build exam stamina.

    What is the best format for sharing notes with parents and other teachers?

    PDFs for print, and cloud-shared editable documents for collaborative planning and moderation. A class folder or school Google Drive simplifies access and version control.

    Where can I find past paper-style questions and marking schemes?

    UNEB publishes past papers and marking guidelines, while national education news outlets and teacher forums often discuss marking standards and sample answers.

    How do I include learners with special needs in my notes?

    Use clear fonts, short paragraphs, audio summaries, and large labeled diagrams. Break tasks into small steps and provide rubrics so progress can be tracked reliably.

    How often should notes be updated?

    Review and update notes each term. After exams, adjust for topics where learners underperformed, adding more examples or practical tasks.

    Are there ready-made curriculum-aligned notes I can use?

    Yes, platforms offering curriculum-aligned courses, notes, and video lessons can reduce preparation time. Check Remedial Corner for Uganda-focused materials and teacher training content.

    Get Remedial Corner resources

    Want ready-made, curriculum-aligned notes and video lessons tailored for Uganda Secondary schools? Visit Remedial Corner for courses, downloadable notes, and teacher training materials to support Senior 1 to Senior 4 learning. https://remedialcorner.com

    Conclusion

    Good curriculum notes bridge the gap between the official syllabus and classroom learning. They save teachers time, improve student revision, and make competency-based assessment manageable. Start small, focus on learning outcomes, add projects and rubrics, and iterate each term. If you need structured, Uganda-focused notes and video lessons, Remedial Corner offers resources built with local classrooms in mind.

  • Fighting Pain Through Meditation: How Mindfulness Transforms the Experience of Pain

    Pain is something every human being understands.

    It can arrive suddenly after an injury, or grow slowly over time. It can be physical, emotional, or both at once. Across cultures, ages, and backgrounds, pain is a shared human experience—and yet, how we experience pain differs dramatically from person to person.

    While modern medicine often treats pain from the outside, meditation works from within.

    In this article, we explore how meditation helps the mind and body face pain—not by denying it or running away from it, but by changing how pain is experienced. This is not theory or imagination. Science, neuroscience, and lived experience all support the powerful role meditation plays in pain management.

    I am Akankwatsa Andrew, and this insight comes from another episode of Strange but True. Let’s mean business.


    Understanding Pain: More Than a Physical Sensation

    Pain is not only a signal from the body.
    It is also a message interpreted by the brain.

    Two people can experience the same injury yet report very different levels of pain. Why? Because pain is shaped by:

    • Attention
    • Emotion
    • Fear
    • Memory
    • Expectations

    The brain does not simply receive pain—it constructs it.

    This is why stress, anxiety, and fear often make pain worse, while calmness and reassurance can reduce it. Meditation works directly with this mental component of pain.


    How Meditation Changes the Pain Response

    When pain appears, the natural human reaction is to fight it.

    • Muscles tighten
    • Breathing becomes shallow
    • Fear increases
    • Stress hormones rise

    This reaction sends danger signals to the brain, which amplifies pain. The body enters “fight or flight” mode, even when the pain itself poses no immediate threat.

    Meditation Interrupts This Cycle

    Meditation teaches the body to slow down and settle.

    Through calm breathing and focused awareness, meditation shifts the nervous system from fight or flight into rest and repair. As this happens:

    • Heart rate lowers
    • Muscles soften
    • Stress hormones reduce
    • Endorphins (natural pain relievers) are released

    Brain imaging studies show that regular meditators activate regions linked to emotional regulation while reducing activity in areas that intensify pain perception.

    This is not imagination. It is measurable neuroscience.


    Meditation Does Not Eliminate Pain—It Transforms It

    Meditation does not always remove pain completely.
    But it changes your relationship with it.

    Instead of pain being an enemy, it becomes a sensation you can observe. When resistance decreases, suffering decreases.

    Pain may still exist, but it becomes:

    • Less overwhelming
    • Less personal
    • Less controlling

    Mindful Breathing: A Simple Meditation for Pain Relief

    One of the most effective meditation techniques for pain is mindful breathing.

    How to Practice Mindful Breathing

    1. Sit or lie down comfortably
    2. Close your eyes
    3. Bring attention to your breath
    4. Do not control the breath—just observe it

    As you breathe in, notice the coolness of the air.
    As you breathe out, notice warmth and release.

    When pain pulls your attention away, gently return to the breath—again and again.

    Over time, the breath becomes an anchor, preventing the mind from being swept away by discomfort.


    Body Scan Meditation: Observing Pain Without Fear

    Another powerful technique is body scan meditation.

    In this practice, you move attention slowly through the body—from head to toe—observing sensations without judgment.

    When you reach the area of pain:

    • Do not push it away
    • Do not label it as “bad”
    • Simply observe it

    Notice:

    • Its shape
    • Its temperature
    • Its movement

    Pain often changes when observed closely. It may pulse, shift, soften, or break into smaller sensations. This reduces fear—and fear is one of the greatest amplifiers of pain.


    Loving-Kindness Meditation and Self-Compassion

    Pain is often accompanied by frustration, anger, or self-blame. Loving-kindness meditation addresses the emotional suffering that comes with pain.

    Instead of fighting pain, you offer kindness to yourself by silently repeating phrases such as:

    • May I be safe.
    • May I be strong.
    • May I find ease in this moment.

    Self-compassion activates calming pathways in the brain and reduces emotional distress, making pain easier to live with.


    What Science Says About Meditation and Chronic Pain

    Scientific studies consistently show that meditation helps people living with chronic pain conditions, including:

    • Arthritis
    • Migraines
    • Fibromyalgia
    • Chronic back pain

    While meditation may not eliminate pain entirely, it significantly improves:

    • Quality of life
    • Sleep
    • Emotional resilience
    • Stress management

    Even short daily sessions—five to ten minutes—can make a meaningful difference over time.


    Meditation Is Not Denial

    It is important to understand this clearly:
    Meditation is not pretending pain does not exist.

    Pain says, “Something is happening.”
    Meditation replies, “I am here, and I can meet this calmly.”

    You are not denying reality—you are learning to experience pain without adding fear, tension, and mental suffering.


    Finding Peace Even When Pain Remains

    With regular practice, many people report that pain loses its sharp edges. It becomes less frightening and more manageable.

    And even in moments where pain cannot be changed, peace still can.

    Meditation teaches:

    • Patience
    • Presence
    • Awareness

    It shows that even in discomfort, there can be space, breath, and calm observation.


    A Final Word for Anyone Living With Pain

    If you are dealing with pain today, remember this:

    • You are not weak for feeling it
    • You are not powerless against it

    Your breath is a tool.
    Your attention is a skill.
    Your mind is an ally.

    With gentle and consistent practice, meditation becomes a quiet inner strength—helping you face pain not with fear, but with calm awareness and inner balance.

    Thank you for reading.

  • 🌟 Uses of Unreactive Metals Like Gold and Everyday Applications of Alloys

    Discover the unique uses of unreactive metals such as gold and learn how alloys like bronze, brass, and stainless steel impact daily life. Explore real-world examples in electronics, construction, and jewellery.


    🧭 Introduction

    Metals play an essential role in modern society, but not all metals are alike. Some are highly reactive, needing careful handling and extraction, while others are incredibly unreactive, remaining unchanged over centuries.

    Among these, gold stands out — not just for its beauty, but for its chemical stability. Meanwhile, alloys, which are mixtures of metals (or metals and non-metals), offer enhanced strength, resistance, and versatility. From kitchen utensils to skyscrapers, alloys shape our daily lives.

    In this blog, we explore:

    • The uses of unreactive metals like gold
    • The importance of alloys and their daily applications
    • Real-world examples that combine chemistry with industry and innovation

    ⚖️ What Are Unreactive Metals?

    Unreactive metals do not easily undergo chemical changes such as rusting, oxidation, or corrosion. They are found low in the reactivity series and include:

    • Gold (Au)
    • Silver (Ag)
    • Platinum (Pt)
    • Copper (Cu) (relatively low reactivity)

    These metals are often found in nature as pure elements, making them rare and valuable.


    👑 Uses of Unreactive Metals Like Gold

    Gold’s resistance to oxidation and corrosion makes it one of the most valuable and versatile unreactive metals. Let’s explore its diverse uses.

    1. 💍 Jewellery and Ornaments

    Gold has been used in jewellery for centuries due to its luster, malleability, and resistance to tarnishing. Pure gold is soft, so it is often alloyed with copper or silver to make it more durable.

    ✅ Why gold? It doesn’t rust or react with sweat, perfume, or moisture.


    2. 💻 Electronics and Circuit Boards

    Gold is an excellent conductor of electricity and does not corrode, making it ideal for:

    • Mobile phone connectors
    • Microchips
    • USB cables
    • Motherboards

    Even though gold is expensive, its reliability in transmitting signals justifies its use in high-end electronics.


    3. 🚀 Aerospace and Satellite Components

    In space, materials must withstand extreme temperatures and radiation. Gold is used to:

    • Coat satellite parts to reflect infrared radiation
    • Protect spacecraft windows
    • Cover astronaut helmets

    🛰️ NASA uses gold films on satellites to control heat and radiation.


    4. 🏦 Currency and Investment

    Gold has long been a symbol of wealth. Even today, central banks store gold as reserves, and investors buy gold bars and coins as a hedge against inflation.


    5. 🩺 Dentistry and Medicine

    • Gold alloys are used in dental fillings, crowns, and bridges
    • It is biocompatible, meaning it doesn’t react with body tissues
    • In medicine, gold nanoparticles are being explored for drug delivery and cancer treatment

    🔩 What Are Alloys?

    An alloy is a mixture of two or more elements, where at least one is a metal. Alloys are made to improve the properties of the base metal, such as strength, hardness, corrosion resistance, or appearance.

    👇 Common Alloy Examples:

    AlloyBase MetalMixed WithProperties
    BronzeCopperTinHarder than copper, corrosion-resistant
    BrassCopperZincStrong, decorative, good acoustic
    SteelIronCarbonStrong, versatile
    Stainless SteelIronChromium, NickelRust-resistant, durable
    SolderLeadTinLow melting point, good bonding

    🛠️ Applications of Alloys in Daily Life

    Alloys are all around us — in buildings, transport, tools, and even musical instruments. Here’s how they make our lives better:

    1. 🏗️ Construction and Infrastructure

    Steel and stainless steel are essential in:

    • Skyscrapers and bridges
    • Reinforcement bars in concrete
    • Roofing materials and pipelines

    ✅ Why alloys? They’re strong, weather-resistant, and long-lasting.


    2. 🍴 Kitchenware and Household Items

    Stainless steel is used in:

    • Cookware (pans, pots, knives)
    • Sinks, dish racks, and cutlery
    • Appliances like refrigerators and stoves

    🧽 It resists rust and stains, making cleaning easier.


    3. 🚗 Automobiles and Transport

    Different alloys are used in vehicle parts:

    • Aluminium alloys: For lightweight car bodies and aircraft
    • Brass: In radiator parts and gears
    • Steel alloys: In engines, frames, and wheels

    ✈️ Aircraft manufacturers use titanium alloys for strength and low weight.


    4. 🎶 Musical Instruments

    • Brass instruments (trumpets, trombones) use brass for tone and durability
    • Strings for guitars and violins often use bronze or nickel alloys
    • Piano wires are made from high-tensile steel

    5. ⛏️ Tools and Machinery

    Alloys are crucial for making:

    • Cutting tools (tungsten-carbide alloys)
    • Drill bits and saw blades
    • Industrial machines and equipment

    🛠️ They offer durability and heat resistance in heavy-duty operations.


    🌍 Environmental and Economic Impact

    Benefits of Using Unreactive Metals and Alloys

    • Long life span reduces replacement costs
    • Recyclable, reducing waste and mining
    • Efficient performance in critical applications

    Environmental Challenges

    • Mining for gold or alloy elements can cause deforestation, pollution, and energy consumption
    • Smelting releases greenhouse gases
    • Ethical sourcing of gold is a concern (e.g., conflict gold)

    📘 Revision Notes: Summary Table

    TopicKey Takeaway
    Unreactive MetalsDon’t corrode, used in jewellery, electronics
    GoldConductive, non-reactive, decorative, valuable
    AlloysImprove metal properties for real-life use
    Common AlloysBrass, bronze, steel, stainless steel
    Applications of AlloysHomes, vehicles, tools, music, aerospace

    🧠 Fun Facts

    • A single mobile phone contains about 0.034g of gold
    • The Eiffel Tower is made of wrought iron, an iron-carbon alloy
    • Stainless steel was discovered by accident in 1913!

    🎯 Conclusion

    The unreactive nature of metals like gold makes them timeless in beauty and technology. Meanwhile, alloys revolutionise our world, offering enhanced properties that pure metals cannot deliver.

    From the ring on your finger to the plane in the sky, the chemistry of metals and alloys is woven into daily life. Understanding their properties helps us design stronger, more sustainable, and efficient tools for the future.

  • Bitcoin Plunges Below $100,000 as Risk Appetite Evaporates, Signaling Market Shift

    Bitcoin Plunges Below $100,000 as Risk Appetite Evaporates, Signaling Market Shift

    BTC ICON

    Kampala, Uganda– The world’s largest cryptocurrency, Bitcoin (BTC), tumbled as much as 6.5 % on Tuesday, falling to approximately $99,963, marking its first breach below the $100,000 threshold since June 2025. (Bloomberg) The decline comes amid a broader pull-back in risk assets, raising questions about whether the rally that propelled Bitcoin to record highs in recent months is now over.


    🔍 What’s happening

    • Bitcoin’s collapse erases much of the summer surge that saw it reach above $126,000 earlier in October. (CoinDesk)
    • The broader cryptocurrency market is also under pressure: Ethereum fell nearly 10 % during the same period, and many less-liquid “altcoins” have lost more than half their value this year. (Bloomberg)
    • Investor sentiment has shifted from bullish to cautious. The market’s “fear and greed” metrics are registering “Extreme Fear” as liquidity tightens and macroeconomic risks loom. (markets.com)

    🧭 Why it matters

    1. Psychological milestone broken: Dropping below $100,000 is a significant technical and psychological signal in the crypto world—it suggests that the bullish momentum may be fading. (Crypto Briefing)
    2. Risk assets flagged: Bitcoin’s decline appears tied to a broader “risk off” environment—weakness in equities, concerns around monetary policy, and reduced appetite for speculative assets. (EBC Financial Group)
    3. Implications for institutional and retail investors: Many institutional players had entered crypto during the recent surge. A sustained downturn could test their conviction, possibly leading to more outflows.
    4. Potential gateway into wider corrections: Given that digital-asset valuations often lead risk sentiment, the drop could foreshadow further pain for crypto and tech-adjacent assets alike.

    📉 Underlying Drivers

    • Sharpened monetary policy outlook: The Federal Reserve has signalled less room for further rate cuts, which dampens the liquidity that fuelled the crypto rally. (EBC Financial Group)
    • Massive liquidation event: On-chain data show a multi-billion-dollar forced-sale event in early October that shook market confidence and set the stage for this decline. (Business Insider)
    • Weakening institutional flows: Spot crypto product outflows and reduced new commitments are weighing on sentiment. (tradingnews.com)
    • Correlation with wider markets: As equities and growth assets waver, Bitcoin’s “risk asset” nature means it is not insulated. (stormrake.com)

    🔮 What to watch next

    • Key support level: If Bitcoin fails to stabilise above ~$100,000, it could open the door to deeper correction levels.
    • Institutional adoption signals: Fresh inflows into crypto ETFs or treasury allocations would bolster confidence; continued outflows could deepen the down-leg.
    • Macro-economic developments: Any surprise change in Fed policy, inflation data, or global risk events (e.g., trade wars, shutdowns) will likely reverberate through the crypto market.
    • Altcoin behaviour: Many smaller tokens are already down 50 % or more this year — their trajectories may provide early clues of broader market direction.

    📌 Bottom line

    Bitcoin’s slide below $100,000 is more than a price blip — it signals a shift in the market’s comfort with risk, liquidity and speculative momentum. For investors in Uganda and beyond, it highlights the importance of managing crypto exposure with an eye on global macro-and-market dynamics, not just on the digital asset story itself.


    (Andrew Oba: Teacher, coding & tech enthusiast. This article provides general information only and is not financial advice.)

  • Impact of Trans-Saharan and Triangular Trades in West Africa

    The history of West Africa is significantly shaped by its participation in two major trade systems: the Trans-Saharan Trade and the Triangular Trade. These complex networks of exchange linked the region to North Africa, Europe, and the Americas, profoundly transforming West Africa’s politics, economy, culture, religion, and demographics.

    In this blog post, we’ll explore the short- and long-term impacts of both trades, with a special focus on how they influenced the development, decline, and legacy of West African societies.


    🐫 A. Impact of the Trans-Saharan Trade in West Africa

    The Trans-Saharan Trade connected West Africa to North Africa and the Mediterranean world from as early as the 7th century AD. Goods such as gold, salt, kola nuts, slaves, ivory, and textiles were exchanged through camel caravans that crossed the Sahara Desert.

    1. Growth of West African Kingdoms

    The trade led to the emergence and expansion of powerful empires such as Ghana, Mali, and Songhai. These states accumulated wealth by taxing trade goods and securing safe trade routes.

    2. Rise of Major Commercial Cities

    Cities like Timbuktu, Gao, and Djenne flourished as centers of commerce, scholarship, and Islamic culture. Timbuktu became a symbol of African prosperity and learning.

    3. Introduction and Spread of Islam

    North African traders, especially the Berbers, introduced Islam to West Africa. Over time, Islam became the dominant religion in trade centers and royal courts, influencing law, education, and architecture.

    4. Promotion of Education and Literacy

    Islamic scholars and clerics established Qur’anic schools and libraries, especially in Timbuktu. Arabic literacy spread among the elites, aiding record-keeping and diplomacy.

    5. Integration into a Global Trade Network

    The trade linked West Africa to Europe, the Middle East, and Asia through the Islamic world. Goods from India and China could reach West Africa via North Africa.

    6. Economic Specialization

    Regions specialized in the production of specific goods. For example, the Taghaza mines in the Sahara became known for salt, while the Wangara people specialized in gold mining.

    7. Slavery and Forced Labor

    Though not on the same scale as the transatlantic trade, the Trans-Saharan trade included the sale of slaves, who were used for domestic service, military roles, and concubinage in North Africa and the Middle East.

    8. Development of Taxation Systems

    West African rulers introduced organized taxation systems on goods crossing their territories, improving revenue collection and administrative control.

    9. Emergence of a Merchant Class

    Trade led to the rise of a wealthy and influential merchant class, often composed of both indigenous Africans and foreign traders, who helped finance political and religious projects.

    10. Cultural Exchange and Syncretism

    Arab, Berber, and African traditions blended to create a unique Islamic-African culture seen in clothing, art, and religious practice.

    11. Internal Trade Boost

    The Trans-Saharan routes stimulated local markets and inter-regional trade within West Africa, linking savannah and forest zones.

    12. Decline Linked to European Maritime Trade

    By the 16th century, maritime trade with Europeans along the coast began to overshadow Trans-Saharan routes, leading to the decline of desert trade cities and empires.


    ⛵ B. Impact of the Triangular Trade in West Africa

    The Triangular Trade, dominant from the 15th to 19th century, involved a three-way exchange between Europe, Africa, and the Americas. European ships carried manufactured goods to Africa, enslaved Africans to the Americas, and raw materials (like sugar, tobacco, and cotton) to Europe.

    Its impact on West Africa was devastating and long-lasting.

    1. Large-Scale Depopulation

    An estimated 12 million Africans were forcibly removed from the continent. This led to the loss of millions of young, able-bodied individuals, weakening population growth and labor force.

    2. Breakdown of Traditional Societies

    Slave raids and wars destroyed villages, kinship ties, and social structures, leading to insecurity and displacement.

    3. Rise of Slave Trading States

    Kingdoms such as Dahomey, Oyo, and Ashanti grew powerful by capturing and selling slaves to Europeans. Their economies and militaries were built around the export of human beings.

    4. Widespread Warfare and Instability

    The demand for captives fueled constant wars, raids, and kidnapping, creating a state of perpetual conflict and fear in many regions.

    5. Introduction of European Goods

    West Africa was flooded with European manufactured goods like cloth, alcohol, and firearms, which weakened local crafts and industries.

    6. Increased Use of Guns and Gunpowder

    Weapons received from Europeans were used to expand territory and capture more slaves. This intensified warfare and militarization of politics.

    7. Disruption of Agriculture and Food Production

    With many people sold or fleeing from raids, agriculture suffered, leading to famine and economic disruption.

    8. Social Fragmentation

    Communities became divided between captors and victims, with some African elites benefiting from the trade while others were enslaved.

    9. Cultural Loss and Trauma

    Whole generations lost their cultural identity, history, and language. The psychological and social trauma of slavery still lingers in African diasporic memory.

    10. Distorted Economic Priorities

    Instead of producing for local development, West African economies became export-oriented, focused on slave trading rather than innovation or infrastructure.

    11. Coastal Overdevelopment vs. Interior Neglect

    Trade focused on coastal ports like Bonny, Lagos, and Elmina, while interior regions lagged in development, creating regional imbalances still seen today.

    12. Introduction of Christianity

    Some missionaries and European traders introduced Christianity, particularly in the 19th century, as part of post-slavery humanitarian efforts.

    13. Start of European Colonization

    European familiarity with African geography and politics through the slave trade laid the groundwork for 19th-century colonization of Africa.

    14. Creation of the African Diaspora

    Millions of Africans were dispersed across the Americas, leading to the formation of Afro-Brazilian, Afro-Caribbean, and African-American communities.

    15. Resistance and Revolts

    West Africans resisted slave trading through armed uprisings, escape, and sabotage—a legacy of courage and survival that is still honored.


    🧠 Conclusion: A Double-Edged Legacy

    The Trans-Saharan and Triangular Trades had both transformative and traumatic effects on West Africa.

    • The Trans-Saharan trade helped build strong empires, promote Islamic culture, and integrate West Africa into a larger global economy.
    • The Triangular trade, on the other hand, led to enslavement, violence, underdevelopment, and the loss of human potential on a massive scale.

    Understanding the impact of these trade systems helps us appreciate the resilience of African civilizations, recognize the roots of modern-day inequalities, and honor the lives and cultures lost to exploitation.

  • 📰 Uganda’s Parliament Approves Military Trials for Civilians, Sparking Human Rights Concerns

    📰 Uganda’s Parliament Approves Military Trials for Civilians, Sparking Human Rights Concerns

    KAMPALA, Uganda — In a move that has ignited widespread debate, Uganda’s Parliament passed the Uganda People’s Defence Forces (Amendment) Bill, 2025, on May 20. This legislation permits military courts to try civilians under specific circumstances, reversing a January Supreme Court ruling that deemed such trials unconstitutional. Trendsnafrica | 24/7 Africa News+8Parliament of Uganda+8Human Rights Watch+8AP News+5Reuters+5Reuters+5

    📜 Key Provisions of the Bill

    The amended law allows civilians to be prosecuted in military courts if they are alleged to have committed offenses “in support of or in association with persons subject to military law.” It also mandates that presiding officers in these courts possess legal qualifications. Human Rights Watch+4Military.com+4Trendsnafrica | 24/7 Africa News+4

    ⚖️ Opposition and Human Rights Concerns

    The bill has faced significant opposition from human rights organizations and political figures. Critics argue that it undermines judicial independence and could be used to suppress dissent, especially ahead of the 2026 general elections. Human Rights Watch and Amnesty International have both expressed concerns about the potential for abuse and the erosion of civil liberties. AP NewsAmnesty International

    Notably, opposition leader Dr. Kizza Besigye, who has previously been tried in military courts, has been a vocal critic of the bill. His legal team argues that such trials violate constitutional rights and international legal standards. Military.com+8AP News+8AP News+8Al Jazeera+8Wikipedia+8Reuters+8

    🏛️ Government’s Justification

    Proponents of the bill, including members of the ruling National Resistance Movement, contend that the legislation is necessary for national security. They argue that it will enhance the military’s ability to address crimes involving both military personnel and civilians. President Yoweri Museveni and his son, Gen. Muhoozi Kainerugaba, have both supported the bill, emphasizing its role in maintaining order. AP News+1Al Jazeera+1

    🌍 Regional and International Implications

    The passage of this bill places Uganda at odds with regional human rights standards. The African Commission on Human and Peoples’ Rights has stated that military courts should not, under any circumstances, have jurisdiction over civilians. Human Rights Watch

    🔍 Looking Ahead

    As the bill awaits President Museveni’s assent, legal experts anticipate potential challenges in the Constitutional Court. The international community and human rights observers will be closely monitoring the situation, given its implications for Uganda’s democratic processes and civil liberties.

    a group of people sitting in a room
×
🚀 Stuck in School? Catch Up and Stand Out!

🚀 Stuck in School? Catch Up and Stand Out!

Don't let difficult topics hold you back. Our fast-track Remedial Courses are designed to bridge the gap and boost your confidence instantly.

What We Offer:

  • Speak Kiswahili From Day One: Master conversational Swahili with zero stress.

  • English for Locals: Perfect your grammar and speak English with absolute confidence.

  • Targeted Remedial Support: Easily catch up on core subjects you find challenging.

Stop struggling. Start mastering.


Learn More
Listen to Remedial Radio

Listen to Remedial Radio

Enjoy the rhythm of knowledge. where books sing!
Learn More