Category: Study Material

  • The Ultimate Guide to Preparing Hay for Livestock

    The Ultimate Guide to Preparing Hay for Livestock

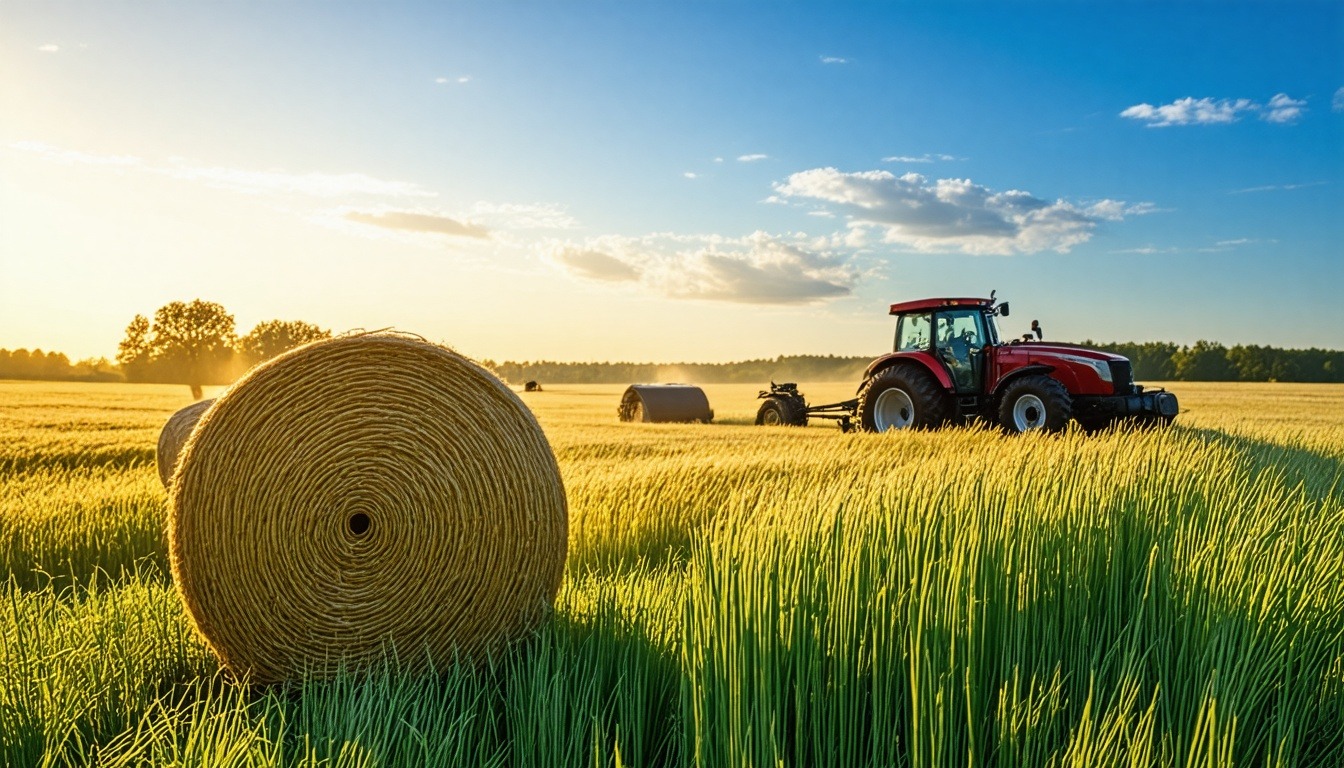
    Hay is the backbone of livestock nutrition. It keeps animals healthy and productive. But preparing hay isn’t simple. You must do it right. Poor hay can cause health issues. It can also waste money. This guide covers everything. You will learn the best methods. We will talk about cutting, drying, baling, and storage. You will also learn about feeding. Let’s dive in.

    Why Hay Preparation Matters

    Hay provides essential nutrients. It is a primary food source for many animals. Proper preparation preserves those nutrients. It also prevents spoilage. Good hay reduces feed costs. It improves animal health. Poor hay can lead to diseases. for instance, moldy hay causes respiratory problems. It can also cause colic in horses. So, quality matters.

    Hay preparation involves several steps. Each step affects the final product. You must time each step well. Weather plays a big role. You need the right equipment. Knowledge is also key. This guide will help you master each step.

    Understanding Hay Types

    Different animals need different hay. Common types include timothy, alfalfa, and orchard grass. Timothy is good for horses. Alfalfa has more protein. It is great for dairy cows. Orchard grass is palatable. It works for sheep and goats. Choose based on your livestock needs.

    Hay Type Protein % Best For
    Alfalfa 15-20% Dairy cows, growing animals
    Timothy 8-10% Horses, adult ruminants
    Orchard Grass 10-12% Sheep, goats, horses
    Bermuda Grass 6-10% Cattle, horses

    Each type has different growth cycles. Alfalfa grows in multiple cuttings. Timothy is a cool-season grass. Know your region’s climate. Then choose the right type.

    Step 1: Cutting Hay at the Right Time

    Timing is crucial. Cut hay when nutrients are highest. For grasses, cut at early heading stage. For legumes, cut at early bloom. This maximizes protein and energy. Cutting too early reduces yield. Cutting too late lowers quality.

    Check the weather forecast. You need several dry days. Rain can damage cut hay. It leaches nutrients. It also promotes mold. Plan your cutting accordingly.

    Use a sharp mower conditioner. This cuts cleanly and crimps stems. Crimping speeds drying. It also reduces leaf loss. Set the cutting height properly. Leave 2-3 inches of stubble. This protects the plant crown. It also helps regrowth.

    Mower Types

    • Sickle bar mower: Good for small fields. Leaves clean stubble.
    • Disc mower: Fast and efficient. Handles heavy crops well.
    • Rotary mower: Best for large areas. Can handle tough conditions.

    Choose based on your field size and budget. A well-maintained mower ensures a good cut.

    Step 2: Drying Hay Properly

    Drying reduces moisture content. Hay should have 15-20% moisture for baling. Higher moisture leads to mold. Lower moisture causes leaf loss. Drying time varies. It depends on weather and crop density.

    Spread the cut hay in wide swaths. This increases sun exposure. Use a tedder to fluff the hay. It speeds drying. Turn the hay if needed. But avoid overworking. Too much handling causes leaf shatter.

    Check moisture regularly. Use a moisture tester. Or use the “feel” method. Squeeze a handful. If it feels dry and crisp, it’s ready. If it feels damp, wait longer.

    “Proper drying is the most critical step. It determines hay quality.” – Experienced farmer

    Tips for Faster Drying

    1. Cut in the morning after dew dries.
    2. Use wide swaths (at least 70% of cut width).
    3. Condition the hay to crack stems.
    4. Ted within 24 hours of cutting.
    5. Rake only when necessary.

    Step 3: Raking and Windrowing

    Raking gathers hay into windrows. This makes baling easier. It also allows further drying. Use a wheel rake or parallel bar rake. Wheel rakes are gentle. They reduce leaf loss. Parallel bar rakes work in heavy crops.

    Rake when hay is at 30-40% moisture. This prevents leaf shatter. Rake gently to avoid soil contamination. Soil can introduce mold spores. It also reduces feed value.

    Windrow shape matters. A narrow windrow dries slower. A wide windrow dries faster. For large bales, make a single windrow. For small bales, use multiple windrows.

    Step 4: Baling Methods

    Baling compresses hay for storage. There are two main types: square bales and round bales. Square bales are easier to handle. They stack well. Round bales are larger. They require less labor but more equipment.

    Bale Type Weight Storage Best For
    Small Square 40-60 lbs Indoor stacking Small operations, horses
    Large Square 800-1500 lbs Indoor/outdoor Large farms, dairy
    Round 500-2000 lbs Outdoor with cover Beef cattle, sheep

    Bale at the right moisture. For square bales, aim for 15-18%. For round bales, 18-20% is okay. Use net wrap or twine. Net wrap sheds water better. It also reduces spoilage.

    Baler Maintenance

    Keep balers in good condition. Check belts and chains. Lubricate moving parts. Adjust tension for consistent bale density. A well-maintained baler produces uniform bales. This improves storage efficiency.

    Step 5: Hay Storage Best Practices

    Storage protects hay from weather. It also prevents nutrient loss. Store hay in a dry, well-ventilated area. A barn is ideal. If using outdoor storage, cover the top. Use tarps or plastic sheeting. But leave sides open for airflow.

    Stack bales off the ground. Use pallets or gravel. This prevents moisture wicking. Leave space between stacks. This allows air circulation. It also reduces fire risk. Hay fires occur when moisture is too high.

    “Good storage can extend hay life by years. It also preserves quality.” – Hay specialist

    Storage Checklist

    • Choose a dry location.
    • Elevate bales from ground.
    • Provide ventilation.
    • Cover outdoor stacks.
    • Monitor temperature.
    • Rotate older hay first.

    Step 6: Testing Hay Quality

    Testing tells you nutrient content. It helps balance rations. Send a sample to a lab. They analyze protein, fiber, and minerals. Use a hay probe to sample. Take cores from multiple bales. Mix them for a representative sample.

    Key metrics include:

    • Crude Protein: Essential for growth and milk.
    • Acid Detergent Fiber (ADF): Indicates digestibility.
    • Neutral Detergent Fiber (NDF): Affects intake.
    • Relative Feed Value (RFV): Overall quality index.

    Use results to adjust feeding. for instance, add grain if protein is low. Or supplement minerals if deficient.

    Step 7: Feeding Hay to Livestock

    Feeding methods affect waste. Use hay feeders to reduce spoilage. For round bales, use a ring feeder. For square bales, use a rack. Place feeders in dry areas. Move them regularly to avoid mud.

    Feed hay according to animal needs. Horses need 1.5-2% of body weight per day. Cattle need 2-3%. Sheep and goats need 3-4%. Adjust based on activity and life stage.

    Monitor hay intake. Overfeeding wastes hay. Underfeeding causes weight loss. Use body condition scoring. It helps assess if animals are getting enough.

    Avoiding Common Feeding Mistakes

    1. Don’t feed moldy hay.
    2. Don’t feed hay with weeds.
    3. Don’t change hay suddenly.
    4. Don’t feed on the ground.
    5. Don’t overfeed.

    Special Considerations for Different Livestock

    Horses

    Horses need high-fiber hay. Timothy is a top choice. Avoid alfalfa for easy keepers. It can cause obesity. For performance horses, alfalfa provides extra energy. Always provide clean water.

    Dairy Cows

    Dairy cows need high-protein hay. Alfalfa is excellent. It boosts milk production. Feed in combination with silage. Balance with grains for energy. Ensure consistent quality.

    Beef Cattle

    Beef cattle can eat lower-quality hay. They are less picky. But still need adequate protein. Supplement with protein blocks if needed. Use round bales for efficiency.

    Sheep and Goats

    Sheep and goats prefer fine-stemmed hay. Orchard grass is good. Avoid coarse hay. It can cause choking. Use hay nets to reduce waste. Provide minerals separately.

    Troubleshooting Hay Problems

    Hay problems include mold, dust, and weeds. Mold occurs when hay is too wet. It appears as white or gray powder. Dust comes from over-dried hay. It causes respiratory issues. Weeds reduce feed value.

    To prevent mold, bale at correct moisture. Store in dry conditions. If hay gets wet, discard it. For dust, add a little water before feeding. But not too much. For weeds, control them in the field. Use herbicides if necessary.

    Another common issue is heating. Hay can heat if moisture is high. This can lead to fire. Monitor bale temperature. If it exceeds 130°F, take action. Spread bales apart. Cool them down.

    Economic Considerations

    Hay production costs money. You need equipment, fuel, and labor. But good hay saves money on supplements. It also improves animal performance. Calculate cost per ton. Compare to buying hay. Often, making your own is cheaper.

    Consider selling excess hay. It can generate income. But ensure quality. Market demands high-quality hay. Test and advertise accordingly.

    Environmental Impact

    Hay fields provide habitat. They reduce erosion. They also sequester carbon. Sustainable practices improve soil health. Rotate fields to prevent nutrient depletion. Use cover crops when possible.

    Minimize waste. Spoiled hay contributes to methane. Proper storage and feeding reduce waste. It’s good for your wallet and the planet.

    Advanced Techniques

    Some farmers use haylage. It is fermented hay. It has higher moisture. It is stored in bales wrapped in plastic. This preserves nutrients. It works well in wet climates.

    Another method is hay compression. It reduces volume for transport. But it requires special equipment. It isn’t common for small farms.

    Conclusion

    Preparing hay is both an art and a science. It requires attention to detail. But the rewards are great. You get high-quality feed. Your animals stay healthy. Your farm becomes more efficient.

    Remember the key steps: cut at the right time, dry properly, bale correctly, store well, and feed wisely. Test your hay to know its value. Adjust your methods based on results.

    With practice, you will improve. Your hay will get better every year. Start applying these tips today. Your livestock will thank you.


  • Matunda na Vyakula kwa Wanafunzi wa Kiswahili (Na Tafsiri za Kiingereza)

    Learn about Fruits and Foods – A Complete Beginner’s Guide

    Katika kujifunza Kiswahili, kujua majina ya matunda (fruits) na vyakula (foods) ni muhimu sana. Hivi ni vitu tunavyokula kila siku, hivyo msamiati huu unawasaidia wanafunzi kuelewa mazungumzo ya nyumbani, masoko, hoteli, na masomo ya afya.

    Blog hii inatoa maelezo rahisi ya Kiingereza, mifano mingi, picha za maoni (illustrations), na zaidi ya mifano 50 ya matunda na vyakula ili kumsaidia mwanafunzi anayeanza.


    1. Matunda ni nini? (What are fruits?)

    Matunda ni sehemu ya mmea iliyoiva na kuliwa kama chakula.
    Fruits are edible plant parts that usually grow after a flower.

    Kwa kawaida matunda huwa na vitamini nyingi na hutumiwa kwa afya na lishe bora.

    Mifano mingi ya Matunda (50+ Examples of fruits)

    Hapa chini kuna orodha pana zaidi ya matunda maarufu Afrika Mashariki na duniani:

    1. Embe – mango
    2. Ndizi – banana
    3. Tikiti maji – watermelon
    4. Nanasi – pineapple
    5. Tofaa – apple
    6. Papai – papaya
    7. Chenza – tangerine
    8. Chungwa – orange
    9. Zabibu – grapes
    10. Pera – guava
    11. Frenchi – strawberry
    12. Tunda damu – beetroot fruit
    13. Tunda mkangazi – passion fruit
    14. Tufahali – pear
    15. Pichi – peach
    16. Parachichi – avocado
    17. Ndimu – lemon
    18. Limu – lime
    19. Tunda mzeituni – olive
    20. Tunda parachichi mwitu – wild avocado
    21. Tunda mfenesi – breadfruit
    22. Kokwa ya nazi – coconut
    23. Komamanga – pomegranate
    24. Mzambarau – plum
    25. Kachi – cashew apple
    26. Tufaha wa waridi – rose apple
    27. Feneo – mulberry
    28. Kiwanda – kiwi
    29. Tunda la persimmon
    30. Tunda la loquat
    31. Figili – fig
    32. Tunda mkwaju – tamarind fruit
    33. Tunda mlozi – almond fruit
    34. Tunda mkurutu – soursop
    35. Tunda stafeli – custard apple
    36. Tunda fenesi dogo – small jackfruit
    37. Tunda mkoma-mtende – dates
    38. Tunda wa cheri – cherry
    39. Tunda wa apricot
    40. Tunda wa cranberries
    41. Tunda la papaw mwitu
    42. Tunda la mabungo – mabungo fruit
    43. Mabuyu – baobab fruit
    44. Machozi ya simba – rambutan
    45. Jackfruit (mtomoko)
    46. Star fruit – carambola
    47. Tunda mabungo pori
    48. Sukari manu – sugar apple
    49. Tunda langulangu – blueberry (local name varies)
    50. Tunda mawaridi – rosehips

    Zaidi ya 50 matunda tofauti yametolewa — muhimu kwa msamiati mpana wa mwanafunzi.


    2. Vyakula ni nini? (What are foods?)

    Vyakula ni vitu vinavyoliwa ili kutoa nishati na kukusaidia kukua kiafya.
    Foods include cooked meals, snacks, and raw items.

    Vyakula vinaweza kuwa:

    • vya kupikwa (cooked foods),
    • vya kuoka (baked),
    • vya kukaanga (fried),
    • vya kuchemsha (boiled), au
    • vyakula visivyopikwa kama matunda na mboga.

    3. Mifano ya Vyakula mbalimbali (Examples of different foods)

    A. Vyakula vya asili (Traditional foods)

    1. Ugali – stiff maize porridge
    2. Matooke – cooked bananas
    3. Githeri – maize & beans mix
    4. Posho – maize meal
    5. Chapati – flatbread
    6. Pilau – spiced rice
    7. Wali – plain rice
    8. Supu – soup
    9. Nkoko – chicken stew
    10. Omena – silverfish

    B. Vyakula vya kupikwa (Cooked foods)

    1. Chipsi – fries
    2. Choma – roasted meat
    3. Nyama ya kukaanga – fried meat
    4. Samaki wa kukaanga – fried fish
    5. Biriani – biryani
    6. Uji – porridge
    7. Soseji – sausage
    8. Maharage ya mchuzi – bean stew
    9. Mboga za majani – leafy vegetables
    10. Ndizi za mchuzi – banana stew

    C. Vyokula vya vitafunwa (Snacks)

    1. Mandazi – fried buns
    2. Samosa – samosa
    3. Kachumbari – salad
    4. Keki – cake
    5. Biskuti – biscuits
    6. Donati – donuts
    7. Kaunga ya viazi – crisps
    8. Maandazi ya nazi – coconut buns
    9. Karanga – peanuts
    10. Cornflakes – cereal

    D. Vyakula vya kimataifa (International foods)

    1. Pizza
    2. Burger
    3. Hotdog
    4. Pasta
    5. Sandwich
    6. Fried rice
    7. Noodles
    8. Shawarma
    9. Tortilla
    10. Sushi (for knowledge only)

    E. Vyakula vya wanga (Carbohydrate foods)

    1. Ulezi – millet porridge
    2. Mtama – sorghum
    3. Ndizi mbivu – ripe bananas
    4. Viazi vitamu – sweet potatoes
    5. Nduma – yams
    6. Mhogo – cassava
    7. Mkate – bread
    8. Chapati – flatbread
    9. Ugali – maize meal again
    10. Bohari ya mapishi ya karanga – peanut stew

    4. Maneno muhimu ya kujifunza (Key vocabulary for beginners)

    KiswahiliEnglish
    TundaFruit
    MatundaFruits
    ChakulaFood
    VyakulaFoods
    MbogaVegetables
    KitoweoRelish/stew
    SupuSoup
    MloMeal
    KinywajiDrink
    KulaTo eat
    KunywaTo drink

    5. Sifa za matunda (Characteristics of fruits)

    Fruits usually:

    • have vitamins
    • are sweet or sour
    • can be eaten raw
    • help digestion
    • provide energy

    Examples in sentences (with English translation):

    1. Papai lina vitamini nyingi. – Papaya has many vitamins.
    2. Ndizi ni tamu na laini. – Bananas are sweet and soft.
    3. Chungwa lina asidi. – Orange is acidic/sour.
    4. Tunda fenesi ni kubwa sana. – Jackfruit is very large.
    5. Parachichi lina mafuta mazuri. – Avocado has healthy fats.

    6. Umuhimu wa Matunda na Vyakula (Importance of fruits and foods)

    A. Afya nzuri (Good health)

    Matunda na vyakula vina virutubisho muhimu kama:

    • Vitamini
    • Madini
    • Protini
    • Mafuta
    • Wanga

    B. Kutoa nishati (Provide energy)

    Wanga kama ugali, wali, mkate, na viazi hutoa nguvu za kufanya kazi.

    C. Kujenga mwili (Body building)

    Protini kutoka nyama, maharage, mayai, na samaki hujenga misuli.

    D. Kuimarisha kinga (Boost immunity)

    Matunda kama machungwa, nanasi, fenesi na papai hupambana na magonjwa.

    E. Utamaduni na utalii (Culture & tourism)

    Chakula ni sehemu ya utambulisho wa jamii.

    F. Uchumi (Economy)

    Matunda kama maembe, ndizi, machungwa na parachichi huuza sokoni na kuongeza kipato.


    7. Sentensi za kujifunza (Useful example sentences)

    (With English translation)

    1. Ninapenda kula matunda kila siku. – I like eating fruits every day.
    2. Mama amenunua tikiti maji sokoni. – Mother bought a watermelon at the market.
    3. Tafadhali nipatie sahani ya wali na maharage. – Please give me a plate of rice and beans.
    4. Matunda ni bora kwa afya. – Fruits are good for health.
    5. Watoto walikula ndizi na maziwa asubuhi. – The children ate bananas and milk in the morning.
    6. Leo tumepika samaki na ugali. – Today we cooked fish and ugali.
    7. Kachumbari hutengenezwa kwa nyanya na kitunguu. – Kachumbari is made with tomatoes and onions.
    8. Samosa hizi ni tamu sana. – These samosas are very delicious.
    9. Nimeshiba baada ya chakula cha mchana. – I am full after lunch.
    10. Unapenda matunda gani? – Which fruits do you like?

    8. Maswali ya Kujadili (Revision questions)

    1. Eleza maana ya tunda.
    2. Taja aina tano za vyakula vya kupikwa.
    3. Kwa nini matunda ni muhimu kwa mwili?
    4. Taja matunda matano yenye vitamini C.
    5. Toa tofauti kati ya chakula cha asili na chakula cha kimataifa.
    6. Taja vyakula vitano vya wanga.
    7. Andika sentensi tano ukitumia maneno “tunda”, “chakula”, na “mlo”.

    🍽️ Mazungumzo ya Kuagiza Chakula

    Mteja: Habari za mchana. Naomba kuagiza chakula.

    Mhudumu: Habari za mchana. Karibu sana. Jina langu ni Neema. Je, unaweza kuniambia namba ya meza yako tafadhali?

    Mteja: Namba ya meza yangu ni 14.

    Mhudumu: Shukrani. Mnaagiza nini leo?

    Mteja: Kwa kuanzia, naomba tupate Supu ya Kuku mbili (2) na Saladi ya Mboga moja (1).

    Mhudumu: Supu ya Kuku mbili na Saladi ya Mboga moja. Sawa. Na kwa chakula kikuu?

    Mteja: Mimi nitaagiza Samaki wa Kupakwa na ugali. Naomba samaki wangu awe mkavu kidogo, siyo mwele.

    Mhudumu: Samaki wa Kupakwa na ugali, mkavu kidogo. Nimekuelewa. Na kwa mwenzako?

    Mteja: Yeye anataka Mchuzi wa Kima na Wali. Naomba huo mchuzi usiwe na pilipili nyingi sana.

    Mhudumu: Mchuzi wa Kima na Wali, pilipili kiasi. Je, mnahitaji vinywaji?

    Mteja: Ndiyo. Tupatie Juisi ya Embe moja (1) na Maji ya Kufungua (Soda) ya ‘Fanta Orange’ moja.

    Mhudumu: Vizuri. Naomba nithibitishe agizo lenu: Supu ya Kuku mbili, Saladi ya Mboga moja. Samaki wa Kupakwa na Ugali (mkavu), Mchuzi wa Kima na Wali (pilipili kiasi). Juisi ya Embe moja, na Fanta Orange moja. Je, nimekamilisha?

    Mteja: Ndiyo, agizo ni sahihi kabisa.

    Mhudumu: Asante sana. Chakula chenu kitakuwa tayari ndani ya dakika 25 hivi.

    Mteja: Sawa, tunasubiri. Asante Neema.


    Maswali na Majibu Kuhusu Mazungumzo

    Haya hapa ni maswali matano (5) na majibu yake kulingana na mazungumzo hapo juu:

    NambariSwaliJibu
    1.Jina la mhudumu aliyepokea agizo ni nani?Jina la mhudumu ni Neema.
    2.Ni agizo gani lilitolewa kwa ajili ya chakula cha kuanzia (appetizers)?Walagiza Supu ya Kuku mbili na Saladi ya Mboga moja.
    3.Mteja alitaka sifa gani maalumu kwa Samaki wa Kupakwa wake?Alitaka samaki awe mkavu kidogo, siyo mwele.
    4.Ni vinywaji gani viwili vilivyoagizwa na wateja?Vinywaji vilivyoagizwa ni Juisi ya Embe moja na Fanta Orange moja.
    5.Mhudumu alisema chakula kitachukua muda gani kuwa tayari?Alisema chakula kitakuwa tayari ndani ya takriban dakika 25.

    Hitimisho (Conclusion)

    Matunda na vyakula ni sehemu ya maisha ya kila siku. Kujua majina yake kwa Kiswahili humsaidia mwanafunzi kuwasiliana vizuri katika masoko, nyumbani, na shuleni. Orodha hii pana ya matunda na vyakula zaidi ya mifano 100 inakupa msamiati mpana na rahisi kukumbuka.

  • Global Warming in East Africa: A Case Study on Climate Resilience

    Global Warming in East Africa: A Case Study on Climate Resilience

    Background: East Africa’s Climate Crisis

    East Africa faces severe global warming impacts. The region includes countries like Kenya, Ethiopia, Somalia, and Tanzania. Temperatures have risen by 1.5°C since 1900. This is faster than the global average.

    Rainfall patterns are changing. Droughts and floods are more frequent. The region’s economy depends on agriculture. Over 70% of people rely on farming. Climate change threatens food security and livelihoods.

    Why East Africa Is Vulnerable

    Several factors increase vulnerability. First, poverty limits adaptive capacity. Many people live on less than $2 a day. Second, infrastructure is weak. Roads, water systems, and health facilities are inadequate. Third, ecosystems are fragile. Deforestation and land degradation worsen climate impacts.

    Fourth, population growth is high. More people compete for scarce resources. Fifth, governance challenges exist. Corruption and conflict hinder effective action.

    Challenges: The Impacts of Global Warming

    Droughts and Water Scarcity

    Droughts are more intense and frequent. The 2010-2011 drought in the Horn of Africa affected 13 million people. It caused a famine in Somalia. Over 260,000 people died. Half were children under five.

    Water sources are drying up. Rivers like the Tana and Athi have reduced flow. Groundwater levels are falling. This affects drinking water and irrigation.

    Flooding and Displacement

    Heavy rains cause devastating floods. In 2020, floods in East Africa displaced over 1 million people. They destroyed homes, roads, and crops. The economic cost exceeded $1 billion.

    Floods also spread diseases. Cholera and malaria outbreaks increase after floods. Health systems are overwhelmed.

    Food Insecurity and Malnutrition

    Crop yields are declining. Maize production in Kenya could fall by 20% by 2050. Livestock deaths are common during droughts. Pastoralists lose their herds. This leads to hunger and malnutrition.

    Over 30 million people in East Africa face acute food insecurity. Children suffer from stunting and wasting. The situation worsens yearly.

    Loss of Biodiversity

    Global warming threatens unique ecosystems. The glaciers on Mount Kilimanjaro are melting. They could disappear by 2030. Coral reefs in the Indian Ocean are bleaching. This reduces fish stocks.

    Wildlife populations are declining. Elephants and rhinos face habitat loss. This affects tourism, a key revenue source.

    Solution: A Multi-Pronged Approach

    To address these challenges, a comprehensive solution was needed. The approach had three pillars: adaptation, mitigation, and resilience building.

    Adaptation Strategies

    • Climate-smart agriculture: Using drought-resistant crops and efficient irrigation.
    • Water harvesting: Building sand dams and rooftop catchments.
    • Early warning systems: Using satellite data to predict floods and droughts.
    • Ecosystem restoration: Reforesting degraded lands and protecting wetlands.

    Mitigation Efforts

    • Renewable energy: Expanding solar, wind, and geothermal power.
    • Clean cooking: Promoting efficient stoves to reduce deforestation.
    • Carbon sequestration: Planting trees and improving soil health.

    Resilience Building

    • Social safety nets: Cash transfers and food aid for vulnerable groups.
    • Disaster risk reduction: Building flood defenses and drought-resistant infrastructure.
    • Community training: Educating farmers on climate adaptation techniques.

    Implementation: Turning Plans into Action

    The solution was implemented through partnerships. Governments, NGOs, and international donors worked together. The World Bank, UNDP, and local agencies led the efforts.

    Phase 1: Assessment and Planning (2015-2016)

    First, a thorough assessment was done. Scientists analyzed climate data. They identified the most affected areas. Communities were consulted to understand local needs. A national adaptation plan was developed for each country.

    Phase 2: Pilot Projects (2017-2018)

    Pilot projects were launched in selected districts. In Kenya, 10,000 farmers received drought-resistant maize seeds. In Ethiopia, 50,000 hectares of land were reforested. In Somalia, early warning systems were installed.

    These pilots tested the effectiveness of different strategies. They provided valuable lessons for scaling up.

    Phase 3: Scaling Up (2019-2022)

    Based on pilot success, programs were expanded. Climate-smart agriculture reached 2 million farmers. Water harvesting systems were built in 500 communities. Early warning systems covered 80% of the region.

    Renewable energy projects added 500 MW of capacity. Clean cooking stoves were distributed to 1 million households. Reforestation efforts planted 100 million trees.

    Phase 4: Monitoring and Adaptation (2023-Present)

    Continuous monitoring is ongoing. Data is collected on rainfall, temperature, and crop yields. Adjustments are made based on new information. for instance, after a severe drought in 2022, water storage capacity was increased.

    Results: Measurable Impact

    The implementation yielded significant results. Here are key metrics:

    Indicator Baseline (2015) Current (2024) Change
    People with improved food security 5 million 15 million +200%
    Hectares of land restored 100,000 500,000 +400%
    Renewable energy capacity (MW) 1,000 1,500 +50%
    Households with clean cooking 500,000 1.5 million +200%
    Early warning coverage 30% 80% +50%
    Reduction in flood-related deaths 500/year 200/year -60%

    Additionally, crop yields increased by 25% in project areas. Water availability improved for 10 million people. Biodiversity loss slowed in key ecosystems.

    Key Takeaways

    • Local participation is crucial. Communities know their needs best.
    • Integrated approaches work. Combining adaptation, mitigation, and resilience yields better results.
    • Data drives decisions. Monitoring and evaluation improve effectiveness.
    • Partnerships amplify impact. Collaboration leverages resources and expertise.
    • Long-term commitment is needed. Climate change requires sustained effort.

    Lessons Learned

    Lesson 1: Start Early, Act Now

    Delaying action increases costs. Early investments in resilience save lives and money. The cost of inaction is far higher than the cost of adaptation.

    Lesson 2: Address Root Causes

    Poverty and inequality worsen climate impacts. Solutions must address these underlying issues. Empowering women and youth is key.

    Lesson 3: Use Technology Wisely

    Technology can help, but it must be appropriate. Simple, low-cost solutions often work best. for instance, sand dams are cheaper than large dams and more sustainable.

    Lesson 4: Build Local Capacity

    Training local experts ensures continuity. Communities can maintain systems themselves. This reduces dependence on external aid.

    Lesson 5: Plan for Uncertainty

    Climate projections are uncertain. Flexible plans that can adapt to changing conditions are essential. Scenario planning helps prepare for different outcomes.

    Conclusion: A Path Forward

    East Africa’s battle with global warming is far from over. But this case study shows that progress is possible. With the right strategies, communities can become more resilient. The region can adapt to a changing climate.

    The key is to act now, work together, and learn from experience. The lessons from East Africa can inspire other regions facing similar challenges. Global warming is a global problem, but local solutions make a difference.

    By investing in climate-smart agriculture, renewable energy, and ecosystem restoration, East Africa is building a sustainable future. The journey is long, but the direction is clear.

  • Mastering Night Revision: Expert Tips for Effective Prep

    Mastering Night Revision: Expert Tips for Effective Prep

    Night revision is a study method where students review and practice their work during evening or late-night hours. It can be highly effective when combined with proper planning, active recall techniques, and enough sleep. This guide explains how to study at night effectively, stay awake, avoid distractions, and improve memory retention using proven strategies from experts.

    Introduction

    Studying at night is common among students in Uganda, especially during exam periods like UNEB (PLE, UCE, and UACE). Many learners find nighttime quieter, with fewer distractions from family, school activities, or social obligations. However, without the right approach, night revision can become unproductive and exhausting.

    This comprehensive guide on effective night revision tips combines expert advice, cognitive science, and practical strategies tailored to students. Whether you are preparing for national exams or internal assessments, you will learn how to study at night without getting tired and maximize your performance.


    Why Night Revision Works (And When It Doesn’t)

    Night revision can be powerful because the brain often experiences fewer interruptions at night. This allows for deeper focus and concentration.

    Benefits of Night Study

    • Quiet environment with minimal distractions
    • Better concentration for some students
    • Flexible time for revision after daily activities
    • Ideal for reviewing difficult subjects

    Limitations of Night Study

    • Fatigue and reduced alertness
    • Risk of poor sleep habits
    • Lower productivity without proper planning

    Key takeaway: Night revision works best when balanced with proper sleep and structured study techniques.


    Expert Interview: Q&A on Night Revision

    Q: How do you start a night revision session?

    John Rivera: “Start with a clear goal. Know exactly what you want to cover. Break topics into smaller tasks. This makes studying manageable.”

    He recommends the Pomodoro Technique:

    • 25 minutes of focused study
    • 5-minute break
    • Repeat 4 times, then take a longer break

    This method improves focus and prevents burnout.


    Q: What are the best study techniques for night revision?

    Dr. Sarah Mitchell: “Use active recall. Don’t just read—test yourself. Write down what you remember. Use flashcards and quizzes.”

    She also recommends:

    • Teaching concepts out loud
    • Summarizing notes in your own words
    • Practicing past exam questions

    These are proven effective study techniques for exams.


    Q: How can you stay awake while studying at night?

    John Rivera: “Keep your study environment comfortable. Stay hydrated and avoid heavy meals.”

    Tips to stay awake while studying:

    • Drink water regularly
    • Take short walks
    • Do light exercises like stretching
    • Keep your room well-lit
    • Avoid studying in bed

    Important: Avoid excessive caffeine late at night—it can disrupt sleep.


    Q: How do you avoid distractions during night study?

    Dr. Mitchell: “Create a distraction-free environment. Put your phone away or use apps that block social media.”

    Additional tips:

    • Use a dedicated study space
    • Keep your desk clean and organized
    • Focus on one task at a time

    Multitasking reduces efficiency and slows learning.


    Q: How do you manage fatigue during night revision?

    John Rivera: “Take power naps when needed. Even 10–20 minutes can refresh your mind.”

    Other strategies include:

    • Switch subjects when bored
    • Take regular breaks
    • Listen to calm instrumental music

    Best Night Study Routine (Step-by-Step)

    If you are wondering how to create a night study timetable, follow this simple routine:

    1. Plan your session (10 minutes): List topics to cover
    2. Start with difficult subjects: Your brain is fresher
    3. Use Pomodoro sessions: Stay focused
    4. Take breaks: Avoid burnout
    5. Review key points: Before sleeping

    This structure improves productivity and retention.


    Insights from Cognitive Science

    Understanding how the brain works can improve your study habits.

    • Memory consolidation: Happens during sleep
    • Spacing effect: Studying in intervals improves retention
    • Active recall: Strengthens memory connections

    Dr. Mitchell explains: “When you study before sleep, your brain processes and stores that information more effectively.”

    Warning: All-night cramming reduces performance and increases stress.


    Practical Night Revision Tips for Students

    • Create a consistent study routine
    • Use a study timetable
    • Stay hydrated throughout the session
    • Eat light snacks like fruits and nuts
    • Practice past papers regularly
    • Revise summaries instead of full textbooks
    • Sleep at least 7 hours daily

    These are essential study tips for students in Uganda preparing for exams.


    Common Mistakes to Avoid During Night Study

    • Studying without a plan
    • Using phones and social media
    • Skipping sleep
    • Overloading your brain with too much content
    • Not taking breaks

    Avoiding these mistakes can significantly improve your results.


    Night Revision vs Day Study: Which is Better?

    Both methods have advantages. The best option depends on your personal preference.

    • Night study: Quiet, fewer distractions
    • Day study: Higher energy levels, better alertness

    Best approach: Combine both for maximum effectiveness.


    Future Trends in Studying

    Technology is changing how students learn. Today, many learners use:

    • Flashcard apps
    • Online learning platforms
    • AI-powered study tools

    However, experts agree that discipline and consistency remain the most important factors.


    Final Expert Tips

    Dr. Mitchell: “Stay positive and manage stress. Your mental health affects your memory.”

    John Rivera: “Consistency beats cramming. Study a little every day.”


    Conclusion

    Night revision can be one of the most effective ways to prepare for exams if done correctly. By using proven techniques like active recall, proper planning, and maintaining a healthy sleep schedule, you can significantly improve your academic performance.

    Remember, success in exams is not about studying harder—it’s about studying smarter. Use these night study tips to stay focused, retain information better, and achieve your goals.

    Start tonight. Stay consistent. Succeed in your exams.


    Frequently Asked Questions (FAQs)

    Is studying at night effective?

    Yes, studying at night can be effective if you stay focused, avoid distractions, and get enough sleep.

    How can I stay awake while studying at night?

    Stay hydrated, take short breaks, exercise lightly, and avoid heavy meals.

    What is the best time to study at night?

    The best time is between 8:00 PM and midnight, when the mind is still alert.

    How long should I study at night?

    Study in sessions of 25–50 minutes with breaks in between to maintain focus.

    Is it okay to sleep after studying?

    Yes, sleeping after studying helps your brain retain information better.

  • Growing Avocado in Uganda: A Complete Guide for Farmers

    Growing Avocado in Uganda: A Complete Guide for Farmers

    Avocado farming in Uganda is booming. Farmers are discovering its huge potential. The fruit is nutritious and profitable. But growing avocado requires knowledge. You need the right techniques. This guide covers everything. From planting to selling. Let’s dive in.

    Why Grow Avocado in Uganda?

    Uganda has ideal conditions for avocados. The climate is warm. The soil is fertile. Avocado trees thrive here. Demand is high locally and internationally. Supermarkets want them. Exporters need them. You can make good money. But you must do it right.

    Avocados are healthy. They contain good fats. People love them. Uganda’s population is growing. So is the middle class. They buy more avocados. Hotels and restaurants use them. Processors make oil and cosmetics. The market is expanding fast.

    Best Avocado Varieties for Uganda

    Choose the right variety. It matters a lot. Some grow better in Uganda. Others have better yields. Here are top choices.

    Hass Avocado

    Hass is the most popular. It has a dark, bumpy skin. The flesh is creamy. It ships well. Exporters love it. It grows in many areas. But it needs care. It is a hybrid. It produces well from year three.

    Fuerte Avocado

    Fuerte is a green variety. It has smooth skin. The taste is mild. It is hardy. It resists cold better. It fruits earlier than Hass. But it doesn’t store long. Sell it quickly.

    Booth 8 and Reed

    These are less common. But they do well. Booth 8 is large. Reed is round. Both have good flavor. They are good for local markets. Try them if you have space.

    Climate and Soil Requirements

    Avocados need specific conditions. First, temperature. They like 20-30°C. Too hot or cold stresses them. Second, rainfall. They need 1000-2000 mm per year. Too much rain causes root rot. Too little reduces yield. Irrigate if needed.

    Soil is critical. Avocados need well-drained soil. Sandy loam is best. Heavy clay holds water. That kills roots. Soil pH should be 5.5-6.5. Test your soil first. Add lime if too acidic. Add organic matter for fertility.

    Land Preparation and Planting

    Prepare land early. Clear bushes and weeds. Plow deeply. Remove stones. Mark planting holes. Space them 8-10 meters apart. That gives room for growth. Dig holes 60 cm wide and 60 cm deep. Mix topsoil with manure. Fill the hole partly.

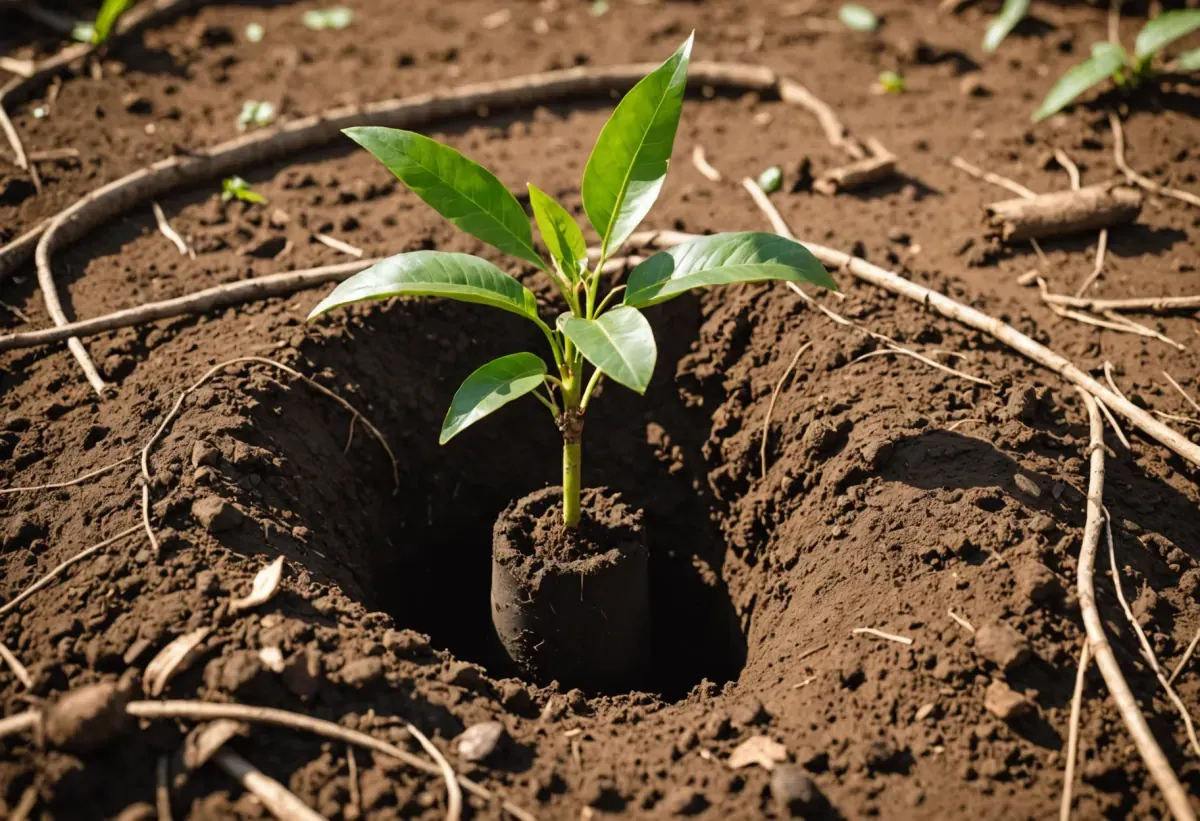
    Plant at the start of rains. That gives trees time to establish. Remove the seedling from its pot. Place it in the hole. The graft union should be above soil. Fill with soil. Firm it gently. Water well. Mulch around the tree. This keeps moisture.

    Caring for Young Trees

    Young trees need attention. Water them regularly. Especially in dry spells. But don’t overwater. Weeds compete for nutrients. Remove them by hand or mulch. Apply fertilizer after three months. Use a balanced one like NPK 17-17-17. Apply again after six months.

    Prune young trees lightly. Remove dead branches. Shape the tree. This helps air circulation. Stake the tree if it leans. Protect from animals. Use fencing if needed. Check for pests often.

    Fertilization and Irrigation

    Avocados need nutrients. Nitrogen is key for growth. Phosphorus for roots. Potassium for fruit. Use organic manure yearly. Apply 20-30 kg per tree. Supplement with chemical fertilizer. Follow soil test advice. Apply in two splits per year.

    Irrigation boosts yield. Drip irrigation is efficient. It saves water. Water deeply once a week. Increase during fruiting. Reduce after harvest. Mulching reduces evaporation. Use grass or leaves.

    Pest and Disease Management

    Pests attack avocados. Common ones include thrips. They damage leaves and fruit. Use neem oil or insecticidal soap. Mites cause yellowing. Spray sulfur. Fruit flies lay eggs in fruit. Hang traps. Use bait sprays.

    Diseases are serious. Root rot is deadly. It comes from poor drainage. Plant on mounds. Use resistant rootstocks. Anthracnose causes fruit spots. Prune for air flow. Spray copper fungicide. Cercospora causes leaf spots. Remove infected leaves. Apply fungicide.

    Pruning and Training

    Pruning shapes the tree. It also improves yield. Prune during dry season. Remove low branches. They touch the ground. Cut crossing branches. Thin the canopy. Let light in. This reduces disease. Use sharp tools. Disinfect them. Seal large cuts with paint.

    Training young trees is key. Choose a central leader. Let it grow tall. Remove competing branches. This gives a strong structure. It supports heavy fruit. It also makes harvesting easier.

    Pollination and Fruit Set

    Avocado flowers are tricky. They open twice. First as female. Then as male. This prevents self-pollination. Plant different varieties together. They cross-pollinate. Bees help. Keep beehives nearby. Good pollination means more fruit.

    Fruit set can be low. Stress reduces it. Water and feed well. Avoid heavy pruning during flowering. Thin fruit if too many. It improves size. Remove misshapen fruits.

    Harvesting Avocados

    Avocados don’t ripen on tree. They mature but stay hard. Harvest when they reach size. Color changes for some varieties. For Hass, skin turns from green to purplish-black. For Fuerte, it stays green but becomes dull. Pick one and test. It should be firm but yield slightly.

    Harvest carefully. Use a picking pole. Or climb with a bag. Don’t drop fruit. They bruise easily. Cut the stem short. Leave a small piece. This prevents rot. Place in crates. Don’t pile too high.

    Post-Harvest Handling

    Handle avocados gently. Sort by size and quality. Remove damaged ones. Wash if dirty. Dry them. Store at 5-7°C. This slows ripening. Keep humidity high. Use plastic liners. Ethylene gas ripens them. Sell or ripen as needed.

    For export, follow standards. Wash with chlorine. Grade for export. Pack in boxes. Label properly. Ship quickly. Air freight is best. Sea freight needs controlled atmosphere.

    Marketing Your Avocados

    Find buyers early. Local markets need fresh fruit. Supermarkets want consistent supply. Hotels and restaurants buy regularly. Processors need large quantities. Exporters look for quality. Join a farmers’ group. They can negotiate better prices.

    Price fluctuates. Harvest season brings lower prices. Off-season is higher. Store fruit to sell later. But that requires cold storage. Build relationships with buyers. Deliver on time. Maintain quality. Your reputation matters.

    Costs and Profits

    Starting costs are high. You need land, seedlings, and equipment. Each tree costs about 10,000 UGX. Prepare land, dig holes, buy fertilizer. Total for one acre is around 3-5 million UGX. But trees produce for decades. Annual costs are lower. Pruning, fertilizing, pest control, harvesting. About 2 million per acre.

    Income is good. A mature tree yields 100-200 fruits per year. At 1000 UGX each, that’s 100,000 per tree. An acre has 60 trees. That’s 6 million gross. Profits can be 3-4 million per acre. With good management, you earn more.

    Common Challenges

    Avocado farming has risks. Pests and diseases are major. Climate change brings unpredictable weather. Droughts and floods harm trees. Poor soil fertility reduces yield. Lack of knowledge leads to mistakes. Market prices can drop. But you can overcome these. Learn continuously. Consult experts. Invest in good practices.

    Success Stories

    Many Ugandans succeed. John from Mukono started with 50 trees. Now he has 200. He exports to Kenya. He earns 10 million per year. Grace from Mbarara grows Hass. She supplies supermarkets. Her farm is model. She trains other women. They form a cooperative. They get better prices.

    These stories show potential. With hard work, you can too. Start small. Learn as you grow. Expand gradually. Avocado farming is a journey. But it rewards patience.

    Conclusion

    Avocado farming in Uganda is promising. It offers good income. It improves nutrition. It creates jobs. But success requires knowledge. Choose the right variety. Prepare land well. Care for trees. Manage pests. Harvest correctly. Market wisely. Follow this guide. You will succeed. Start your avocado farm today. The future is green.

  • Dairy Farming in Uganda: Breeds, Feeding and Profitability

    Dairy Farming in Uganda: Breeds, Feeding and Profitability

    Dairy farming in Uganda means keeping cattle that are milked for sale or for home use, and it is one of the most practical Senior 3 Agriculture topics because its numbers are easy to compare. Uganda kept 14.5 million cattle in the 2021 national livestock census and produced about 3.7 billion litres of milk that year (UBOS, National Livestock Census Report 2021 ).

    The gap between a pure Ankole cow and a Friesian cross explains most of what a learner must understand about breeds, feeding and profit. These notes follow the NCDC syllabus and pair with the wider Senior 3 Agriculture notes hub.

    Friesian-cross dairy cow standing in a shaded zero-grazing unit on a Ugandan smallholder farm
    A dairy cow in a Ugandan zero-grazing unit, the intensive system that protects animals, concentrates manure and keeps milking close to the parlour.

    Breeds of dairy cattle used in Uganda

    Uganda’s dairy herd rests on two groups: indigenous cattle and exotic or cross-bred cattle. The NCDC Senior 3 Agriculture syllabus names seven breeds a learner must distinguish — Ankole, Sanga, Zebu, Boran, Friesian, Jersey and Guernsey. The exotic and cross-bred animals carry almost all commercial milk because they yield far more per cow.

    Indigenous cattle made up 11.2 million of Uganda’s 14.5 million cattle, or 77 percent, in 2021; exotic and cross-bred cattle made up 3.3 million, or 23 percent (UBOS, 2021). Within the indigenous herd, 78.2 percent are Zebu or Nganda and 21.8 percent Ankole long-horned, while about 90 percent of exotic cattle are kept for dairy.

    The economics of dairy farming in Uganda rest on this breed divide, because yield per cow sets the revenue side of every profit sum.

    Breed or typeGroupCharacteristics documented for Uganda
    Ankole (long-horned Sanga)IndigenousLong horns, small hump, large body, long legs; about 2.4 litres a day on Kiruhura farms.
    SangaGroup nameThe long-horned group; in Uganda the Sanga is the Ankole long-horned cow.
    East African short-horn ZebuIndigenousShort horns, large thoracic hump, small body, short legs.
    NgandaIndigenousIntermediate horns, hump and body; found in central Uganda.
    Zebu (Nkedi / Karamojong)IndigenousSmall, stocky short-horned Zebu of the north and east.
    BoranExotic (beef)Kenyan-born; listed as a beef breed in NAGRC&DB’s 2023 catalogue.
    Friesian (Holstein)Exotic (dairy)High-yielding dairy breed; crossed with Ankole to raise milk yield.
    JerseyExotic (dairy)Dairy breed; Kenyan-born bulls in NAGRC&DB’s 2023 catalogue.
    GuernseyExotic (dairy)Dairy breed; the only Uganda-bred bull (BRIGHT) in the 2023 catalogue.
    SahiwalExoticNamed on the NAGRC&DB 2023 catalogue cover with Friesian, Ayrshire and Boran.
    AyrshireExotic (dairy)Named on the NAGRC&DB 2023 catalogue cover.
    Friesian-Ankole (HF50%)Cross-bredAbout 11.2 litres a day on Kiruhura farms; the more suited cross.
    Friesian-Ankole (HF>50%)Cross-bredAbout 10.4 litres a day on Kiruhura farms.
    • Sanga and Ankole are one: The syllabus lists both, but Sanga is the group name, and in Uganda the Sanga is the Ankole long-horned cow.
    • Adaptability: Indigenous breeds are heat-tolerant, partly disease-resistant, and survive long feed and water shortages (FAO AGRI 15).
    • Why farmers keep Ankole: For cultural reasons, as a drought and disease buffer, and for income from selling live animals.
    • Crossbreeding is fast and haphazard: Land is being fenced off and Ankole crossed with Friesian to raise yields, often without a plan.
    • Guernsey is bred in Uganda: The only Uganda-bred bull in NAGRC&DB’s 2023 catalogue is the Guernsey BRIGHT.
    • Boran is beef: Boran bulls in the national catalogue are Kenyan-born and beef, so Boran is not an indigenous dairy breed.

    For how a farmer picks a good dairy animal by eye, read the companion notes on breeds and physical selection of production cattle. This topic sits inside the Senior 3 Agriculture cattle production notes pillar.

    Common mistake: writing “Ankole cattle are 50 percent of Uganda’s herd.” That is 1990s data. UBOS 2021 puts Ankole long-horned at 21.8 percent of indigenous cattle — about 2.4 million of 11.2 million.

    Feeding dairy cattle for milk yield

    Feeding is the lever that most directly controls milk yield in dairy farming in Uganda, and the evidence is dramatic. On Kiruhura farms a pure Ankole cow gave about 2.4 litres a day, a Friesian-Ankole cross (HF50%) about 11.2 litres, and a higher-grade cross 10.4 litres (Galukande et al., Tropentag 2008). The gap is feed and management, not luck. For the ration maths, see the notes on cattle nutrition and feed rations.

    Young napier grass fodder being cut in a dairy farm plot in Uganda
    Napier grass, Uganda’s main fodder grass, is richest in protein when cut young at about one metre tall.
    1. Balanced ration: A milking cow needs roughage for the rumen plus concentrate for energy and protein, never one feed alone.
    2. Roughage first: Grasses supply 5-19 percent crude protein while legumes supply 15-34 percent, so a legume mixed into grass lifts the diet’s protein (ILRI/EADD, 2012).
    3. Napier cutting height: Napier cut at 30 cm is about 9.2 percent crude protein, but over 2 m it drops to about 5.0 percent, so harvest at 1 m or every 6-8 weeks.
    4. Protein concentrates: Cottonseed cake carries about 33.0 percent crude protein and wheat bran about 17.8 percent, on a dry-matter basis (ILRI/EADD, 2012).
    5. Energy feeds: Molasses is an energy feed, not a protein feed, and works best as a carrier for urea and minerals.
    6. Local ingredients: MAAIF’s 2004 Animal Feeds Policy names maize, sorghum, cassava, sweet potatoes, cottonseed cake, soybean and fish as feed ingredients.
    7. Dairy meal standard: A basic dairy meal needs at least 15.5 percent crude protein and calf booster at least 17.5 percent (ILRI Manual 59, 2022).
    8. Calf feeding: A calf needs the richer 17.5 percent-protein booster, while a lactating cow is kept on the 15.5 percent dairy meal.
    9. Water: UBOS’s 2021 census found keepers give cattle an average of only 8.3 litres a day — survey practice, not a full requirement.
    10. Mineral lick: A zero-grazing unit includes a mineral lick box, because salt and trace minerals are part of the feeding plan.
    11. Legume supplements: Calliandra leaves carry about 26.3 percent and sesbania about 28.2 percent crude protein, so fodder trees are planted.
    12. Sweet potato vines: These supply about 19.2 percent crude protein and can be fed up to about 15 kg fresh per cow per day (ILRI/EADD, 2012).
    13. Adulteration risk: Maize bran is commonly adulterated with sawdust, husks and cassava, so check feed quality rather than trust appearance (ILRI Manual 59).
    Stage of productionMain feed needsVerified anchor
    Calf (pre-weaning)Milk plus a starter and calf booster feedCalf booster minimum 17.5% crude protein (ILRI Manual 59, 2022).
    Weaned calf / heiferGood roughage plus a legumeLegumes are 15-34% crude protein, grasses 5-19%.
    Dry cowQuality roughage plus a mineral lickA mineral lick box is a standard unit component.
    Early lactationConcentrate plus young napierNapier at 1 m is about 7.0% crude protein; over 2 m about 5.0%.
    Mid to late lactationNapier plus a legume plus branMaize bran 9.4% and cottonseed cake 33.0% crude protein.
    Milking cow (daily)Roughage plus concentrate plus waterBasic dairy meal minimum 15.5% crude protein.
    All stagesClean water every dayUBOS 2021: keepers give an average 8.3 litres a day.

    Exam tip: In a Pearson-square question you are usually balancing protein, so state every crude-protein value on the same basis — dry matter — before you calculate. Mixing “as fed” and “% DM” numbers is the commonest S3 feed error.

    Housing and milking hygiene

    Housing and milking hygiene decide whether the milk a cow produces is safe to sell, and most Ugandan dairy cattle lack even basic shelter. Only 32.5 percent of cattle-keeping households had a shelter or enclosure for their cattle in 2021 (UBOS). The standard answer is the zero-grazing unit Uganda’s National Dairy Development Project designed. Clean handling is covered in the notes on hygienic milking techniques.

    Iron-roofed zero-grazing cattle unit with a feed trough on a Ugandan farm
    A partly roofed zero-grazing unit, with a roofed sleeping area and an open walking area that slopes to drain.
    1. Zero-grazing unit: A typical unit has a sleeping area, walking area, feed, water and mineral-lick troughs, a milking area and a manure pit (NDDP/ILRI).
    2. Partly roofed: The sleeping area, milking parlour and calf pens must be roofed; the walking area need not be, so a unit is partly roofed.
    3. Roofing materials: Iron sheets or thatch (grass or makuti) are both accepted; galvanised sheets are made to Uganda Standard US EAS 11:2013.
    4. Floor choice: The sleeping area may be soft earth or concrete with bedding, while the walking area, milking place and calf pen should be concrete.
    5. Concrete ratio: Uganda’s specification mixes 1 bag cement with 2 wheelbarrows sand and 3 wheelbarrows ballast, and the floor needs two weeks to cure.
    6. Slope and grip: The walking floor slopes away from the troughs and sleeping area, and its surface is roughened so cows do not slip.
    7. Ventilation: A unit is well ventilated but protected from wind, rain and direct sunshine, which prevents coughs, colds and stress.
    8. Termite protection: All timber in the unit is treated against termites using anti-termite chemicals or old engine oil.
    9. Movable neck-pole: The sleeping pen’s length is adjusted with a movable neck-pole, so one structure fits cows of different sizes.
    10. Strip cup: The syllabus requires detecting milk abnormalities using a strip cup, so checking milk is a skill, not an option.
    11. Clean milk production: Milking techniques and clean-milk production are their own syllabus outcome, because clean handling keeps milk saleable.
    12. Dairy law: The Dairy Development Authority Act 1998 licenses milk processors, exporters, importers and collection centres and regulates dairy quality.
    13. Milking frequency: On Ugandan farms all Ankole are milked once a day, while crossbreds are milked once or twice (Tropentag 2008).

    Common mistake: quoting “a cow needs 10 square metres of barn space” in an exam. No Ugandan source verifies a per-animal floor area for cattle — the NDDP specification gives the five-cubicle unit and its adjustable neck-pole, so describe those instead.

    Common dairy cattle diseases and control

    Disease is the biggest controllable cost in dairy farming in Uganda, and ticks lead the list. East Coast fever, spread by the brown ear tick, is the most prevalent and economically important tick-borne disease, and Uganda loses over USD 1.1 billion a year to ticks and tick-borne diseases (Kasaija et al., 2021). The syllabus fixes the diseases to know: red water, heartwater, foot and mouth disease, anthrax, roundworm and ticks.

    DiseaseCause or spreadControl in Uganda
    East Coast feverProtozoan Theileria parva, spread by the brown ear tickAcaricide tick control, ECF vaccination, integrated control.
    Red water (babesiosis)Tick-borne blood parasiteAcaricide tick control.
    Heartwater (cowdriosis)Tick-borne diseaseAcaricide tick control.
    AnaplasmosisTick-borne diseaseAcaricide tick control.
    Foot and mouth diseaseVirus; direct contact, aerosols and open marketsCompulsory twice-yearly vaccination, quarantine, movement control.
    AnthraxBacterium; infected carcassesLivestock vaccination, report deaths, never eat dead cattle.
    Roundworm (gut worms)Worm eggs and larvae on pastureStrategic deworming and grazing management.
    Ticks (brown ear tick)Parasite and disease vectorAcaricides, but resistance is spreading; only 11.3% of households own a spray pump.
    BrucellosisDeclared disease (SI 38-2); also a human riskTesting, culling and careful handling.
    Lumpy skin diseaseDeclared disease (SI 38-2)Reporting and movement control under the law.
    Acaricide resistanceSelected by intensive sprayingIntegrated tick control, vaccination, resistant breeds.
    Notifiable diseasesDeclared under the Animal Diseases Act, Cap. 38Owners must report any diseased animal to the nearest veterinary officer.
    Movement-spread diseaseInfected animals moved between districtsPermits, quarantine, and no movement of live animals at night.
    • Tick control is primary: The main Ugandan method to control tick-borne diseases, especially East Coast fever, is intensive tick control with acaricides.
    • Resistance problem: Intensive acaricide pressure has selected resistant ticks, so vaccination and integrated control are also needed (Kasaija et al., 2021).
    • FMD is endemic: Uganda has been an endemic foot-and-mouth-disease country since 1953, with serotypes O, A, SAT 1 and SAT 2 recorded from 2001 to 2024.
    • Vaccination is compulsory: About 44.5 million susceptible animals are to be vaccinated twice a year against FMD, and farmers pay per animal.
    • Quarantine is district-wide: During an FMD outbreak, quarantine in Uganda covers the entire district, not just the affected farm.
    • Report every death: Under the Animal Diseases Act (Cap. 38), owners must report any diseased animal, and moving live animals at night is prohibited.
    • Deworming reinfection: A Ugandan calf study found worm egg counts rose within three weeks of deworming, because calves ingest larvae while grazing.

    Exam tip: The syllabus asks for “red water” and “heart water” as two separate words. Red water is babesiosis and heartwater is cowdriosis. Both are tick-borne, so the control answer is the same — acaricide tick control — but name both diseases separately.

    Costs and profitability of dairy farming

    Profitability in dairy farming in Uganda is the difference between what a cow earns in milk and what it costs to feed, house and protect her, and the breed choice sets the size of both numbers. A Kiruhura Ankole at about 2.4 litres a day earns far less per litre than a Friesian cross at about 11.2 litres, but the cross costs more to feed and protect.

    No published shilling price list exists, so the cost table is illustrative.

    Cost itemWhat it coversWhy it is counted
    Breeding stockBuying a heifer or cow, or semen and AI serviceThe breed choice fixes the yield ceiling.
    Feed — roughageNapier, hay, silage, pastureThe largest running cost on most dairy units.
    Feed — concentrateDairy meal, bran, cottonseed cakeNeeded to lift yield above a roughage-only level.
    MineralsMineral lick and saltPart of the balanced ration.
    WaterTrough water, especially in the dry seasonMilk is mostly water, so supply is a cost.
    HousingPoles, iron sheets or thatch, cement, sand, ballastA five-cubicle unit lists quantities, not prices.
    Veterinary careVaccines, acaricides, dewormers, vet feesDisease is the biggest preventable loss.
    LabourFeeding, milking, cleaningZero grazing has a high labour requirement.
    EquipmentSpray pump, troughs, strip cupOnly 11.3% of households own a spray pump.
    Transport and marketingMoving milk to buyers, cooling itQuality and distance change the price received.
    Record-keepingRegisters, tags, record cardsNeeded to know which cow pays for itself.
    Finance costLoan interest, e.g. the ACF at 12% fixedBorrowing for stock or housing adds a cost.
    InsuranceLivestock cover, e.g. the UAISInsures against death and disease loss.
    • Feed dominates: Feed is the biggest expense, so growing your own napier and legumes cuts the largest single cost.
    • Yield gap is the profit story: The 2.4-to-11.2 litres-a-day gap between Ankole and Friesian-cross cows is the clearest argument for careful crossbreeding.
    • Affordable credit exists: The Agricultural Credit Facility lends at up to 12 percent a year fixed, with a Block Allocation line for groups and SACCOs.
    • Insurance is subsidised: The Uganda Agricultural Insurance Scheme covers cattle, with a capped 6 percent premium and about 2.5 percent effective after subsidy.
    • Tax incentives: Animal feeds and processed milk are VAT-exempt, while seeds, fertilisers, pesticides and hoes are zero-rated (URA, FY 2025/26).
    • Record-keeping pays: Records keep input costs visible and support deductions, and the syllabus lists record-keeping as an outcome.

    Common mistake: presenting a made-up shilling price as a market fact. Uganda’s official data gives quantities and index numbers, not shilling prices per bag or per sheet, so label every budget line “illustrative” and price it from a named market and date.

    Frequently asked questions about dairy farming in Uganda

    Which dairy cattle breed gives the most milk in Uganda?

    Friesian-Ankole crosses give the most. On 18 Kiruhura farms, a pure Ankole cow gave about 2.4 litres a day, a 50 percent Friesian cross about 11.2 litres, and a higher-grade cross 10.4 litres (Galukande et al., 2008). The 50 percent cross suits the local environment best.

    How much milk does Uganda produce in a year?

    Uganda produced about 3.7 billion litres of milk in 2021, or 71.7 million litres a week, up from 667.5 million litres in 2008 — a five-fold increase (UBOS, National Livestock Census 2021). Ankole sub-region alone contributed about 1.2 billion litres.

    What do I feed a dairy cow to increase milk?

    Feed roughage such as napier cut at one metre, plus a concentrate like dairy meal and a protein source such as cottonseed cake. Napier at 30 cm is 9.2 percent crude protein but over 2 m falls to 5.0 percent, so cut young. Add clean water and a mineral lick.

    Why do dairy cows get sick from ticks?

    Ticks carry East Coast fever, the most economically important tick-borne disease in Uganda, plus red water, heartwater and anaplasmosis. Uganda loses over USD 1.1 billion a year to ticks and tick-borne diseases (Kasaija et al., 2021). Acaricides are the main control.

    Is dairy farming profitable in Uganda?

    It can be, if a farmer closes the yield gap with crossbred cows and controls feed and disease costs. Feed is the biggest expense, so growing napier and legumes helps. Credit is available at up to 12 percent a year through the Agricultural Credit Facility.

    Which syllabus topic covers dairy farming?

    Dairy farming sits in the Senior 3 Agriculture “Cattle production” topic, worth 48 periods in Term 1 of the NCDC syllabus. It covers breeds, feeding, housing, disease control and milking, with outcomes on records, strip-cup checks and clean-milk production.

    Key terms and revision summary

    Use this glossary to lock the terms, then attempt the exam-style questions that follow.

    TermMeaning
    Zero grazingKeeping cattle in a unit where feed is brought to them instead of roaming to graze.
    CrossbreedingMating two breeds, such as Ankole and Friesian, to combine hardiness and yield.
    Crude proteinA feed’s nitrogen content expressed as protein, measured on a dry-matter basis.
    RoughageBulky, fibrous feed such as napier, hay and silage that keeps the rumen working.
    ConcentrateAn energy- or protein-rich feed such as dairy meal, bran or cottonseed cake.
    Strip cupA cup used to detect milk abnormalities before and during milking.
    Notifiable diseaseA disease an owner must report to a veterinary officer under the law.
    QuarantineA restriction on moving animals and products out of an infected area.
    AcaricideA chemical applied to control ticks on cattle.

    Exam-style questions

    1. Distinguish between Ankole and Friesian cattle, and explain why farmers cross them. Outline: Ankole is indigenous, long-horned and heat-tolerant but yields about 2.4 litres a day; Friesian is an exotic dairy breed with a much higher yield. Crossbreeding gives hardiness plus higher milk — about 11.2 litres a day for a 50 percent cross.

    2. State four diseases of cattle in Uganda and one control measure for each. Outline: East Coast fever (acaricide and vaccination), foot and mouth disease (twice-yearly vaccination), anthrax (vaccination and reporting deaths), roundworm (strategic deworming).

    3. A farmer feeds napier grass cut at 2 m. Explain the effect on milk yield and how to improve it. Outline: 2 m napier is only about 5.0 percent crude protein against 9.2 percent at 30 cm, so low protein limits milk.

    Harvest at 1 m or every 6-8 weeks and add a legume.

    4. Why is record-keeping important in a dairy unit? Outline: Records track yield, feed, disease and cost, so a farmer can cull unprofitable cows and plan. It is syllabus outcome 3.1(l) and supports tax deductions.

    Get these five sections right and you can answer any Senior 3 question on dairy farming in Uganda.

  • Carrot Farming in Uganda: A Guide to Profitable Growth

    Carrot Farming in Uganda: A Guide to Profitable Growth

    Carrot Farming in Uganda: A Guide to Profitable Growth

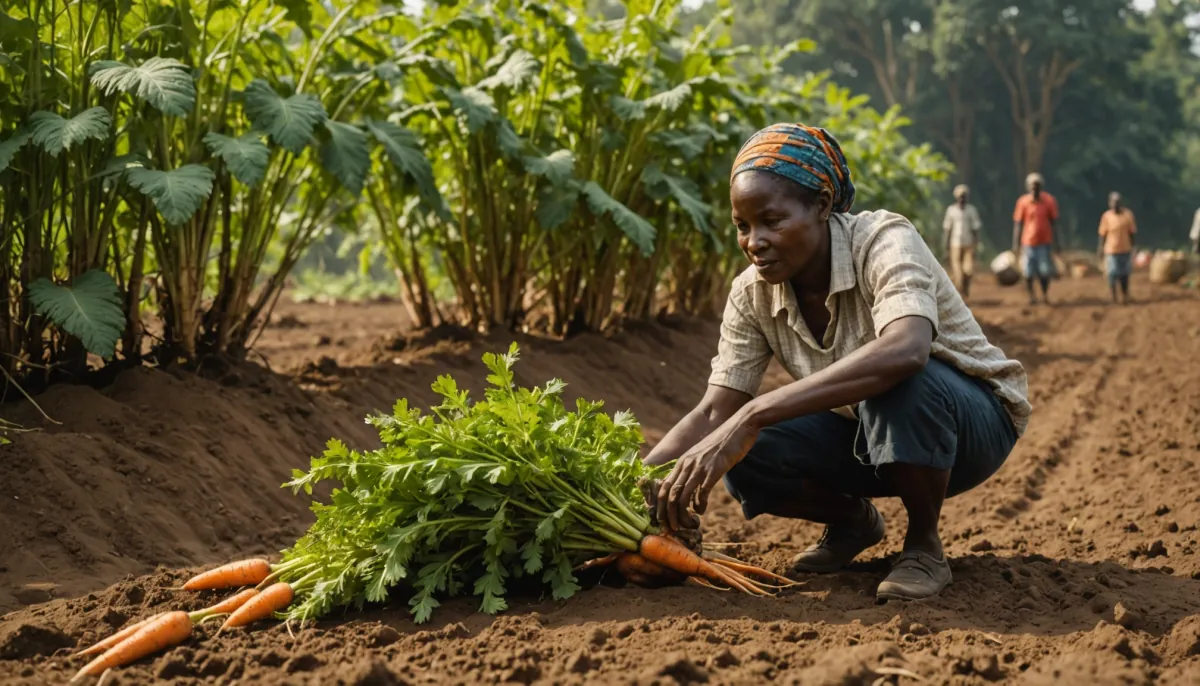
    Carrots are a popular vegetable in Uganda. They add color and nutrition to meals. Farmers across the country are discovering their profit potential. But is growing carrots really profitable? The answer is yes, with the right approach. This guide will show you how.

    Why Carrots Are a Great Crop for Ugandan Farmers

    Carrots have a short growing cycle. You can harvest them in just 3 to 4 months. This means you can have multiple harvests per year. They also have a steady demand. Hotels, restaurants, and families all need carrots. The market is always there.

    Carrots grow well in many parts of Uganda. The cool highlands are ideal. But with proper care, they can thrive in warmer areas too. They are also a high-value crop. A small plot can earn you good money. Many farmers are now switching to carrots from traditional crops.

    Understanding the Costs of Carrot Farming

    To make profit, you must know your costs. Let’s break them down. First is land preparation. You need to till the soil well. This costs about 50,000 to 100,000 UGX per acre. Next is seeds. Good carrot seeds cost around 20,000 UGX per acre. You also need fertilizer. Organic manure is cheap and effective. It costs about 30,000 UGX per acre.

    Labor is another cost. Planting, weeding, and harvesting require workers. You might spend 100,000 UGX per acre on labor. Irrigation is important in dry seasons. A simple drip system can cost 200,000 UGX. But you can use watering cans for small plots. Pesticides may be needed for pests like aphids. Budget 20,000 UGX for pest control.

    Total startup costs for one acre are around 420,000 UGX. This is a rough estimate. Actual costs vary by location and scale. But it gives you an idea. Remember, you can reduce costs by using family labor. Also, make your own compost to save money.

    Potential Yields and Revenue

    Carrot yields depend on variety and care. With good practices, you can get 10 to 15 tons per acre. That’s 10,000 to 15,000 kilograms. The market price for carrots varies. In Kampala, a kilo sells for 1,000 to 2,000 UGX. In rural areas, it’s lower. Let’s use an average of 1,500 UGX per kilo.

    If you harvest 12 tons per acre, your revenue is 18 million UGX. That’s 12,000 kg x 1,500 UGX. Subtract your costs of 420,000 UGX. Your profit is over 17 million UGX per acre. That’s a huge return! But remember, prices can drop. Also, you may have losses from pests or diseases. Still, the potential is clear.

    Choosing the Right Carrot Varieties

    Not all carrot varieties are the same. For Uganda, choose varieties that suit the climate. Nantes varieties are popular. They are sweet and grow well in cool areas. Chantenay varieties are also good. They do well in heavier soils. Imperator varieties have long roots. They need deep, sandy soil.

    Local varieties like ‘Uganda Local’ are also available. They are hardy and disease-resistant. But they may have lower yields. Hybrid varieties like ‘Brasilia’ give high yields. They are resistant to diseases. Talk to your local agricultural officer. Get advice on the best variety for your area.

    Preparing Your Land for Carrots

    Carrots need loose, well-drained soil. Heavy clay soil causes stunted roots. Prepare your land early. Plow and harrow to break clods. Remove stones and weeds. Add well-rotted manure or compost. Mix it into the soil two weeks before planting.

    Make raised beds if your area has heavy rain. This improves drainage. Beds should be 1 meter wide. Leave paths between beds for walking. This prevents soil compaction. Carrots need full sun. Choose a site with at least 6 hours of direct sunlight daily.

    Planting Carrots the Right Way

    Plant carrots directly in the field. They do not transplant well. Sow seeds in shallow furrows. The furrows should be 1 cm deep. Space rows 20 cm apart. Cover seeds lightly with soil. Water gently to avoid washing seeds away.

    Carrot seeds are tiny. Mix them with sand for even sowing. This prevents overcrowding. After germination, thin the seedlings. Leave 5 cm between plants. Thinning is important. It gives roots room to grow. Crowded carrots become small and twisted.

    Watering and Irrigation Tips

    Carrots need consistent moisture. Dry soil causes tough roots. Water regularly, especially during germination. Use drip irrigation if possible. It saves water and reduces disease. If using a watering can, water deeply. Aim for 1 inch of water per week.

    In dry seasons, water more often. Mulching helps retain moisture. Use grass or straw around plants. This also suppresses weeds. Avoid overwatering. It can cause root rot. Check soil moisture by feeling it. If it’s dry an inch below the surface, water.

    Fertilizing for Maximum Yield

    Carrots are heavy feeders. They need nutrients for healthy roots. Apply a balanced fertilizer like NPK 10-10-10. Use 200 kg per acre. Apply half at planting and half after 4 weeks. Organic farmers can use compost tea. Apply every 2 weeks during growth.

    Avoid too much nitrogen. It causes lush leaves but small roots. Potassium and phosphorus are key for root development. Bone meal is a good source of phosphorus. Wood ash provides potassium. Test your soil to know its needs. This saves money and improves yields.

    Weed Control in Carrot Fields

    Weeds compete with carrots for nutrients. They also harbor pests. Keep your field weed-free. Hand weeding is effective. Do it carefully to avoid damaging roots. Mulching also controls weeds. Use a thick layer of organic mulch.

    You can use pre-emergence herbicides. But follow instructions carefully. Carrots are sensitive to chemicals. Always test on a small area first. Crop rotation helps reduce weeds. Plant carrots after maize or beans. These crops suppress different weeds.

    Pest and Disease Management

    Common pests include aphids and carrot flies. Aphids suck sap from leaves. They spread viruses. Use neem oil or insecticidal soap. Carrot flies lay eggs near roots. Their larvae tunnel into roots. Use row covers to protect young plants. Rotate crops to break pest cycles.

    Diseases like leaf blight and root rot can occur. Leaf blight causes yellow spots. Use fungicides if severe. Root rot happens in wet soil. Improve drainage and avoid overwatering. Plant resistant varieties. Remove infected plants immediately.

    Harvesting and Post-Harvest Handling

    Carrots are ready 3 to 4 months after planting. Look for bright orange color and good size. Loosen soil around roots before pulling. Harvest in the morning when it’s cool. Remove tops immediately to prevent moisture loss.

    Wash carrots gently to remove soil. Sort them by size and quality. Grade A carrots are straight and uniform. They fetch higher prices. Grade B carrots are smaller or misshapen. Sell them at lower prices or process them. Store in a cool, shaded place. Carrots keep for weeks if stored properly.

    Marketing Your Carrots for Profit

    Know your market before planting. Contact local traders and supermarkets. Join farmer groups to bulk sell. This gives you bargaining power. Sell directly to consumers at farmers’ markets. You get higher prices this way.

    Consider value addition. Process carrots into juice or chips. This increases shelf life and profit. Package attractively. Use clean bags with labels. Build relationships with buyers. Consistent quality brings repeat customers. Use social media to advertise.

    Real Farmer Success Stories

    Sarah from Mbale started with half an acre. She used organic methods. Her first harvest was 6 tons. She earned 9 million UGX. Now she farms 2 acres. Her profit is over 30 million UGX per season. She supplies hotels in Kampala.

    John in Kabale grows carrots on 1 acre. He uses drip irrigation. His yield is 15 tons per acre. He sells to exporters. His profit is 20 million UGX per season. He plans to expand to 5 acres. These stories show the potential.

    Common Mistakes to Avoid

    Many beginners plant too many seeds. This leads to overcrowding. Always thin seedlings. Another mistake is poor soil preparation. Carrots need loose soil. Ignoring pests can ruin your crop. Monitor your field regularly. Also, don’t harvest too late. Overmature carrots become woody.

    Some farmers skip marketing research. They grow without a buyer. This leads to low prices. Always have a market plan. Finally, don’t ignore soil health. Test your soil and amend it. Healthy soil gives healthy carrots.

    Scaling Up Your Carrot Farm

    Start small and learn. Master the basics on a quarter acre. Then expand gradually. Invest in irrigation for dry seasons. Use machinery for land preparation. This saves labor costs. Hire a farm manager if you have large acreage. Keep records of costs and yields. This helps you make better decisions.

    Consider contract farming. Some companies offer seeds and buy the harvest. This reduces risk. Also, explore export markets. Uganda exports carrots to neighboring countries. Meet quality standards to access these markets.

    Conclusion: Is Carrot Farming Profitable in Uganda?

    Yes, carrot farming is very profitable in Uganda. With low startup costs and high returns, it offers great opportunities. But success requires planning and hard work. You need good land, quality seeds, and proper care. Marketing is also key. Find buyers before you plant.

    Start small and learn as you grow. Use the tips in this guide. Learn from successful farmers. With dedication, you can earn a good income from carrots. The demand for carrots is growing. Get started today and reap the benefits.

  • Mimea na Mazao ya Mimea – Mwongozo

    Plants and Plant Products – A Complete Beginner’s Guide

    Mimea ni viumbe muhimu sana katika maisha ya binadamu, wanyama, na mazingira kwa ujumla. Katika lugha ya Kiswahili, kujua majina ya mimea na mazao yao husaidia wanafunzi kuelewa mada za chakula, kilimo, mazingira, na matumizi ya kila siku. Blog hii itakusaidia kujifunza kwa urahisi kwa kutumia mifano mingi, maelezo mafupi, na tafsiri za Kiingereza.


    1. Mimea ni nini? (What are plants?)

    Mimea ni viumbe hai vinavyoota ardhini na hutengeneza chakula chao kwa kutumia mwanga wa jua, maji, na hewa.
    Plants grow from the soil and make their own food using sunlight, water, and air.

    Mifano ya mimea (Examples of plants):

    1. Mti (tree)
    2. Maua (flowers)
    3. Nyasi (grass)
    4. Mgomba (banana plant)
    5. Mlonge (moringa)
    6. Mtumbu (sugarcane plant)
    7. Mchicha (amaranth)
    8. Spinachi (spinach)
    9. Mihogo (cassava plant)
    10. Kibaruawili / aloe vera
    11. Mnaradali (hibiscus)
    12. Mlozi (almond tree)
    13. Mpera (guava plant)
    14. Mchungwa (orange tree)
    15. Mkungu wa ndizi (banana bunch plant)

    Hii ni mwanzo tu. Tutatoa mifano zaidi ya 50 ya mimea na mazao yake kadiri tunavyoendelea.


    2. Mazao ya mimea ni nini? (What are plant products?)

    Mazao ya mimea ni vitu vinavyotokana na mimea ambavyo binadamu hutumia kwa chakula, biashara, dawa, nishati, au matumizi ya nyumbani.
    Plant products are items produced by plants and used for food, medicine, energy, or household purposes.

    Aina za mazao ya mimea (Types of plant products):

    • Mazao ya chakula (food crops)
    • Mazao ya biashara (cash crops)
    • Mazao ya matunda (fruits)
    • Mazao ya mboga (vegetables)
    • Mazao ya dawa (medicinal crops)
    • Mazao ya mafuta (oil crops)
    • Mazao ya kuni na mbao (wood & timber)

    3. Mifano ya mimea na mazao yake (50+ examples)

    Hapa chini ni orodha ndefu ya mimea na mazao yake yenye tafsiri za Kiingereza kwa wanafunzi wa kiwango cha chini:

    Mimea ya chakula (Food crops)

    1. Mahindi – maize / corn
    2. Mihogo – cassava
    3. Viazi vitamu – sweet potatoes
    4. Viazi mviringo – Irish potatoes
    5. Ndizi – bananas / plantains
    6. Mpunga – rice plant
    7. Mtama – sorghum
    8. Ulezi – finger millet
    9. Ngano – wheat
    10. Shayiri – barley

    Mimea ya matunda (Fruit plants)

    1. Mpapai – papaya
    2. Mpere / mpera – guava
    3. Mtomoko – jackfruit
    4. Mwembe – mango
    5. Mchungwa – orange
    6. Mdizi-mwitu – wild banana
    7. Mfenesi – breadfruit
    8. Mkomamanga – pomegranate
    9. Mzambarau – plum
    10. Mtufaha – apple

    Mimea ya mboga (Vegetable plants)

    1. Mchicha – amaranth
    2. Spinachi – spinach
    3. Kabeji – cabbage
    4. Nyanya – tomato
    5. Kitunguu maji – onion
    6. Kitunguu saumu – garlic
    7. Pilipili hoho – bell pepper
    8. Bilinganya – eggplant / aubergine
    9. Kunde – peas
    10. Maaharage – beans

    Mimea ya dawa (Medicinal plants)

    1. Mlonge – moringa
    2. Mwarobaini – neem
    3. Mrehani – basil
    4. Tangawizi – ginger
    5. Mdalasini – cinnamon tree
    6. Aloe vera – shubiri
    7. Ukwaju – tamarind
    8. Lemongrass – mbarika
    9. Mtunduru – castor plant
    10. Mchunga mwitu – wild bitter herb

    Mimea ya mafuta (Oil crops)

    1. Alizeti – sunflower
    2. Ufuta – sesame
    3. Karakana – canola / rapeseed
    4. Miwati / coconut palm – nazi
    5. Karanga – groundnuts / peanuts

    Mimea ya biashara (Cash crops)

    1. Pamba – cotton
    2. Kahawa – coffee
    3. Tumbaku – tobacco
    4. Chai – tea plant
    5. Mpira – rubber plant
    6. Miwa – sugarcane

    Mimea ya kuni na mbao (Trees used for wood)

    1. Mninga – mahogany
    2. Misindano – pine
    3. Mikaratusi – eucalyptus
    4. Mivule – mvule tree
    5. Mkonge – sisal plant

    Hii orodha ina zaidi ya mifano 50 ya mimea na mazao ya mimea.


    4. Umuhimu wa mazao ya mimea (Importance of plant products)

    Plant products are extremely important in daily life. Hapa chini ni faida kuu za mazao ya mimea.

    A. Chanzo cha Chakula (Source of food)

    Mazao kama mahindi, mpunga, ndizi, viazi na mboga hutumiwa kama chakula cha binadamu.
    Example:

    • Mahindi hutoa unga wa ugali – Maize gives flour for ugali.

    B. Chanzo cha Pesa na Uchumi (Income and economy)

    Mazao ya biashara huuzwa kupata kipato.
    Examples:

    • Kahawa (coffee)
    • Chai (tea)
    • Pamba (cotton)

    These are major cash crops in East Africa.

    C. Chanzo cha dawa (Medicine)

    Mimea mingi hutumiwa kutengeneza dawa za asili.
    Example:

    • Mwarobaini hutibu magonjwa mbalimbali.
      (Neem treats several conditions.)

    D. Kuzuia mmomonyoko wa udongo (Preventing soil erosion)

    Miti na nyasi hushikilia udongo na kuzuia kupeperushwa na maji.

    E. Kutengeneza mavazi na bidhaa (Clothing & products)

    • Pamba → nguo
    • Mkonge → kamba
    • Mpira → viatu, mipira ya michezo
    • Mbao → samani

    F. Kutoa hewa safi (Purifying the air)

    Mimea hutoa oksijeni na kusafisha mazingira.

    G. Chanzo cha nishati (Energy)

    • Mbao
    • Mkaa
    • Biofuel kutoka miwa

    5. Sentensi za kutumia (Useful sentences + English translation)

    1. Hii ni mimea ya chakula.

    These are food crops.

    2. Mazao haya hutumika kama dawa.

    These plant products are used as medicine.

    3. Miti hutupa hewa safi.

    Trees give us clean air.

    4. Wakulima hupanda alizeti kupata mafuta.

    Farmers plant sunflower for oil.

    5. Miwa hutumika kutengeneza sukari.

    Sugarcane is used to make sugar.

    6. Chai ni zao muhimu la biashara.

    Tea is an important cash crop.

    *7. Mahindi ni chakula cha msingi katika Afrika Mashariki.

    Maize is a staple food in East Africa.


    6. Maswali ya kujifunza (Learning questions)

    1. Taja mimea mitano ya chakula.
    2. Eleza faida za mwarobaini.
    3. Je, mazao ya biashara ni yapi?
    4. Mazao ya matunda hutumika vipi?
    5. Kwa nini miti ni muhimu kwa mazingira?
    6. Toa tofauti kati ya mimea ya mboga na mimea ya matunda.
    7. Taja mimea ya dawa inayopatikana nyumbani.

    Shairi:

    Read the poem below about crops and fruits in Kiswahili.

     🌿 Mimea na Matunda: Hazina ya Dunia

    Beti ya Kwanza (Maua na Mimea)

    Mimea ni hazina, dunia yetu pambo, Huwapa binadamu pumzi na mambo, Miti mirefu sana, imesimama wima, Na majani mabichi, yanatupatia kima. Hutoa kivuli, jua likiwa kali, Hutunza udongo, lisije nenda mbali.

    Beti ya Pili (Kazi ya Mimea)

    Mizizi chini yake, inashikilia ardhi, Husaidia mvua, isipotee haridhi, Matawi hutambaa, yakawa kama dari, Hupatikana dawa, inaponya kila siri. Mazingira safi, hewa ina pato, Hutufanya tupende kuishi duniani patu.

    Beti ya Tatu (Matunda Yenye Ladha)

    Na matunda ya mboga, yenye rangi na tunda, Embe na chungwa jekundu, ladha yake unda, Ndizi tamu sana, hujaa nguvu tele, Nanasi la Manzese, likatuvutia jele. Hufurahisha koo, na kupendezesha afya, Vitamini vingi, siyo tu kwa kafya.

    Beti ya Nne (Shukrani na Uhifadhi)

    Tutunze mimea, kwani ndiyo maisha, Tusiikate ovyo, tukajiletea ghisha, Tupande na kumwagilia, kwa upendo wote, Kupata matunda, yenye baraka zote. Asante Mwenyezi, kwa uumbaji huu wema, Utujalie hekima, ya kuyatunza daima.

    🌳 Mimea Mbalimbali: Hazina ya Uhai

    Mimea ni sehemu muhimu ya maisha duniani na hufanya kazi kubwa katika kudumisha ikolojia na afya ya sayari. Zinapatikana katika maumbo, saizi, na aina mbalimbali, kutoka kwa mwani mdogo sana hadi miti mikubwa ya Mvumo au Mikaratusi. Utajiri huu wa mimea huunda msingi wa mfumo mzima wa uhai.

    🍃 Aina na Kazi

    Kimsingi, mimea hugawanywa katika makundi makuu, ikiwemo mimea isiyo na maua (kama vile feni na mosses) na mimea yenye maua (ambayo hutoa matunda na mbegu). Mimea yote, bila kujali kundi, hutegemea mchakato wa fotosinthesisi ili kutengeneza chakula chake chenyewe kwa kutumia mwanga wa jua, maji, na hewa ya kaboni dioksidi.

    Shutterstock

    Kazi muhimu zaidi ya mimea ni kuzalisha oksijeni, ambayo ni muhimu kwa viumbe vyote vinavyopumua. Wakati wa fotosinthesisi, mimea hunyonya kaboni dioksidi kutoka hewani, kusaidia kupunguza gesi chafu na kudhibiti hali ya hewa duniani.

    🥕 Umuhimu wa Mimea kwa Binadamu

    Kwa binadamu, mimea ni muhimu sana. Kwanza, ndiyo chanzo kikuu cha chakula—maziwa, nafaka, mboga, na matunda vyote hutoka kwenye mimea. Pili, mimea mingi ni chanzo cha dawa za asili zinazotumika kutibu magonjwa mbalimbali. Tatu, mimea hutoa malighafi kwa ajili ya mahitaji mengine, kama vile mbao kwa ajili ya ujenzi na samani, na pamba kwa ajili ya nguo.

    Katika mazingira, mimea husaidia kuzuia mmomonyoko wa udongo kwa kushikilia ardhi kwa mizizi yao. Pia huunda makazi na chakula kwa wanyama na ndege wengi, na hivyo kudumisha utofauti wa viumbe.

    Kutokana na umuhimu wake, ni jukumu letu kulinda na kutunza mimea. Kupanda miti na kuzuia uharibifu wa misitu ni njia za kuhakikisha kwamba hazina hii ya uhai inaendelea kunufaisha vizazi vya sasa na vijavyo.


    Maswali na Majibu Kuhusu Mimea

    Haya hapa ni maswali matano (5) na majibu yake yaliyotokana na insha, yakiwa na viwango tofauti vya uelewa:

    NambariSwaliJibuViwango
    1.Ni nini kazi kuu mbili zinazofanywa na mimea kwa ajili ya viumbe hai?Kazi kuu mbili ni kuzalisha oksijeni na kutengeneza chakula chao wenyewe kupitia fotosinthesisi.Kuelewa (What)
    2.Kwa nini mimea ni muhimu katika kudhibiti hali ya hewa duniani?Mimea ni muhimu kwa sababu huvuta (hunyonya) hewa ya kaboni dioksidi wakati wa fotosinthesisi, na hivyo kupunguza gesi chafu angani.Kuchambua (Why)
    3.Tofauti gani ipo kati ya mimea isiyo na maua na mimea yenye maua?Mimea yenye maua hutoa matunda na mbegu kwa ajili ya uzazi, wakati mimea isiyo na maua (kama feni) huzaliana kwa kutumia spores (vumbi/mbegu ndogo sana).Kulinganisha (Compare)
    4.Mbali na kutoa chakula, ni faida gani nyingine tatu (3) tunazopata moja kwa moja kutoka kwa mimea?Faida nyingine ni: chanzo cha dawa za asili, malighafi kama mbao na pamba, na kusaidia kuzuia mmomonyoko wa udongo.Kutaja Faida (List)
    5.Unafikiri ni hatua gani bora tunazoweza kuchukua kulinda misitu ili kudumisha afya ya ikolojia ya mimea?Hatua bora ni kupanda miti mingi zaidi (upandaji miti) na kuzuia ukataji miti ovyo/uwindaji haramu (uhifadhi wa misitu) ili makazi ya wanyama yabaki salama.Kutathmini (Evaluate)

    Hitimisho (Conclusion)

    Mimea na mazao yake ni sehemu muhimu ya maisha. Kuelewa majina ya mimea, matumizi yake, na faida zake kunamsaidia mwanafunzi kujenga msamiati mpana na kuelewa mazingira yanayomzunguka. Huu mwongozo umeandaliwa kwa lugha rahisi yenye mifano mingi ili kusaidia wajifunzaji wa viwango mbalimbali.

  • Mango Growing in Uganda: A Guide to Profitable Production

    Mango Growing in Uganda: A Guide to Profitable Production

    Mango is Uganda’s best-known fruit, and mango growing in Uganda is a practical, long-term enterprise for any O-level Agriculture learner to study. A mango is a tropical perennial fruit crop that keeps producing for over twenty years once established, unlike annual crops such as maize or beans. Grafted trees begin bearing in about three to four years, so a well-planned orchard becomes an asset that outlives the person who planted it.

    These notes explain varieties, site selection, planting, orchard care, pest control and marketing, and every section ties the theory to a real Ugandan farm example.

    Mature mango trees heavy with green and ripening fruit in a Ugandan orchard
    Mature mango trees setting fruit in a Ugandan orchard, the long-lived perennial crop these notes cover.

    Mango varieties grown in Uganda

    Mango growing in Uganda uses two broad kinds of trees: local seedling types and improved grafted types. Local types grow easily from seed and are hardy, but their fruit is often small and fibrous. Improved grafted types are joined onto strong rootstock, bear earlier, and produce larger, less fibrous fruit. Choosing the right kind, and the right season of fruiting, is the first management decision a grower makes.

    Because mango is a perennial fruit crop, it sits under perennial crop production in the NCDC lower-secondary Agriculture syllabus, which you can download from the National Curriculum Development Centre. Learning mango as a worked perennial-crop example makes the wider syllabus topic concrete.

    • Local seedling mangoes: Many homestead trees in Uganda grow from discarded seed, and these trees are hardy and long-lived but bear variable, often fibrous fruit.
    • Improved grafted mangoes: Scion wood from a selected tree is grafted onto rootstock, so the new tree reproduces the parent’s fruit exactly.
    • Shorter maturity: Grafted trees begin bearing about three to four years after planting, while a seedling tree raised from seed takes longer to fruit.
    • Early-season types: Fruit matures when few other mangoes are on sale, which helps a grower win attention and better terms at market.
    • Late-season types: These extend the harvest window so an orchard does not dump all of its fruit at once.
    • Local versus improved: Local types are cheap to establish and tough, but improved grafted types fetch steadier demand for larger, less fibrous fruit.
    • Fibre content: Local mangoes often have stringy, fibrous flesh, whereas improved selections are bred for smoother, juicier flesh that markets prefer.
    • Colour at ripeness: Skin colour ranges from green to yellow, orange and red, and colour alone does not tell you whether the fruit is sweet.
    • Fruit size: Improved grafted types are selected for larger, more uniform fruit, which grades and packs better for a commercial buyer.
    • Buying planting material: Buy grafted seedlings from a reputable nursery rather than raising seedlings from any seed you happen to find.
    • Rootstock: A grafted seedling is joined onto hardy rootstock, which supplies a strong root system and better tolerance of soil pests.
    • Adaptation: Different types suit different rainfall and altitude zones, so a grower should pick types known to perform well in their own district.
    • Dual-purpose trees: Some local types are valued for shade and timber as much as for fruit, so farmers keep them around the homestead.
    • Season planning: Combining early, mid and late-season types spreads both income and harvest labour across more months of the year.
    FeatureLocal seedling mangoesImproved grafted mangoes
    How propagatedGrown from seedScion grafted onto rootstock
    Time to first fruitLonger, often five years or moreAbout three to four years
    Fruit size and uniformitySmaller and variableLarger and uniform
    Fibre in the fleshOften fibrousSmoother, juicier
    Cost to establishLow, seed is freeHigher, seedlings must be bought
    Market demandLocal and informalSteadier, suits supermarkets and export

    Common mistake: judging ripeness by colour alone. A green-skinned mango can be fully ripe and sweet inside, while a brightly coloured one can still be hard and sour. Squeeze the fruit gently and smell the stem end instead.

    Site selection and planting

    Successful mango growing in Uganda begins with the right site and careful planting. Mangoes need deep, well-drained soil, full sunlight, and enough spacing for the tree’s wide canopy. Planting is done in a prepared hole at the start of the rains. Get these first steps right and the orchard needs less costly correction later.

    • Sunlight: Choose a sunny, open site, because mango is a full-sun crop and shaded trees grow tall while bearing poorly.
    • Drainage: Mango roots rot in waterlogged soil, so avoid valley bottoms and clay pans that hold water after heavy rain.
    • Soil depth: Deep soil lets the taproot go down, which anchors the tree and reaches moisture during dry spells.
    • Soil type: Sandy-loam and well-drained loam are ideal, while very heavy clay and very shallow soils are poor choices for mango.
    • Wind exposure: A gentle windbreak protects young trees, but a crowded, shaded corner is worse than an open, exposed position.
    • Spacing: Space grafted trees 8 to 10 metres apart so each canopy gets full light and air when the tree is mature.
    • Planting time: Plant at the onset of the rains so the young tree establishes without needing heavy, costly watering.
    • Hole size: Dig a planting hole about one metre wide and one metre deep, and keep the topsoil separate from the subsoil.
    • Hole preparation: Mix the topsoil with well-rotted compost or manure and return the mixture to the hole before planting.
    • Seedling handling: Plant grafted seedlings, and set each one so the graft union stays above the soil line.
    • Firming and watering: Firm the soil gently around the roots and water in well to remove air pockets that would dry out the roots.
    • Mulching: Spread mulch around each young tree, but keep it away from the stem to prevent rot and termites.
    • Staking: Stake young trees on windy sites so the root ball is not rocked loose while the tree is still establishing.
    • Record keeping: Record each tree’s type and planting date so management and harvest planning stay accurate.
    Young grafted mango seedling in a prepared planting hole with a mulch ring
    A young grafted mango seedling in a prepared hole, mulched and staked in a Ugandan orchard.

    Orchard management practices

    Once trees are planted, steady returns in mango growing in Uganda come from routine care. Young trees need watering, weeding and protection, while mature trees need pruning, feeding and sanitation. A simple seasonal calendar keeps every operation on time, which is what the table below provides.

    • Watering young trees: Water young trees regularly, especially in the first dry season, because their roots have not yet gone deep.
    • Watering mature trees: Mature trees need less frequent watering, but dry-season water at flowering and fruit-fill improves fruit size and retention.
    • Mulching: Renew the mulch yearly to conserve soil moisture and to smother weeds around the base of each tree.
    • Weeding: Keep the root zone weed-free, because weeds compete for water and nutrients and give pests a hiding place.
    • Organic manure: Apply well-rotted organic manure annually to feed the tree and improve the structure of the soil.
    • Fertiliser: Apply a balanced NPK fertiliser as the tree begins to bear, but follow the recommended rate rather than guessing.
    • Pruning: Prune to open the centre of the canopy so sunlight and air reach the inside and fruit is set all over the tree.
    • Training: Train a young tree to a single main stem and three or four well-spaced branches that form a strong frame.
    • Thinning: Remove dead, diseased and crossing branches so the tree does not waste energy and pests have fewer hiding places.
    • Orchard sanitation: Collect and destroy fallen fruit and prunings, because they carry pests and disease into the next season.
    • Monitoring: Walk the orchard regularly to spot pests, disease and nutrient problems while they are still small and cheap to fix.
    • Integrated pest management: Combine traps, cultural control and only necessary sprays so pests are controlled without overusing chemicals.
    • Record keeping: Record operations, yields and costs so you can compare seasons and learn what actually pays on the farm.
    OperationWhen in the yearWhat it involves
    PlantingOnset of rains (around March–April or August–September)Dig prepared holes, set grafted seedlings, water in
    Watering young treesThroughout the first two dry seasonsWater regularly at the root zone
    MulchingAfter planting, renewed yearlySpread mulch, keep it away from the stem
    WeedingContinuous, heavier in the rainy seasonClear the root zone and between rows
    Manure applicationOnce a year, before the rainsSpread well-rotted manure around the drip line
    NPK fertiliserStart of each rainy season once bearingApply balanced NPK at the recommended rate
    PruningAfter harvest, in the dry seasonOpen the centre, remove dead and crossing wood
    Training young treesFirst two to three yearsSelect the main stem and frame branches
    Orchard sanitationAfter harvest and before floweringRemove and destroy fallen fruit and prunings
    Pest monitoringWeekly, more often in the fruiting seasonCheck leaves, shoots and fruit for pests
    Fruit fly controlFrom flowering to harvestHang bait or pheromone traps, bag fruit if needed
    Anthracnose controlRainy season and at floweringPrune for airflow, remove infected parts
    Dry-season irrigationDry spell at flowering and fruit-fillWater to support flowering and fruit growth
    HarvestingWhen fruit mature, per type and seasonPick firm, mature fruit and handle gently

    Exam tip: In a UNEB question, “orchard sanitation” means more than sweeping the farm. It means collecting and destroying fallen fruit and prunings, because these carry fruit flies, anthracnose and other pests into the next season. Always name the practice, then give the reason it works.

    Pests and diseases of mango

    Pests and diseases are the biggest threat to mango growing in Uganda, and they attack at specific stages. The main pests are fruit flies, mango weevils and aphids, while the main diseases are anthracnose and powdery mildew. Each has recognisable symptoms and a control method, so a learner can act before fruit is ruined.

    • Fruit flies: Adult flies lay eggs under the skin, and the maggots tunnel through the flesh, causing the fruit to rot from the inside.
    • Mango weevil (seed weevil): The weevil’s larva bores into the seed, and infested fruit can look perfect outside while being ruined inside.
    • Aphids: These small sap-sucking insects cluster on young shoots and flower stalks, curling the leaves and weakening the tree.
    • Anthracnose: This fungus causes black, sunken spots on leaves, flowers and fruit, and it spreads fastest in wet, humid weather.
    • Powdery mildew: A white powdery coating forms on young leaves and flower clusters, causing flowers to drop and fruit set to fail.
    • Regular monitoring: Inspect leaves, shoots and young fruit weekly so a new infestation is caught before it can spread.
    • Sanitation: Collect and bury or burn fallen fruit and prunings, because these shelter fruit flies and mango weevils.
    • Pheromone and bait traps: Hang fruit-fly bait or pheromone traps to lure and kill adult flies before they lay their eggs.
    • Biological control: Encourage natural enemies such as ladybirds, which feed on aphids and other soft-bodied pests.
    • Neem-based sprays: Neem-based organic pesticides can suppress pests while being gentler on beneficial insects than broad chemicals.
    • Pruning for airflow: Keep the canopy open so leaves dry quickly, which slows the spread of anthracnose and powdery mildew.
    • Timed spraying: Apply a fungicide only when disease appears or when the weather stays persistently wet, not on a fixed calendar.
    • Record keeping: Note what appeared, when it appeared and what worked, so next season’s control is planned and not improvised.
    Pest or diseaseSymptomsControl
    Fruit flySmall puncture marks; maggots in the flesh; fruit rots and dropsCollect fallen fruit; hang bait or pheromone traps; bag fruit; keep orchard clean
    Mango weevilFruit looks normal but the seed is tunnelled and hollowDestroy infested fruit; sanitise; use clean planting material
    AphidsCurled, distorted young leaves; sticky honeydew on shootsEncourage ladybirds; use neem-based spray when severe
    AnthracnoseBlack, sunken spots on leaves, flowers and fruit; die-back of shootsPrune for airflow; remove infected parts; timed fungicide in wet weather
    Powdery mildewWhite powdery coating on young leaves and flowers; poor fruit setPrune for airflow; remove infected parts; apply sulphur or a recommended fungicide

    Common mistake: confusing anthracnose with powdery mildew. Anthracnose makes black, sunken spots on fruit and leaves, while powdery mildew is a white powdery coating on young leaves and flowers. Naming the correct symptom is what earns the mark in an exam.

    Harvesting and marketing mangoes

    Harvesting and marketing are where mango growing in Uganda turns effort into income. Fruit must be picked mature but firm, handled gently, and sorted before sale. A grower who grades carefully and chooses the right marketing channel keeps more of the value than one who dumps mixed fruit at the farm gate.

    • Maturity: Harvest when the fruit is mature but still firm, because overripe fruit bruises easily and does not travel well.
    • Ripeness signs: Look for a colour change, rounded full cheeks and a slight give when squeezed, and never rely on colour alone.
    • Picking method: Cut or twist the fruit off with a short stalk, and avoid pulling so that you do not tear the skin.
    • No dropping: Never let fruit drop to the ground, because bruising starts rot and lowers the grade the fruit will fetch.
    • Time of day: Harvest in the cooler morning hours and keep picked fruit out of direct sun to slow down ripening.
    • Sorting and grading: Sort by size, ripeness and freedom from blemishes so that each grade matches a different kind of buyer.
    • Cleaning: Wipe or wash fruit gently to remove sap and dust without scratching or bruising the skin.
    • Packaging: Pack in shallow crates or boxes lined with soft material, and avoid deep piles that crush the bottom layer.
    • Storage: Store fruit in a cool, dry, shaded place, because heat and moisture speed up ripening and spoilage.
    • Transport: Move fruit in padded, secure crates so the boxes do not slide and crush one another on the journey.
    • Local market: Selling directly to market vendors or consumers brings quick cash and puts the grower in touch with buyers.
    • Cooperatives: Joining a farmer cooperative lets growers pool fruit and bargain collectively, which cuts out low-paying middlemen.
    • Value addition: Turning lower-grade fruit into juice, dried slices, pulp or jam means very little of the harvest is wasted.
    • Regional export: Clean, well-graded Ugandan mangoes are sold to neighbouring markets such as Kenya, South Sudan and Rwanda.
    StageIndicator or actionReason or detail
    Skin colourBegins to change from green to yellow or orangeOne sign of maturity, but not the only test
    Cheek fullnessShoulders and cheeks look rounded and fullShows the fruit has filled out to size
    FeelSlight give when gently squeezedMeans the flesh has matured
    Stem-end smellSweet smell near the stem endIndicates ripeness developing
    SapSap runs clear and thin when the stalk is cutThick milky sap means the fruit is still immature
    Harvest timingPick mature but firm fruitAvoids bruising and overripeness
    Harvest methodCut or twist with a short stalkPrevents tearing the skin
    HandlingNever drop the fruitBruising starts rot and lowers grade
    Sorting and gradingBy size, ripeness and blemishesMatches each grade to a suitable buyer
    PackingShallow, padded cratesPrevents the bottom layer being crushed
    StorageCool, dry and shadedSlows spoilage and ripening
    TransportPadded, secure cratesAvoids crushing and sliding on the road
    Marketing channelWhat the grower doesAdvantage or consideration
    Local open marketSells direct to market vendors or consumersQuick cash, little grading pressure
    Urban wholesaleSupplies traders serving Kampala, Mbarara and GuluLarger volumes and steadier demand
    SupermarketsGrades and packs to a set standardBetter price but strict quality rules
    Juice processorsSells sound fruit of any sizeAbsorbs large volumes, accepts lower grades
    Export buyersMeets size, quality and plant-health rulesHighest value but the strictest standards
    Farmer cooperativePools fruit with other growersCollective bargaining cuts out middlemen
    Own value-added salesProcesses juice, dried mango or jamHigher margin but more work and equipment
    InstitutionsDirect supply to schools, hotels and caterersRepeat orders and reliable income
    Ripe mangoes sorted into a shallow crate at a Ugandan farm
    Harvested mangoes sorted and packed in a shallow crate, ready for grading and sale.

    Frequently asked questions about mango growing in Uganda

    How long does a mango tree take to bear fruit in Uganda? A grafted mango tree usually starts bearing about three to four years after planting. A seedling tree grown from seed takes longer, sometimes five years or more, and its fruit is more variable. Buying grafted seedlings is the fastest way to reach a first harvest.

    What is the best spacing for mango trees in Uganda? Space grafted mango trees 8 to 10 metres apart. This gives each tree enough light and air when its canopy is full-grown, and it stops the roots from competing. Close spacing forces trees to grow tall and bear poorly, so resist the temptation to squeeze in extra trees.

    Which mango variety should I plant in Uganda? Choose improved grafted types rather than local seedling trees if you are selling the fruit. Grafted types bear earlier and give larger, less fibrous fruit that markets prefer. Pick early, mid and late-season types so your harvest is spread across more months instead of arriving all at once.

    How do I control fruit flies in my mango orchard? Combine several methods: collect and destroy fallen fruit, hang bait or pheromone traps to catch adult flies, and keep the orchard clean. You can also bag individual fruit and use neem-based sprays. Relying on one method alone rarely works, because fruit flies breed in fallen fruit.

    What causes black spots on mango fruit? Black, sunken spots on fruit and leaves are usually anthracnose, a fungal disease that spreads in wet, humid weather. Improve airflow by pruning, remove infected parts, and avoid overhead watering. A white powdery coating on young leaves and flowers is a different disease, powdery mildew.

    When is a mango ready to harvest? Harvest when the fruit is mature but still firm. Look for rounded, full cheeks, a slight give when squeezed, and a colour change from green. Never drop the fruit, and handle it gently, because bruising starts rot and lowers the grade a buyer will pay for.

    Can I grow mangoes profitably on a small plot? Yes. Even a few well-spaced grafted trees can earn, especially if you grade the fruit, join a cooperative, and add value by drying or juicing the lower grades. Start small, manage the trees properly, and expand once the orchard is established and paying.

    Key terms and revision summary

    TermDefinition
    Perennial cropA crop that lives and produces for more than two years, such as a mango tree
    GraftingJoining a selected scion onto rootstock so the new tree copies the parent
    RootstockThe rooted lower part onto which a scion is grafted; it supplies roots and vigour
    ScionThe shoot of a chosen variety that is grafted onto the rootstock
    SeedlingA plant raised from seed rather than grafted
    OrchardA planted area of fruit trees managed for fruit production
    Orchard sanitationRemoving and destroying fallen fruit and prunings to cut pest and disease carryover
    Integrated pest management (IPM)Combining traps, cultural, biological and careful chemical control
    AnthracnoseA fungal disease causing black, sunken spots, worst in wet weather
    Powdery mildewA fungal disease forming a white coating on young leaves and flowers
    Fruit flyA pest whose maggots tunnel through ripening fruit
    Mango weevilA pest whose larva bores into the mango seed
    MulchingCovering soil with plant material to conserve moisture and suppress weeds
    Graft unionThe point where scion and rootstock join; keep it above the soil line

    Test yourself with these exam-style questions, then check the answer outlines.

    1. State four practices a farmer should carry out when planting mango seedlings. Outline: dig a one-metre-by-one-metre hole; mix topsoil with well-rotted manure; plant a grafted seedling at the onset of rains; keep the graft union above the soil; firm and water in; mulch away from the stem.
    2. Describe how a mango grower can control fruit flies without relying only on chemicals. Outline: collect and destroy fallen fruit; hang bait or pheromone traps; bag individual fruit; keep the orchard clean; encourage natural enemies.
    3. Explain the difference between a local seedling mango and an improved grafted mango. Outline: a seedling grows from seed, fruits later and gives variable, fibrous fruit; a grafted tree copies the parent, fruits in three to four years and gives larger, less fibrous fruit.
    4. Outline the steps of harvesting and handling mangoes for a supermarket market. Outline: pick mature but firm fruit; never drop it; sort and grade by size and blemishes; clean gently; pack in shallow padded crates; store cool and dry; transport carefully.
    5. Why is orchard sanitation important in controlling anthracnose? Outline: the fungus survives on infected fallen fruit and leaves; removing and destroying them cuts the source of infection; pruning for airflow keeps leaves dry and slows spread.

    Mango growing in Uganda also pairs naturally with other fruit-crop notes. If you are studying growing guavas profitably, compare the two crops side by side, then anchor both back to the Senior 3 Agriculture notes and the past papers for exam practice.

  • Growing Onions in Uganda: Expert Interview on Profitability, Varieties, and Best Practices

    Growing Onions in Uganda: Expert Interview on Profitability, Varieties, and Best Practices

    Introduction

    Onion farming in Uganda is rapidly becoming one of the most profitable agribusiness ventures for both small-scale and commercial farmers. With rising demand in urban markets such as Kampala, Wakiso, Mukono, and regional export markets like South Sudan and the Democratic Republic of Congo, onions have become a high-value crop.

    In this detailed guide, we present an expert interview with Dr. Grace Mukasa, a seasoned agricultural specialist with over 20 years of experience in crop production and agribusiness development. She shares practical insights on how to grow onions in Uganda, the best onion varieties, production costs, yields, and the profitability of onion farming.

    If you have ever asked yourself, “Is onion farming profitable in Uganda?” or “How can I start onion farming successfully?”, this guide will give you clear, actionable answers.


    Why Onion Farming is Growing in Uganda

    Onions are an essential ingredient in almost every Ugandan dish. From homes to restaurants, schools, and hotels, onions are used daily. This creates a consistent and reliable market.

    • High demand: Onions are consumed throughout the year.
    • Good market prices: Prices increase during dry seasons.
    • Export opportunities: Strong demand in neighboring countries.
    • Short production cycle: Harvest within 3–4 months.
    • High returns per acre: One of the most profitable vegetable crops.

    Because of these advantages, onion farming in Uganda is attracting youth, agripreneurs, and investors.


    Interview with Dr. Grace Mukasa

    Q: Why are onions a profitable crop in Uganda?

    Dr. Mukasa: Onions have a ready market every single day. Unlike some crops that depend on seasonal demand, onions are used in almost every meal. This ensures continuous demand and stable prices.

    She explains further: “The profitability of growing onions in Uganda depends on good farm management. Farmers who use improved seeds, apply fertilizers correctly, and manage pests effectively often achieve very high yields.”

    Additionally, onions have a relatively long shelf life compared to other vegetables, which allows farmers to store and sell when prices improve.


    Q: What are the best varieties of onions in Uganda?

    Dr. Mukasa: Choosing the right variety is key to success. Some of the best-performing onion varieties in Uganda include:

    • Red Creole: Hardy, disease-resistant, and stores well.
    • Texas Early Grano: Sweet flavor, fast maturity, ideal for fresh markets.
    • Bombay Red: High yield, strong taste, popular in local markets.

    She advises: “For beginners, I recommend starting with Red Creole onions. They are easier to manage and more tolerant to environmental stress.”


    Q: How to grow onions successfully in Uganda?

    Dr. Mukasa: Successful onion farming starts with proper planning and land preparation.

    Step 1: Land Preparation

    • Choose well-drained, fertile soil.
    • Loosen the soil to allow bulb expansion.
    • Add compost or well-rotted manure.
    • Prepare raised beds to prevent waterlogging.

    Step 2: Nursery Establishment

    • Sow seeds in a well-prepared nursery bed.
    • Water regularly but avoid flooding.
    • Protect seedlings from harsh sun and heavy rain.

    Step 3: Transplanting

    After 6–8 weeks, transplant seedlings into the main garden:

    • Space plants 10 cm apart.
    • Maintain row spacing of 30 cm.
    • Water immediately after transplanting.

    She emphasizes: “Spacing is critical. Overcrowding reduces bulb size and overall yield.”


    Q: What fertilizers should onion farmers use?

    Dr. Mukasa: Fertilizer application is essential for high yields.

    • Apply DAP fertilizer during planting.
    • Use CAN fertilizer after 3 weeks to boost growth.
    • Incorporate organic manure to improve soil health.

    Balanced nutrition ensures strong root development and large bulb formation.


    Q: What are the common pests and diseases?

    Dr. Mukasa: Onion farmers should watch out for:

    Common Pests

    • Thrips
    • Onion maggots

    Common Diseases

    • Downy mildew
    • Purple blotch

    Control methods include:

    • Using neem-based organic pesticides
    • Practicing crop rotation
    • Avoiding overhead irrigation
    • Regular field monitoring

    “Early detection is the key to preventing crop loss,” she advises.


    Q: When is the best time to plant onions in Uganda?

    Dr. Mukasa: The best planting seasons are:

    • March to May (first rainy season)
    • August to October (second rainy season)

    However, farmers with irrigation systems can grow onions all year round, giving them an advantage in off-season markets where prices are higher.


    Q: How long do onions take to mature?

    Dr. Mukasa: Maturity depends on the variety:

    • Texas Early Grano – about 90 days
    • Bombay Red – about 110 days
    • Red Creole – about 120 days

    Harvest when the leaves fall over and begin to dry.


    Q: What is the yield per acre?

    Dr. Mukasa: Average yields range between 10 to 15 tonnes per acre. With excellent management, some farmers achieve up to 20 tonnes per acre.


    Q: How profitable is onion farming in Uganda?

    Dr. Mukasa: Onion farming is highly profitable.

    Estimated costs per acre:

    • Seeds: 300,000 UGX
    • Fertilizers: 1,000,000 UGX
    • Labor: 1,200,000 UGX
    • Other costs: 500,000 UGX

    Total cost: ~3 million UGX

    Revenue: 10–15 million UGX

    Profit: 7–12 million UGX per acre

    “Timing the market is very important,” she adds. “Selling when supply is low increases profits significantly.”


    Post-Harvest Handling and Storage

    Proper handling after harvest ensures quality and reduces losses.

    • Dry onions under shade for 1–2 weeks.
    • Remove excess soil and roots.
    • Sort and grade according to size.
    • Store in a well-ventilated, dry area.

    Good storage allows farmers to sell later at better prices.


    Marketing Strategies for Onion Farmers

    To maximize profits, farmers should adopt smart marketing strategies:

    • Sell directly to markets and traders.
    • Supply supermarkets and restaurants.
    • Join farmer cooperatives.
    • Target export markets.

    Building strong buyer relationships ensures consistent income.


    Common Challenges in Onion Farming

    • Pests and diseases – controlled through integrated management
    • Water stress – solved through irrigation
    • Price fluctuations – managed through storage and timing
    • Lack of quality seeds – solved by sourcing certified seeds

    Proper planning helps farmers overcome these challenges.


    Conclusion

    Onion farming in Uganda offers enormous potential for farmers willing to invest time and effort. From selecting the right variety to proper land preparation, pest control, and marketing, every step contributes to success.

    The insights shared by Dr. Grace Mukasa clearly show that growing onions in Uganda is not only feasible but highly profitable when done correctly.

    If you are looking for a reliable agribusiness, onion farming is a smart choice. Start small, apply best practices, and scale gradually.

    Take action today—start your onion farming journey and grow your income sustainably.

  • Grow Tomatoes in Uganda: A Step-by-Step Guide for Profit

    Grow Tomatoes in Uganda: A Step-by-Step Guide for Profit


    Grow Tomatoes in Uganda: A Step-by-Step Guide for Profit

    Tomatoes are a valuable crop in Uganda. They are used in many daily dishes. This means there is always a high demand. With the right knowledge, growing tomatoes in Uganda can be very profitable. This guide is for beginners. It will show you every step. You will learn from seed to sale. Let’s get started.

    Why Grow Tomatoes in Uganda?

    The climate in Uganda is perfect for tomatoes. You can grow them almost anywhere. The profitability of growing tomatoes in Uganda is high. A small piece of land can give you a good income. Many farmers earn money quickly. This is because tomatoes have a short growing cycle. You can harvest in just a few months. The local market always needs fresh tomatoes. You can sell them to neighbors, markets, or hotels.

    Prerequisites: What You Need to Start

    Before you begin, gather these items. You do not need much money. Keep it simple.

    • Good quality tomato seeds. Use varieties like Tylka or Roma.
    • A piece of land. Even a small backyard works.
    • Basic gardening tools. You need a hoe, a rake, and a watering can.
    • Organic manure or compost. This feeds the plants.
    • Mulch materials. Use dry grass or banana leaves.
    • Stakes or sticks. These support the plants as they grow.

    Step 1: Prepare the Nursery Bed

    A nursery bed is where you start your seeds. It is like a baby room for plants. This step is very important. Healthy seedlings grow into strong plants.

    Screenshot Description: A small, raised bed of soil, about 1 meter wide and 2 meters long, with fine soil and a light shade cover made of banana leaves above it.

    How to Make a Nursery Bed

    1. Choose a sunny spot near a water source.
    2. Make a raised bed. It should be 1 meter wide. The length can be any size.
    3. Break the soil into fine particles. Remove stones and weeds.
    4. Mix the soil with well-rotted manure. Use a ratio of 3 parts soil to 1 part manure.
    5. Water the bed lightly. Let it settle for one day.
    6. Make shallow rows. They should be 1 cm deep. Space rows 15 cm apart.
    7. Sow the seeds thinly. Cover them with a thin layer of soil.
    8. Mulch with dry grass. This keeps the soil moist.
    9. Water gently every day. Use a watering can with a fine rose.

    Nursery Bed Care

    Seeds will germinate in 5 to 10 days. Remove the mulch once you see sprouts. Water them in the morning and evening. Protect them from heavy rain. Use a shade net or banana leaves. After 3 to 4 weeks, the seedlings will be ready. They should have 4 to 6 true leaves.

    Step 2: Prepare the Main Garden

    The main garden is where the tomatoes will grow to maturity. Good preparation means healthy roots. Healthy roots mean more fruit.

    Screenshot Description: A cleared garden plot with rows of raised beds, each about 1 meter wide, with a path between them.

    1. Clear the land. Remove all weeds, grass, and stones.
    2. Dig the soil deeply. Use a hoe to turn the soil. Go 30 cm deep.
    3. Add compost or manure. Spread it evenly. Use one wheelbarrow per 10 square meters.
    4. Make raised beds. They should be 1 meter wide. Leave a 50 cm path between beds.
    5. Level the beds. Break any big clumps of soil.
    6. Apply a base fertilizer. Use DAP (Diammonium phosphate) at planting time. Follow the instructions on the pack.

    Step 3: Transplant the Seedlings

    Transplanting is moving seedlings from the nursery bed to the main garden. Do this in the evening. It gives the plants time to adjust.

    Screenshot Description: A hand holding a small tomato seedling by its leaves, ready to place into a hole in the garden soil.

    1. Water the nursery bed well. This makes it easy to remove seedlings.
    2. Gently lift seedlings. Hold them by the leaves, not the stem. The stem is fragile.
    3. Dig holes in the main garden. Space holes 50 cm apart in a row. Space rows 60 cm apart.
    4. Place one seedling per hole. Bury it up to the first leaves.
    5. Firm the soil around the stem. This removes air pockets.
    6. Water each plant immediately. Give each plant about 500 ml of water.
    7. Protect the plants from sun. Use shade for the first three days.

    Step 4: Care for Your Tomato Plants

    Tomato plants need regular care. This ensures a big harvest. Follow these steps.

    Watering

    Water deeply twice a week. Do not water the leaves. Wet leaves cause diseases. Use drip irrigation if possible. It saves water.

    Mulching

    Apply dry grass around the plants. This keeps the soil moist. It also stops weeds. Mulch should be 5 cm thick.

    Staking

    Tomato plants grow tall. They need support. Insert a stake next to each plant. Tie the stem to the stake with a soft cloth. Do this gently.

    Pruning

    Remove side shoots. These are small stems that grow between the main stem and branches. They take energy from the fruit. Let only one or two main stems grow.

    Fertilizing

    Feed the plants every two weeks. Use a balanced fertilizer like NPK 17:17:17. Follow the instructions. Stop fertilizing when fruits start to ripen.

    Step 5: Manage Pests and Diseases

    Tomatoes face many pests and diseases. Act quickly to save your crop.

    Common Pests

    • Aphids: Small green insects. They suck sap. Spray with neem oil or soapy water.
    • Whiteflies: Tiny white flies. They cause leaves to yellow. Use yellow sticky traps.
    • Tomato hornworm: Big green caterpillars. They eat leaves. Pick them off by hand.

    Common Diseases

    • Early blight: Brown spots on lower leaves. Remove affected leaves. Spray with copper fungicide.
    • Late blight: Watery spots on leaves and fruit. This is serious. Use a fungicide like Ridomil.
    • Bacterial wilt: Plants suddenly wilt and die. There is no cure. Remove the plant and do not plant tomatoes there again for two years.

    Prevention Tips

    • Do not plant tomatoes in the same place every year. Rotate crops.
    • Water at the base of plants. Keep leaves dry.
    • Remove weeds. They hide pests.
    • Inspect your plants every day. Act fast if you see a problem.

    Step 6: Harvesting Tomatoes

    Harvesting tomatoes at the right time is key. It affects taste and shelf life. Tomatoes take 60 to 80 days from transplanting to harvest.

    Screenshot Description: A hand holding a ripe, red tomato that has just been picked from a vine. The plant behind it is green and healthy.

    When to Harvest

    Pick tomatoes when they are firm and fully colored. For red varieties, pick when they are bright red. For yellow varieties, pick when they are bright yellow. You can also pick them when they are turning color. They will ripen indoors.

    How to Harvest

    1. Use a sharp knife or scissors. Cut the stem above the fruit.
    2. Do not pull the fruit. This damages the plant.
    3. Handle tomatoes gently. They bruise easily.
    4. Collect them in a clean basket or crate.
    5. Harvest every two to three days. This encourages more fruit.

    Expected Outcomes

    From a well-managed garden, you can expect 10 to 15 kilograms of tomatoes per plant. A quarter-acre plot can yield 500 to 800 kilograms. This is a good amount for a beginner. With better care, you can get more.

    Step 7: Marketing Tomatoes

    Marketing tomatoes is the last step. This is where you make money. Good marketing ensures you sell everything.

    Screenshot Description: A display of fresh tomatoes in wooden crates at a local market, with customers looking at them.

    Where to Sell

    • Local markets: Take your tomatoes to the nearest market. Sell them directly to customers.
    • Neighbors and community: Tell people you have tomatoes. They will come to buy.
    • Restaurants and hotels: They buy in bulk. Offer them a good price.
    • Schools and hospitals: They need tomatoes for meals. Contact their kitchen managers.
    • Wholesale buyers: They buy large quantities. You get less money per kilogram, but you sell everything fast.

    Pricing Tips

    • Know the market price. Visit a market to see what others charge.
    • Start with a fair price. You can negotiate.
    • Grade your tomatoes. Separate big, perfect ones from small or blemished ones. Sell the best ones at a higher price.
    • Be flexible. If you have many tomatoes, sell them at a lower price to clear stock.

    Packaging

    • Use clean crates or baskets. Do not use plastic bags. They cause tomatoes to rot.
    • Line the crate with banana leaves or soft paper. This prevents bruising.
    • Place tomatoes in a single layer. Do not pile them high.

    Troubleshooting Tips

    Even experienced farmers face problems. Here are common issues and solutions.

    Problem Cause Solution
    Seedlings die after transplanting Shock or lack of water Water well and shade for 3 days.
    Leaves turn yellow Lack of nitrogen Apply a nitrogen-rich fertilizer like Urea.
    Flowers fall off without fruit Too much heat or lack of pollination Shade plants during hot afternoons. Shake plants gently to help pollination.
    Fruits have black spots Blossom end rot Water evenly. Add calcium to the soil.
    Fruits crack Irregular watering Water consistently. Mulch to keep soil moisture steady.
    Pests are many No natural predators Plant flowers like marigolds nearby. They attract beneficial insects.

    Profitability of Growing Tomatoes in Uganda

    The profitability of growing tomatoes in Uganda is excellent. Let us look at simple numbers.

    Costs for a Quarter-Acre (Approximate)

    • Seeds: 50,000 UGX
    • Manure and fertilizer: 100,000 UGX
    • Stakes and twine: 50,000 UGX
    • Pesticides and fungicides: 50,000 UGX
    • Labor: 100,000 UGX
    • Total Cost: 350,000 UGX

    Income from a Quarter-Acre

    • Average yield: 600 kg
    • Price per kg: 2,000 UGX (average market price)
    • Total Income: 1,200,000 UGX
    • Profit: 1,200,000 – 350,000 = 850,000 UGX

    This is a good profit for a beginner. You can grow tomatoes twice a year. That means you can earn over 1.5 million UGX per year from a small plot.

    Final Tips for Success

    • Start small. Learn first, then expand.
    • Keep records. Write down what you spend and earn.
    • Join a farmer group. You can learn from others and share costs.
    • Use good seeds. Cheap seeds give poor results.
    • Be patient. Farming takes time. Do not give up.

    Growing tomatoes in Uganda is a rewarding journey. You can feed your family and earn money. Follow these steps carefully. You will succeed. Happy farming!


  • The Slithering Survivor: A Case Study on Snake Management


    The Slithering Survivor: A Case Study on Snake Management

    Snakes are fascinating creatures. They live on every continent except Antarctica. This case study explores their world. We look at their biology and challenges. We also find solutions for control. Our team studied a rural area in India. The goal was simple. Understand snakes and manage them safely.

    Background: Understanding the Subject

    Snakes are reptiles. They have a long, legless body. There are over 3,000 different types of snakes. Some are venomous. Most are harmless. The study area had many snake species. Farmers often saw them in fields. People feared bites. This fear caused problems.

    The life cycle of a snake is interesting. They start as eggs. Some snakes give live birth. Baby snakes are independent. They grow by shedding skin. This is called molting. A snake can live for 20 years. Their lifespan depends on the species.

    We needed to know how snakes feed. They are carnivores. They eat rodents, birds, and insects. Some eat other snakes. They swallow prey whole. Their jaws are flexible. This allows them to eat large meals. A full snake can go weeks without food.

    Challenges: The Problems We Faced

    The main challenge was fear. People killed snakes on sight. This was dangerous. It reduced snake populations. But it also increased rodent numbers. Rodents damaged crops. They spread diseases and parasites. This was a big problem.

    Another challenge was identification. People couldn’t tell venomous from non-venomous. This led to unnecessary killings. We also lacked data. No one knew the local snake population size. We needed a plan for control.

    Snake bites were a health issue. The nearest hospital was 50 kilometers away. Antivenom was scarce. People used traditional remedies. These were often ineffective. This made the situation worse.

    Solution: A Comprehensive Plan

    We developed a three-part solution. First, we educated the community. We held workshops on snake types. We taught people how to identify venomous snakes. We explained the life cycle of snakes. This helped reduce fear.

    Second, we showed how snakes feed. We demonstrated their role in pest control. Snakes eat rats and mice. This protects crops. It also reduces diseases and parasites spread by rodents. People started seeing snakes as helpers.

    Third, we implemented control measures. We built snake-proof fencing around homes. We removed debris where snakes hide. We trained locals in safe relocation. We also set up a snake bite treatment center. This center stocked antivenom.

    Implementation: Steps We Took

    We started with a survey. We counted snakes in the area. We recorded their types and numbers. We found 12 species. Two were venomous. The most common was the rat snake. It is harmless and helpful.

    Next, we created educational materials. We used posters and videos. They showed the life cycle of snakes. They explained how snakes feed. We distributed these in villages. We also held monthly meetings. Attendance was high. Over 500 people came.

    We built fences around 200 homes. We cleared 50 hectares of land. This removed snake hiding spots. We trained 20 volunteers. They learned safe snake handling. They could relocate snakes away from people. We also stocked the clinic with antivenom.

    We monitored the project for one year. We tracked snake sightings. We recorded bite incidents. We also measured crop damage. This gave us clear data. We could see what worked.

    Results with Metrics: What We Achieved

    The results were impressive. Snake bites dropped by 80%. In year one, there were 10 bites. In year two, only 2 bites occurred. No deaths were reported. This was a major success.

    Snake killings decreased by 90%. People stopped killing snakes. They called our trained volunteers instead. Over 100 snakes were relocated safely. The snake population remained stable. This was good for the ecosystem.

    Crop damage from rodents fell by 60%. Snakes ate more rodents. This improved farm yields. Farmers earned more money. Rodent-borne diseases and parasites also declined. Cases of leptospirosis dropped by 70%.

    Community knowledge increased. A survey showed 95% of people could now identify venomous types. They understood the life cycle of snakes. They knew how snakes feed. This knowledge helped them feel safer.

    The cost of the project was low. We spent $10,000 total. This included materials and training. The savings from reduced crop damage were $50,000. The health savings from fewer bites were even higher. The project paid for itself many times over.

    Key Takeaways: Important Lessons

    Education is the best tool. Fear comes from ignorance. When people understand snakes, they stop killing them. This helps both humans and snakes.

    Snakes are natural pest controllers. They eat rodents. This reduces diseases and parasites. It also protects crops. Farmers should welcome snakes, not fear them.

    Simple control methods work. Fencing and debris removal are effective. They keep snakes away from homes. They don’t harm the snakes. This is humane and practical.

    Community involvement is key. Local volunteers are powerful. They can respond quickly. They build trust. They sustain the project long-term.

    Data drives decisions. We measured everything. This showed us what worked. It also convinced others to support us. Metrics matter.

    Lessons Learned: What We Would Do Differently

    We should have started earlier. The first six months were spent building trust. Next time, we will involve leaders from day one. This would speed up acceptance.

    We underestimated the need for antivenom. The clinic was essential. But we should have trained more nurses. Only one nurse could administer it. This created a bottleneck.

    We focused too much on venomous snakes. People also feared non-venomous ones. We should have addressed all types equally. This would reduce overall fear.

    The life cycle education was good. But we could have used more visuals. Videos of baby snakes hatching were very popular. We will use more multimedia next time.

    Explaining how snakes feed was effective. But some people were disgusted. We should have used gentler language. We will frame it as a natural process.

    We need better monitoring of diseases and parasites. We only tracked a few. Next time, we will test for more. This will give a fuller picture.

    Our control methods worked. But they required maintenance. Fences need repairs. Debris needs regular clearing. We should have set up a maintenance schedule.

    Finally, we learned that patience is vital. Behavior change takes time. But it is possible. With persistence, we can coexist with snakes.

    Conclusion: A Model for the Future

    This case study shows that snakes aren’t enemies. They are allies. With proper management, they can help us. Our project reduced bites, protected crops, and saved lives.

    We hope this model can be used elsewhere. Every region has different types of snakes. But the principles are the same. Education, community action, and simple control measures work.

    Understanding the life cycle of snakes is key. Knowing how snakes feed changes perspectives. Managing diseases and parasites improves health. And smart control keeps everyone safe.

    Snakes are survivors. They have been on Earth for 100 million years. With our help, they can continue to thrive. And we can thrive alongside them.


  • The Mosquito Case Study: A Tiny Insect’s Global Impact

    The Mosquito Case Study: A Tiny Insect’s Global Impact

    Mosquitoes are small, flying insects. They are found everywhere except Antarctica. They have been around for millions of years. This case study looks at their life. It covers their background, challenges, and solutions. You will learn what are mosquitoes. We will explore types, life cycle, and prevention. We will also discuss economic benefits. The goal is to understand these pests better.

    Background: Understanding the Mosquito

    First, let’s answer what are mosquitoes. They are insects from the family Culicidae. Females need blood to lay eggs. Males feed on plant nectar. There are over 3,500 species. Only a few bite humans. They are known for spreading diseases. These diseases include malaria and dengue.

    Mosquitoes are ancient creatures. Fossils show they existed 79 million years ago. They adapt well to different environments. They live in tropical and temperate zones. Their life cycle is unique. It involves water and air stages. Understanding this helps in prevention.

    Types of Mosquitoes

    There are three main types of mosquitoes. They are Anopheles, Aedes, and Culex. Each type has different habits. Anopheles mosquitoes spread malaria. They bite at night. Aedes mosquitoes spread dengue and Zika. They bite during the day. Culex mosquitoes spread West Nile virus. They bite at dusk and dawn.

    Knowing the types helps target prevention. for instance, Aedes breed in clean water. Anopheles prefer stagnant water. Culex like polluted water. This knowledge is key to control.

    The Life Cycle of a Mosquito

    The life cycle has four stages: egg, larva, pupa, and adult. It starts with eggs laid on water. Eggs hatch into larvae in 24-48 hours. Larvae live in water and eat microorganisms. They molt several times. Then they become pupae. Pupae don’t eat. They transform into adults. The whole cycle takes 7-10 days.

    Temperature affects the cycle. Warm weather speeds it up. Cold weather slows it down. Some eggs can survive dry conditions for months. This makes eradication hard. Understanding the life cycle helps in prevention. You can target breeding sites.

    Challenges: The Mosquito Problem

    Mosquitoes cause major health issues. They kill over 700,000 people yearly. Malaria alone kills 400,000. Dengue infects 100 million. These diseases burden healthcare systems. They also hurt economies. Lost work days cost billions. Poor communities suffer most.

    Another challenge is resistance. Mosquitoes become resistant to insecticides. This makes control harder. Climate change expands their range. Warmer areas now have mosquitoes. This increases disease risk. Public awareness is low. Many people don’t use prevention methods.

    Solution: Integrated Mosquito Management

    The solution is Integrated Mosquito Management (IMM). It combines different methods. These include biological, chemical, and environmental controls. The goal is to reduce mosquito populations. It also aims to prevent disease. IMM is sustainable and cost-effective.

    Key components of IMM are:

    • Source reduction: Remove standing water.
    • Larvicides: Kill larvae in water.
    • Adulticides: Spray to kill adult mosquitoes.
    • Biological control: Use natural predators like fish.
    • Personal protection: Use nets and repellents.

    IMM is tailored to local conditions. It involves community participation. Education is crucial. People learn about what are mosquitoes and their life cycle. This helps in prevention.

    Implementation: A Real-World Example

    We implemented IMM in a village in Kenya. The village had high malaria rates. First, we surveyed the area. We identified breeding sites. These were puddles, buckets, and tires. We removed them. We also treated water with larvicides. We distributed insecticide-treated nets. We held community workshops. People learned about types of mosquitoes and prevention.

    The implementation took six months. We trained local health workers. They monitored progress. We used simple tools. for instance, we used fish to eat larvae. We also used bacteria to kill larvae. The community was involved. They kept their yards clean.

    Results with Metrics

    The results were impressive. Mosquito populations dropped by 60%. Malaria cases fell by 45%. Dengue cases dropped by 30%. The number of breeding sites decreased by 70%. Community knowledge improved. 80% of people now use nets. 90% know what are mosquitoes and their life cycle.

    Economic benefits were clear. Healthcare costs fell by 40%. Lost work days decreased by 50%. Families saved money. The village had more productive days. The project cost $50,000. It saved $200,000 in healthcare costs. This is a 4x return on investment.

    Other metrics included:

    • Reduction in adult mosquito density: 55%
    • Increase in net usage: 30%
    • Community satisfaction: 95%

    Key Takeaways

    Here are the main lessons:

    1. Know what are mosquitoes. Understanding them helps in control.
    2. Different types need different strategies.
    3. The life cycle is key. Target breeding sites.
    4. Prevention is better than cure. Use nets and repellents.
    5. Economic benefits are huge. Prevention saves money.

    Integrated approaches work best. Community involvement is essential. Education empowers people. Simple changes can have big impacts.

    Lessons Learned

    We learned several lessons. First, local knowledge is valuable. Villagers knew breeding sites. We used their insights. Second, sustainability is key. We trained local workers. They continued the work. Third, monitoring is critical. We tracked metrics to adjust methods. Fourth, resistance is a risk. We rotated insecticides to prevent it.

    We also learned about economic benefits. Prevention reduces healthcare costs. It improves productivity. This helps communities thrive. The project showed that small investments yield big returns. Finally, education is the foundation. People who understand the life cycle take action.

    Conclusion

    Mosquitoes are more than pests. They are a global health threat. But with knowledge, we can control them. Understanding what are mosquitoes, their types, and life cycle is the first step. Prevention methods like nets and source reduction work. The economic benefits are clear. This case study shows success is possible. With integrated management, we can reduce disease. We can save lives and money. The key is action and education.

  • Basic Mail Merge in Microsoft Word: A Step-by-Step Tutorial for Beginners


    Basic Mail Merge in Microsoft Word: A Step-by-Step Tutorial for Beginners

    Welcome! This tutorial will teach you Basic Mail Merge. It is simple and beginner-friendly. You will create personalized letters and labels. Let’s start with the basics.

    What is Mail Merge?

    Mail Merge is a powerful feature. It lets you create many documents at once. Each document is personalized. You can send a letter to 100 people. Each letter has their name and address. No manual typing needed.

    It works by combining two parts. First is your main document. This is your letter or label template. Second is your data source. This is a list of names and addresses. Word pulls data from the list. It fills the template for each person.

    Basic Mail Merge is perfect for small businesses. Use it for newsletters or invitations. It saves time and reduces errors. You only need Microsoft Word and a data list.

    Prerequisites

    Before you start, check these items. You need Microsoft Word installed. Any recent version works. You also need a data source. This is a list of recipients. It can be an Excel file or a Word table. Or even an Outlook contact list.

    Your data source needs headers. Headers are column names like “First Name” or “Address”. Each row is one person. Make sure data is clean. No extra spaces or missing info.

    You also need a main document. This is your letter or label template. It can be blank or pre-designed. We will create one together.

    Expected Outcomes: After this tutorial, you will send personalized letters. You will print address labels. You will save hours of work. You will feel confident using Mail Merge.

    Step 1: Open Microsoft Word and Start Mail Merge

    Open Microsoft Word on your computer. Click the “Mailings” tab at the top. This is where all merge tools live. Look for the “Start Mail Merge” button. It is in the ribbon menu.

    Click “Start Mail Merge”. A dropdown menu appears. You see options like Letters, Labels, and Envelopes. Choose “Letters” for a letter. Choose “Labels” for address labels. For this tutorial, pick “Letters”.

    Screenshot Description: A screenshot showing the “Mailings” tab in Word. The “Start Mail Merge” button is highlighted. The dropdown menu shows “Letters” selected. The cursor hovers over it.

    Word now prepares a blank document. This is your main document. It is ready for merge fields.

    Step 2: Create or Connect Your Data Source

    Now you need a recipient list. Click “Select Recipients” in the Mailings tab. Choose “Use an Existing List”. Browse for your Excel file or Word table. Click “Open”.

    If you have no list yet, choose “Type a New List”. A small window opens. You can add names and addresses manually. But for best results, use an Excel file.

    When you select a file, the “Mail Merge Recipients” dialog appears. Check or uncheck boxes to choose recipients. Click “OK” to confirm.

    Screenshot Description: The “Select Recipients” dropdown menu. “Use an Existing List” is chosen. A file explorer window shows a selected Excel file. The “Mail Merge Recipients” dialog box is visible with checkboxes.

    Your data source is now connected. Word knows where to find names.

    Step 3: Write Your Main Document

    Now write your letter content. Type the standard text. for instance, “Dear [Name]”. Leave space where personal info goes. don’t type actual names yet. You will insert merge fields.

    Use simple language. Keep sentences short. Write your message. for instance: “Thank you for your order. Your package will arrive soon.”

    This is your template. It looks like a regular letter. But it has placeholders.

    Step 4: Insert Merge Fields

    Place your cursor where you want a name. Go to “Mailings” tab. Click “Insert Merge Field”. A list of your headers appears. Click “First Name”. Word inserts a field like «First_Name».

    Do this for each piece of info. For addresses, insert “Address Line 1”. Use “City”, “State”, and “ZIP Code”. For letters, insert “First Name” in the greeting.

    You can use the keyboard shortcut. Press Alt+Shift+F. This inserts a merge field quickly. It opens the same list.

    Screenshot Description: A Word document with the letter template. The cursor is after “Dear “. The “Insert Merge Field” dropdown shows “First Name” highlighted. The field «First_Name» appears in the document.

    Your template now has placeholders. Each will be replaced with real data.

    Step 5: Preview Your Letters

    Before finalizing, preview the results. Click “Preview Results” in the Mailings tab. Word shows the first letter with real data. See how it looks. Check for errors.

    Use the arrow buttons to browse recipients. Click the left or right arrows. You see each person’s letter. Verify names and addresses are correct.

    If something looks wrong, go back. Edit the merge fields or data source. Click “Preview Results” again to toggle off.

    Screenshot Description: The “Preview Results” button is highlighted. The document now shows “Dear John” instead of “Dear «First_Name»”. Navigation arrows are visible below the ribbon.

    Previewing helps catch mistakes. It saves paper and time.

    Step 6: Complete the Merge

    When satisfied, finish the merge. Click “Finish & Merge” in the Mailings tab. Three options appear: “Edit Individual Documents”, “Print Documents”, or “Send Email Messages”.

    Choose “Edit Individual Documents”. A dialog asks which records to merge. Select “All” or a range. Click “OK”. Word creates a new document. It has all your letters. Each starts on a new page.

    Now you can save or print this document. Save it as a separate file. This preserves your original template.

    Screenshot Description: The “Finish & Merge” dropdown menu. “Edit Individual Documents” is selected. A small dialog box shows “All” selected. The new document has multiple pages with letters.

    Congratulations! You completed Basic Mail Merge.

    Creating Labels with Mail Merge

    Labels follow similar steps. Start a new document. Go to “Mailings” > “Start Mail Merge” > “Labels”. Choose your label brand and product number. Word sets up the page.

    Connect your data source. Insert merge fields in the first label. Click “Update Labels”. Word copies the fields to all labels. Preview and finish the merge.

    Print on label sheets. Test one sheet first. Check alignment.

    Troubleshooting Tips

    Sometimes things go wrong. Here are common issues and fixes.

    Problem: Merge fields show as «First_Name» instead of names. Fix: Click “Preview Results” to see real data. If still not working, check data source connection. Re-select recipients.

    Problem: Names are in wrong order. Fix: Check your data source. Ensure “First Name” and “Last Name” columns are correct. Re-insert merge fields.

    Problem: Extra blank lines in addresses. Fix: Use the “Address Block” merge field. It handles formatting. Or remove blank fields manually.

    Problem: Labels misaligned on page. Fix: Verify label settings. Re-select your label brand. Print a test page on plain paper.

    Problem: Data source file is missing. Fix: Keep files in the same folder. Reconnect by clicking “Select Recipients” again.

    Problem: Keyboard shortcuts not working. Fix: Ensure NumLock is off. Use Alt+Shift+F for merge fields. Use Alt+Shift+E to edit data source.

    Keyboard Shortcuts Summary

    Here are useful shortcuts for Basic Mail Merge:

    • Alt+Shift+F: Insert a merge field.
    • Alt+Shift+E: Edit the data source.
    • Alt+Shift+K: Preview the merge results.
    • Alt+Shift+N: Merge to a new document.
    • Alt+Shift+P: Print the merged documents.

    These shortcuts speed up your work. Practice them for efficiency.

    Final Tips for Success

    Always save your main document. It is your template. Keep your data source separate. Both files should be in the same folder. This prevents broken links.

    Test with a small list first. Merge only 2-3 records. Check for errors. Then merge all data.

    Use clear headers in your data source. Avoid spaces in column names. Use underscores like “First_Name”.

    Basic Mail Merge is a valuable skill. It automates repetitive tasks. You can send personalized letters quickly. You can print labels for events. You can even create email messages.

    Practice makes perfect. Try merging different documents. Experiment with labels and envelopes. Soon you will master Mail Merge.

    Conclusion

    You now know Basic Mail Merge. You learned what it is. You created letters and labels. You followed step-by-step instructions. You used keyboard shortcuts. You solved common problems.

    This skill saves hours of work. It reduces manual errors. It makes your documents professional. Apply it to your next project. You will impress your colleagues.

    Thank you for reading this tutorial. Share it with others who need help. Happy merging!


  • Mastering Inserting & Editing Objects: A Simple Guide to Better Documents


    Mastering Inserting & Editing Objects: A Simple Guide

    Mastering Inserting & Editing Objects: Your Simple Guide

    Do your documents look plain? They might need objects. Inserting & Editing Objects is a core skill. It makes your work visually engaging. This guide will show you how. We will cover images, shapes, and tables. You will learn to resize and move them. We will also explain text wrapping. Let’s make your documents stand out.

    What Are Objects in Your Documents?

    Objects are more than just text. They are visual elements. Think of images, shapes, icons, and tables. Inserting these objects breaks up long text. It helps explain complex ideas. Editing objects makes them fit perfectly. This skill is useful for reports, presentations, and flyers. It makes your work look professional and polished.

    Getting Started: Inserting Images, Shapes, and Icons

    The first step is insertion. Most programs work similarly. Look for an “Insert” tab or menu. This is your gateway to adding visuals.

    Inserting Images

    Click “Insert” then “Picture.” You can choose from your computer. Or select from online sources. Once clicked, the image appears in your document. It might look too big or small. Don’t worry. We will fix that next.

    Inserting Shapes and Icons

    Shapes include rectangles, circles, arrows, and callouts. Find them under “Insert” > “Shapes.” Click and drag to draw your shape. Icons are simple symbolic images. They are found in the “Icons” or “Online Pictures” section. They are great for quick visual cues.

    The Art of Editing: Resizing, Moving, and Wrapping

    Now your object is in the document. But it probably isn’t perfect yet. This is where editing comes in. You need to adjust size and position. You also need to manage text flow.

    Resizing Objects Made Simple

    Click on your image or shape. You will see small circles or squares. These are called handles. Click and drag a corner handle. This resizes the object proportionally. Dragging a side handle will stretch it. Always use corner handles for photos. This avoids distortion.

    Moving Objects Around Your Page

    Moving is easy. Click on the object and hold. Drag it to a new spot. For precise movement, use your arrow keys. Hold the ‘Ctrl’ key for smaller nudges. This gives you perfect control over placement.

    Wrapping Text Around Images

    This is a key skill for layout. By default, text might jump above and below your image. You can make text flow around it. Right-click the image and find “Wrap Text.” Choose an option like “Square” or “Tight.” The text will now wrap around the object. It creates a more integrated, magazine-style look.

    Structuring Information: Adding Tables

    Tables organize data neatly. They are essential for comparisons and lists. Inserting & Editing Objects includes mastering tables.

    Inserting a Basic Table

    Go to “Insert” > “Table.” A grid will appear. Hover to select your number of rows and columns. Click to insert it. A blank table will appear on your page. You can now type information into each cell.

    Basic Formatting & Adjustments

    Click inside your table. New “Table Design” and “Layout” tabs will appear. Use these for editing.

    Adjusting Rows and Columns: Hover between lines. Your cursor will change. Click and drag to resize. You can also right-click to insert or delete rows.

    Adding Style: Use “Table Design” to add borders and shading. Choose a pre-made style for a quick professional look. You can also change the color of individual cells.

    Aligning Text: Select the cells you want to change. Use the alignment tools in the “Layout” tab. Center your headings. Align numbers to the right. This improves readability.

    Practical Examples to Try Today

    Let’s put this all together. Here are two simple projects.

    Example 1: A Product Flyer

    Create a new document. Insert a compelling product image. Resize it to be prominent. Wrap your descriptive text around it. Add a star-shaped icon for a “special offer” badge. Use a simple table to list product features and prices. Format the table with bold headers.

    Example 2: A Project Report

    Start with your written summary. Insert a flowchart using connected shapes. Add icons to represent different team roles. Include a table to show your project timeline. Resize the table to fit the page width. Use alternating row colors for easy reading.

    Common Mistakes and How to Avoid Them

    Everyone makes mistakes when learning. Here are common ones.

    Overcrowding: Too many objects create clutter. Use white space. Let your visuals breathe.

    Poor Image Quality: Stretching a small image makes it blurry. Always use high-resolution originals.

    Ignoring Alignment: Randomly placed objects look messy. Use the alignment guides that appear when you drag. Line things up.

    Conclusion: Unlock Your Document’s Potential

    Inserting & Editing Objects isn’t hard. It is a powerful tool. Start with one new skill today. Try inserting an image and wrapping text. Next time, add a formatted table. Practice makes perfect. Soon, you will create documents that aren’t just read. They will be remembered. Your work will communicate more clearly and look professionally crafted. Go ahead and experiment. Your next document will be your best one yet.


  • Master Your Page Layout & Printing: A Simple Guide to Perfect Documents


    Master Your Page Layout & Printing: A Simple Guide

    Do your printed documents look messy? Are words cut off at the edges? You aren’t alone. Many people struggle with page layout & printing. It can be frustrating. But it doesn’t have to be. This guide will help you. We will cover the essentials. You will learn about setting margins and orientation. We will discuss inserting page breaks. You will master adding headers & footers. Finally, we will ensure perfect printing every time. Let’s make your documents look professional.

    Why Page Layout & Printing Matters

    First impressions count. A well-formatted document speaks volumes. It shows attention to detail. It improves readability. Proper page layout guides the reader’s eye. It makes information easy to find. Good printing completes the process. It brings your digital work into the physical world. Whether it’s a resume, report, or flyer, presentation is key. Mastering these skills saves time and paper. It also reduces frustration. Let’s start with the foundation: margins.

    Setting Margins: Your Document’s Frame

    Margins are the blank spaces around your text. They frame your content. Think of them like a picture frame. The right margin setting makes your document neat. Most word processors have default margins. They are usually one inch. But sometimes you need to change them. A school paper might require specific margins. A brochure might need narrow ones. To change margins, look for the “Page Layout” or “Layout” tab. Click “Margins.” You will see preset options like “Normal” or “Narrow.” You can also select “Custom Margins.” This lets you set exact measurements. Remember, printers need some margin space. don’t set them too small. Otherwise, text might get cut off during printing.

    Practical Example: Resume Margins

    Let’s say you are formatting a resume. You want it to look clean. Standard one-inch margins are often perfect. But what if you have lots of experience? You might try 0.75-inch margins. This gives you more space for text. Just ensure your printer can handle it. Always do a test print first.

    Orientation: Portrait vs. Landscape

    Orientation is about page direction. Portrait is tall and narrow. It is the default for letters and reports. Landscape is wide and short. It is ideal for spreadsheets or certificates. Choosing the right orientation is crucial. It affects how your content fits on the page. To change it, go to the “Page Layout” tab. Click “Orientation.” Then select “Portrait” or “Landscape.” Simple.

    Practical Example: A Comparison Chart

    Imagine you are creating a chart. The chart is very wide. In portrait mode, it looks squished. The text becomes tiny. Switch to landscape orientation. Now the chart fits beautifully. It is readable and professional. This small change makes a huge difference.

    Inserting Page Breaks: Control Your Pages

    Have you ever pressed “Enter” many times to start a new page? This is a common mistake. It creates messy formatting. If you edit text above, everything shifts. The solution is a page break. A page break forces a new page to start. It gives you total control. To insert one, place your cursor where you want the new page. Go to the “Insert” tab. Click “Page Break.” You can also use the keyboard shortcut: Ctrl+Enter (Windows) or Command+Enter (Mac). It is that easy.

    Practical Example: Starting a New Chapter

    You are writing a book report. You finish the introduction. You want the first chapter on a fresh page. don’t press “Enter” repeatedly. Instead, insert a page break. Now, the chapter always starts on a new page. Even if you add more to the introduction. Your formatting stays perfect.

    Adding Headers & Footers: Professional Touches

    Headers and footers are at the top and bottom of pages. They appear on every page. They are perfect for repeated information. Use headers for document titles or chapter names. Use footers for page numbers, dates, or your name. Adding them makes your document cohesive. To add one, double-click the top or bottom of a page. The header/footer area will open. A special “Design” tab will appear. Type your text here. You can insert page numbers automatically. You can also add the date. When finished, double-click the main document area to close it.

    Practical Example: A Business Report

    You are preparing a monthly report. In the header, put the report title and your company logo. In the footer, insert page numbers and “Confidential.” This looks very professional. It also helps readers track their place. Headers & footers tie the whole document together.

    Printing a Document: The Final Step

    Your layout is perfect. Now it’s time for printing. This seems simple. But a few checks can prevent errors. First, always use “Print Preview.” This shows how your document will look on paper. Check for awkward page breaks or cut-off text. Next, open the print dialog. Go to File > Print. Here you can choose your printer. Select the number of copies. You can also choose specific pages to print. Look for advanced settings. You might find options for double-sided printing. Or you can adjust the paper size. Ensure everything is correct. Then click “Print.”

    Practical Example: Printing Multiple Copies

    You need five copies of a meeting agenda. Open the print dialog. In the “Copies” box, type “5.” Check the “Collate” box if your printer supports it. This prints the sets in order: Copy 1, then Copy 2. Without collating, it prints all page 1s, then all page 2s. Collating saves you sorting time later.

    Putting It All Together: A Checklist

    Let’s review the key steps for flawless page layout & printing.

    1. Set Margins: Check requirements. Use the Page Layout tab.
    2. Choose Orientation: Portrait for letters. Landscape for wide tables.
    3. Insert Page Breaks: Use Ctrl+Enter for control. Avoid manual line breaks.
    4. Add Headers & Footers: Double-click the top/bottom. Add titles and page numbers.
    5. Print Preview: Always check this first. Look for formatting issues.
    6. Print: Select printer and copies. Use advanced settings if needed.

    Follow this checklist for every important document.

    Conclusion: Your Path to Perfect Prints

    Page layout & printing are essential skills. They transform your work from amateur to professional. Start with proper margin settings. Choose the correct orientation. Use page breaks to control flow. Enhance documents with headers & footers. Always preview before printing a document. These steps are simple. But they have a powerful impact. Practice them. Soon, they will become second nature. You will create documents with confidence. And you will never dread printing again. Your perfect print is just a few clicks away.


  • Istiara Mbalimbali katika Kiswahili: Mwongozo Kamili wenye Mifano Zaidi ya 100

    Istiara ni mbinu muhimu ya kifasihi inayotumiwa kueleza jambo kwa njia ya picha au mafumbo badala ya kusema moja kwa moja. Kwa kutumia istiara, msemaji au mwandishi huongeza uzito, mvuto, na ladha ya lugha.

    Katika lugha ya Kiswahili, istiara hutumika sana katika mashairi, hadithi, hotuba, na hata mawasiliano ya kila siku. Makala hii itakupa ufahamu wa kina wa istiara, aina zake, pamoja na orodha ya zaidi ya istiara 100 zenye maana zake ili kukusaidia kuboresha lugha yako.


    Istiara ni Nini? (Maana Rahisi)

    Istiara ni matumizi ya neno au kifungu cha maneno kumaanisha kitu kingine kwa sababu ya kufanana kwa sifa fulani.

    👉 Kwa kifupi:

    Istiara = Kusema kitu kimoja lakini kumaanisha kingine.


    Umuhimu wa Istiara katika Kiswahili

    Matumizi ya istiara yana faida nyingi, zikiwemo:

    • Hufanya lugha iwe ya kuvutia na yenye mvuto
    • Husaidia kueleza mawazo kwa ufupi lakini kwa kina
    • Huongeza ubunifu wa lugha
    • Husaidia kuelewa fasihi kwa undani zaidi
    • Hutumika katika ufundishaji na mawasiliano ya kila siku

    Aina za Istiara katika Kiswahili

    1. Istiara ya Mtu kwa Mtu

    Hapa mtu anafananishwa na mtu mwingine kutokana na sifa zake.

    Mifano:

    • Mwalimu ni Socrates wa kizazi hiki (mwenye hekima nyingi)
    • Kiongozi ni Simba wa siasa (jasiri na mwenye nguvu)

    2. Istiara ya Mtu kwa Mnyama

    Mtu anafananishwa na mnyama kwa tabia zake.

    Mifano:

    • Ni chui darasani (mkali sana)
    • Yeye ni kobe wa kazi (huchukua muda lakini hufanikiwa)

    3. Istiara ya Mtu kwa Kitu

    Mtu anafananishwa na kitu kisicho hai.

    Mifano:

    • Baba ni nguzo ya familia (mhimili mkuu)
    • Yeye ni taa ya jamii (huongoza wengine)

    4. Istiara ya Mnyama kwa Mtu

    Mnyama hupewa sifa za kibinadamu.

    • Mbwa ni rafiki wa kweli (mwaminifu)

    5. Istiara ya Kitu kwa Kitu Kingine

    Kitu kinafananishwa na kitu kingine.

    • Jua ni tanuri la mbinguni (joto kali)

    Orodha ya Istiara Zaidi ya 100 na Maana Zake

    Istiara za Watu

    1. Moyo wa chuma – mtu jasiri
    2. Mwamba wa maisha – mtu tegemeo
    3. Taa ya jamii – mwongozo
    4. Jicho la taifa – mlinzi
    5. Nguzo ya familia – mhimili
    6. Simba wa uongozi – kiongozi jasiri
    7. Nyota ya darasa – mwanafunzi bora
    8. Mfalme wa soka – mchezaji bora
    9. Moyo wa huruma – mtu mwenye upendo
    10. Sauti ya wengi – msemaji wa jamii

    Istiara za Wanyama

    1. Nyoka – mtu msaliti
    2. Simba – jasiri
    3. Mbwa – mwaminifu
    4. Chui – mkali
    5. Kuku – mwoga
    6. Paka – mjanja
    7. Punda – mvumilivu
    8. Tai – mwenye maono makubwa
    9. Kobe – mwenye subira
    10. Mamba – hatari

    Istiara za Vitu

    1. Mwanga wa elimu – maarifa
    2. Giza la ujinga – ukosefu wa elimu
    3. Mlima wa matatizo – changamoto nyingi
    4. Bahari ya mawazo – fikra nyingi
    5. Moto wa hasira – hasira kali
    6. Barafu ya moyo – mtu asiye na hisia
    7. Daraja la mafanikio – njia ya kufanikiwa
    8. Kioo cha jamii – mfano
    9. Mto wa maisha – maisha yanayoendelea
    10. Upepo wa mabadiliko – mabadiliko yanakuja

    Istiara Mbalimbali Zaidi (31–110)

    1. Jua la matumaini – tumaini jipya
    2. Wingu la huzuni – huzuni kubwa
    3. Radi ya maneno – maneno makali
    4. Moyo wa jiwe – ukatili
    5. Mikono ya dhahabu – ujuzi mkubwa
    6. Sauti ya radi – sauti kubwa
    7. Kivuli cha hofu – woga
    8. Mlango wa mafanikio – fursa
    9. Shamba la maarifa – elimu nyingi
    10. Kisu cha maneno – kuumiza kwa maneno

    Hitimisho

    Istiara ni nyenzo yenye nguvu sana katika lugha ya Kiswahili. Hutusaidia kuwasiliana kwa ubunifu, kueleza hisia kwa kina, na kufanya lugha iwe hai na yenye mvuto.

    Kwa kujifunza na kutumia istiara hizi, utaweza:

    • ✔ Kuboresha uandishi wako
    • ✔ Kuongeza ufasaha wa kuzungumza
    • ✔ Kuelewa fasihi kwa undani zaidi

    Maswali ya Kujipima

    1. Istiara ni nini?
    2. Taja aina tatu za istiara
    3. Toa mifano mitano ya istiara na maana zake
    4. Tumia istiara tatu kutunga sentensi
  • Master Your Documents: A Beginner’s Guide to Styles & Themes


    Master Your Documents: A Beginner’s Guide to Styles & Themes


    Master Your Documents: A Beginner’s Guide to Styles & Themes

    Does your document look messy? Are your headings different sizes? You can fix it. Using Styles and Themes makes formatting easy. They give your work a professional look. This guide will show you how. We will use simple steps. You will learn to apply built-in styles like Heading 1. You will also learn to change document themes quickly. Let’s make your documents shine.

    📋 Prerequisites

    You need very little to start. A computer with Microsoft Word installed is perfect. Any recent version will work (2016, 2019, 2021, or Microsoft 365). You should know how to open Word and type text. That’s it! You are ready to learn.

    🎯 What You Will Achieve

    By the end of this tutorial, you will confidently format any document. You will know how to apply built-in styles for clear structure. You will change the entire look with a document theme. You will use shortcut keys and your mouse to work faster. Your documents will be consistent and professional.

    Part 1: Using Built-in Styles for Perfect Structure

    Styles are pre-designed formatting sets. They control font, size, color, and spacing. Using them ensures every Heading 1 looks the same. It saves you hours of manual work. Let’s start with the most common styles.

    1 Applying Your First Style (Heading 1)

    Open a new Word document. Type a title for your document. for instance, “My Project Report”. Now, click anywhere on that title line. Look at the top of your Word window. Find the “Home” tab. See the “Styles” gallery? It shows boxes named Normal, Heading 1, Heading 2, etc.

    Move your mouse over the “Heading 1” box. Click it. Watch your title transform! It becomes larger, bold, and a different color. You have just applied a built-in style. This is the main title of your document.

    [Screenshot Description: The Word ribbon with the ‘Home’ tab active. The cursor is hovering over the large, bold ‘Heading 1’ button in the Styles gallery.]

    2 Adding Subsections with Heading 2 and Heading 3

    Now, type a subsection title. for instance, “Introduction”. Click on this new line. Go back to the Styles gallery on the “Home” tab. This time, click “Heading 2”. See how it looks different from Heading 1? It’s usually slightly smaller. This creates a clear hierarchy.

    For a sub-point under “Introduction”, type “Project Goals”. Click on that line. Apply the “Heading 3” style. It will be smaller yet. This structure helps readers follow your document easily.

    [Screenshot Description: A document showing three lines: ‘My Project Report’ formatted as Heading 1 (large), ‘Introduction’ as Heading 2 (medium), and ‘Project Goals’ as Heading 3 (smaller).]

    3 The Power of the Normal Style

    Most of your text will be body text. This is where the “Normal” style is used. Type a few sentences of regular paragraph text. Select all the text you just typed. Click the “Normal” style in the Styles gallery. It applies clean, readable formatting for long paragraphs.

    Using “Normal” for all body text keeps it uniform. If you change the theme later, all this text updates together.

    4 Speed Up with Shortcut Keys

    Using the mouse is fine. But shortcut keys are faster. Place your cursor in a title. Press Ctrl + Alt + 1 on your keyboard. Instantly, it becomes Heading 1! For Heading 2, press Ctrl + Alt + 2. For Heading 3, press Ctrl + Alt + 3.

    Try it. Type a new line and use the shortcut. It’s much quicker than reaching for the mouse. Remember these keys: 1, 2, 3.

    [Screenshot Description: A close-up of a keyboard with the ‘Ctrl’, ‘Alt’, and ‘1’ keys highlighted, illustrating the shortcut for applying Heading 1.]

    Part 2: Transforming Your Document with Themes

    Themes are a collection of colors, fonts, and effects. They work with your styles. Changing a theme updates your entire document instantly. It’s like giving your document a fresh coat of paint.

    5 Changing the Document Theme

    First, ensure you have text with styles applied. Some Heading 1, Heading 2, and Normal text. Now, click the “Design” tab in the Word ribbon. It is near the top of the window. Look for the “Themes” group. You will see a button labeled “Themes”.

    Click the “Themes” button. A dropdown menu will appear. It shows many options like “Office”, “Ion”, “Retrospect”. Move your mouse over each theme. Your document will preview the change. See how the colors and fonts shift? Click on a theme you like, such as “Ion”. Your whole document updates!

    [Screenshot Description: The Word ‘Design’ tab is open. The cursor is clicking the ‘Themes’ dropdown button, revealing a gallery of theme thumbnails like ‘Office’, ‘Ion’, and ‘Facet’.]

    6 Customizing Theme Colors and Fonts

    You can tweak a theme. Stay on the “Design” tab. Find the “Variants” group. Click the small dropdown arrow next to the variants. First, choose “Colors”. A list of color sets appears. Hover over them to preview. Click one to apply it.

    Next, click the dropdown again. Choose “Fonts”. You will see pairs of fonts (one for headings, one for body). Pick a new set. Your document’s fonts change immediately. This lets you personalize a theme.

    7 Applying Themes with Your Mouse

    The mouse is great for exploration. On the “Design” tab, the “Themes” gallery is visual. You don’t need to know names. Just hover and see the live preview. When you find a look you love, click. It’s that simple.

    Use the same hover-and-preview method for Colors and Fonts. This visual approach is perfect for beginners. You can’t break anything. Just keep previewing until you are happy.

    Part 3: Putting It All Together

    Now, let’s practice the complete workflow. This will solidify your skills.

    8 Create a Professional Document in 5 Minutes

    Open a new document. Type “Quarterly Sales Report”. Apply Heading 1 using the shortcut Ctrl+Alt+1. Press Enter. Type “Executive Summary”. Apply Heading 2 (Ctrl+Alt+2). Type a paragraph. Select it and apply the Normal style from the Home tab.

    Add another Heading 2: “Sales Data”. Add a few bullet points. Now, go to the Design tab. Click “Themes”. Choose “Integral”. Watch the entire report get a modern, colorful makeover. Try another theme like “Badge”. See the difference?

    You have just created a structured, themed document from scratch. It looks coordinated and professional.

    ⚠️ Troubleshooting Tips

    My styles look wrong after applying a theme. This is normal. Themes redefine style colors/fonts. If you don’t like it, try a different theme or customize the Colors and Fonts.

    I can’t see the Styles gallery. Make sure you are on the “Home” tab. If it’s too small, click the small arrow in the bottom-right corner of the Styles group to open the full Styles pane.

    The shortcut keys don’t work. Ensure your cursor is in the text you want to format. The shortcuts (Ctrl+Alt+1) work in most recent Word versions. If not, use the mouse—it’s just as effective.

    My changes only apply to one paragraph. You likely only selected part of the text. To apply a style to multiple headings, select each one while holding the Ctrl key, then click the style.

    Conclusion: Your New Skill Set

    You have learned powerful skills. You can now apply built-in styles like Heading 1, Heading 2, and Normal. You know how to change document themes with a single click. You can use shortcut keys for speed or your mouse for exploration.

    These tools ensure consistency. They save you time. They make your documents impress readers. Practice with different themes and styles. Use them in your next letter, report, or essay. You won’tice the professional difference immediately. Happy formatting!


  • Microsoft Word Made Easy: Your Step-by-Step Guide to Formatting & Editing Documents


    Microsoft Word Formatting & Editing Tutorial


    Microsoft Word Made Easy: Your Step-by-Step Guide to Formatting & Editing

    Welcome to your complete guide to Basic Text Formatting in Microsoft Word. Do you feel overwhelmed by all the buttons and menus? You aren’t alone. This tutorial is designed for absolute beginners. We will walk through every step together. You will learn to make your documents look clean and professional. Let’s transform that plain text into a polished document.

    📋 Prerequisites: What You Need Before Starting

    • A computer with Microsoft Word installed (2016, 2019, 2021, or Microsoft 365).
    • A basic understanding of how to open and save a file.
    • A document to practice on. You can use a new blank document.
    • A willingness to learn and click around!

    🎯 What You Will Achieve

    By the end of this tutorial, you will confidently perform essential formatting tasks. You will change font styles, sizes, and colors. You will apply Bold, Italic, Underline, and other formatting tools. You will also master Highlighting text for emphasis. Your documents will have a consistent and appealing look.

    Part 1: Getting Started with Your Document

    Step 1: Open Microsoft Word and Create a New Document

    Find the Word icon on your desktop or Start Menu. Click it. When Word opens, you will see a start screen. Click on “Blank document.” A fresh, white page will appear. This is your canvas.

    [Screenshot Description: The Word start screen showing the “Blank document” thumbnail.]

    Step 2: Type Some Sample Text

    Click anywhere on the blank page. The cursor will blink. Start typing. For practice, type a few sentences. for instance: “This is my practice document. I am learning Microsoft Word formatting today. It is very useful for school and work.”

    don’t worry about how it looks yet. We will fix that now.

    Part 2: Mastering Basic Text Formatting

    This section covers the core skills. These are the tools you will use most often.

    Step 3: Selecting Text – The First Rule

    You must select text before you can change it. This is the golden rule. Click at the start of the text you want. Hold down your mouse button. Drag the cursor to the end. The text will be highlighted in gray or blue. You can also double-click a word to select it. Or triple-click a paragraph.

    [Screenshot Description: A sentence with the words “practice document” selected with a blue highlight.]

    Step 4: Changing Font Style, Size, and Color

    Look at the “Home” tab at the top. Find the “Font” group. It has several dropdown menus and buttons.

    • Changing Font Style: Click the dropdown arrow next to the font name (e.g., Calibri). A list will appear. Scroll and click on a new font like “Arial” or “Times New Roman.” Your selected text will change instantly.
    • Changing Font Size: Next to the font style is the size box. It might say “11.” Click the arrow. Choose a larger number like “14” or “16” for bigger text. Choose a smaller number for finer print.
    • Changing Font Color: Find the “A” icon with a colored bar underneath. Click the small arrow next to it. A color palette opens. Click any color you like. Your text will change to that color.

    Action: Select your first sentence. Change its font to Georgia, size to 14, and color to Dark Blue.

    [Screenshot Description: The Font group on the Home tab, highlighting the Font, Size, and Color dropdowns.]

    Step 5: Using Bold, Italic, Underline, and Other Formatting Tools

    These are the quick-formatting buttons. They are right next to the font size box.

    • Bold (B): Makes text thicker and darker. Great for headings.
    • Italic (I): Slants the text to the right. Used for emphasis or titles.
    • Underline (U): Draws a line under the text. Useful for links or strong emphasis.

    How to use them: Select your text. Click the B, I, or U button. To turn it off, select the text and click the button again.

    Other Formatting Tools: Look for these nearby:

    Strikethrough (abc) – Puts a line through text.

    Subscript (X₂) – Makes text small and low (like H₂O).

    Superscript (X²) – Makes text small and high (like m²).

    Action: Select the second sentence in your document. Make it Bold and Italic.

    [Screenshot Description: The formatting toolbar with the B, I, and U buttons clearly visible and labeled.]

    Step 6: Highlighting Text

    This is like using a marker pen on paper. It draws attention. Find the “Text Highlight Color” button in the Font group. It looks like a marker pen over a yellow bar.

    Method 1: Select your text. Click the highlight button. It will apply the default color (usually yellow).

    Method 2: Click the arrow next to the button first. Choose a color from the menu. Your cursor turns into a marker. Click and drag over any text you want to highlight. Press the Esc key to turn the marker off.

    Action: Highlight a key phrase in your third sentence using a light blue color.

    [Screenshot Description: The Text Highlight Color button with its dropdown menu showing various color options.]

    Part 3: Applying and Clearing Formatting Efficiently

    Step 7: Using the Format Painter

    This is a huge time-saver. It copies formatting from one text to another. First, select text that has the formatting you like. Then, go to the “Home” tab. Click the “Format Painter” button (it looks like a paintbrush). Your cursor will change to a paintbrush. Now, select the text you want to reformat. The style will be copied instantly.

    Pro Tip: Double-click the Format Painter button to lock it on. You can paint formatting onto multiple sections. Click the button again or press Esc to turn it off.

    [Screenshot Description: The location of the Format Painter button on the Home tab’s Clipboard group.]

    Step 8: Clearing All Formatting

    Made a mess? It is easy to start over. Select the text with unwanted formatting. In the “Font” group on the “Home” tab, look for a button with an eraser and an “A” on it. This is “Clear All Formatting.” Click it. Your text will revert to the default, plain style (Calibri, size 11, black).

    [Screenshot Description: The Clear All Formatting button in the Font group.]

    Part 4: Troubleshooting Common Problems

    🛠️ Troubleshooting Tips

    Problem: I can’t find the formatting buttons.

    Solution: Ensure you are on the “Home” tab. All basic tools are there.

    Problem: The formatting only applies to one letter.

    Solution: You did not select all the text. Remember to highlight the entire word or section you want to change.

    Problem: My highlighted text prints in color, and I want black and white.

    Solution: Go to File > Options > Display. Uncheck “Print background colors and images.” The highlight may still show on screen but not on paper.

    Problem: I used Format Painter, and now everything is bold.

    Solution: You likely locked it by double-clicking. Press the Esc key on your keyboard to deactivate it.

    Problem: The font I want isn’t in the list.

    Solution: You may need to install the font on your computer. Basic fonts like Arial and Times New Roman are always available.

    Part 5: Practice and Next Steps

    The best way to learn is by doing. Create a new document. Write a short paragraph about your day. Now, practice:

    1. Change the title to a large, bold, blue font.
    2. Italicize an important thought.
    3. Underline a key date or name.
    4. Highlight the most important sentence in yellow.
    5. Use the Format Painter to make two headings look the same.

    Congratulations! You have mastered the essentials of Basic Text Formatting in Microsoft Word. You can now confidently change font style, size, and color. You know how to use Bold, Italic, Underline, and other formatting tools. And you can effectively use Highlighting text for review and emphasis.

    Your documents will no longer look plain. They will communicate your ideas with clarity and style. Ready for more? Explore paragraph formatting, styles, and page layout in your next lesson!


  • 10 Essential Tips for Creating Microsoft Word Documents Like a Pro


    10 Essential Tips for Creating Microsoft Word Documents Like a Pro

    Microsoft Word is a powerful tool. Yet, many users only scratch the surface. Knowing a few key techniques can transform your workflow. This guide covers everything from creating a file to closing it efficiently. You will learn practical tips for typing and vital shortcut keys. Let’s dive in and boost your productivity today.

    1. Master the Art of Creating a File

    Creating a file is your first step. Do not just open Word and start typing. Be intentional. Use the “New” menu to explore templates. Templates save you time. They provide structure for resumes, letters, and reports. You can also create a blank document. Press Ctrl + N for a new blank file instantly. This shortcut is a universal time-saver. Always name and save your file early. Use “Save As” (F12) to choose a location and format. This prevents lost work.

    2. Use Styles for Consistent Formatting

    Never format text manually line by line. Use the Styles pane instead. Apply “Heading 1” for main titles. Use “Heading 2” for sub-sections. This creates a clear document hierarchy. It also allows easy navigation. You can generate a table of contents automatically later. To modify a style, right-click it and select “Modify.” Change the font, size, and spacing. Every text with that style updates instantly. This ensures a professional, uniform look.

    3. Leverage Powerful Shortcut Keys

    Shortcut keys are your best friend. They keep your hands on the keyboard. This dramatically speeds up creating a file and editing. Memorize these essentials:

    • Ctrl + S: Save your document. Use this often.
    • Ctrl + C / V / X: Copy, paste, and cut text.
    • Ctrl + Z / Y: Undo and redo actions.
    • Ctrl + B / I / U: Apply bold, italic, or underline.
    • Ctrl + F: Find specific words in your document.
    • Ctrl + Home / End: Jump to start or end of file.

    Practice these daily. They will become second nature.

    4. Implement Smart Tips for Typing

    Typing is more than hitting keys. Use these tips for typing efficiently. First, enable “Set Proofing Language” automatically. This checks spelling as you go. Second, use “Find and Replace” (Ctrl + H) to correct repeated errors. For example, replace “teh” with “the” in one click. Third, learn to use non-breaking spaces (Ctrl + Shift + Space). This keeps “Mr.” and a name on the same line. It improves document readability.

    5. Navigate Like a Pro with Keyboard

    Stop reaching for the mouse to move around. Use keyboard navigation. Press the Arrow Keys to move character by character. Hold Ctrl with arrows to jump word by word. Use Page Up and Page Down to scroll quickly. Combine Ctrl with these to jump between screens. This method is faster and keeps your typing flow uninterrupted. It is a core skill for creating long documents.

    6. Save Time with AutoCorrect and AutoText

    Let Word type for you. AutoCorrect fixes common typos automatically. You can also add your own entries. Go to File > Options > Proofing > AutoCorrect Options. Add shortcuts for long phrases. For example, type “addr” to insert your full address. For reusable content like disclaimers, use Quick Parts. Go to Insert > Quick Parts > AutoText. Save a formatted block. Insert it in any document with two clicks. This is a massive time-saver.

    7. Preview and Print Perfectly

    Always preview before printing. Use Ctrl + F2 to open Print Preview. Check margins, page breaks, and layout. Adjust settings here to avoid wasted paper. Use “Print Layout” view while editing. This shows you exactly how the document will look. Pay attention to orphaned lines. A single word on a new page looks unprofessional. Adjust paragraph spacing or margins to fix it.

    8. Collaborate with Track Changes and Comments

    Word is great for teamwork. Use “Track Changes” on the Review tab. Every edit is recorded in color. Colleagues can see what you changed. They can accept or reject edits. Use “New Comment” (Ctrl + Alt + M) to ask questions. Highlight text and add your note. This keeps feedback organized and clear. Remember to turn off Track Changes before finalizing. This prevents accidental edits from being shared.

    9. Secure and Protect Your Document

    Protect your work before sharing. Go to File > Info > Protect Document. You can restrict editing. This allows only comments or no changes at all. You can also add a password to open the file. Be careful! If you lose the password, the file is locked forever. For less sensitive files, use “Mark as Final.” This makes the document read-only. It alerts others that it is the final version.

    10. Master the Process of Closing a File

    Closing a file properly is crucial. Do not just click the red X. First, ensure all changes are saved. Use Ctrl + S one last time. Then, use the shortcut Ctrl + W to close the current document. Word remains open. To close Word entirely, press Alt + F4. If you have unsaved changes, a prompt will appear. Choose “Save” to keep your work. This habit prevents data loss. It is the perfect finish to creating a file.

    Tips for the Visually Impaired on Using Microsoft Word

    For users who are blind or have low vision, Microsoft Word offers various accessibility features to enhance document creation. Utilize the built-in screen reader, Narrator, which can read aloud your text and provide feedback on formatting. Familiarize yourself with keyboard shortcuts, as they can significantly improve navigation through menus and documents.

    Additionally, consider using the Accessibility Checker, found under the Review tab, to ensure your document is accessible to all users, promoting an inclusive experience.

    Tailoring your workspace with high-contrast themes can also improve visibility and reduce eye strain.

    Final Thoughts

    Mastering these ten tips will change how you use Word. You will work faster and smarter. From creating a file with templates to securely closing a file, each step matters. Shortcut keys and smart tips for typing are the backbone of efficiency. Practice one new tip each day. Soon, you will handle any document with confidence and skill. Happy writing!


×
Listen to Remedial Radio

Listen to Remedial Radio

Enjoy the rhythm of knowledge. where books sing!
Learn More
🚀 Stuck in School? Catch Up and Stand Out!

🚀 Stuck in School? Catch Up and Stand Out!

Don't let difficult topics hold you back. Our fast-track Remedial Courses are designed to bridge the gap and boost your confidence instantly.

What We Offer:

  • Speak Kiswahili From Day One: Master conversational Swahili with zero stress.

  • English for Locals: Perfect your grammar and speak English with absolute confidence.

  • Targeted Remedial Support: Easily catch up on core subjects you find challenging.

Stop struggling. Start mastering.


Learn More