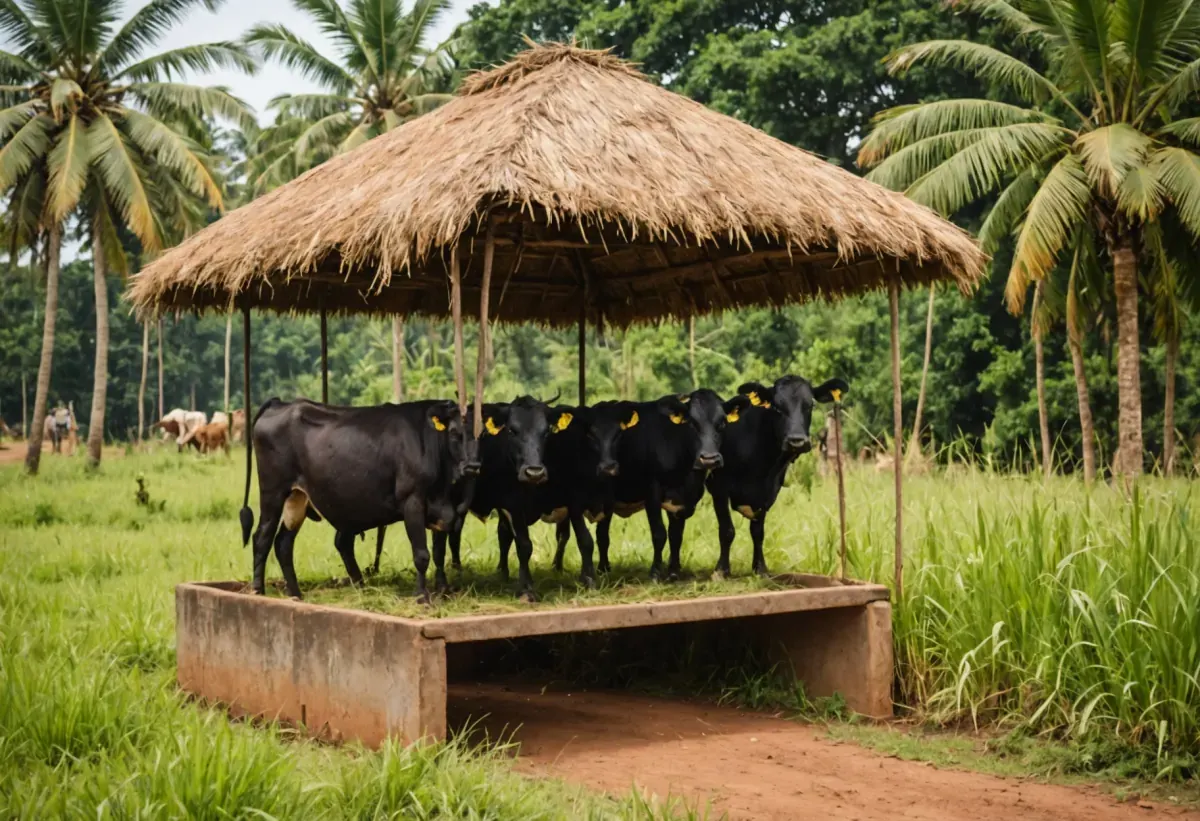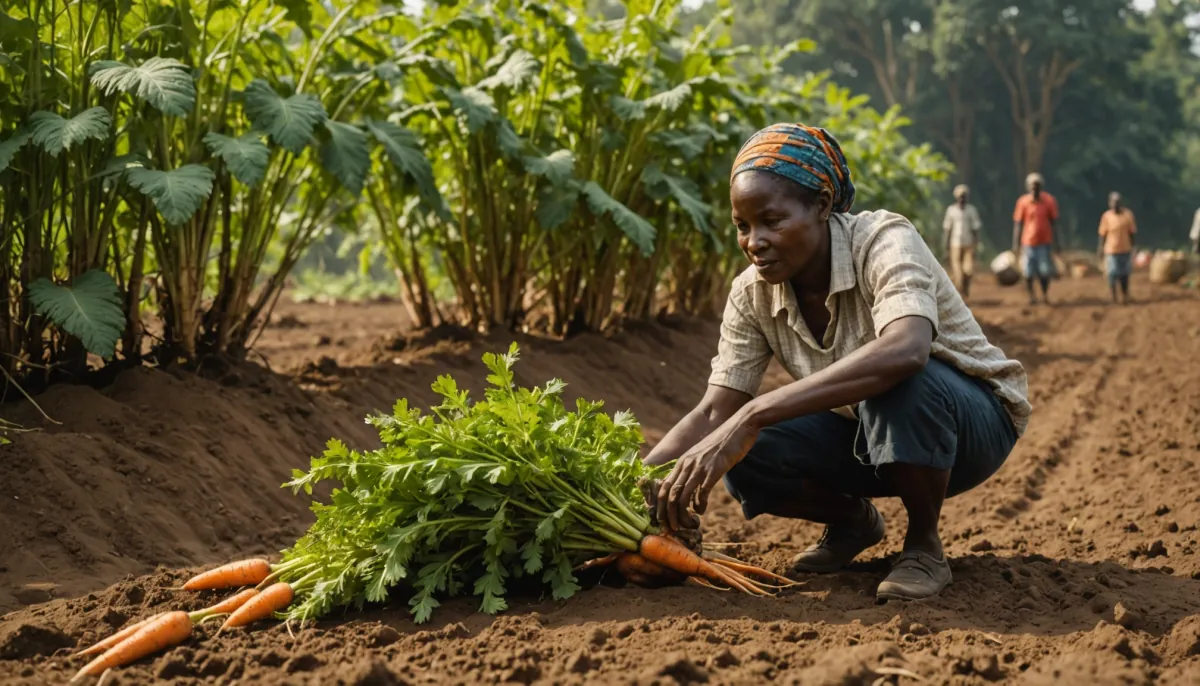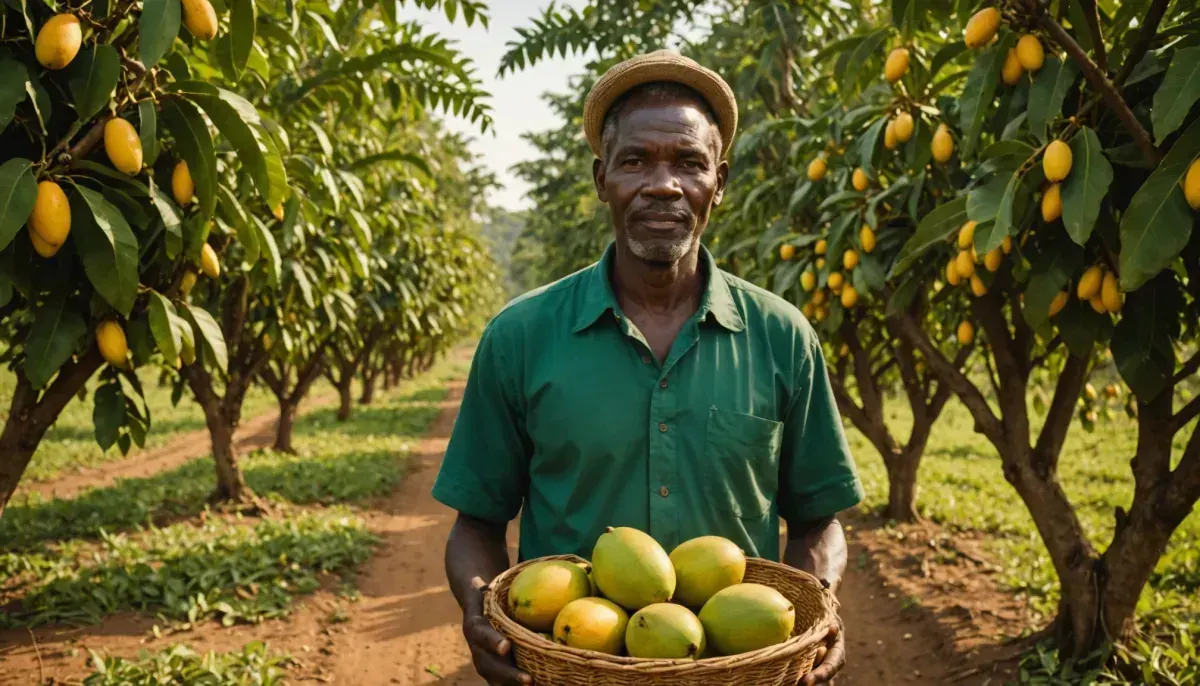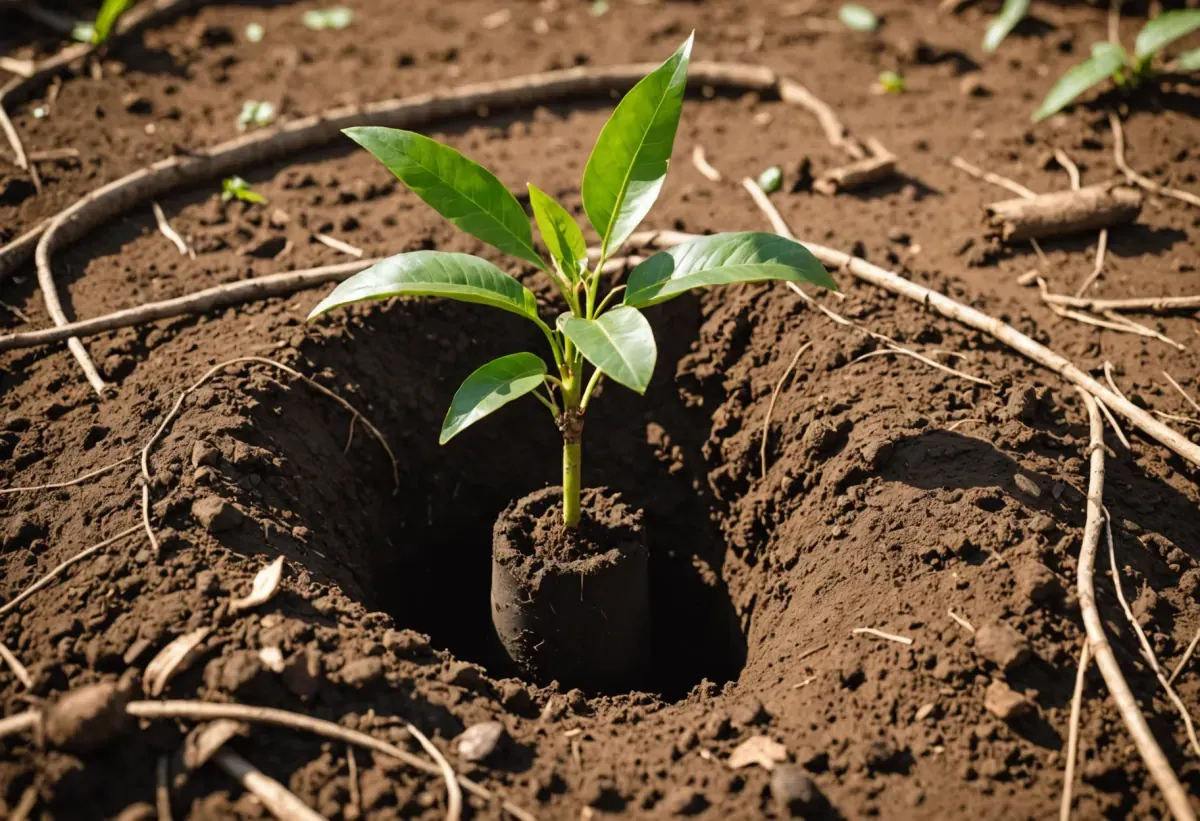

Tag: senior 3

  • THE EVOLUTION OF HUMAN RIGHTS IN UGANDA

    THE EVOLUTION OF HUMAN RIGHTS IN UGANDA

    {
    “title”: “The Evolution of Human Rights in Uganda: From Colonial Legacy to Modern Challenges”,
    “slug”: “evolution-human-rights-uganda”,
    “meta_description”: “Explore the evolution of human rights in Uganda, from colonial times to today. Understand rights vs responsibilities, rule of law, civil society, violations, and how to respect human rights.”,
    “content”: “

    Introduction

    The evolution of human rights in Uganda is a complex narrative shaped by colonialism, independence, dictatorship, civil war, and ongoing struggles for justice. Understanding this journey requires examining the difference between rights and responsibilities, the concept of human rights, the rule of law, civil society, various ways of violating human rights, and how to avoid such violations. This article provides a comprehensive academic overview of these themes, tracing Uganda’s path from a British protectorate to a modern state grappling with human rights challenges.

    The Concept of Human Rights: A Foundational Understanding

    Human rights are inherent, inalienable entitlements belonging to every person by virtue of their humanity. They are universal, indivisible, and interdependent. In Uganda, the concept is enshrined in the 1995 Constitution, which guarantees civil, political, economic, social, and cultural rights. but, the practical realization of these rights has been uneven.

    Key Principles of Human Rights

    • Universality: Rights apply to all individuals regardless of nationality, ethnicity, gender, or religion.
    • Inalienability: Rights can’t be taken away except in specific legal circumstances (e.g., lawful imprisonment).
    • Indivisibility: All rights are equally important; civil and political rights can’t be separated from economic, social, and cultural rights.
    • Interdependence: The fulfillment of one right often depends on the realization of others (e.g., the right to health depends on access to clean water).

    Human Rights in Uganda’s Legal Framework

    Uganda’s Constitution includes a comprehensive Bill of Rights (Chapter Four), covering rights to life, personal liberty, freedom of expression, assembly, and association, as well as economic and social rights like education and health. The Constitution also establishes the Uganda Human Rights Commission (UHRC) to monitor and enforce these rights.

    The Difference Between Rights and Responsibilities

    Rights and responsibilities are two sides of the same coin. A right is an entitlement to something (e.g., freedom of speech), while a responsibility is a duty to act in a way that respects the rights of others (e.g., not using speech to incite violence). In Uganda, the Constitution emphasizes that rights aren’t absolute; they are limited by the rights of others and public interest.

    Examples of Rights and Corresponding Responsibilities

    Right Responsibility
    Freedom of expression Not to defame or incite hatred
    Right to education To attend school and respect teachers
    Right to a fair trial To obey court orders and testify truthfully
    Right to vote To vote responsibly and peacefully

    Understanding this balance is crucial for building a culture of human rights in Uganda. When citizens exercise their rights without corresponding responsibilities, conflicts arise, and the rule of law weakens.

    The Rule of Law and Civil Society in Uganda

    The rule of law means that no one is above the law, and all individuals and institutions are accountable to laws that are publicly promulgated, equally enforced, and independently adjudicated. In Uganda, the rule of law has been challenged by executive overreach, corruption, and weak judicial independence.

    Civil Society’s Role

    Civil society organizations (CSOs) in Uganda, such as the Uganda Law Society, Foundation for Human Rights Initiative, and Human Rights Watch, play a vital role in promoting human rights and holding the government accountable. They monitor violations, provide legal aid, and advocate for policy reforms. but, CSOs face restrictions, including registration hurdles and surveillance.

    Key Functions of Civil Society

    • Monitoring human rights abuses
    • Providing legal assistance to victims
    • Educating the public about rights and responsibilities
    • Lobbying for legislative changes
    • Engaging in international advocacy

    Historical Evolution of Human Rights in Uganda

    Colonial Era (1894-1962)

    Under British colonial rule, human rights were largely denied to Ugandans. The colonial administration imposed forced labor, land confiscation, and racial discrimination. The legal system was designed to serve colonial interests, with customary law often ignored. The concept of universal human rights was absent, and resistance was brutally suppressed.

    Post-Independence and the First Republic (1962-1971)

    After independence in 1962, Uganda adopted a constitution that included some fundamental rights. but, political instability and ethnic tensions led to the abrogation of the constitution in 1966 by Prime Minister Milton Obote. The 1967 Constitution centralized power, undermining human rights protections.

    The Idi Amin Era (1971-1979)

    Idi Amin’s regime was one of the most brutal in African history. Human rights violations included extrajudicial killings, torture, disappearances, and persecution of ethnic groups (especially the Acholi and Langi). The rule of law collapsed, and civil society was decimated. An estimated 300,000 people were killed.

    The Second Obote Regime and Civil War (1980-1986)

    After Amin’s overthrow, Obote returned to power, but his government was marked by human rights abuses by the Uganda National Liberation Army (UNLA). The civil war in the Luwero Triangle resulted in mass atrocities, including massacres and forced displacement. The rule of law remained weak.

    The Museveni Era (1986-Present)

    Yoweri Museveni’s National Resistance Movement (NRM) came to power in 1986 promising restoration of human rights. The 1995 Constitution and the establishment of the UHRC were positive steps. but, the government has been criticized for suppressing political opposition, restricting media freedom, and human rights abuses by security forces, especially in the conflict with the Lord’s Resistance Army (LRA) in northern Uganda and ongoing operations in Karamoja.

    Various Ways of Violating Human Rights in Uganda

    Human rights violations in Uganda take many forms, from state-sponsored abuses to societal discrimination.

    State Violations

    • Extrajudicial killings: Security forces have been implicated in unlawful killings, particularly of suspected criminals and political opponents.
    • Torture and cruel treatment: Detainees are often subjected to torture to extract confessions or information.
    • Arbitrary detention: Individuals are held without charge or trial, sometimes for extended periods.
    • Suppression of freedom of expression: Journalists and activists face harassment, arrest, and closure of media outlets.
    • Restrictions on assembly: Peaceful protests are often dispersed violently, and permits are denied arbitrarily.

    Societal Violations

    • Gender-based violence: Domestic violence, sexual assault, and female genital mutilation (FGM) remain prevalent.
    • Discrimination against minorities: LGBTQ+ individuals face criminalization, violence, and social exclusion.
    • Child labor and trafficking: Many children are forced into labor or sexual exploitation.
    • Land rights abuses: Land grabbing and evictions disproportionately affect vulnerable communities.

    How Violations Can Be Avoided

    Avoiding human rights violations requires a multi-pronged approach:

    1. Strengthening the rule of law: Ensure independent judiciary, police accountability, and transparent legal processes.
    2. Human rights education: Teach citizens their rights and responsibilities, especially in schools and communities.
    3. Empowering civil society: Protect CSOs from harassment and allow them to monitor and report abuses.
    4. International oversight: Engage with UN human rights mechanisms and regional bodies like the African Commission.
    5. Victim support: Provide legal aid, psychosocial support, and reparations for victims.
    6. Community dialogue: Promote conflict resolution and reconciliation at local levels.

    The Need to Respect Human Rights and the Rule of Law

    Respecting human rights and the rule of law is essential for sustainable development, peace, and democracy in Uganda. When rights are protected, citizens trust institutions, invest in the economy, and participate in governance. Conversely, violations breed resentment, instability, and conflict.

    Benefits of Respecting Human Rights

    • Social cohesion: Equal treatment reduces ethnic and religious tensions.
    • Economic growth: Rule of law attracts foreign investment and encourages entrepreneurship.
    • Political stability: Inclusive governance prevents insurgency and civil war.
    • International standing: Good human rights record enhances Uganda’s reputation and access to aid.

    Challenges to Respecting Rights

    Despite the benefits, Uganda faces obstacles: weak institutions, corruption, impunity for security forces, and a culture of silence. Overcoming these requires political will, civic engagement, and sustained advocacy.

    Case Studies: Human Rights in Specific Contexts

    Northern Uganda and the LRA Conflict

    The two-decade war between the government and the Lord’s Resistance Army (LRA) resulted in massive human rights violations: abductions of children, forced displacement, and massacres. The government’s response also included human rights abuses by the Uganda People’s Defence Force (UPDF). Post-conflict, transitional justice mechanisms like the International Crimes Division and traditional rituals (e.g., Mato Oput) have sought accountability and reconciliation.

    Karamoja Region

    The Karamoja region has experienced forced disarmament campaigns by the army, which have sometimes involved excessive force, torture, and extrajudicial killings. The government’s development programs have also led to land evictions. Human rights organizations have documented abuses and called for community-based approaches.

    LGBTQ+ Rights

    Uganda has some of the harshest anti-LGBTQ+ laws in the world, including the Anti-Homosexuality Act (2023) which imposes the death penalty for “aggravated homosexuality.” This has led to increased violence, discrimination, and persecution. Human rights defenders face threats and arrests. The international community has condemned these laws, but domestic support remains strong among conservative groups.

    Role of International Human Rights Mechanisms

    Uganda is party to key international human rights treaties, including the International Covenant on Civil and Political Rights (ICCPR) and the African Charter on Human and Peoples’ Rights. The country undergoes periodic reviews by the UN Human Rights Council (Universal Periodic Review) and treaty bodies. but, implementation of recommendations is often weak.

    Regional Mechanisms

    The African Commission on Human and Peoples’ Rights and the African Court on Human and Peoples’ Rights have heard cases against Uganda. for instance, the case of Thomas Kwoyelo (a former LRA commander) raised issues of fair trial and amnesty. The East African Court of Justice has also addressed human rights violations related to elections.

    Contemporary Human Rights Issues in Uganda

    Freedom of Expression and Media

    In recent years, the government has imposed a social media tax, shut down internet during elections, and arrested journalists. The 2021 elections saw widespread suppression of dissent. The UHRC has documented cases of harassment and censorship.

    Political Repression

    Opposition leaders like Bobi Wine have faced arrest, torture, and restrictions on campaigning. The security forces have used excessive force against protesters, including the 2020 protests following Wine’s arrest. The rule of law is often bypassed in the name of national security.

    Land Rights

    Land conflicts are rampant, with large-scale evictions for oil exploration, infrastructure projects, and conservation. The Land Act (1998) hasn’t prevented abuses, and the courts are backlogged. Women and pastoralists are particularly vulnerable.

    Strategies for Promoting Human Rights in Uganda

    Legal Reforms

    Repeal repressive laws (e.g., Anti-Homosexuality Act, Public Order Management Act) and strengthen the independence of the judiciary and UHRC.

    Education and Awareness

    Integrate human rights education into school curricula and conduct community outreach programs. Use media and social media to spread awareness.

    Empowering Civil Society

    Provide funding and legal protection for CSOs. Encourage partnerships between local and international organizations.

    Accountability for Past Abuses

    Prosecute perpetrators of human rights violations, including state actors. Establish truth commissions and reparations programs.

    International Pressure

    Engage with UN mechanisms, impose targeted sanctions on violators, and condition aid on human rights improvements.

    Conclusion

    The evolution of human rights in Uganda is a story of progress and setbacks. From colonial oppression to post-independence struggles, the country has made strides in enshrining rights in law, but implementation remains elusive. The difference between rights and responsibilities must be understood to foster a culture of respect. The rule of law and civil society are critical pillars for protecting rights. Violations persist, but they can be avoided through education, legal reforms, and accountability. Ultimately, respecting human rights isn’t only a moral imperative but a practical necessity for Uganda’s future peace and prosperity. The journey continues, and every citizen has a role to play.

    Frequently Asked Questions

    What is the difference between rights and responsibilities?

    Rights are entitlements that individuals have, such as freedom of speech or the right to education. Responsibilities are duties that individuals must fulfill to ensure that their exercise of rights doesn’t infringe on the rights of others. for instance, the right to freedom of expression comes with the responsibility not to spread hate speech.

    What is the concept of human rights?

    Human rights are basic rights and freedoms that belong to every person in the world, from birth until death. They are based on shared values like dignity, fairness, equality, respect, and independence. These rights are protected by law and include civil, political, economic, social, and cultural rights.

    How does the rule of law protect human rights?

    The rule of law ensures that all individuals and institutions are accountable to the law, which is applied equally and fairly. It prevents arbitrary use of power, protects individuals from abuse, and provides mechanisms for redress when rights are violated. Without the rule of law, human rights are vulnerable to government overreach.

    What role does civil society play in human rights?

    Civil society organizations (CSOs) monitor human rights abuses, provide legal aid, educate the public, advocate for policy changes, and hold governments accountable. They act as a bridge between citizens and the state, amplifying voices of marginalized groups.

    What are some common human rights violations in Uganda?

    Common violations include extrajudicial killings, torture, arbitrary detention, suppression of free speech, gender-based violence, discrimination against LGBTQ+ individuals, child labor, and land grabbing. Both state and non-state actors commit these abuses.

    How can human rights violations be avoided?

    Violations can be avoided by strengthening the rule of law, promoting human rights education, empowering civil society, ensuring accountability for perpetrators, and engaging with international human rights mechanisms. Community dialogue and victim support are also crucial.

    Why is it important to respect human rights?

    Respecting human rights fosters social cohesion, economic growth, political stability, and international goodwill. It ensures that all individuals can live with dignity and participate fully in society. Violations lead to conflict, poverty, and instability.

    “,
    “excerpt”: “A comprehensive academic overview of the evolution of human rights in Uganda, covering colonial legacy, post-independence struggles, the rule of law, civil society, violations, and strategies for promotion. Includes key concepts like rights vs responsibilities.”
    }

    Human Rights and the Justice System in Uganda

    The justice system is a critical arena for the protection and violation of human rights. In Uganda, the judiciary has at times been a beacon of hope, issuing landmark rulings that uphold rights, but it also faces systemic challenges. Access to justice remains limited for many Ugandans, particularly the poor and those in rural areas. The formal court system is slow, expensive, and often corrupt. Paralegal programs and community-based mediation have emerged as alternative avenues, but they lack the authority to enforce rights fully.

    Independence of the Judiciary

    Judicial independence is enshrined in the Constitution, but in practice, the executive has exerted influence through appointments, budget control, and intimidation. The 2017 attack on the High Court by security forces during a bail hearing for opposition politicians highlighted the fragility of judicial autonomy. The judiciary’s ability to check executive power is crucial for human rights, as courts can declare laws unconstitutional and order remedies for violations.

    Prison Conditions and Detainee Rights

    Uganda’s prisons are overcrowded, with poor sanitation, inadequate food, and limited healthcare. Pre-trial detention is often prolonged, with many suspects held for months or years without trial. The Uganda Prisons Service has implemented reforms, such as the Justice Law and Order Sector (JLOS) programs, but conditions remain below international standards. The right to a fair trial is compromised by lack of legal representation, especially for capital offenses. The UHRC has conducted inspections and recommended improvements, but implementation is slow.

    Police Accountability

    The Uganda Police Force has a history of human rights abuses, including torture, extrajudicial killings, and arbitrary arrests. The Police Act and the Uganda Human Rights Commission Act provide mechanisms for accountability, but complaints are often ignored or perpetrators go unpunished. The establishment of the Police Professional Standards Unit has had limited impact. Civil society organizations like the Foundation for Human Rights Initiative document abuses and advocate for reform. Community policing initiatives aim to build trust, but deep-seated impunity persists.

    Economic, Social, and Cultural Rights in Uganda

    While civil and political rights often dominate discourse, economic, social, and cultural rights (ESCR) are equally vital. Uganda has made progress in some areas, such as primary education enrollment and access to healthcare, but challenges remain. The right to health is undermined by underfunding, shortage of medical personnel, and outbreaks of diseases like Ebola and COVID-19. The right to education faces quality issues, with many children dropping out due to poverty and early marriage. The right to adequate housing is threatened by urbanization and land conflicts.

    Right to Health

    The Constitution guarantees the right to health, but the government spends only about 7% of its budget on health, below the Abuja Declaration target of 15%. Maternal mortality remains high, and access to reproductive health services is limited. The COVID-19 pandemic exposed weaknesses in the health system, with shortages of oxygen, ventilators, and vaccines. Human rights violations occurred during lockdowns, including excessive force by security forces and restrictions on movement that affected livelihoods. The right to health also encompasses mental health, which is stigmatized and under-resourced.

    Right to Education

    Uganda’s Universal Primary Education (UPE) policy has increased enrollment, but quality has suffered due to overcrowded classrooms, lack of trained teachers, and inadequate materials. The right to education is also affected by child labor, early marriage, and cultural norms that prioritize boys’ education over girls’. The COVID-19 pandemic led to prolonged school closures, exacerbating learning losses and increasing dropout rates. The government’s response included radio and online learning, but many children lacked access. The right to education requires not just access but also quality and relevance.

    Right to Food and Water

    The right to adequate food isn’t explicitly in the Constitution but is implied through the right to life and development. Uganda faces food insecurity due to climate change, land degradation, and conflict. The right to clean water is recognized, but access is uneven, with rural areas and informal settlements lacking safe water sources. The government’s National Development Plan includes targets for water and sanitation, but implementation is slow. Human rights violations occur when communities are displaced for development projects without adequate compensation or resettlement.

    Women’s Rights and Gender Equality

    Uganda has made significant strides in promoting women’s rights, including constitutional guarantees of gender equality and affirmative action policies. Women hold seats in parliament (about 34%) and local councils, but representation in decision-making positions remains low. Gender-based violence (GBV) is pervasive, with 56% of women experiencing physical or sexual violence in their lifetime. The Domestic Violence Act (2010) and the Sexual Offences Bill (2019) provide legal frameworks, but enforcement is weak. Cultural practices like bride price and polygamy perpetuate inequality.

    Legal Reforms and Challenges

    The Constitution prohibits discrimination on grounds of sex, but customary and religious laws often override statutory provisions. The Marriage and Divorce Bill has been stalled for years due to opposition from religious and cultural leaders. Women’s property rights, especially land ownership, are limited by customary practices that favor men. The UHRC and women’s rights organizations advocate for legal reforms and provide support to victims of GBV. but, access to justice remains a barrier, with many women unable to afford legal fees or facing stigma when reporting abuse.

    Female Genital Mutilation (FGM)

    FGM is practiced in some communities, particularly among the Sabiny and Pokot. The Prohibition of Female Genital Mutilation Act (2010) criminalizes the practice, but enforcement is challenging due to its cultural roots. Community-based programs that involve elders and religious leaders have been effective in reducing FGM rates. The government has also established safe houses for girls fleeing FGM. but, the practice persists in remote areas, and cross-border FGM with Kenya remains a concern.

    Children’s Rights

    Uganda ratified the UN Convention on the Rights of the Child and has enacted laws like the Children Act (Cap 59) to protect children. but, children face numerous violations: child labor, trafficking, recruitment into armed groups, and sexual exploitation. The National Child Policy (2020) aims to coordinate efforts, but implementation is fragmented. The right to education is compromised by poverty and early marriage, with 34% of girls married before age 18. The right to health is affected by malnutrition and lack of access to healthcare.

    Child Labor and Trafficking

    An estimated 2 million children in Uganda are engaged in child labor, often in hazardous conditions in agriculture, mining, and domestic work. Trafficking of children for forced labor and sexual exploitation is a serious problem, with internal trafficking more common than cross-border. The government has established the National Task Force on Child Labour and the Anti-Trafficking in Persons Act (2009), but convictions are rare. Poverty and lack of education drive children into labor, and enforcement of labor laws is weak.

    Justice for Children

    Children in conflict with the law are supposed to be treated under the juvenile justice system, which emphasizes rehabilitation. but, many children are held in adult prisons due to lack of separate facilities. The Probation and Social Welfare Services are understaffed and underfunded. The UHRC and NGOs like Save the Children advocate for diversion programs and community-based alternatives. The right of children to participate in decisions affecting them is often ignored.

    Rights of Persons with Disabilities

    The Constitution prohibits discrimination against persons with disabilities (PWDs), and Uganda has a progressive legal framework, including the Persons with Disabilities Act (2006) and the National Policy on Disability. but, PWDs face significant barriers in accessing education, employment, healthcare, and public services. Stigma and negative attitudes persist. The government has established the National Council for Disability to coordinate policies, but implementation is slow. Accessibility of buildings and transportation remains poor.

    Education and Employment

    Children with disabilities are often excluded from mainstream schools due to lack of inclusive facilities and trained teachers. Special schools are few and under-resourced. The right to work is hindered by discrimination and lack of reasonable accommodation. The government has a 3% quota for PWDs in public employment, but it isn’t always enforced. Self-employment and vocational training programs have been initiated, but access to credit and markets is limited.

    Political Participation

    The Constitution reserves seats for PWDs in parliament and local councils, but representation is often tokenistic. PWDs face barriers to voting, such as inaccessible polling stations and lack of assistive technology. The Electoral Commission has made some efforts to improve accessibility, but more needs to be done. Civil society organizations like the National Union of Disabled Persons of Uganda (NUDIPU) advocate for the rights of PWDs and provide capacity building.

    Environmental Rights and Climate Justice

    Environmental rights are increasingly recognized as human rights, as a healthy environment is essential for the enjoyment of other rights like health, food, and water. Uganda’s Constitution doesn’t explicitly guarantee a right to a healthy environment, but the National Environment Act (2019) provides for environmental protection. Climate change poses significant threats to Uganda, including droughts, floods, and landslides, which disproportionately affect vulnerable communities. The government has developed a National Climate Change Policy, but implementation is weak.

    Land and Natural Resource Conflicts

    Oil exploration in the Albertine Graben has led to land evictions, environmental degradation, and human rights abuses. Communities have been displaced without adequate compensation, and their rights to livelihood and cultural heritage have been violated. The government’s decision to fast-track the East African Crude Oil Pipeline (EACOP) has raised concerns about environmental impact and human rights. Civil society organizations have documented abuses and called for transparency and community consent.

    Rights of Indigenous Communities

    Indigenous communities like the Batwa and Benet have faced displacement from their ancestral lands for conservation and development projects. The Batwa, in particular, have been evicted from forests without adequate resettlement, leading to loss of livelihood and cultural identity. The government has initiated some compensation programs, but they are inadequate. The Constitutional Court has ruled in favor of the Batwa’s land rights, but implementation has been slow. The right to self-determination and cultural preservation is at stake.

    The Role of International and Regional Human Rights Bodies

    Uganda is a state party to major international human rights treaties and has submitted periodic reports to UN treaty bodies. The UN Human Rights Council’s Universal Periodic Review (UPR) has made recommendations to Uganda, including on freedom of expression, LGBTQ+ rights, and torture. The government has accepted many recommendations but implementation is inconsistent. The African Commission on Human and Peoples’ Rights has also issued decisions against Uganda, such as in the case of Micheal Majambere (concerning arbitrary detention). The East African Court of Justice has addressed human rights issues related to elections and the rule of law.

    Engagement with the International Criminal Court (ICC)

    Uganda referred the situation concerning the Lord’s Resistance Army (LRA) to the ICC in 2003. The ICC has issued arrest warrants for LRA leaders, including Joseph Kony. but, the government has also been criticized for not cooperating fully with the ICC and for pursuing alternative justice mechanisms like traditional rituals. The ICC’s involvement has raised questions about complementarity and the effectiveness of international justice in Uganda.

    Regional Human Rights Mechanisms

    The African Court on Human and Peoples’ Rights has jurisdiction over Uganda, and several cases have been filed. for instance, the case of Thomas Kwoyelo (a former LRA commander) raised issues of fair trial and amnesty. The African Commission has also addressed the rights of indigenous communities and freedom of expression. but, the government hasn’t always complied with the decisions of these bodies. The African Union’s human rights framework provides avenues for advocacy, but political will is often lacking.

    Human Rights Education and Awareness

    Human rights education is essential for creating a culture of respect for rights. In Uganda, the UHRC has a mandate to promote human rights education, and it conducts training for security forces, civil servants, and the public. but, resources are limited, and coverage is uneven. Schools have integrated human rights into the curriculum, but teachers lack training. Civil society organizations run community workshops and use media to spread awareness. The challenge is to move beyond knowledge to behavioral change.

    Training for Security Forces

    The Uganda Police Force and the Uganda People’s Defence Force have human rights training programs, often supported by international donors. but, the impact is limited by a culture of impunity and lack of accountability. Training alone is insufficient without institutional reforms. The UHRC has recommended that human rights be a core component of training curricula, and that violations be investigated and punished.

    Public Awareness Campaigns

    Campaigns like the “Know Your Rights” initiative by the UHRC and NGOs aim to educate citizens about their rights and how to claim them. Radio programs, community dialogues, and social media are used to reach diverse audiences. The challenge is to ensure that information is accessible to marginalized groups, including those in remote areas and with low literacy. The use of local languages and culturally appropriate methods is crucial.

    Conclusion: The Way Forward for Human Rights in Uganda

    The evolution of human rights in Uganda is a journey marked by both achievements and persistent challenges. The legal framework is robust, but implementation gaps remain. The difference between rights and responsibilities must be internalized by all citizens. The rule of law and civil society are indispensable for protecting rights. Violations can be avoided through education, accountability, and reforms. The need to respect human rights isn’t just a legal obligation but a moral imperative for building a just and peaceful society. Uganda’s future depends on its ability to uphold the dignity of every person, ensuring that the promise of the Constitution becomes a reality for all.

  • Maximizing Profits in Fish Farming: A Comprehensive Guide to Aquaculture Economics

    Maximizing Profits in Fish Farming: A Comprehensive Guide to Aquaculture Economics

    Fish farming, or aquaculture, is one of the fastest-growing sectors in global food production. With the increasing demand for seafood and declining wild fish stocks, fish farming presents a lucrative opportunity for entrepreneurs and investors. This comprehensive guide explores the key aspects of making money through fish farming, from species selection to marketing and financial management. Whether you’re a beginner or an experienced farmer, this article provides actionable insights to maximize your profits.

    Introduction to Fish Farming Profitability

    Fish farming can be highly profitable when managed correctly. The global aquaculture market is projected to reach $242 billion by 2027, driven by rising seafood consumption and sustainability concerns. but, success requires careful planning, knowledge of best practices, and efficient resource management. This section outlines the foundational principles of profitable fish farming.

    Choosing the Right Fish Species for Profit

    The choice of fish species significantly impacts profitability. Factors to consider include market demand, growth rate, feed conversion ratio (FCR), disease resistance, and environmental adaptability. Below are some of the most profitable species for commercial farming.

    High-Value Species

    • Tilapia: Fast-growing, hardy, and in high demand globally. Tilapia has a low FCR (1.5-1.8) and can be farmed in various systems.
    • Catfish: Popular in the US and Africa, catfish have a high market value and are relatively easy to farm.
    • Salmon: High market price but requires sophisticated farming techniques and cold water conditions.
    • Shrimp: Very high market value, especially for export, but requires careful management of water quality.
    • Barramundi: A premium fish with high growth rate and adaptability to different farming systems.

    Comparison of Popular Species

    Species Growth Rate FCR Market Price (per kg) Suitability for Beginners
    Tilapia Fast (6-8 months) 1.5-1.8 $3-5 High
    Catfish Moderate (8-12 months) 1.6-2.0 $4-6 High
    Salmon Slow (18-24 months) 1.2-1.5 $10-15 Low
    Shrimp Fast (4-6 months) 1.5-2.0 $10-20 Medium
    Barramundi Fast (6-9 months) 1.5-1.8 $8-12 Medium

    Farming Systems and Their Cost Implications

    The choice of farming system affects capital expenditure, operating costs, and potential yields. The three main systems are pond culture, recirculating aquaculture systems (RAS), and cage culture.

    Pond Culture

    Ponds are the most traditional and cost-effective system for many species. Initial construction costs range from $5,000 to $20,000 per hectare, depending on land preparation and water supply. Operating costs include feed, labor, and water management. Yields can reach 5-10 tons per hectare per year for tilapia.

    Recirculating Aquaculture Systems (RAS)

    RAS allows intensive production in a controlled environment with high water reuse. Initial investment is high ($50,000-$200,000 per ton of production capacity) but offers consistent yields and reduced disease risk. Operating costs are lower for water but higher for energy and filtration.

    Cage Culture

    Cages are placed in natural water bodies like lakes or oceans. This system has lower capital costs ($10,000-$30,000 per cage) but requires permits and environmental management. Yields can be high, but risks include water quality fluctuations and escapes.

    Cost Comparison Table

    System Initial Investment (per ton capacity) Operating Cost (per kg) Yield per Cycle Risk Level
    Pond $2,000-$5,000 $1.50-$2.50 5-10 tons/ha Medium
    RAS $20,000-$50,000 $2.00-$3.50 20-50 tons/m³ Low
    Cage $3,000-$10,000 $1.00-$2.00 10-30 tons/cage High

    Feed Management: The Largest Variable Cost

    Feed accounts for 40-60% of total operating costs in fish farming. Efficient feed management is crucial for profitability. Key factors include feed quality, feeding frequency, and feed conversion ratio (FCR).

    Feed Quality and Formulation

    High-quality feed with optimal protein content (28-32% for tilapia, 35-40% for salmon) ensures rapid growth and low FCR. Commercial feeds are available, but some farmers produce their own to reduce costs. but, homemade feed requires careful formulation to avoid nutritional deficiencies.

    Feeding Strategies

    • Hand feeding: Allows observation of fish behavior but is labor-intensive.
    • Automatic feeders: Reduce labor and provide consistent feeding schedules.
    • Demand feeders: Allow fish to feed on demand, reducing waste.
    • Restricted feeding: Feeding at 80-90% of satiation improves FCR.

    Adopting a feeding strategy that minimizes waste can reduce feed costs by 10-20%. Additionally, using feed additives like probiotics can improve digestion and reduce mortality.

    Water Quality Management

    Water quality directly affects fish health, growth, and survival. Key parameters include dissolved oxygen (DO), pH, ammonia, nitrite, and temperature. Poor water quality leads to stress, disease, and mortality, reducing profitability.

    Monitoring and Control

    Regular monitoring of water parameters is essential. Use test kits or sensors to measure DO, pH, and ammonia levels. Aeration systems, such as paddlewheels or diffusers, maintain DO levels above 5 mg/L. Water exchange rates should be adjusted based on system type and stocking density.

    Cost of Water Treatment

    In RAS, water treatment costs include filtration, UV sterilization, and biofiltration. Initial investment for a small RAS (10 tons capacity) can be $10,000-$30,000 for water treatment equipment. Operating costs include electricity for pumps and replacement of filter media.

    Disease Prevention and Health Management

    Disease outbreaks can wipe out entire stocks, leading to significant financial losses. Prevention is more cost-effective than treatment. Biosecurity measures include quarantine of new fish, disinfection of equipment, and vaccination.

    Common Diseases and Treatment Costs

    Disease Symptoms Treatment Cost per Treatment
    Columnaris Frayed fins, lesions Antibiotics, salt baths $50-$200 per pond
    Ichthyophthirius (Ich) White spots, flashing Formalin, copper sulfate $100-$500 per system
    Streptococcus Exophthalmia, erratic swimming Antibiotics, vaccination $200-$1,000 per cycle

    Investing in high-quality fingerlings from certified hatcheries reduces disease risk. Routine health checks and maintaining optimal water quality are essential preventive measures.

    Harvesting and Post-Harvest Handling

    Proper harvesting techniques ensure high-quality product and minimize stress. Harvesting methods include seining, draining, or using pumps. After harvest, fish should be immediately chilled to preserve freshness. Processing options include gutting, filleting, or whole fish sales.

    Value Addition

    Processing fish into fillets, smoked products, or ready-to-cook meals can increase profit margins by 30-50%. but, it requires additional investment in processing equipment and compliance with food safety regulations.

    Marketing and Distribution Channels

    Effective marketing is key to selling fish at premium prices. Options include direct sales to consumers, supplying restaurants and supermarkets, or exporting. Building a brand and using online platforms can expand reach.

    Pricing Strategies

    Price your fish based on production costs, market demand, and competitor prices. for instance, tilapia sold directly to consumers can fetch $5-7 per kg, while wholesale prices are $3-4 per kg. Consider value-added products to capture higher margins.

    Financial Planning and Profitability Analysis

    A sound financial plan includes startup costs, operating expenses, revenue projections, and break-even analysis. Below is a sample budget for a small tilapia pond farm (1 hectare).

    Sample Budget for Tilapia Pond Farm (1 ha)

    Item Cost (USD)
    Land preparation $5,000
    Pond construction $10,000
    Water supply system $3,000
    Fingerlings (10,000 @ $0.10) $1,000
    Feed (10 tons @ $500/ton) $5,000
    Labor (6 months) $4,000
    Electricity and water $2,000
    Miscellaneous (nets, chemicals) $1,000
    Total Operating Cost $31,000

    Assuming a yield of 8 tons (8,000 kg) at a selling price of $4/kg, revenue is $32,000. Net profit = $32,000 – $31,000 = $1,000 (3.2% margin). but, with better management and higher prices, margins can exceed 20%.

    Scaling Up: From Small Farm to Commercial Operation

    Scaling up requires additional capital, infrastructure, and management skills. Consider forming cooperatives or partnerships to share costs. Access to credit through agricultural loans or government grants can facilitate expansion.

    Risk Management and Insurance

    Fish farming faces risks such as disease, weather events, and market fluctuations. Mitigation strategies include diversification (multiple species or systems), insurance policies, and emergency funds. Aquaculture insurance is available in many countries, covering stock loss and property damage.

    Environmental Sustainability and Certification

    Sustainable practices improve long-term profitability and market access. Certifications like ASC (Aquaculture Stewardship Council) or GlobalG.A.P. can command premium prices. Implement waste management, reduce water usage, and avoid antibiotics to enhance sustainability.

    Technology in Fish Farming

    Modern technologies such as IoT sensors, automated feeding systems, and data analytics can optimize production and reduce costs. Investment in technology can improve FCR, reduce labor, and enhance monitoring. for instance, smart feeding systems can reduce feed waste by 15%.

    Case Studies of Profitable Fish Farms

    Examining successful farms provides valuable insights. For instance, a tilapia farm in Ghana using RAS achieved a 25% profit margin by targeting high-end restaurants. Another example is a catfish farm in Nigeria that integrated processing and direct sales, doubling its revenue.

    Frequently Asked Questions (FAQs)

    How much money can I make from fish farming?

    Profitability varies widely. A small 1-hectare tilapia pond can yield a net profit of $1,000-$5,000 per cycle, while larger commercial operations can generate hundreds of thousands of dollars. Factors include species, scale, and market access.

    What is the most profitable fish to farm?

    High-value species like salmon, shrimp, and barramundi offer higher profit margins but require more investment and expertise. Tilapia and catfish are more accessible for beginners with moderate profit potential.

    Do I need a lot of land for fish farming?

    Not necessarily. RAS allows intensive production in small spaces. A small backyard system can produce 500 kg of fish per year. but, larger operations require more land.

    What are the main costs in fish farming?

    Feed is the largest cost (40-60%), followed by fingerlings, labor, and utilities. Initial investment includes pond construction or RAS setup.

    How can I reduce feed costs?

    Optimize feeding strategies, use high-quality feed with low FCR, consider homemade feed, and incorporate feed additives to improve conversion.

    Is fish farming environmentally friendly?

    When done sustainably, fish farming can have a lower environmental impact than wild fishing. but, poor management can cause pollution and habitat damage. Certifications and best practices mitigate these issues.

    Can I get a loan to start fish farming?

    Yes, many banks and agricultural lenders offer loans for aquaculture. You will need a business plan, collateral, and technical expertise. Government grants may also be available.

    How long does it take to see a profit?

    From startup to first harvest typically takes 6-12 months for fast-growing species like tilapia. Profitability may take 2-3 cycles due to initial investment.

    What permits do I need?

    Permits vary by location and system. Common requirements include water use permits, environmental impact assessments, and business licenses. Consult local authorities.

    How do I market my fish?

    Options include direct sales at farmers’ markets, supplying local restaurants and grocery stores, selling online, or exporting. Building relationships with buyers and branding can increase sales.

    Conclusion

    Making money through fish farming is achievable with careful planning, efficient management, and a focus on profitability. Key factors include selecting the right species, optimizing feed and water management, preventing diseases, and effective marketing. While initial investment can be high, the growing demand for seafood offers substantial opportunities. By adopting sustainable practices and leveraging technology, fish farmers can build profitable and resilient businesses. Start small, learn from experience, and scale up gradually to maximize returns.

  • Pineapple Paradise: Expert Interview on Growing Pineapples in Uganda

    Pineapple Paradise: Expert Interview on Growing Pineapples in Uganda

    Introduction: Why Pineapples in Uganda?

    Uganda has ideal conditions for pineapple farming. The climate is warm and humid. Many farmers now grow pineapples for profit. But success requires knowledge. We spoke with Dr. Grace Nakato, a leading horticulturist. She has 20 years of experience. Her insights will help you start or improve your pineapple farm.

    Pineapples are a high-value crop. They can be sold fresh or processed. Uganda exports to regional markets. Demand is growing. But farmers face challenges. Pests, diseases, and poor soil can reduce yields. Our expert explains how to overcome these.

    This interview covers everything. From land preparation to harvesting. You will get practical advice. Let’s dive into the conversation with Dr. Nakato.

    Getting Started: Land and Climate

    What is the best climate for pineapples in Uganda?

    Dr. Nakato: Pineapples love warm weather. Temperatures between 20-30°C are ideal. They need about 1000-1500 mm of rain per year. Too much rain causes rot. Too little slows growth. Uganda’s central and eastern regions are perfect. Areas like Kayunga, Luwero, and Mukono do well.

    Altitude matters too. Pineapples grow best below 1500 meters. Higher areas are cooler. This delays fruiting. But you can still grow them. Just expect longer cycles. For commercial farming, choose lowland areas.

    Wind can damage leaves. Plant windbreaks like bananas or trees. This protects your crop. Also, ensure good drainage. Pineapples hate waterlogged soil. Raised beds help in heavy rain areas.

    What soil type works best?

    Dr. Nakato: Sandy loam soil is perfect. It drains well and warms quickly. Soil pH should be 4.5-5.5. Acidic soil prevents nutrient deficiencies. Test your soil before planting. Add organic matter like compost. This improves fertility.

    Avoid heavy clay soils. They hold water and cause root rot. If you have clay, mix in sand and organic matter. Raised beds also help. Pineapples have shallow roots. They need loose soil for spreading.

    Nutrient requirements: Nitrogen, potassium, and magnesium are key. Phosphorus is needed early. Use a balanced fertilizer like NPK 10-10-10. Apply every 2-3 months. Foliar sprays with micronutrients boost growth.

    Choosing the Right Variety

    Which pineapple varieties are best for Uganda?

    Dr. Nakato: Smooth Cayenne is the most common. It has large fruits and good yield. It is sweet and juicy. But it is susceptible to diseases. MD2 is a hybrid variety. It is sweeter and has a longer shelf life. It is popular for export. but, it needs more care.

    Other varieties: Queen Victoria is small but very sweet. It is good for local markets. Red Spanish is less common. It has a strong flavor and fibrous flesh. Choose based on your market. For fresh consumption, MD2 or Smooth Cayenne. For processing, any variety works.

    Planting material: Use suckers or crowns. Suckers from healthy plants are best. They fruit earlier. Crowns take longer. Always buy from certified sources. Avoid using fruit tops from unknown origins. They may carry diseases.

    Planting and Spacing

    When is the best time to plant?

    Dr. Nakato: Plant at the start of the rainy season. March-April or September-October. This gives plants enough water. Avoid planting in dry months. You will need irrigation then. Pineapples are drought-tolerant but need water for establishment.

    Plant in the afternoon or evening. This reduces transplant shock. Water immediately after planting. Mulch around plants to retain moisture. Use dry grass or leaves. Mulch also suppresses weeds.

    Spacing: Double-row system is common. Space rows 90 cm apart. Within rows, 30-45 cm between plants. This gives about 30,000 plants per acre. Closer spacing increases yield but requires more fertilizer. Wider spacing gives larger fruits.

    Caring for Your Pineapple Plants

    How do you manage weeds?

    Dr. Nakato: Weeds compete for nutrients and water. Use mulch to control them. Hand-weed around plants. Avoid deep cultivation. Pineapple roots are shallow. Herbicides can be used. But apply carefully to avoid damage.

    Mulching with black plastic is effective. It warms soil and suppresses weeds. But it is costly. Organic mulch is cheaper. Use rice husks, coffee husks, or dry grass. Apply a thick layer of 10-15 cm.

    Weed every 2-3 weeks during rainy season. In dry season, weeding is less frequent. Keep the field clean. This reduces pest hiding places.

    How do you fertilize pineapples?

    Dr. Nakato: Fertilize every 2-3 months. Use a complete fertilizer like NPK 17-17-17. Apply 10-15 grams per plant. Increase to 20 grams as plants grow. Foliar spray with micronutrients monthly. Zinc and boron are important for fruit quality.

    Organic fertilizers work too. Compost or well-rotted manure. Apply 5-10 kg per plant yearly. This improves soil structure. Avoid fresh manure. It can burn roots or introduce pests.

    Fertigation is efficient. Inject fertilizer through drip irrigation. This saves labor and ensures even distribution. But it requires investment. For small farms, hand application is fine.

    Watch for deficiency signs. Yellow leaves mean nitrogen lack. Purple leaves indicate phosphorus deficiency. Brown leaf tips suggest potassium shortage. Adjust fertilizer accordingly.

    How do you water pineapples?

    Dr. Nakato: Pineapples need 1-2 inches of water per week. In dry periods, irrigate. Drip irrigation is best. It conserves water and reduces disease. Overhead sprinklers can cause leaf rot. Water in the morning to allow leaves to dry.

    During fruit development, water consistently. Inconsistent watering leads to cracking or poor flavor. Reduce water after harvest. This forces plants to produce suckers.

    Mulch helps retain moisture. In very dry areas, use shade nets. They reduce evaporation. But pineapples need full sun for best growth. Balance is key.

    Pest and Disease Management

    What are the common pests?

    Dr. Nakato: Mealybugs are the worst. They spread wilt disease. They hide in leaf bases. Control with systemic insecticides or biological predators. Ants protect mealybugs. Control ants too. Use bait stations.

    Scale insects and thrips also attack. They cause yellowing and stunted growth. Spray with neem oil or insecticidal soap. Regular monitoring is essential. Check under leaves weekly.

    Nematodes are microscopic worms. They damage roots. Use nematode-resistant varieties. Solarize soil before planting. Cover with clear plastic for 4-6 weeks. This kills nematodes.

    What diseases affect pineapples?

    Dr. Nakato: Fusarium wilt is deadly. It turns leaves pink and kills plants. Remove and burn infected plants. Avoid planting in infected soil. Use disease-free suckers. Fungicides can prevent but not cure.

    Heart rot and root rot are caused by fungi. They thrive in wet conditions. Ensure good drainage. Avoid overhead watering. Treat with copper fungicides.

    Pineapple black rot affects fruit after harvest. Handle fruits carefully. Store in cool, dry conditions. Dip in fungicide solution before storage. Good hygiene prevents many diseases.

    Flowering and Fruit Development

    How do you induce flowering?

    Dr. Nakato: Pineapples flower naturally after 12-18 months. But you can force flowering. Use calcium carbide or ethylene. Apply at night when temperatures are cool. This synchronizes harvest. Apply 2-3 months before desired harvest.

    Forcing is common in commercial farms. It ensures uniform fruit size. But it stresses plants. Only force healthy plants. Weak plants may not respond. Follow recommended doses.

    Natural flowering is fine for small farms. Just wait longer. Fruits will be smaller but sweeter. Forcing gives larger fruits. Choose based on your market.

    How long does fruit take to mature?

    Dr. Nakato: From flowering to harvest takes 5-6 months. Fruit color changes from green to yellow. Harvest when 1/3 to 1/2 yellow. Overripe fruits spoil quickly. Underripe fruits aren’t sweet.

    Harvest in the morning. Use a sharp knife. Cut the fruit with a small piece of stem. Handle carefully. Bruises reduce shelf life. Place in crates lined with leaves.

    After harvest, plants produce ratoon crops. The second crop takes less time. About 12 months from first harvest. You can get 2-3 crops from one planting. Then replant.

    Harvesting and Post-Harvest Handling

    What are the best practices for harvesting?

    Dr. Nakato: Harvest at the right maturity. Test by tapping the fruit. A dull sound means ripe. A metallic sound means not ripe. Also check sugar content. Use a refractometer. Brix levels should be 12-14 for local market, 14-16 for export.

    Wear gloves to avoid sharp leaves. Cut fruit with a clean knife. Leave a 2-3 cm stem. This prevents rot. Place fruits in shade immediately. Sun heats them and reduces quality.

    Grade fruits by size and color. Export markets require uniform fruits. Local markets accept mixed sizes. Remove damaged fruits. They can be processed into juice or dried.

    How do you store and transport pineapples?

    Dr. Nakato: Store at 7-10°C with high humidity. don’t refrigerate below 7°C. This causes chilling injury. Fruits turn brown and lose flavor. Transport in ventilated containers. Avoid stacking too high. Use cushioning materials.

    For local markets, harvest one day before selling. Keep in cool place. For export, use cold chain. Pre-cool fruits after harvest. This extends shelf life to 2-3 weeks.

    Process surplus fruits. Make dried pineapple, juice, or jam. This adds value and reduces waste. Many farmers sell fresh only. But processing increases income.

    Market and Selling

    Where can you sell pineapples in Uganda?

    Dr. Nakato: Local markets are everywhere. Kampala, Jinja, and Gulu. Also sell to schools, hotels, and supermarkets. Pineapples are popular for fresh consumption. You can also supply juice processors. Companies like Britannia and Mukwano buy in bulk.

    Export markets include Kenya, South Sudan, and Europe. But export requires certification. GlobalGAP is common. You need good agricultural practices. Start with local markets. Then expand.

    Price fluctuates. During peak season, prices drop. Off-season, prices rise. Use forcing to harvest off-season. This gives better prices. Also sell directly to consumers. Use social media to advertise.

    How do you calculate profit?

    Dr. Nakato: Cost per acre: land preparation, suckers, fertilizer, labor, and pest control. Total about 5-7 million UGX. Yield per acre: 20-30 tons. Price per kg: 1000-2000 UGX. Gross revenue: 20-60 million UGX. Net profit: 13-53 million UGX.

    Profit depends on management. Good practices increase yield. Reduce costs by using organic inputs. Also, intercropping with beans or vegetables gives extra income. But avoid competition.

    Keep records of expenses and sales. This helps you track profitability. Many farmers fail because they don’t record. Use a simple notebook or app.

    Challenges and Solutions

    What are the biggest challenges?

    Dr. Nakato: Pest and disease pressure. Mealybugs and Fusarium wilt are major. Also, price volatility. Market prices can drop suddenly. Climate change causes unpredictable rains. Drought or floods affect yields.

    Lack of quality planting material. Many suckers are diseased. Use certified sources. Government programs provide clean material. Also, join farmer groups for bulk buying.

    Access to credit is hard. Banks require collateral. Some microfinance institutions offer loans. But interest rates are high. Save money from previous harvests. Reinvest in your farm.

    How can farmers overcome these?

    Dr. Nakato: Practice integrated pest management. Combine biological, cultural, and chemical controls. Use resistant varieties. Rotate crops with legumes. This breaks pest cycles.

    Diversify income. Grow other crops like bananas or coffee. Also, add value to pineapples. Make juice, dried slices, or vinegar. This reduces reliance on fresh sales.

    Form cooperatives. They help with marketing and bulk inputs. Also, share knowledge. Attend training from extension officers. Use mobile apps for weather and market info.

    Future of Pineapple Farming in Uganda

    What are the trends?

    Dr. Nakato: Demand for organic pineapples is growing. Export markets pay premium. Organic farming uses natural inputs. It is better for soil health. Start transitioning to organic. Get certification.

    Technology is changing farming. Drip irrigation, solar pumps, and drones are used. They improve efficiency. But they require investment. Start small and scale up.

    Climate-smart agriculture is key. Use drought-tolerant varieties. Practice rainwater harvesting. Plant trees for shade. This reduces heat stress.

    What is your prediction for the next 5 years?

    Dr. Nakato: Pineapple farming will grow. More farmers will adopt improved varieties. Export will increase. But competition will also rise. Quality and consistency will matter. Farmers who follow best practices will succeed.

    Processing will become more common. Small-scale solar dryers and juicers will be affordable. This will reduce post-harvest losses. Government support will improve. More training and subsidies will be available.

    Climate change will pose risks. But with adaptation, pineapple farming remains profitable. I am optimistic. Uganda can become a top pineapple exporter in Africa.

    Final Advice

    What is your message to new farmers?

    Dr. Nakato: Start small. Learn the basics. don’t invest all your money at once. Test on a quarter acre. Gain experience. Then expand.

    Seek knowledge. Visit successful farms. Attend field days. Read books and online resources. Join farmer groups. Share experiences.

    Be patient. Pineapples take time. The first harvest may be small. But with care, yields increase. Farming is a business. Treat it as such. Keep records and plan.

    Finally, love what you do. Farming is hard work. But it is rewarding. Seeing your pineapples grow and sell is satisfying. Good luck!

    Quick Tips Table

    Aspect Recommendation
    Soil pH 4.5-5.5
    Spacing 90 cm between rows, 30-45 cm within
    Fertilizer NPK 10-10-10 every 2-3 months
    Watering 1-2 inches per week
    Harvest maturity 1/3 to 1/2 yellow
    Storage temp 7-10°C

    Common Mistakes to Avoid

    • Planting in waterlogged soil
    • Using diseased suckers
    • Over-fertilizing with nitrogen
    • Harvesting too early or late
    • Ignoring pest control

    “Pineapple farming requires patience and care. But the rewards are sweet.” – Dr. Grace Nakato

    Thank you for reading. We hope this interview helps you. Start your pineapple journey today. With the right knowledge, you can succeed.

  • Silage for Livestock: Making and Storing Quality Feed

    Silage for Livestock: Making and Storing Quality Feed

    Silage for livestock is fermented fodder made by packing fresh chopped crops, usually maize or grass, into airtight storage so natural bacteria turn the plant sugars into lactic acid. The acid preserves the feed, letting a farmer keep wet-season fodder and feed it during the dry months when pasture is scarce. Dairy farmers in Mbarara, Kiruhura, Luwero and Masaka rely on this practice to keep cows milking when grass dries out.

    These notes cover what silage is, the crops to use, and how to make, store and feed it safely. It is one topic in the wider Senior 3 Agriculture notes .

    Ugandan farmer compacting chopped maize into a lined pit silo on a small dairy farm
    A smallholder presses chopped maize into a lined pit before sealing it to ferment for the dry season.

    What silage is and why it matters

    Silage is animal feed preserved by anaerobic fermentation, which means fermentation without air. Fresh chopped fodder is packed tightly and sealed so the little air left is used up and lactic-acid bacteria take over. The lactic acid they produce stops the feed from rotting, much as souring preserves food. That is why silage keeps feeding value that ordinary drying loses.

    • Definition: Silage for livestock is fermented animal feed made by storing fresh crops such as maize or grass in airtight conditions.
    • Anaerobic fermentation: The process runs without oxygen as natural bacteria turn plant sugars into lactic acid, which preserves the feed.
    • Preserves nutrients: Gentle fermentation keeps more energy and protein than sun-drying, so the feed stays valuable for months.
    • Dry-season insurance: Silage carries wet-season surplus into the dry season, which is why it counts among dry-season livestock feeds in the syllabus.
    • Milk production: Dairy farmers who make silage report higher milk yields and healthier animals when pasture dries out.
    • Lower feeding cost: Home-made silage costs less than bought concentrate, so a farmer feeds the herd well for less money.
    • Whole-crop use: Nearly the entire maize or grass crop enters the silo, stems, leaves and grain together, cutting waste.
    • Good-silage signs: Good silage is light green to golden brown, smells pleasantly sour, and shows no mould or slime.
    • Silage versus hay: Unlike hay, which is first dried in the sun, silage is stored moist and fermented, suiting Uganda’s wet seasons. Compare the two methods in our notes on preparing hay for livestock, which sit alongside the rest of the Senior 3 Agriculture notes.
    • Ugandan example: In Mbarara and Kiruhura, a farmer cuts maize in the wet season and opens the pit months later when pasture is gone.
    • Curriculum link: The NCDC Agriculture syllabus includes livestock feed making, and silage is the practical dry-season feed a learner must prepare, covered in the Senior 3 Agriculture notes on livestock feed making.
    • Animal health: Feeding mould-free fermented fodder keeps the gut healthy, because spoiled feed upsets digestion and appetite.
    • Farm profitability: Reliable year-round feeding smooths milk flow and weight gain, so the farm earns more evenly across the year.
    FeatureSilageHay
    What it isFresh chopped fodder preserved by fermentation without airDried forage preserved by removing moisture in the sun
    Moisture at makingKept moist and packed straight into airtight storageDried in the field before baling and stacking
    StorageAirtight pit, bunker, bag or tubeDry, ventilated store or covered stack
    Feeding valueKeeps more energy and protein; often more palatableGood fibre; can lose leaves during drying and turning
    Risk of spoilageMould if air enters or the seal breaksMould if baled too wet or stored damp

    Common mistake: writing that silage is “dried and stored feed”. Silage is not dried; it is stored moist and fermented. Hay is the dried one, and examiners test this contrast most years.

    Crops used for making silage in Uganda

    Almost any leafy crop that ferments well can be ensiled, and the crops used for making silage for livestock in Uganda are few and proven. Maize leads because its grain and stalk together carry high energy, while Napier grass, legumes and sweet potato vines add fibre and protein. The right choice depends on the animals being fed and on what grows well on the farm.

    • Maize silage: Maize is the most popular Ugandan silage crop because grain and stalk together pack high energy for dairy cows.
    • Napier grass: Napier grows widely on Ugandan farms and makes a medium-energy, medium-protein silage for beef cattle.
    • Legume silage: Legumes such as lablab and desmodium are high in protein, suiting calves and mixing well with grass.
    • Grass protein band: Grasses generally hold about 5–19% crude protein while legumes run 15–34%, so mixing the two balances a silage.
    • Napier quality: Napier cut young is richer than tall grass; crude protein falls from about 9.2% at 30 cm to about 5% above 2 m.
    • Maize grain value: Whole maize grain analyses at about 11.2% crude protein on a dry-matter basis, making maize energy feed.
    • Maize stover: Dry maize stover is only about 3.7% crude protein on a dry-matter basis, so it is roughage, not good silage.
    • Sweet potato vines: Sweet potato vines hold about 19.2% crude protein on a dry-matter basis and lift protein in grass silage.
    • Forage sorghum: Sorghum and Columbus grass suit drier areas, though young sorghum must be avoided for prussic-acid risk.
    • Harvest stage: Maize is cut at the milk-to-dough stage, when nutrients peak and the stalk still holds moisture to ferment.
    • Calliandra leaves: Calliandra leaves, about 26.3% crude protein on a dry-matter basis, enrich a grass silage in small amounts.
    • Local seed supply: Napier, Rhodes grass, lablab, desmodium, Brachiaria and calliandra are all sold commercially in Uganda.
    • Ugandan example: On a zero-grazing unit near Kampala, a farmer ensiles maize and napier, then top-dresses with calliandra.
    CropEnergyProteinBest fed to
    MaizeHighLowDairy cows
    Napier grassMediumMediumBeef cattle
    Legumes (lablab, desmodium)LowHighCalves and growing stock
    Sweet potato vinesMediumHighMixed with grass silage

    Common mistake: calling maize silage a “protein feed”. Maize is energy feed at about 11.2% crude protein on a dry-matter basis. Mix in legumes or add a supplement to raise protein.

    Steps in making quality silage

    Making silage for livestock follows a fixed sequence, and each step must be done quickly. The aim at every stage is to remove air and let lactic-acid bacteria work on moist, chopped fodder. Any air left in, or any delay between cutting and sealing, invites mould and a sour, rotten result.

    1. Choose the crop: Pick a high-yield crop that ferments well, with maize preferred for energy and Napier for bulk.
    2. Harvest at the right stage: Cut maize at the milk-to-dough stage, when nutrients peak and moisture is still enough to ferment.
    3. Wilt the material: Wilt cut fodder briefly to shed surface water, but do not dry it out, as silage must stay moist.
    4. Chop finely: Chop into pieces of about 1–2 cm so the crop packs tightly, releasing sugars and leaving few air pockets.
    5. Check moisture: Squeeze a handful hard; it should ball up and leave the palm damp but not dripping juice.
    6. Fill the silo quickly: Pack the chopped material into the pit, drum or bag fast, ideally the same day, before it heats.
    7. Compact tightly: Press the material down hard, layer by layer, because oxygen is what lets spoilage organisms grow.
    8. Exclude air: Keep pressing as you fill so the heap is dense, since any pocket of air becomes a pocket of rot.
    9. Seal airtight: Cover with polythene and weigh it down with soil or sandbags so no air creeps in at the edges.
    10. Allow fermentation: Leave the silage sealed for about 21–30 days while lactic-acid bacteria turn sugars into acid.
    11. Store undisturbed: Do not open or poke the silo during fermentation, because breaking the seal spoils the batch.
    12. Open carefully: After 21–30 days, open one end and take feed from a clean face, then reseal what remains.
    13. Feed gradually: Introduce silage a little at a time over several days so the rumen adjusts without digestive upset.
    StepWhat goes wrong at this step
    1. Harvest at the right stageToo early loses yield; too late, the stalk is woody and low in sugar, so it ferments poorly.
    2. WiltOver-wilting dries the crop so bacteria cannot work; under-wilting leaves free water that leaks out.
    3. ChopLong, uneven pieces trap air and refuse to compact, leaving pockets where mould grows.
    4. CompactLight pressing leaves oxygen in the heap, so the top and edges heat and rot instead of fermenting.
    5. Exclude airRemaining air lets yeasts and moulds consume the sugars the lactic bacteria need.
    6. SealA torn or poorly weighted cover lets rain and air in, the commonest cause of surface mould.
    7. FermentOpening too early stops the cure, leaving the feed half-sour and unstable.
    8. StoreOnce opened, an untidy face exposed to air begins to heat and spoil within days.
    Chopped green fodder being packed into a heavy plastic silage tube by a Ugandan farmer
    Short, evenly chopped fodder packs tightly into a plastic tube, leaving few air pockets for the lactic-acid bacteria to work in.

    Exam tip: the moisture squeeze test is a favourite practical question. Name both parts: the material balls up without crumbling, and the palm is damp with no dripping juice.

    Storage structures for silage

    A silo has one job: to keep air and rain out while the crop ferments. The storage structures used for silage for livestock in Uganda weigh cost against the amount stored, and a low-cost pit serves most school and small farm needs.

    • Pit silo: A lined pit dug in the ground is the cheapest and most common Ugandan silage store for small farmers.
    • Bunker silo: A bunker is a larger, partly above-ground trench with walls, suiting medium to large dairy farms.
    • Tower silo: A tall, sealed upright tower keeps feed well but costs much more, so it is rare on smallholdings.
    • Above-ground clamp: A clamp is a heap built on the ground and covered, suiting a one-off batch where digging is hard.
    • Bag or tube silage: Chopped fodder in heavy plastic bags or tubes gives flexible, portable storage for small and urban farmers.
    • Drum silage: Clean metal or plastic drums make cheap, small silos for urban keepers with few animals.
    • Site choice: Put the silo on drained, raised ground near the feeding point so water cannot flood in.
    • Drainage: A pit needs a slight floor slope and a channel, because standing water ruins the bottom layers.
    • Wall and floor: Line earth pits with polythene or plaster, since bare soil lets air and moisture spoil the edges.
    • Capacity match: Size the silo to daily use so the open face is removed quickly and never heats or moulds.
    • Sealing material: Polythene weighted with soil, tyres or sandbags is the standard seal, and tears must be repaired.
    • Cost versus scale: Pits, drums and bags cost least and fit smallholders; bunkers and towers pay off only at scale.
    • Ugandan example: A school farm can dig a pit for maize and use plastic tubes for napier, then compare which keeps better.
    StructureCostScaleSuitability for a Ugandan smallholder
    Pit siloLowSmall to mediumBest first choice; cheap, common and easy to dig and seal
    Bunker siloMediumLargeSuited to bigger dairy herds and farms with machinery
    Tower siloHighLargeRare; high cost makes it impractical for most smallholders
    Above-ground clampLow to mediumOne-off large batchUseful where digging is hard or the water table is high
    Plastic bag or tubeLow, flexibleSmall, portableExcellent for small and urban farmers; needs careful sealing
    Sealed pit silo covered with polythene and soil beside a Ugandan zero-grazing unit
    A covered pit silo keeps air and rain out while the ensiled crop cures over 21 to 30 days.

    Common mistake: building the silo away from the feeding area. A silo beside the trough is used promptly, while a distant one is opened late and spoils.

    Feeding silage and common problems

    Feeding silage for livestock means giving it as a bulk roughage, usually alongside a protein supplement and clean water. Dairy cows can take 20–30 kg a day and beef cattle 15–25 kg, but the amounts only help if the feed is clean and introduced slowly. Most feeding problems trace back to a fault made at ensiling.

    • Dairy cows: Feed a milking cow about 20–30 kg of silage daily with a protein supplement and clean water.
    • Beef cattle: Give beef animals about 15–25 kg each day, combined with concentrates for fast weight gain.
    • Introduce gradually: Bring silage in over several days, because a sudden change upsets the rumen and causes problems.
    • Protein balance: Silage, especially maize silage, is low in protein, so mix legumes or a protein supplement.
    • Clean water: Silage is moist but no substitute for water; a cow still needs daily drinking water to digest fibre.
    • Fresh feed daily: Take out only what animals finish that day, because silage exposed to air heats and sours quickly.
    • Mould fault: Mould, seen as grey or black patches, comes from poor compaction or a broken seal; press and reseal.
    • Butyric smell: A sharp, unpleasant smell means poor fermentation from a too-wet or dirty crop; discard affected feed.
    • Overheating: A silo that feels hot has air entering, so reseal it and press exposed faces firmly.
    • Seepage: Brown liquid oozing out shows excess moisture; wilt the crop more before the next batch.
    • Test before feeding: Check colour, smell and texture; good silage is greenish-golden, sour and free of slime.
    • Nutrient value: Silage supplies energy, protein, fibre and some vitamins and minerals, supporting milk and growth.
    • Ugandan example: A dairy keeper in Luwero opens one bag at a time and feeds it within two days to keep milk steady.
    FaultCauseRemedy
    MouldAir entering through poor compaction or a broken sealCompact harder, reseal torn covers and discard mouldy feed
    Butyric smellPoor fermentation from a too-wet or dirty cropWilt more, keep soil out and feed only clean material
    OverheatingAir entering the silo or an exposed feed faceSeal firmly, press the face and feed out faster
    SeepageExcess moisture in the ensiled cropWilt longer before chopping and drain the silo base

    Exam tip: link each fault to its step. Mould and overheating mean air entered; seepage means the crop was too wet; a butyric smell means fermentation failed.

    Frequently asked questions about silage for livestock

    1. What is silage for livestock? Silage is fermented animal feed made by packing fresh chopped crops such as maize or grass into airtight storage. Natural bacteria turn the plant sugars into lactic acid, which preserves the feed. Farmers keep it for the dry season, when fresh pasture is scarce and expensive.
    2. Which crop is best for making silage in Uganda? Maize is the best because of its high energy content, which suits dairy cows. Napier grass gives medium energy and protein for beef cattle, while legumes such as lablab add protein for calves. Mixing a grass with a legume balances the ration.
    3. How long does silage take to be ready? Silage is ready after about 21 to 30 days of fermentation. The sealed silo must stay undisturbed for that whole period while the lactic-acid bacteria work. Opening it early stops the cure and leaves the feed half-sour.
    4. Can a small farmer make silage in Uganda? Yes. A smallholder can use a low-cost pit silo, a clean drum, or plastic bags and tubes, none of which needs machinery. The key steps of chopping, compacting and sealing are done by hand, so any farmer can make silage.
    5. How do you know if silage has gone bad? Check the colour, smell and feel. Good silage is light green to golden brown with a pleasant sour smell and no mould. Bad silage shows grey or black patches, smells sharp, feels slimy, or feels hot where air has entered.
    6. How much silage do you feed a dairy cow per day? A dairy cow takes about 20 to 30 kg a day, given with a protein supplement and clean water. Beef cattle take about 15 to 25 kg daily. Introduce silage gradually over several days so the rumen adjusts.

    Key terms and revision summary

    TermMeaning
    SilageFermented animal feed made by storing fresh chopped crops airtight
    EnsilingThe whole process of making silage, from chopping through to sealing
    AnaerobicWithout air; the oxygen-free condition silage needs to ferment
    Lactic acidThe acid bacteria produce from plant sugars that preserves the feed
    WiltingLetting cut fodder dry slightly to shed surface water before ensiling
    CompactionPressing the chopped crop down hard to squeeze out trapped air
    SiloAny airtight structure, pit, bunker, tower, clamp, bag or tube, that stores silage
    SeepageBrown liquid oozing from too-wet silage, which carries away nutrients
    Butyric smellA sharp, unpleasant smell showing that fermentation went wrong
    Milk-to-dough stageThe grain stage when maize is cut for silage, at peak nutrient value
    1. Define silage for livestock and explain why it is a dry-season feed. Outline: define silage as feed preserved by anaerobic fermentation through lactic acid; it is made in the wet season and stored for the dry months, linking to the Senior 3 dry-season feeds outcome.
    2. Describe the steps of making quality silage from maize. Outline: harvest at the milk-to-dough stage, wilt, chop into 1–2 cm pieces, test moisture by squeezing, fill fast, compact, seal, and ferment for 21–30 days.
    3. Compare silage and hay as fodder conservation methods. Outline: silage is stored moist and fermented without air; hay is dried then stored dry; use the five-feature table to set them side by side.
    4. A farmer’s silage grows mould on top. State the cause and two remedies. Outline: air entered through poor compaction or a broken seal; compact harder and reseal the torn cover, then discard the mouldy feed.
    5. Give the moisture test used before ensiling and what each result means. Outline: squeeze a handful of chopped material; a ball with a damp, non-dripping palm is right, crumbling means too dry, and dripping means too wet.
    6. Why introduce silage to cattle gradually? Outline: a sudden change upsets the rumen microbes and causes digestive problems; introduce the feed over several days.
  • The Complete Guide to Brooding Local Chickens: Essential Techniques for Success

    The Complete Guide to Brooding Local Chickens: Essential Techniques for Success

    Brooding is the critical period in a chicken’s life from hatch to the time they no longer need supplemental heat. For local chicken breeds, which are often hardier but still require careful management, proper brooding sets the foundation for a healthy, productive flock. This guide covers everything from pre-brooding preparation to weaning, focusing on best practices for local chickens.

    Understanding Brooding Basics for Local Chickens

    Brooding mimics the natural warmth and protection a hen provides her chicks. For local chickens, which may be more resilient but also more prone to predation and environmental stress, a controlled brooding environment is essential. The goal is to provide consistent heat, clean water, nutritious feed, and protection from disease.

    Key Environmental Requirements

    Temperature is the most critical factor. For the first week, maintain 95°F (35°C) at chick level, reducing by 5°F each week until reaching ambient temperature. Use a brooder lamp or heat plate. Local chickens may tolerate slightly lower temperatures, but it’s safer to follow standard guidelines.

    Space and Ventilation

    Provide at least 0.5 square feet per chick initially, increasing to 1 square foot by week 4. Good ventilation prevents ammonia buildup but avoid drafts. Local chickens are often raised in semi-open housing; ensure the brooder area is draft-free.

    Lighting Schedule

    Continuous light for the first 48 hours helps chicks find feed and water. Then, reduce to 16 hours light per day. For local chickens raised for meat or eggs, adjust lighting based on production goals.

    Pre-Brooding Preparation: Setting Up for Success

    Before chicks arrive, thoroughly clean and disinfect the brooder. Use a 10% bleach solution or commercial disinfectant. Set up heat source, feeders, and drinkers. Test temperature and adjust height of heat lamp to achieve correct brooder temperature.

    Choosing the Right Brooder Type

    Options include box brooders, battery brooders, or floor pens. For local chickens, floor pens with a heat lamp are common. Ensure sides are high enough to prevent drafts but allow ventilation.

    Bedding Selection

    Use pine shavings, rice hulls, or chopped straw. Avoid newspaper as it can cause leg problems. Depth of 2-4 inches provides insulation and absorbs moisture.

    Equipment Checklist

    • Heat source (250-watt infrared heat lamp or heat plate)
    • Thermometer (placed at chick level)
    • Chick feeders (one per 25 chicks)
    • Chick drinkers (one per 50 chicks)
    • Bedding material
    • Supplemental vitamins/electrolytes (optional)

    Brooding Temperature Management

    Temperature management is the most critical aspect of brooding. Chicks that are too cold will huddle under the heat source and may die; chicks too hot will pant and move away from heat. Observe chick behavior: evenly distributed chicks indicate correct temperature.

    Temperature Table

    Week Temperature (°F) Temperature (°C)
    1 95 35
    2 90 32
    3 85 29
    4 80 27
    5 75 24
    6 70 21

    Adjusting Heat Source Height

    For a 250-watt heat lamp, start at 18 inches from the litter. Raise 2 inches per week. Use a thermometer to verify. For heat plates, follow manufacturer instructions.

    Monitoring Chick Behavior

    Chicks that are comfortable will be active, eating, drinking, and resting spread out. If they chirp loudly and huddle, increase heat. If they pant and avoid the heat source, decrease heat.

    Nutrition and Feeding for Local Chicks

    Start with a high-quality chick starter feed (20-22% protein). For local chickens, which may be slower growing, ensure feed is fresh and free from mold. Provide feed in shallow trays for the first week, then switch to tube feeders.

    Feeding Schedule

    Offer feed ad libitum (free choice) for the first 8 weeks. After that, you can limit feed if raising for layers. Local chickens are good foragers; you can introduce greens after week 2.

    Water Requirements

    Provide clean, fresh water at all times. Use chick-sized drinkers to prevent drowning. Add 1 tablespoon of sugar per gallon for the first 24 hours to reduce stress. Clean drinkers daily.

    Supplemental Nutrients

    Consider adding probiotics or apple cider vinegar (1 tbsp per gallon) to support gut health. Avoid antibiotics unless prescribed.

    Health Management During Brooding

    Preventive health measures are crucial. Vaccinate against Marek’s disease at hatch (if not done by hatchery). Monitor for coccidiosis, a common problem in damp litter.

    Common Diseases and Prevention

    • Coccidiosis: Prevent with anticoccidial feed or clean dry litter.
    • Pasty Butt: Clean vent area with warm water and apply petroleum jelly.
    • Respiratory infections: Avoid drafts and maintain ventilation.

    Biosecurity Measures

    Limit visitors, use footbaths, and quarantine new birds. Local chickens are often raised in free-range systems; ensure brooder area is isolated from older birds.

    Brooding Environment: Light, Ventilation, and Space

    Lighting affects activity and growth. For local chickens, natural daylight supplemented with artificial light can work. Ensure 16 hours of light for the first 2 weeks, then reduce to 8-10 hours if raising for layers.

    Ventilation

    Proper ventilation removes moisture and ammonia. Use vents or fans but avoid direct drafts on chicks. Ammonia levels should be below 25 ppm.

    Space Requirements

    As chicks grow, expand space. At 4 weeks, provide 1 square foot per chick. Overcrowding leads to stress and disease.

    Weaning Chicks Off Heat

    Weaning is gradual. Start at week 4 by reducing temperature 5°F per week. By week 6-8, chicks should be fully feathered and able to regulate body temperature. Observe for signs of cold (huddling) and if needed, keep heat source available at night.

    Signs Chicks Are Ready to Wean

    • Full feather coverage
    • No huddling under heat source
    • Active during cooler parts of day

    Brooding Local Chickens for Meat Production

    If raising local chickens for meat (e.g., broilers), brooding practices are similar but with higher protein feed (22-24%) and shorter brooding period (4-5 weeks). Ensure rapid growth by providing constant access to feed and water.

    Brooding Local Chickens for Egg Production

    For layers, focus on skeleton development. Use a starter feed with 20% protein and adequate calcium (1% for starters). Avoid overfeeding to prevent obesity. Provide oyster shell after 16 weeks.

    Common Mistakes in Brooding Local Chickens

    Many beginners make errors that affect chick survival. Avoid these:

    • Incorrect temperature – too hot or too cold
    • Poor ventilation leading to respiratory issues
    • Inadequate sanitation causing disease
    • Using incorrect feeder/drinker sizes

    Advanced Brooding Techniques for Local Chickens

    For experienced farmers, consider using heat plates instead of lamps to reduce fire risk and provide more natural warmth. Also, using infrared thermometers to monitor surface temperature.

    Seasonal Considerations in Brooding

    Brooding in winter requires more heat and insulation; summer may require cooling (fans, shade). For local chickens, which are adapted to local climates, adjust accordingly.

    Brooding and Vaccination Schedule

    Vaccinate at hatch for Marek’s disease. For Newcastle and bronchitis, consult local vet. Administer via drinking water or spray.

    Record Keeping During Brooding

    Track mortality, feed intake, weight gain, and temperature. This data helps improve future batches.

    Transitioning to the Field or Grow-Out House

    After brooding, gradually acclimate chicks to outdoor temperatures. For local chickens, this can start at 6-8 weeks. Provide shelter and protection from predators.

    Frequently Asked Questions

    How long do chicks need a heat lamp?

    Typically 6-8 weeks, until fully feathered. Reduce temperature gradually.

    Can I brood local chickens without a heat lamp?

    Only if ambient temperature is above 90°F for the first week. Otherwise, heat source is necessary.

    What is the best feed for local chicken chicks?

    A starter feed with 20-22% protein, preferably medicated (for coccidiosis prevention) or non-medicated with clean litter.

    How often should I clean the brooder?

    Remove wet bedding daily. Full clean weekly.

    What is pasty butt and how to treat it?

    Pasty butt is feces sticking to vent. Clean with warm water and apply petroleum jelly.

    Conclusion

    Successful brooding of local chickens requires attention to temperature, nutrition, health, and environment. By following the guidelines in this comprehensive guide, you can raise healthy chicks that will grow into productive members of your flock. Remember that local chickens are resilient, but they still need proper care during the vulnerable brooding period. Implement these practices to ensure high survival rates and strong, thriving birds.

  • Complete Guide to Feeding Local Chickens: Nutrition, Feed Formulation, and Management

    Complete Guide to Feeding Local Chickens: Nutrition, Feed Formulation, and Management

    Introduction

    Feeding local chickens (also known as indigenous, village, or backyard chickens) is a critical aspect of poultry farming that directly impacts productivity, health, and profitability. Unlike commercial hybrid breeds that have been selected for high feed conversion efficiency, local chickens are hardy, adaptable, and require a more balanced approach to nutrition. This guide provides comprehensive class subject notes on feeding local chickens, covering nutritional requirements, feed ingredients, ration formulation, feeding management, and common challenges. Whether you are a smallholder farmer, a student, or an extension officer, this resource will equip you with the knowledge to optimize the feeding of local chickens.

    Understanding the Nutritional Requirements of Local Chickens

    Local chickens have specific nutritional needs that vary with age, production stage, and environment. Unlike commercial layers or broilers, local chickens are often scavengers and may not consume formulated feeds exclusively. but, to achieve optimal growth and egg production, supplemental feeding is essential.

    Energy Requirements

    Energy is the primary dietary component, derived mainly from carbohydrates and fats. Local chickens require energy for maintenance, growth, egg production, and thermoregulation. The energy requirement is expressed in metabolizable energy (ME) per kilogram of feed. For growing local chickens, the recommended energy level is 2,800–3,000 kcal ME/kg, while for layers, it is 2,700–2,900 kcal ME/kg. Insufficient energy leads to poor growth, reduced egg production, and increased susceptibility to diseases.

    Protein Requirements

    Protein is crucial for muscle development, feathering, and egg formation. Local chickens have lower protein requirements than commercial breeds but still need adequate levels. For chicks (0–8 weeks), a diet with 18–20% crude protein is ideal. Growers (8–20 weeks) require 14–16% crude protein, and layers need 16–18% crude protein. Protein quality is important; the feed must contain essential amino acids like methionine, lysine, and tryptophan. Local ingredients such as soybean meal, fish meal, and groundnut cake are excellent sources.

    Vitamin and Mineral Requirements

    Vitamins and minerals are vital for metabolic functions, bone development, and eggshell quality. Local chickens often obtain these from scavenging, but supplementation is necessary for optimal performance. Key vitamins include A, D3, E, B-complex, and choline. Minerals such as calcium, phosphorus, sodium, and trace elements (zinc, copper, manganese) must be balanced. Calcium is especially critical for layers; a deficiency leads to thin-shelled eggs and osteoporosis. A typical layer diet should contain 3.5–4% calcium.

    Feed Ingredients for Local Chickens

    Local chickens can be fed a variety of ingredients, including grains, protein sources, and supplements. The choice of ingredients depends on availability, cost, and nutritional value. Below is a table comparing common feed ingredients.

    Ingredient Crude Protein (%) Metabolizable Energy (kcal/kg) Calcium (%) Phosphorus (%)
    Maize 9 3,350 0.02 0.25
    Sorghum 11 3,200 0.03 0.30
    Wheat bran 15 1,900 0.10 1.20
    Soybean meal 44 2,500 0.30 0.65
    Fish meal 60 2,800 5.00 3.00
    Groundnut cake 40 2,600 0.20 0.50
    Oyster shell 0 0 38 0

    Energy Sources

    The primary energy source is maize (corn), which is highly palatable and digestible. Sorghum and millet are alternatives in drier regions. Wheat bran is a byproduct with moderate energy and higher fiber, suitable for growers. Fats and oils (e.g., vegetable oil) can be added to increase energy density, especially during cold weather or for layers in production.

    Protein Sources

    Plant-based proteins like soybean meal and groundnut cake are widely used. Animal proteins such as fish meal and meat meal provide essential amino acids and are more digestible. but, they are more expensive. Local chickens can also benefit from insects, earthworms, and kitchen waste, but these shouldn’t replace balanced feed.

    Mineral and Vitamin Supplements

    Calcium is supplied through oyster shells, limestone, or bone meal. Phosphorus comes from dicalcium phosphate or bone meal. A premix containing vitamins and trace minerals should be added to ensure adequacy. Salt (sodium chloride) is also required at 0.25–0.5% of the diet.

    Formulating Rations for Local Chickens

    Ration formulation involves combining ingredients to meet the nutritional requirements of the birds at different stages. For local chickens, simple methods like the Pearson square or trial and error can be used. but, computer software or online calculators provide more precision. Below is a sample ration formulation for growing local chickens (8–20 weeks) and layers.

    Sample Grower Ration (Crude Protein 16%, ME 2,800 kcal/kg)

    • Maize: 60%
    • Soybean meal: 20%
    • Wheat bran: 15%
    • Fish meal: 3%
    • Limestone: 1%
    • Premix: 0.5%
    • Salt: 0.25%
    • Methionine: 0.1%

    Sample Layer Ration (Crude Protein 17%, ME 2,750 kcal/kg, Calcium 3.5%)

    • Maize: 55%
    • Soybean meal: 22%
    • Wheat bran: 8%
    • Fish meal: 5%
    • Oyster shell: 8%
    • Premix: 0.5%
    • Salt: 0.25%
    • Methionine: 0.1%

    Note: Adjust feed formulation based on ingredient availability and bird performance. Always provide clean water and grit for digestion.

    Feeding Management Practices

    Proper feeding management ensures that birds consume adequate nutrients without wastage. Local chickens are often allowed to scavenge, but supplemental feeding is necessary.

    Feeding Frequency and Amount

    Chicks should be fed ad libitum (free access) for the first 8 weeks. Growers and layers can be fed twice daily (morning and afternoon) with measured amounts. A general guideline is to provide 100–120 grams of feed per bird per day for layers and 80–100 grams for growers. Adjust based on body condition and production.

    Feeding Systems

    Common systems include:

    • Scavenging + Supplementation: Birds forage during the day and receive a balanced feed in the morning and evening. This reduces feed costs but may lead to variable intake.
    • Confined Feeding: Birds are kept in pens and fed complete rations. This ensures controlled intake but increases costs.
    • Mixed System: Birds are confined at night and released during the day. Supplementation is provided in the morning.

    Water Management

    Clean, fresh water must be available at all times. Water consumption is about 2–3 times feed intake. In hot climates, provide shade and cool water. Use drinkers that minimize spillage and contamination.

    Common Feeding Problems and Solutions

    Feeding local chickens can present challenges such as nutrient deficiencies, feed wastage, and toxicity. Below are common problems and their solutions.

    Nutrient Deficiencies

    Deficiencies in protein, vitamins, or minerals lead to poor growth, feather pecking, and reduced egg production. Solution: Provide a balanced ration with a premix. Include green forage for vitamins.

    Feed Wastage

    Wastage occurs due to poor feeder design, overfilling, or spoilage. Solution: Use trough feeders with lips, fill only one-third full, and store feed in dry, ventilated containers.

    Mycotoxin Contamination

    Moldy grains contain mycotoxins that cause immunosuppression and mortality. Solution: Use clean, dry grains; add mycotoxin binders (e.g., bentonite) to feed.

    High Feed Costs

    Feed accounts for 60–70% of production costs. Solution: Use local ingredients, grow your own fodder, and practice feed restriction for non-productive birds.

    Feeding for Specific Production Goals

    Feeding strategies differ based on whether the goal is meat, eggs, or breeding.

    Feeding for Meat Production

    For broiler-type local chickens, a high-energy, high-protein diet (20% CP, 3,000 kcal/kg) promotes rapid growth. Feed ad libitum for the first 6 weeks, then restrict slightly to prevent obesity. Use a finisher diet (18% CP) from 6 weeks to slaughter.

    Feeding for Egg Production

    Layers require a diet with 16–18% CP and 3.5% calcium. Increase feed intake during peak production (up to 120 g/bird/day). Provide oyster shell separately for additional calcium. Ensure adequate vitamin D3 for calcium absorption.

    Feeding Breeding Stock

    Breeders (cocks and hens) need a diet with 16% CP and balanced amino acids. Add extra vitamin E and selenium for fertility. Avoid overfeeding to maintain body condition.

    Use of Alternative Feed Ingredients

    To reduce costs, farmers can use alternative ingredients such as kitchen waste, insects, and forage. but, these must be balanced.

    Kitchen Waste

    Vegetable peels, leftover rice, and bread can be fed, but they are low in protein and high in moisture. Supplement with protein sources. Avoid salty or spoiled waste.

    Insects and Larvae

    Black soldier fly larvae, earthworms, and termites are rich in protein (40–50%) and can replace fish meal. They can be reared on farm waste.

    Forage and Greens

    Green leaves (e.g., amaranth, moringa, cassava leaves) provide vitamins and minerals. Chop and mix with feed or hang in bunches for birds to peck.

    Economic Considerations in Feeding

    Feed cost is the major expense in local chicken production. To maximize profitability, farmers should calculate feed conversion ratio (FCR) and cost per kilogram of egg or meat. Local chickens have higher FCR (3.5–4.5) than commercial breeds, but they fetch premium prices. Use cost-benefit analysis to determine optimal feeding levels.

    Feed Conversion Ratio (FCR)

    FCR = Feed intake (kg) / Weight gain (kg). For local chickens, an FCR of 4 means 4 kg of feed produces 1 kg of weight gain. Improving FCR through balanced nutrition reduces costs.

    Cost-Saving Strategies

    • Formulate feed using local ingredients.
    • Use feed additives like enzymes to improve digestibility.
    • Practice rotational grazing to utilize forage.
    • Reduce feed waste with proper feeders.

    Frequently Asked Questions (FAQs)

    What is the best feed for local chickens?

    The best feed is a balanced ration that meets the birds’ nutritional requirements at their specific stage of life. For chicks, use a starter mash with 18–20% protein. For growers, a grower mash with 14–16% protein. For layers, a layer mash with 16–18% protein and 3.5% calcium. Supplement with greens and grit.

    Can local chickens survive on scavenging alone?

    While local chickens can survive on scavenging, they won’t achieve optimal growth or egg production. Scavenging provides only about 30–50% of their nutritional needs. Supplemental feeding is essential for good performance.

    How much feed does a local chicken eat per day?

    On average, a local chicken consumes 80–120 grams of feed per day, depending on age, body weight, and production stage. Layers eat more than growers. Provide water ad libitum.

    What are the signs of protein deficiency in local chickens?

    Signs include poor feathering, reduced growth, low egg production, and cannibalism (feather pecking). In severe cases, birds may become lethargic and susceptible to diseases.

    Can I feed kitchen waste to my chickens?

    Yes, but kitchen waste should be fresh, free from salt, oil, and spoiled items. It should only be a supplement to a balanced ration, not the main feed. Ensure it is chopped and mixed with other ingredients.

    How do I prevent feed wastage?

    Use feeders with lips to prevent scattering, fill feeders only one-third full, and adjust feeder height as birds grow. Store feed in airtight containers to protect from pests and moisture.

    What is the ideal calcium level for laying local chickens?

    Laying hens require 3.5–4% calcium in their diet. Provide oyster shell or limestone separately to allow birds to adjust intake as needed. Vitamin D3 is necessary for calcium absorption.

    Can I use antibiotics in chicken feed?

    Antibiotics shouldn’t be used routinely as growth promoters due to resistance concerns. Use only under veterinary guidance for disease treatment. Instead, use probiotics and organic acids to improve gut health.

    How do I formulate feed for local chickens?

    Use the Pearson square method or a simple spreadsheet. Determine the desired protein level, then mix ingredients to achieve that level. Include a premix for vitamins and minerals. Test the feed by observing bird performance.

    What is the role of grit in feeding local chickens?

    Grit (small stones or insoluble material) aids in grinding feed in the gizzard. Local chickens that scavenge may get grit naturally, but confined birds need a supply. Provide insoluble grit like granite chips.

    Conclusion

    Feeding local chickens is a science and an art. Understanding their nutritional requirements, selecting appropriate ingredients, and implementing proper feeding management are key to successful production. While local chickens are hardy and can utilize scavenged feed, supplemental feeding with a balanced ration significantly improves growth, egg production, and overall health. Farmers should aim to reduce feed costs without compromising nutrition by using local ingredients and minimizing waste. Regular monitoring of bird condition and feed intake allows for timely adjustments. With the knowledge provided in this guide, you can optimize the feeding of local chickens and achieve sustainable, profitable poultry farming.

  • The Ultimate Guide to Preparing Hay for Livestock

    The Ultimate Guide to Preparing Hay for Livestock

    Hay is the backbone of livestock nutrition. It keeps animals healthy and productive. But preparing hay isn’t simple. You must do it right. Poor hay can cause health issues. It can also waste money. This guide covers everything. You will learn the best methods. We will talk about cutting, drying, baling, and storage. You will also learn about feeding. Let’s dive in.

    Why Hay Preparation Matters

    Hay provides essential nutrients. It is a primary food source for many animals. Proper preparation preserves those nutrients. It also prevents spoilage. Good hay reduces feed costs. It improves animal health. Poor hay can lead to diseases. for instance, moldy hay causes respiratory problems. It can also cause colic in horses. So, quality matters.

    Hay preparation involves several steps. Each step affects the final product. You must time each step well. Weather plays a big role. You need the right equipment. Knowledge is also key. This guide will help you master each step.

    Understanding Hay Types

    Different animals need different hay. Common types include timothy, alfalfa, and orchard grass. Timothy is good for horses. Alfalfa has more protein. It is great for dairy cows. Orchard grass is palatable. It works for sheep and goats. Choose based on your livestock needs.

    Hay Type Protein % Best For
    Alfalfa 15-20% Dairy cows, growing animals
    Timothy 8-10% Horses, adult ruminants
    Orchard Grass 10-12% Sheep, goats, horses
    Bermuda Grass 6-10% Cattle, horses

    Each type has different growth cycles. Alfalfa grows in multiple cuttings. Timothy is a cool-season grass. Know your region’s climate. Then choose the right type.

    Step 1: Cutting Hay at the Right Time

    Timing is crucial. Cut hay when nutrients are highest. For grasses, cut at early heading stage. For legumes, cut at early bloom. This maximizes protein and energy. Cutting too early reduces yield. Cutting too late lowers quality.

    Check the weather forecast. You need several dry days. Rain can damage cut hay. It leaches nutrients. It also promotes mold. Plan your cutting accordingly.

    Use a sharp mower conditioner. This cuts cleanly and crimps stems. Crimping speeds drying. It also reduces leaf loss. Set the cutting height properly. Leave 2-3 inches of stubble. This protects the plant crown. It also helps regrowth.

    Mower Types

    • Sickle bar mower: Good for small fields. Leaves clean stubble.
    • Disc mower: Fast and efficient. Handles heavy crops well.
    • Rotary mower: Best for large areas. Can handle tough conditions.

    Choose based on your field size and budget. A well-maintained mower ensures a good cut.

    Step 2: Drying Hay Properly

    Drying reduces moisture content. Hay should have 15-20% moisture for baling. Higher moisture leads to mold. Lower moisture causes leaf loss. Drying time varies. It depends on weather and crop density.

    Spread the cut hay in wide swaths. This increases sun exposure. Use a tedder to fluff the hay. It speeds drying. Turn the hay if needed. But avoid overworking. Too much handling causes leaf shatter.

    Check moisture regularly. Use a moisture tester. Or use the “feel” method. Squeeze a handful. If it feels dry and crisp, it’s ready. If it feels damp, wait longer.

    “Proper drying is the most critical step. It determines hay quality.” – Experienced farmer

    Tips for Faster Drying

    1. Cut in the morning after dew dries.
    2. Use wide swaths (at least 70% of cut width).
    3. Condition the hay to crack stems.
    4. Ted within 24 hours of cutting.
    5. Rake only when necessary.

    Step 3: Raking and Windrowing

    Raking gathers hay into windrows. This makes baling easier. It also allows further drying. Use a wheel rake or parallel bar rake. Wheel rakes are gentle. They reduce leaf loss. Parallel bar rakes work in heavy crops.

    Rake when hay is at 30-40% moisture. This prevents leaf shatter. Rake gently to avoid soil contamination. Soil can introduce mold spores. It also reduces feed value.

    Windrow shape matters. A narrow windrow dries slower. A wide windrow dries faster. For large bales, make a single windrow. For small bales, use multiple windrows.

    Step 4: Baling Methods

    Baling compresses hay for storage. There are two main types: square bales and round bales. Square bales are easier to handle. They stack well. Round bales are larger. They require less labor but more equipment.

    Bale Type Weight Storage Best For
    Small Square 40-60 lbs Indoor stacking Small operations, horses
    Large Square 800-1500 lbs Indoor/outdoor Large farms, dairy
    Round 500-2000 lbs Outdoor with cover Beef cattle, sheep

    Bale at the right moisture. For square bales, aim for 15-18%. For round bales, 18-20% is okay. Use net wrap or twine. Net wrap sheds water better. It also reduces spoilage.

    Baler Maintenance

    Keep balers in good condition. Check belts and chains. Lubricate moving parts. Adjust tension for consistent bale density. A well-maintained baler produces uniform bales. This improves storage efficiency.

    Step 5: Hay Storage Best Practices

    Storage protects hay from weather. It also prevents nutrient loss. Store hay in a dry, well-ventilated area. A barn is ideal. If using outdoor storage, cover the top. Use tarps or plastic sheeting. But leave sides open for airflow.

    Stack bales off the ground. Use pallets or gravel. This prevents moisture wicking. Leave space between stacks. This allows air circulation. It also reduces fire risk. Hay fires occur when moisture is too high.

    “Good storage can extend hay life by years. It also preserves quality.” – Hay specialist

    Storage Checklist

    • Choose a dry location.
    • Elevate bales from ground.
    • Provide ventilation.
    • Cover outdoor stacks.
    • Monitor temperature.
    • Rotate older hay first.

    Step 6: Testing Hay Quality

    Testing tells you nutrient content. It helps balance rations. Send a sample to a lab. They analyze protein, fiber, and minerals. Use a hay probe to sample. Take cores from multiple bales. Mix them for a representative sample.

    Key metrics include:

    • Crude Protein: Essential for growth and milk.
    • Acid Detergent Fiber (ADF): Indicates digestibility.
    • Neutral Detergent Fiber (NDF): Affects intake.
    • Relative Feed Value (RFV): Overall quality index.

    Use results to adjust feeding. for instance, add grain if protein is low. Or supplement minerals if deficient.

    Step 7: Feeding Hay to Livestock

    Feeding methods affect waste. Use hay feeders to reduce spoilage. For round bales, use a ring feeder. For square bales, use a rack. Place feeders in dry areas. Move them regularly to avoid mud.

    Feed hay according to animal needs. Horses need 1.5-2% of body weight per day. Cattle need 2-3%. Sheep and goats need 3-4%. Adjust based on activity and life stage.

    Monitor hay intake. Overfeeding wastes hay. Underfeeding causes weight loss. Use body condition scoring. It helps assess if animals are getting enough.

    Avoiding Common Feeding Mistakes

    1. Don’t feed moldy hay.
    2. Don’t feed hay with weeds.
    3. Don’t change hay suddenly.
    4. Don’t feed on the ground.
    5. Don’t overfeed.

    Special Considerations for Different Livestock

    Horses

    Horses need high-fiber hay. Timothy is a top choice. Avoid alfalfa for easy keepers. It can cause obesity. For performance horses, alfalfa provides extra energy. Always provide clean water.

    Dairy Cows

    Dairy cows need high-protein hay. Alfalfa is excellent. It boosts milk production. Feed in combination with silage. Balance with grains for energy. Ensure consistent quality.

    Beef Cattle

    Beef cattle can eat lower-quality hay. They are less picky. But still need adequate protein. Supplement with protein blocks if needed. Use round bales for efficiency.

    Sheep and Goats

    Sheep and goats prefer fine-stemmed hay. Orchard grass is good. Avoid coarse hay. It can cause choking. Use hay nets to reduce waste. Provide minerals separately.

    Troubleshooting Hay Problems

    Hay problems include mold, dust, and weeds. Mold occurs when hay is too wet. It appears as white or gray powder. Dust comes from over-dried hay. It causes respiratory issues. Weeds reduce feed value.

    To prevent mold, bale at correct moisture. Store in dry conditions. If hay gets wet, discard it. For dust, add a little water before feeding. But not too much. For weeds, control them in the field. Use herbicides if necessary.

    Another common issue is heating. Hay can heat if moisture is high. This can lead to fire. Monitor bale temperature. If it exceeds 130°F, take action. Spread bales apart. Cool them down.

    Economic Considerations

    Hay production costs money. You need equipment, fuel, and labor. But good hay saves money on supplements. It also improves animal performance. Calculate cost per ton. Compare to buying hay. Often, making your own is cheaper.

    Consider selling excess hay. It can generate income. But ensure quality. Market demands high-quality hay. Test and advertise accordingly.

    Environmental Impact

    Hay fields provide habitat. They reduce erosion. They also sequester carbon. Sustainable practices improve soil health. Rotate fields to prevent nutrient depletion. Use cover crops when possible.

    Minimize waste. Spoiled hay contributes to methane. Proper storage and feeding reduce waste. It’s good for your wallet and the planet.

    Advanced Techniques

    Some farmers use haylage. It is fermented hay. It has higher moisture. It is stored in bales wrapped in plastic. This preserves nutrients. It works well in wet climates.

    Another method is hay compression. It reduces volume for transport. But it requires special equipment. It isn’t common for small farms.

    Conclusion

    Preparing hay is both an art and a science. It requires attention to detail. But the rewards are great. You get high-quality feed. Your animals stay healthy. Your farm becomes more efficient.

    Remember the key steps: cut at the right time, dry properly, bale correctly, store well, and feed wisely. Test your hay to know its value. Adjust your methods based on results.

    With practice, you will improve. Your hay will get better every year. Start applying these tips today. Your livestock will thank you.

  • Growing Avocado in Uganda: A Complete Guide for Farmers

    Growing Avocado in Uganda: A Complete Guide for Farmers

    Avocado farming in Uganda is booming. Farmers are discovering its huge potential. The fruit is nutritious and profitable. But growing avocado requires knowledge. You need the right techniques. This guide covers everything. From planting to selling. Let’s dive in.

    Why Grow Avocado in Uganda?

    Uganda has ideal conditions for avocados. The climate is warm. The soil is fertile. Avocado trees thrive here. Demand is high locally and internationally. Supermarkets want them. Exporters need them. You can make good money. But you must do it right.

    Avocados are healthy. They contain good fats. People love them. Uganda’s population is growing. So is the middle class. They buy more avocados. Hotels and restaurants use them. Processors make oil and cosmetics. The market is expanding fast.

    Best Avocado Varieties for Uganda

    Choose the right variety. It matters a lot. Some grow better in Uganda. Others have better yields. Here are top choices.

    Hass Avocado

    Hass is the most popular. It has a dark, bumpy skin. The flesh is creamy. It ships well. Exporters love it. It grows in many areas. But it needs care. It is a hybrid. It produces well from year three.

    Fuerte Avocado

    Fuerte is a green variety. It has smooth skin. The taste is mild. It is hardy. It resists cold better. It fruits earlier than Hass. But it doesn’t store long. Sell it quickly.

    Booth 8 and Reed

    These are less common. But they do well. Booth 8 is large. Reed is round. Both have good flavor. They are good for local markets. Try them if you have space.

    Climate and Soil Requirements

    Avocados need specific conditions. First, temperature. They like 20-30°C. Too hot or cold stresses them. Second, rainfall. They need 1000-2000 mm per year. Too much rain causes root rot. Too little reduces yield. Irrigate if needed.

    Soil is critical. Avocados need well-drained soil. Sandy loam is best. Heavy clay holds water. That kills roots. Soil pH should be 5.5-6.5. Test your soil first. Add lime if too acidic. Add organic matter for fertility.

    Land Preparation and Planting

    Prepare land early. Clear bushes and weeds. Plow deeply. Remove stones. Mark planting holes. Space them 8-10 meters apart. That gives room for growth. Dig holes 60 cm wide and 60 cm deep. Mix topsoil with manure. Fill the hole partly.

    Plant at the start of rains. That gives trees time to establish. Remove the seedling from its pot. Place it in the hole. The graft union should be above soil. Fill with soil. Firm it gently. Water well. Mulch around the tree. This keeps moisture.

    Caring for Young Trees

    Young trees need attention. Water them regularly. Especially in dry spells. But don’t overwater. Weeds compete for nutrients. Remove them by hand or mulch. Apply fertilizer after three months. Use a balanced one like NPK 17-17-17. Apply again after six months.

    Prune young trees lightly. Remove dead branches. Shape the tree. This helps air circulation. Stake the tree if it leans. Protect from animals. Use fencing if needed. Check for pests often.

    Fertilization and Irrigation

    Avocados need nutrients. Nitrogen is key for growth. Phosphorus for roots. Potassium for fruit. Use organic manure yearly. Apply 20-30 kg per tree. Supplement with chemical fertilizer. Follow soil test advice. Apply in two splits per year.

    Irrigation boosts yield. Drip irrigation is efficient. It saves water. Water deeply once a week. Increase during fruiting. Reduce after harvest. Mulching reduces evaporation. Use grass or leaves.

    Pest and Disease Management

    Pests attack avocados. Common ones include thrips. They damage leaves and fruit. Use neem oil or insecticidal soap. Mites cause yellowing. Spray sulfur. Fruit flies lay eggs in fruit. Hang traps. Use bait sprays.

    Diseases are serious. Root rot is deadly. It comes from poor drainage. Plant on mounds. Use resistant rootstocks. Anthracnose causes fruit spots. Prune for air flow. Spray copper fungicide. Cercospora causes leaf spots. Remove infected leaves. Apply fungicide.

    Pruning and Training

    Pruning shapes the tree. It also improves yield. Prune during dry season. Remove low branches. They touch the ground. Cut crossing branches. Thin the canopy. Let light in. This reduces disease. Use sharp tools. Disinfect them. Seal large cuts with paint.

    Training young trees is key. Choose a central leader. Let it grow tall. Remove competing branches. This gives a strong structure. It supports heavy fruit. It also makes harvesting easier.

    Pollination and Fruit Set

    Avocado flowers are tricky. They open twice. First as female. Then as male. This prevents self-pollination. Plant different varieties together. They cross-pollinate. Bees help. Keep beehives nearby. Good pollination means more fruit.

    Fruit set can be low. Stress reduces it. Water and feed well. Avoid heavy pruning during flowering. Thin fruit if too many. It improves size. Remove misshapen fruits.

    Harvesting Avocados

    Avocados don’t ripen on tree. They mature but stay hard. Harvest when they reach size. Color changes for some varieties. For Hass, skin turns from green to purplish-black. For Fuerte, it stays green but becomes dull. Pick one and test. It should be firm but yield slightly.

    Harvest carefully. Use a picking pole. Or climb with a bag. Don’t drop fruit. They bruise easily. Cut the stem short. Leave a small piece. This prevents rot. Place in crates. Don’t pile too high.

    Post-Harvest Handling

    Handle avocados gently. Sort by size and quality. Remove damaged ones. Wash if dirty. Dry them. Store at 5-7°C. This slows ripening. Keep humidity high. Use plastic liners. Ethylene gas ripens them. Sell or ripen as needed.

    For export, follow standards. Wash with chlorine. Grade for export. Pack in boxes. Label properly. Ship quickly. Air freight is best. Sea freight needs controlled atmosphere.

    Marketing Your Avocados

    Find buyers early. Local markets need fresh fruit. Supermarkets want consistent supply. Hotels and restaurants buy regularly. Processors need large quantities. Exporters look for quality. Join a farmers’ group. They can negotiate better prices.

    Price fluctuates. Harvest season brings lower prices. Off-season is higher. Store fruit to sell later. But that requires cold storage. Build relationships with buyers. Deliver on time. Maintain quality. Your reputation matters.

    Costs and Profits

    Starting costs are high. You need land, seedlings, and equipment. Each tree costs about 10,000 UGX. Prepare land, dig holes, buy fertilizer. Total for one acre is around 3-5 million UGX. But trees produce for decades. Annual costs are lower. Pruning, fertilizing, pest control, harvesting. About 2 million per acre.

    Income is good. A mature tree yields 100-200 fruits per year. At 1000 UGX each, that’s 100,000 per tree. An acre has 60 trees. That’s 6 million gross. Profits can be 3-4 million per acre. With good management, you earn more.

    Common Challenges

    Avocado farming has risks. Pests and diseases are major. Climate change brings unpredictable weather. Droughts and floods harm trees. Poor soil fertility reduces yield. Lack of knowledge leads to mistakes. Market prices can drop. But you can overcome these. Learn continuously. Consult experts. Invest in good practices.

    Success Stories

    Many Ugandans succeed. John from Mukono started with 50 trees. Now he has 200. He exports to Kenya. He earns 10 million per year. Grace from Mbarara grows Hass. She supplies supermarkets. Her farm is model. She trains other women. They form a cooperative. They get better prices.

    These stories show potential. With hard work, you can too. Start small. Learn as you grow. Expand gradually. Avocado farming is a journey. But it rewards patience.

    Conclusion

    Avocado farming in Uganda is promising. It offers good income. It improves nutrition. It creates jobs. But success requires knowledge. Choose the right variety. Prepare land well. Care for trees. Manage pests. Harvest correctly. Market wisely. Follow this guide. You will succeed. Start your avocado farm today. The future is green.

  • Dairy Farming in Uganda: Breeds, Feeding and Profitability

    Dairy Farming in Uganda: Breeds, Feeding and Profitability

    Dairy farming in Uganda means keeping cattle that are milked for sale or for home use, and it is one of the most practical Senior 3 Agriculture topics because its numbers are easy to compare. Uganda kept 14.5 million cattle in the 2021 national livestock census and produced about 3.7 billion litres of milk that year (UBOS, National Livestock Census Report 2021 ).

    The gap between a pure Ankole cow and a Friesian cross explains most of what a learner must understand about breeds, feeding and profit. These notes follow the NCDC syllabus and pair with the wider Senior 3 Agriculture notes hub.

    Friesian-cross dairy cow standing in a shaded zero-grazing unit on a Ugandan smallholder farm
    A dairy cow in a Ugandan zero-grazing unit, the intensive system that protects animals, concentrates manure and keeps milking close to the parlour.

    Breeds of dairy cattle used in Uganda

    Uganda’s dairy herd rests on two groups: indigenous cattle and exotic or cross-bred cattle. The NCDC Senior 3 Agriculture syllabus names seven breeds a learner must distinguish — Ankole, Sanga, Zebu, Boran, Friesian, Jersey and Guernsey. The exotic and cross-bred animals carry almost all commercial milk because they yield far more per cow.

    Indigenous cattle made up 11.2 million of Uganda’s 14.5 million cattle, or 77 percent, in 2021; exotic and cross-bred cattle made up 3.3 million, or 23 percent (UBOS, 2021). Within the indigenous herd, 78.2 percent are Zebu or Nganda and 21.8 percent Ankole long-horned, while about 90 percent of exotic cattle are kept for dairy.

    The economics of dairy farming in Uganda rest on this breed divide, because yield per cow sets the revenue side of every profit sum.

    Breed or typeGroupCharacteristics documented for Uganda
    Ankole (long-horned Sanga)IndigenousLong horns, small hump, large body, long legs; about 2.4 litres a day on Kiruhura farms.
    SangaGroup nameThe long-horned group; in Uganda the Sanga is the Ankole long-horned cow.
    East African short-horn ZebuIndigenousShort horns, large thoracic hump, small body, short legs.
    NgandaIndigenousIntermediate horns, hump and body; found in central Uganda.
    Zebu (Nkedi / Karamojong)IndigenousSmall, stocky short-horned Zebu of the north and east.
    BoranExotic (beef)Kenyan-born; listed as a beef breed in NAGRC&DB’s 2023 catalogue.
    Friesian (Holstein)Exotic (dairy)High-yielding dairy breed; crossed with Ankole to raise milk yield.
    JerseyExotic (dairy)Dairy breed; Kenyan-born bulls in NAGRC&DB’s 2023 catalogue.
    GuernseyExotic (dairy)Dairy breed; the only Uganda-bred bull (BRIGHT) in the 2023 catalogue.
    SahiwalExoticNamed on the NAGRC&DB 2023 catalogue cover with Friesian, Ayrshire and Boran.
    AyrshireExotic (dairy)Named on the NAGRC&DB 2023 catalogue cover.
    Friesian-Ankole (HF50%)Cross-bredAbout 11.2 litres a day on Kiruhura farms; the more suited cross.
    Friesian-Ankole (HF>50%)Cross-bredAbout 10.4 litres a day on Kiruhura farms.
    • Sanga and Ankole are one: The syllabus lists both, but Sanga is the group name, and in Uganda the Sanga is the Ankole long-horned cow.
    • Adaptability: Indigenous breeds are heat-tolerant, partly disease-resistant, and survive long feed and water shortages (FAO AGRI 15).
    • Why farmers keep Ankole: For cultural reasons, as a drought and disease buffer, and for income from selling live animals.
    • Crossbreeding is fast and haphazard: Land is being fenced off and Ankole crossed with Friesian to raise yields, often without a plan.
    • Guernsey is bred in Uganda: The only Uganda-bred bull in NAGRC&DB’s 2023 catalogue is the Guernsey BRIGHT.
    • Boran is beef: Boran bulls in the national catalogue are Kenyan-born and beef, so Boran is not an indigenous dairy breed.

    For how a farmer picks a good dairy animal by eye, read the companion notes on breeds and physical selection of production cattle. This topic sits inside the Senior 3 Agriculture cattle production notes pillar.

    Common mistake: writing “Ankole cattle are 50 percent of Uganda’s herd.” That is 1990s data. UBOS 2021 puts Ankole long-horned at 21.8 percent of indigenous cattle — about 2.4 million of 11.2 million.

    Feeding dairy cattle for milk yield

    Feeding is the lever that most directly controls milk yield in dairy farming in Uganda, and the evidence is dramatic. On Kiruhura farms a pure Ankole cow gave about 2.4 litres a day, a Friesian-Ankole cross (HF50%) about 11.2 litres, and a higher-grade cross 10.4 litres (Galukande et al., Tropentag 2008). The gap is feed and management, not luck. For the ration maths, see the notes on cattle nutrition and feed rations.

    Young napier grass fodder being cut in a dairy farm plot in Uganda
    Napier grass, Uganda’s main fodder grass, is richest in protein when cut young at about one metre tall.
    1. Balanced ration: A milking cow needs roughage for the rumen plus concentrate for energy and protein, never one feed alone.
    2. Roughage first: Grasses supply 5-19 percent crude protein while legumes supply 15-34 percent, so a legume mixed into grass lifts the diet’s protein (ILRI/EADD, 2012).
    3. Napier cutting height: Napier cut at 30 cm is about 9.2 percent crude protein, but over 2 m it drops to about 5.0 percent, so harvest at 1 m or every 6-8 weeks.
    4. Protein concentrates: Cottonseed cake carries about 33.0 percent crude protein and wheat bran about 17.8 percent, on a dry-matter basis (ILRI/EADD, 2012).
    5. Energy feeds: Molasses is an energy feed, not a protein feed, and works best as a carrier for urea and minerals.
    6. Local ingredients: MAAIF’s 2004 Animal Feeds Policy names maize, sorghum, cassava, sweet potatoes, cottonseed cake, soybean and fish as feed ingredients.
    7. Dairy meal standard: A basic dairy meal needs at least 15.5 percent crude protein and calf booster at least 17.5 percent (ILRI Manual 59, 2022).
    8. Calf feeding: A calf needs the richer 17.5 percent-protein booster, while a lactating cow is kept on the 15.5 percent dairy meal.
    9. Water: UBOS’s 2021 census found keepers give cattle an average of only 8.3 litres a day — survey practice, not a full requirement.
    10. Mineral lick: A zero-grazing unit includes a mineral lick box, because salt and trace minerals are part of the feeding plan.
    11. Legume supplements: Calliandra leaves carry about 26.3 percent and sesbania about 28.2 percent crude protein, so fodder trees are planted.
    12. Sweet potato vines: These supply about 19.2 percent crude protein and can be fed up to about 15 kg fresh per cow per day (ILRI/EADD, 2012).
    13. Adulteration risk: Maize bran is commonly adulterated with sawdust, husks and cassava, so check feed quality rather than trust appearance (ILRI Manual 59).
    Stage of productionMain feed needsVerified anchor
    Calf (pre-weaning)Milk plus a starter and calf booster feedCalf booster minimum 17.5% crude protein (ILRI Manual 59, 2022).
    Weaned calf / heiferGood roughage plus a legumeLegumes are 15-34% crude protein, grasses 5-19%.
    Dry cowQuality roughage plus a mineral lickA mineral lick box is a standard unit component.
    Early lactationConcentrate plus young napierNapier at 1 m is about 7.0% crude protein; over 2 m about 5.0%.
    Mid to late lactationNapier plus a legume plus branMaize bran 9.4% and cottonseed cake 33.0% crude protein.
    Milking cow (daily)Roughage plus concentrate plus waterBasic dairy meal minimum 15.5% crude protein.
    All stagesClean water every dayUBOS 2021: keepers give an average 8.3 litres a day.

    Exam tip: In a Pearson-square question you are usually balancing protein, so state every crude-protein value on the same basis — dry matter — before you calculate. Mixing “as fed” and “% DM” numbers is the commonest S3 feed error.

    Housing and milking hygiene

    Housing and milking hygiene decide whether the milk a cow produces is safe to sell, and most Ugandan dairy cattle lack even basic shelter. Only 32.5 percent of cattle-keeping households had a shelter or enclosure for their cattle in 2021 (UBOS). The standard answer is the zero-grazing unit Uganda’s National Dairy Development Project designed. Clean handling is covered in the notes on hygienic milking techniques.

    Iron-roofed zero-grazing cattle unit with a feed trough on a Ugandan farm
    A partly roofed zero-grazing unit, with a roofed sleeping area and an open walking area that slopes to drain.
    1. Zero-grazing unit: A typical unit has a sleeping area, walking area, feed, water and mineral-lick troughs, a milking area and a manure pit (NDDP/ILRI).
    2. Partly roofed: The sleeping area, milking parlour and calf pens must be roofed; the walking area need not be, so a unit is partly roofed.
    3. Roofing materials: Iron sheets or thatch (grass or makuti) are both accepted; galvanised sheets are made to Uganda Standard US EAS 11:2013.
    4. Floor choice: The sleeping area may be soft earth or concrete with bedding, while the walking area, milking place and calf pen should be concrete.
    5. Concrete ratio: Uganda’s specification mixes 1 bag cement with 2 wheelbarrows sand and 3 wheelbarrows ballast, and the floor needs two weeks to cure.
    6. Slope and grip: The walking floor slopes away from the troughs and sleeping area, and its surface is roughened so cows do not slip.
    7. Ventilation: A unit is well ventilated but protected from wind, rain and direct sunshine, which prevents coughs, colds and stress.
    8. Termite protection: All timber in the unit is treated against termites using anti-termite chemicals or old engine oil.
    9. Movable neck-pole: The sleeping pen’s length is adjusted with a movable neck-pole, so one structure fits cows of different sizes.
    10. Strip cup: The syllabus requires detecting milk abnormalities using a strip cup, so checking milk is a skill, not an option.
    11. Clean milk production: Milking techniques and clean-milk production are their own syllabus outcome, because clean handling keeps milk saleable.
    12. Dairy law: The Dairy Development Authority Act 1998 licenses milk processors, exporters, importers and collection centres and regulates dairy quality.
    13. Milking frequency: On Ugandan farms all Ankole are milked once a day, while crossbreds are milked once or twice (Tropentag 2008).

    Common mistake: quoting “a cow needs 10 square metres of barn space” in an exam. No Ugandan source verifies a per-animal floor area for cattle — the NDDP specification gives the five-cubicle unit and its adjustable neck-pole, so describe those instead.

    Common dairy cattle diseases and control

    Disease is the biggest controllable cost in dairy farming in Uganda, and ticks lead the list. East Coast fever, spread by the brown ear tick, is the most prevalent and economically important tick-borne disease, and Uganda loses over USD 1.1 billion a year to ticks and tick-borne diseases (Kasaija et al., 2021). The syllabus fixes the diseases to know: red water, heartwater, foot and mouth disease, anthrax, roundworm and ticks.

    DiseaseCause or spreadControl in Uganda
    East Coast feverProtozoan Theileria parva, spread by the brown ear tickAcaricide tick control, ECF vaccination, integrated control.
    Red water (babesiosis)Tick-borne blood parasiteAcaricide tick control.
    Heartwater (cowdriosis)Tick-borne diseaseAcaricide tick control.
    AnaplasmosisTick-borne diseaseAcaricide tick control.
    Foot and mouth diseaseVirus; direct contact, aerosols and open marketsCompulsory twice-yearly vaccination, quarantine, movement control.
    AnthraxBacterium; infected carcassesLivestock vaccination, report deaths, never eat dead cattle.
    Roundworm (gut worms)Worm eggs and larvae on pastureStrategic deworming and grazing management.
    Ticks (brown ear tick)Parasite and disease vectorAcaricides, but resistance is spreading; only 11.3% of households own a spray pump.
    BrucellosisDeclared disease (SI 38-2); also a human riskTesting, culling and careful handling.
    Lumpy skin diseaseDeclared disease (SI 38-2)Reporting and movement control under the law.
    Acaricide resistanceSelected by intensive sprayingIntegrated tick control, vaccination, resistant breeds.
    Notifiable diseasesDeclared under the Animal Diseases Act, Cap. 38Owners must report any diseased animal to the nearest veterinary officer.
    Movement-spread diseaseInfected animals moved between districtsPermits, quarantine, and no movement of live animals at night.
    • Tick control is primary: The main Ugandan method to control tick-borne diseases, especially East Coast fever, is intensive tick control with acaricides.
    • Resistance problem: Intensive acaricide pressure has selected resistant ticks, so vaccination and integrated control are also needed (Kasaija et al., 2021).
    • FMD is endemic: Uganda has been an endemic foot-and-mouth-disease country since 1953, with serotypes O, A, SAT 1 and SAT 2 recorded from 2001 to 2024.
    • Vaccination is compulsory: About 44.5 million susceptible animals are to be vaccinated twice a year against FMD, and farmers pay per animal.
    • Quarantine is district-wide: During an FMD outbreak, quarantine in Uganda covers the entire district, not just the affected farm.
    • Report every death: Under the Animal Diseases Act (Cap. 38), owners must report any diseased animal, and moving live animals at night is prohibited.
    • Deworming reinfection: A Ugandan calf study found worm egg counts rose within three weeks of deworming, because calves ingest larvae while grazing.

    Exam tip: The syllabus asks for “red water” and “heart water” as two separate words. Red water is babesiosis and heartwater is cowdriosis. Both are tick-borne, so the control answer is the same — acaricide tick control — but name both diseases separately.

    Costs and profitability of dairy farming

    Profitability in dairy farming in Uganda is the difference between what a cow earns in milk and what it costs to feed, house and protect her, and the breed choice sets the size of both numbers. A Kiruhura Ankole at about 2.4 litres a day earns far less per litre than a Friesian cross at about 11.2 litres, but the cross costs more to feed and protect.

    No published shilling price list exists, so the cost table is illustrative.

    Cost itemWhat it coversWhy it is counted
    Breeding stockBuying a heifer or cow, or semen and AI serviceThe breed choice fixes the yield ceiling.
    Feed — roughageNapier, hay, silage, pastureThe largest running cost on most dairy units.
    Feed — concentrateDairy meal, bran, cottonseed cakeNeeded to lift yield above a roughage-only level.
    MineralsMineral lick and saltPart of the balanced ration.
    WaterTrough water, especially in the dry seasonMilk is mostly water, so supply is a cost.
    HousingPoles, iron sheets or thatch, cement, sand, ballastA five-cubicle unit lists quantities, not prices.
    Veterinary careVaccines, acaricides, dewormers, vet feesDisease is the biggest preventable loss.
    LabourFeeding, milking, cleaningZero grazing has a high labour requirement.
    EquipmentSpray pump, troughs, strip cupOnly 11.3% of households own a spray pump.
    Transport and marketingMoving milk to buyers, cooling itQuality and distance change the price received.
    Record-keepingRegisters, tags, record cardsNeeded to know which cow pays for itself.
    Finance costLoan interest, e.g. the ACF at 12% fixedBorrowing for stock or housing adds a cost.
    InsuranceLivestock cover, e.g. the UAISInsures against death and disease loss.
    • Feed dominates: Feed is the biggest expense, so growing your own napier and legumes cuts the largest single cost.
    • Yield gap is the profit story: The 2.4-to-11.2 litres-a-day gap between Ankole and Friesian-cross cows is the clearest argument for careful crossbreeding.
    • Affordable credit exists: The Agricultural Credit Facility lends at up to 12 percent a year fixed, with a Block Allocation line for groups and SACCOs.
    • Insurance is subsidised: The Uganda Agricultural Insurance Scheme covers cattle, with a capped 6 percent premium and about 2.5 percent effective after subsidy.
    • Tax incentives: Animal feeds and processed milk are VAT-exempt, while seeds, fertilisers, pesticides and hoes are zero-rated (URA, FY 2025/26).
    • Record-keeping pays: Records keep input costs visible and support deductions, and the syllabus lists record-keeping as an outcome.

    Common mistake: presenting a made-up shilling price as a market fact. Uganda’s official data gives quantities and index numbers, not shilling prices per bag or per sheet, so label every budget line “illustrative” and price it from a named market and date.

    Frequently asked questions about dairy farming in Uganda

    Which dairy cattle breed gives the most milk in Uganda?

    Friesian-Ankole crosses give the most. On 18 Kiruhura farms, a pure Ankole cow gave about 2.4 litres a day, a 50 percent Friesian cross about 11.2 litres, and a higher-grade cross 10.4 litres (Galukande et al., 2008). The 50 percent cross suits the local environment best.

    How much milk does Uganda produce in a year?

    Uganda produced about 3.7 billion litres of milk in 2021, or 71.7 million litres a week, up from 667.5 million litres in 2008 — a five-fold increase (UBOS, National Livestock Census 2021). Ankole sub-region alone contributed about 1.2 billion litres.

    What do I feed a dairy cow to increase milk?

    Feed roughage such as napier cut at one metre, plus a concentrate like dairy meal and a protein source such as cottonseed cake. Napier at 30 cm is 9.2 percent crude protein but over 2 m falls to 5.0 percent, so cut young. Add clean water and a mineral lick.

    Why do dairy cows get sick from ticks?

    Ticks carry East Coast fever, the most economically important tick-borne disease in Uganda, plus red water, heartwater and anaplasmosis. Uganda loses over USD 1.1 billion a year to ticks and tick-borne diseases (Kasaija et al., 2021). Acaricides are the main control.

    Is dairy farming profitable in Uganda?

    It can be, if a farmer closes the yield gap with crossbred cows and controls feed and disease costs. Feed is the biggest expense, so growing napier and legumes helps. Credit is available at up to 12 percent a year through the Agricultural Credit Facility.

    Which syllabus topic covers dairy farming?

    Dairy farming sits in the Senior 3 Agriculture “Cattle production” topic, worth 48 periods in Term 1 of the NCDC syllabus. It covers breeds, feeding, housing, disease control and milking, with outcomes on records, strip-cup checks and clean-milk production.

    Key terms and revision summary

    Use this glossary to lock the terms, then attempt the exam-style questions that follow.

    TermMeaning
    Zero grazingKeeping cattle in a unit where feed is brought to them instead of roaming to graze.
    CrossbreedingMating two breeds, such as Ankole and Friesian, to combine hardiness and yield.
    Crude proteinA feed’s nitrogen content expressed as protein, measured on a dry-matter basis.
    RoughageBulky, fibrous feed such as napier, hay and silage that keeps the rumen working.
    ConcentrateAn energy- or protein-rich feed such as dairy meal, bran or cottonseed cake.
    Strip cupA cup used to detect milk abnormalities before and during milking.
    Notifiable diseaseA disease an owner must report to a veterinary officer under the law.
    QuarantineA restriction on moving animals and products out of an infected area.
    AcaricideA chemical applied to control ticks on cattle.

    Exam-style questions

    1. Distinguish between Ankole and Friesian cattle, and explain why farmers cross them. Outline: Ankole is indigenous, long-horned and heat-tolerant but yields about 2.4 litres a day; Friesian is an exotic dairy breed with a much higher yield. Crossbreeding gives hardiness plus higher milk — about 11.2 litres a day for a 50 percent cross.

    2. State four diseases of cattle in Uganda and one control measure for each. Outline: East Coast fever (acaricide and vaccination), foot and mouth disease (twice-yearly vaccination), anthrax (vaccination and reporting deaths), roundworm (strategic deworming).

    3. A farmer feeds napier grass cut at 2 m. Explain the effect on milk yield and how to improve it. Outline: 2 m napier is only about 5.0 percent crude protein against 9.2 percent at 30 cm, so low protein limits milk.

    Harvest at 1 m or every 6-8 weeks and add a legume.

    4. Why is record-keeping important in a dairy unit? Outline: Records track yield, feed, disease and cost, so a farmer can cull unprofitable cows and plan. It is syllabus outcome 3.1(l) and supports tax deductions.

    Get these five sections right and you can answer any Senior 3 question on dairy farming in Uganda.

  • Carrot Farming in Uganda: A Guide to Profitable Growth

    Carrot Farming in Uganda: A Guide to Profitable Growth

    Carrot Farming in Uganda: A Guide to Profitable Growth

    Carrots are a popular vegetable in Uganda. They add color and nutrition to meals. Farmers across the country are discovering their profit potential. But is growing carrots really profitable? The answer is yes, with the right approach. This guide will show you how.

    Why Carrots Are a Great Crop for Ugandan Farmers

    Carrots have a short growing cycle. You can harvest them in just 3 to 4 months. This means you can have multiple harvests per year. They also have a steady demand. Hotels, restaurants, and families all need carrots. The market is always there.

    Carrots grow well in many parts of Uganda. The cool highlands are ideal. But with proper care, they can thrive in warmer areas too. They are also a high-value crop. A small plot can earn you good money. Many farmers are now switching to carrots from traditional crops.

    Understanding the Costs of Carrot Farming

    To make profit, you must know your costs. Let’s break them down. First is land preparation. You need to till the soil well. This costs about 50,000 to 100,000 UGX per acre. Next is seeds. Good carrot seeds cost around 20,000 UGX per acre. You also need fertilizer. Organic manure is cheap and effective. It costs about 30,000 UGX per acre.

    Labor is another cost. Planting, weeding, and harvesting require workers. You might spend 100,000 UGX per acre on labor. Irrigation is important in dry seasons. A simple drip system can cost 200,000 UGX. But you can use watering cans for small plots. Pesticides may be needed for pests like aphids. Budget 20,000 UGX for pest control.

    Total startup costs for one acre are around 420,000 UGX. This is a rough estimate. Actual costs vary by location and scale. But it gives you an idea. Remember, you can reduce costs by using family labor. Also, make your own compost to save money.

    Potential Yields and Revenue

    Carrot yields depend on variety and care. With good practices, you can get 10 to 15 tons per acre. That’s 10,000 to 15,000 kilograms. The market price for carrots varies. In Kampala, a kilo sells for 1,000 to 2,000 UGX. In rural areas, it’s lower. Let’s use an average of 1,500 UGX per kilo.

    If you harvest 12 tons per acre, your revenue is 18 million UGX. That’s 12,000 kg x 1,500 UGX. Subtract your costs of 420,000 UGX. Your profit is over 17 million UGX per acre. That’s a huge return! But remember, prices can drop. Also, you may have losses from pests or diseases. Still, the potential is clear.

    Choosing the Right Carrot Varieties

    Not all carrot varieties are the same. For Uganda, choose varieties that suit the climate. Nantes varieties are popular. They are sweet and grow well in cool areas. Chantenay varieties are also good. They do well in heavier soils. Imperator varieties have long roots. They need deep, sandy soil.

    Local varieties like ‘Uganda Local’ are also available. They are hardy and disease-resistant. But they may have lower yields. Hybrid varieties like ‘Brasilia’ give high yields. They are resistant to diseases. Talk to your local agricultural officer. Get advice on the best variety for your area.

    Preparing Your Land for Carrots

    Carrots need loose, well-drained soil. Heavy clay soil causes stunted roots. Prepare your land early. Plow and harrow to break clods. Remove stones and weeds. Add well-rotted manure or compost. Mix it into the soil two weeks before planting.

    Make raised beds if your area has heavy rain. This improves drainage. Beds should be 1 meter wide. Leave paths between beds for walking. This prevents soil compaction. Carrots need full sun. Choose a site with at least 6 hours of direct sunlight daily.

    Planting Carrots the Right Way

    Plant carrots directly in the field. They do not transplant well. Sow seeds in shallow furrows. The furrows should be 1 cm deep. Space rows 20 cm apart. Cover seeds lightly with soil. Water gently to avoid washing seeds away.

    Carrot seeds are tiny. Mix them with sand for even sowing. This prevents overcrowding. After germination, thin the seedlings. Leave 5 cm between plants. Thinning is important. It gives roots room to grow. Crowded carrots become small and twisted.

    Watering and Irrigation Tips

    Carrots need consistent moisture. Dry soil causes tough roots. Water regularly, especially during germination. Use drip irrigation if possible. It saves water and reduces disease. If using a watering can, water deeply. Aim for 1 inch of water per week.

    In dry seasons, water more often. Mulching helps retain moisture. Use grass or straw around plants. This also suppresses weeds. Avoid overwatering. It can cause root rot. Check soil moisture by feeling it. If it’s dry an inch below the surface, water.

    Fertilizing for Maximum Yield

    Carrots are heavy feeders. They need nutrients for healthy roots. Apply a balanced fertilizer like NPK 10-10-10. Use 200 kg per acre. Apply half at planting and half after 4 weeks. Organic farmers can use compost tea. Apply every 2 weeks during growth.

    Avoid too much nitrogen. It causes lush leaves but small roots. Potassium and phosphorus are key for root development. Bone meal is a good source of phosphorus. Wood ash provides potassium. Test your soil to know its needs. This saves money and improves yields.

    Weed Control in Carrot Fields

    Weeds compete with carrots for nutrients. They also harbor pests. Keep your field weed-free. Hand weeding is effective. Do it carefully to avoid damaging roots. Mulching also controls weeds. Use a thick layer of organic mulch.

    You can use pre-emergence herbicides. But follow instructions carefully. Carrots are sensitive to chemicals. Always test on a small area first. Crop rotation helps reduce weeds. Plant carrots after maize or beans. These crops suppress different weeds.

    Pest and Disease Management

    Common pests include aphids and carrot flies. Aphids suck sap from leaves. They spread viruses. Use neem oil or insecticidal soap. Carrot flies lay eggs near roots. Their larvae tunnel into roots. Use row covers to protect young plants. Rotate crops to break pest cycles.

    Diseases like leaf blight and root rot can occur. Leaf blight causes yellow spots. Use fungicides if severe. Root rot happens in wet soil. Improve drainage and avoid overwatering. Plant resistant varieties. Remove infected plants immediately.

    Harvesting and Post-Harvest Handling

    Carrots are ready 3 to 4 months after planting. Look for bright orange color and good size. Loosen soil around roots before pulling. Harvest in the morning when it’s cool. Remove tops immediately to prevent moisture loss.

    Wash carrots gently to remove soil. Sort them by size and quality. Grade A carrots are straight and uniform. They fetch higher prices. Grade B carrots are smaller or misshapen. Sell them at lower prices or process them. Store in a cool, shaded place. Carrots keep for weeks if stored properly.

    Marketing Your Carrots for Profit

    Know your market before planting. Contact local traders and supermarkets. Join farmer groups to bulk sell. This gives you bargaining power. Sell directly to consumers at farmers’ markets. You get higher prices this way.

    Consider value addition. Process carrots into juice or chips. This increases shelf life and profit. Package attractively. Use clean bags with labels. Build relationships with buyers. Consistent quality brings repeat customers. Use social media to advertise.

    Real Farmer Success Stories

    Sarah from Mbale started with half an acre. She used organic methods. Her first harvest was 6 tons. She earned 9 million UGX. Now she farms 2 acres. Her profit is over 30 million UGX per season. She supplies hotels in Kampala.

    John in Kabale grows carrots on 1 acre. He uses drip irrigation. His yield is 15 tons per acre. He sells to exporters. His profit is 20 million UGX per season. He plans to expand to 5 acres. These stories show the potential.

    Common Mistakes to Avoid

    Many beginners plant too many seeds. This leads to overcrowding. Always thin seedlings. Another mistake is poor soil preparation. Carrots need loose soil. Ignoring pests can ruin your crop. Monitor your field regularly. Also, don’t harvest too late. Overmature carrots become woody.

    Some farmers skip marketing research. They grow without a buyer. This leads to low prices. Always have a market plan. Finally, don’t ignore soil health. Test your soil and amend it. Healthy soil gives healthy carrots.

    Scaling Up Your Carrot Farm

    Start small and learn. Master the basics on a quarter acre. Then expand gradually. Invest in irrigation for dry seasons. Use machinery for land preparation. This saves labor costs. Hire a farm manager if you have large acreage. Keep records of costs and yields. This helps you make better decisions.

    Consider contract farming. Some companies offer seeds and buy the harvest. This reduces risk. Also, explore export markets. Uganda exports carrots to neighboring countries. Meet quality standards to access these markets.

    Conclusion: Is Carrot Farming Profitable in Uganda?

    Yes, carrot farming is very profitable in Uganda. With low startup costs and high returns, it offers great opportunities. But success requires planning and hard work. You need good land, quality seeds, and proper care. Marketing is also key. Find buyers before you plant.

    Start small and learn as you grow. Use the tips in this guide. Learn from successful farmers. With dedication, you can earn a good income from carrots. The demand for carrots is growing. Get started today and reap the benefits.

  • Mango Growing in Uganda: A Guide to Profitable Production

    Mango Growing in Uganda: A Guide to Profitable Production

    Mango is Uganda’s best-known fruit, and mango growing in Uganda is a practical, long-term enterprise for any O-level Agriculture learner to study. A mango is a tropical perennial fruit crop that keeps producing for over twenty years once established, unlike annual crops such as maize or beans. Grafted trees begin bearing in about three to four years, so a well-planned orchard becomes an asset that outlives the person who planted it.

    These notes explain varieties, site selection, planting, orchard care, pest control and marketing, and every section ties the theory to a real Ugandan farm example.

    Mature mango trees heavy with green and ripening fruit in a Ugandan orchard
    Mature mango trees setting fruit in a Ugandan orchard, the long-lived perennial crop these notes cover.

    Mango varieties grown in Uganda

    Mango growing in Uganda uses two broad kinds of trees: local seedling types and improved grafted types. Local types grow easily from seed and are hardy, but their fruit is often small and fibrous. Improved grafted types are joined onto strong rootstock, bear earlier, and produce larger, less fibrous fruit. Choosing the right kind, and the right season of fruiting, is the first management decision a grower makes.

    Because mango is a perennial fruit crop, it sits under perennial crop production in the NCDC lower-secondary Agriculture syllabus, which you can download from the National Curriculum Development Centre. Learning mango as a worked perennial-crop example makes the wider syllabus topic concrete.

    • Local seedling mangoes: Many homestead trees in Uganda grow from discarded seed, and these trees are hardy and long-lived but bear variable, often fibrous fruit.
    • Improved grafted mangoes: Scion wood from a selected tree is grafted onto rootstock, so the new tree reproduces the parent’s fruit exactly.
    • Shorter maturity: Grafted trees begin bearing about three to four years after planting, while a seedling tree raised from seed takes longer to fruit.
    • Early-season types: Fruit matures when few other mangoes are on sale, which helps a grower win attention and better terms at market.
    • Late-season types: These extend the harvest window so an orchard does not dump all of its fruit at once.
    • Local versus improved: Local types are cheap to establish and tough, but improved grafted types fetch steadier demand for larger, less fibrous fruit.
    • Fibre content: Local mangoes often have stringy, fibrous flesh, whereas improved selections are bred for smoother, juicier flesh that markets prefer.
    • Colour at ripeness: Skin colour ranges from green to yellow, orange and red, and colour alone does not tell you whether the fruit is sweet.
    • Fruit size: Improved grafted types are selected for larger, more uniform fruit, which grades and packs better for a commercial buyer.
    • Buying planting material: Buy grafted seedlings from a reputable nursery rather than raising seedlings from any seed you happen to find.
    • Rootstock: A grafted seedling is joined onto hardy rootstock, which supplies a strong root system and better tolerance of soil pests.
    • Adaptation: Different types suit different rainfall and altitude zones, so a grower should pick types known to perform well in their own district.
    • Dual-purpose trees: Some local types are valued for shade and timber as much as for fruit, so farmers keep them around the homestead.
    • Season planning: Combining early, mid and late-season types spreads both income and harvest labour across more months of the year.
    FeatureLocal seedling mangoesImproved grafted mangoes
    How propagatedGrown from seedScion grafted onto rootstock
    Time to first fruitLonger, often five years or moreAbout three to four years
    Fruit size and uniformitySmaller and variableLarger and uniform
    Fibre in the fleshOften fibrousSmoother, juicier
    Cost to establishLow, seed is freeHigher, seedlings must be bought
    Market demandLocal and informalSteadier, suits supermarkets and export

    Common mistake: judging ripeness by colour alone. A green-skinned mango can be fully ripe and sweet inside, while a brightly coloured one can still be hard and sour. Squeeze the fruit gently and smell the stem end instead.

    Site selection and planting

    Successful mango growing in Uganda begins with the right site and careful planting. Mangoes need deep, well-drained soil, full sunlight, and enough spacing for the tree’s wide canopy. Planting is done in a prepared hole at the start of the rains. Get these first steps right and the orchard needs less costly correction later.

    • Sunlight: Choose a sunny, open site, because mango is a full-sun crop and shaded trees grow tall while bearing poorly.
    • Drainage: Mango roots rot in waterlogged soil, so avoid valley bottoms and clay pans that hold water after heavy rain.
    • Soil depth: Deep soil lets the taproot go down, which anchors the tree and reaches moisture during dry spells.
    • Soil type: Sandy-loam and well-drained loam are ideal, while very heavy clay and very shallow soils are poor choices for mango.
    • Wind exposure: A gentle windbreak protects young trees, but a crowded, shaded corner is worse than an open, exposed position.
    • Spacing: Space grafted trees 8 to 10 metres apart so each canopy gets full light and air when the tree is mature.
    • Planting time: Plant at the onset of the rains so the young tree establishes without needing heavy, costly watering.
    • Hole size: Dig a planting hole about one metre wide and one metre deep, and keep the topsoil separate from the subsoil.
    • Hole preparation: Mix the topsoil with well-rotted compost or manure and return the mixture to the hole before planting.
    • Seedling handling: Plant grafted seedlings, and set each one so the graft union stays above the soil line.
    • Firming and watering: Firm the soil gently around the roots and water in well to remove air pockets that would dry out the roots.
    • Mulching: Spread mulch around each young tree, but keep it away from the stem to prevent rot and termites.
    • Staking: Stake young trees on windy sites so the root ball is not rocked loose while the tree is still establishing.
    • Record keeping: Record each tree’s type and planting date so management and harvest planning stay accurate.
    Young grafted mango seedling in a prepared planting hole with a mulch ring
    A young grafted mango seedling in a prepared hole, mulched and staked in a Ugandan orchard.

    Orchard management practices

    Once trees are planted, steady returns in mango growing in Uganda come from routine care. Young trees need watering, weeding and protection, while mature trees need pruning, feeding and sanitation. A simple seasonal calendar keeps every operation on time, which is what the table below provides.

    • Watering young trees: Water young trees regularly, especially in the first dry season, because their roots have not yet gone deep.
    • Watering mature trees: Mature trees need less frequent watering, but dry-season water at flowering and fruit-fill improves fruit size and retention.
    • Mulching: Renew the mulch yearly to conserve soil moisture and to smother weeds around the base of each tree.
    • Weeding: Keep the root zone weed-free, because weeds compete for water and nutrients and give pests a hiding place.
    • Organic manure: Apply well-rotted organic manure annually to feed the tree and improve the structure of the soil.
    • Fertiliser: Apply a balanced NPK fertiliser as the tree begins to bear, but follow the recommended rate rather than guessing.
    • Pruning: Prune to open the centre of the canopy so sunlight and air reach the inside and fruit is set all over the tree.
    • Training: Train a young tree to a single main stem and three or four well-spaced branches that form a strong frame.
    • Thinning: Remove dead, diseased and crossing branches so the tree does not waste energy and pests have fewer hiding places.
    • Orchard sanitation: Collect and destroy fallen fruit and prunings, because they carry pests and disease into the next season.
    • Monitoring: Walk the orchard regularly to spot pests, disease and nutrient problems while they are still small and cheap to fix.
    • Integrated pest management: Combine traps, cultural control and only necessary sprays so pests are controlled without overusing chemicals.
    • Record keeping: Record operations, yields and costs so you can compare seasons and learn what actually pays on the farm.
    OperationWhen in the yearWhat it involves
    PlantingOnset of rains (around March–April or August–September)Dig prepared holes, set grafted seedlings, water in
    Watering young treesThroughout the first two dry seasonsWater regularly at the root zone
    MulchingAfter planting, renewed yearlySpread mulch, keep it away from the stem
    WeedingContinuous, heavier in the rainy seasonClear the root zone and between rows
    Manure applicationOnce a year, before the rainsSpread well-rotted manure around the drip line
    NPK fertiliserStart of each rainy season once bearingApply balanced NPK at the recommended rate
    PruningAfter harvest, in the dry seasonOpen the centre, remove dead and crossing wood
    Training young treesFirst two to three yearsSelect the main stem and frame branches
    Orchard sanitationAfter harvest and before floweringRemove and destroy fallen fruit and prunings
    Pest monitoringWeekly, more often in the fruiting seasonCheck leaves, shoots and fruit for pests
    Fruit fly controlFrom flowering to harvestHang bait or pheromone traps, bag fruit if needed
    Anthracnose controlRainy season and at floweringPrune for airflow, remove infected parts
    Dry-season irrigationDry spell at flowering and fruit-fillWater to support flowering and fruit growth
    HarvestingWhen fruit mature, per type and seasonPick firm, mature fruit and handle gently

    Exam tip: In a UNEB question, “orchard sanitation” means more than sweeping the farm. It means collecting and destroying fallen fruit and prunings, because these carry fruit flies, anthracnose and other pests into the next season. Always name the practice, then give the reason it works.

    Pests and diseases of mango

    Pests and diseases are the biggest threat to mango growing in Uganda, and they attack at specific stages. The main pests are fruit flies, mango weevils and aphids, while the main diseases are anthracnose and powdery mildew. Each has recognisable symptoms and a control method, so a learner can act before fruit is ruined.

    • Fruit flies: Adult flies lay eggs under the skin, and the maggots tunnel through the flesh, causing the fruit to rot from the inside.
    • Mango weevil (seed weevil): The weevil’s larva bores into the seed, and infested fruit can look perfect outside while being ruined inside.
    • Aphids: These small sap-sucking insects cluster on young shoots and flower stalks, curling the leaves and weakening the tree.
    • Anthracnose: This fungus causes black, sunken spots on leaves, flowers and fruit, and it spreads fastest in wet, humid weather.
    • Powdery mildew: A white powdery coating forms on young leaves and flower clusters, causing flowers to drop and fruit set to fail.
    • Regular monitoring: Inspect leaves, shoots and young fruit weekly so a new infestation is caught before it can spread.
    • Sanitation: Collect and bury or burn fallen fruit and prunings, because these shelter fruit flies and mango weevils.
    • Pheromone and bait traps: Hang fruit-fly bait or pheromone traps to lure and kill adult flies before they lay their eggs.
    • Biological control: Encourage natural enemies such as ladybirds, which feed on aphids and other soft-bodied pests.
    • Neem-based sprays: Neem-based organic pesticides can suppress pests while being gentler on beneficial insects than broad chemicals.
    • Pruning for airflow: Keep the canopy open so leaves dry quickly, which slows the spread of anthracnose and powdery mildew.
    • Timed spraying: Apply a fungicide only when disease appears or when the weather stays persistently wet, not on a fixed calendar.
    • Record keeping: Note what appeared, when it appeared and what worked, so next season’s control is planned and not improvised.
    Pest or diseaseSymptomsControl
    Fruit flySmall puncture marks; maggots in the flesh; fruit rots and dropsCollect fallen fruit; hang bait or pheromone traps; bag fruit; keep orchard clean
    Mango weevilFruit looks normal but the seed is tunnelled and hollowDestroy infested fruit; sanitise; use clean planting material
    AphidsCurled, distorted young leaves; sticky honeydew on shootsEncourage ladybirds; use neem-based spray when severe
    AnthracnoseBlack, sunken spots on leaves, flowers and fruit; die-back of shootsPrune for airflow; remove infected parts; timed fungicide in wet weather
    Powdery mildewWhite powdery coating on young leaves and flowers; poor fruit setPrune for airflow; remove infected parts; apply sulphur or a recommended fungicide

    Common mistake: confusing anthracnose with powdery mildew. Anthracnose makes black, sunken spots on fruit and leaves, while powdery mildew is a white powdery coating on young leaves and flowers. Naming the correct symptom is what earns the mark in an exam.

    Harvesting and marketing mangoes

    Harvesting and marketing are where mango growing in Uganda turns effort into income. Fruit must be picked mature but firm, handled gently, and sorted before sale. A grower who grades carefully and chooses the right marketing channel keeps more of the value than one who dumps mixed fruit at the farm gate.

    • Maturity: Harvest when the fruit is mature but still firm, because overripe fruit bruises easily and does not travel well.
    • Ripeness signs: Look for a colour change, rounded full cheeks and a slight give when squeezed, and never rely on colour alone.
    • Picking method: Cut or twist the fruit off with a short stalk, and avoid pulling so that you do not tear the skin.
    • No dropping: Never let fruit drop to the ground, because bruising starts rot and lowers the grade the fruit will fetch.
    • Time of day: Harvest in the cooler morning hours and keep picked fruit out of direct sun to slow down ripening.
    • Sorting and grading: Sort by size, ripeness and freedom from blemishes so that each grade matches a different kind of buyer.
    • Cleaning: Wipe or wash fruit gently to remove sap and dust without scratching or bruising the skin.
    • Packaging: Pack in shallow crates or boxes lined with soft material, and avoid deep piles that crush the bottom layer.
    • Storage: Store fruit in a cool, dry, shaded place, because heat and moisture speed up ripening and spoilage.
    • Transport: Move fruit in padded, secure crates so the boxes do not slide and crush one another on the journey.
    • Local market: Selling directly to market vendors or consumers brings quick cash and puts the grower in touch with buyers.
    • Cooperatives: Joining a farmer cooperative lets growers pool fruit and bargain collectively, which cuts out low-paying middlemen.
    • Value addition: Turning lower-grade fruit into juice, dried slices, pulp or jam means very little of the harvest is wasted.
    • Regional export: Clean, well-graded Ugandan mangoes are sold to neighbouring markets such as Kenya, South Sudan and Rwanda.
    StageIndicator or actionReason or detail
    Skin colourBegins to change from green to yellow or orangeOne sign of maturity, but not the only test
    Cheek fullnessShoulders and cheeks look rounded and fullShows the fruit has filled out to size
    FeelSlight give when gently squeezedMeans the flesh has matured
    Stem-end smellSweet smell near the stem endIndicates ripeness developing
    SapSap runs clear and thin when the stalk is cutThick milky sap means the fruit is still immature
    Harvest timingPick mature but firm fruitAvoids bruising and overripeness
    Harvest methodCut or twist with a short stalkPrevents tearing the skin
    HandlingNever drop the fruitBruising starts rot and lowers grade
    Sorting and gradingBy size, ripeness and blemishesMatches each grade to a suitable buyer
    PackingShallow, padded cratesPrevents the bottom layer being crushed
    StorageCool, dry and shadedSlows spoilage and ripening
    TransportPadded, secure cratesAvoids crushing and sliding on the road
    Marketing channelWhat the grower doesAdvantage or consideration
    Local open marketSells direct to market vendors or consumersQuick cash, little grading pressure
    Urban wholesaleSupplies traders serving Kampala, Mbarara and GuluLarger volumes and steadier demand
    SupermarketsGrades and packs to a set standardBetter price but strict quality rules
    Juice processorsSells sound fruit of any sizeAbsorbs large volumes, accepts lower grades
    Export buyersMeets size, quality and plant-health rulesHighest value but the strictest standards
    Farmer cooperativePools fruit with other growersCollective bargaining cuts out middlemen
    Own value-added salesProcesses juice, dried mango or jamHigher margin but more work and equipment
    InstitutionsDirect supply to schools, hotels and caterersRepeat orders and reliable income
    Ripe mangoes sorted into a shallow crate at a Ugandan farm
    Harvested mangoes sorted and packed in a shallow crate, ready for grading and sale.

    Frequently asked questions about mango growing in Uganda

    How long does a mango tree take to bear fruit in Uganda? A grafted mango tree usually starts bearing about three to four years after planting. A seedling tree grown from seed takes longer, sometimes five years or more, and its fruit is more variable. Buying grafted seedlings is the fastest way to reach a first harvest.

    What is the best spacing for mango trees in Uganda? Space grafted mango trees 8 to 10 metres apart. This gives each tree enough light and air when its canopy is full-grown, and it stops the roots from competing. Close spacing forces trees to grow tall and bear poorly, so resist the temptation to squeeze in extra trees.

    Which mango variety should I plant in Uganda? Choose improved grafted types rather than local seedling trees if you are selling the fruit. Grafted types bear earlier and give larger, less fibrous fruit that markets prefer. Pick early, mid and late-season types so your harvest is spread across more months instead of arriving all at once.

    How do I control fruit flies in my mango orchard? Combine several methods: collect and destroy fallen fruit, hang bait or pheromone traps to catch adult flies, and keep the orchard clean. You can also bag individual fruit and use neem-based sprays. Relying on one method alone rarely works, because fruit flies breed in fallen fruit.

    What causes black spots on mango fruit? Black, sunken spots on fruit and leaves are usually anthracnose, a fungal disease that spreads in wet, humid weather. Improve airflow by pruning, remove infected parts, and avoid overhead watering. A white powdery coating on young leaves and flowers is a different disease, powdery mildew.

    When is a mango ready to harvest? Harvest when the fruit is mature but still firm. Look for rounded, full cheeks, a slight give when squeezed, and a colour change from green. Never drop the fruit, and handle it gently, because bruising starts rot and lowers the grade a buyer will pay for.

    Can I grow mangoes profitably on a small plot? Yes. Even a few well-spaced grafted trees can earn, especially if you grade the fruit, join a cooperative, and add value by drying or juicing the lower grades. Start small, manage the trees properly, and expand once the orchard is established and paying.

    Key terms and revision summary

    TermDefinition
    Perennial cropA crop that lives and produces for more than two years, such as a mango tree
    GraftingJoining a selected scion onto rootstock so the new tree copies the parent
    RootstockThe rooted lower part onto which a scion is grafted; it supplies roots and vigour
    ScionThe shoot of a chosen variety that is grafted onto the rootstock
    SeedlingA plant raised from seed rather than grafted
    OrchardA planted area of fruit trees managed for fruit production
    Orchard sanitationRemoving and destroying fallen fruit and prunings to cut pest and disease carryover
    Integrated pest management (IPM)Combining traps, cultural, biological and careful chemical control
    AnthracnoseA fungal disease causing black, sunken spots, worst in wet weather
    Powdery mildewA fungal disease forming a white coating on young leaves and flowers
    Fruit flyA pest whose maggots tunnel through ripening fruit
    Mango weevilA pest whose larva bores into the mango seed
    MulchingCovering soil with plant material to conserve moisture and suppress weeds
    Graft unionThe point where scion and rootstock join; keep it above the soil line

    Test yourself with these exam-style questions, then check the answer outlines.

    1. State four practices a farmer should carry out when planting mango seedlings. Outline: dig a one-metre-by-one-metre hole; mix topsoil with well-rotted manure; plant a grafted seedling at the onset of rains; keep the graft union above the soil; firm and water in; mulch away from the stem.
    2. Describe how a mango grower can control fruit flies without relying only on chemicals. Outline: collect and destroy fallen fruit; hang bait or pheromone traps; bag individual fruit; keep the orchard clean; encourage natural enemies.
    3. Explain the difference between a local seedling mango and an improved grafted mango. Outline: a seedling grows from seed, fruits later and gives variable, fibrous fruit; a grafted tree copies the parent, fruits in three to four years and gives larger, less fibrous fruit.
    4. Outline the steps of harvesting and handling mangoes for a supermarket market. Outline: pick mature but firm fruit; never drop it; sort and grade by size and blemishes; clean gently; pack in shallow padded crates; store cool and dry; transport carefully.
    5. Why is orchard sanitation important in controlling anthracnose? Outline: the fungus survives on infected fallen fruit and leaves; removing and destroying them cuts the source of infection; pruning for airflow keeps leaves dry and slows spread.

    Mango growing in Uganda also pairs naturally with other fruit-crop notes. If you are studying growing guavas profitably, compare the two crops side by side, then anchor both back to the Senior 3 Agriculture notes and the past papers for exam practice.

  • Growing Onions in Uganda: Expert Interview on Profitability, Varieties, and Best Practices

    Growing Onions in Uganda: Expert Interview on Profitability, Varieties, and Best Practices

    Introduction

    Onion farming in Uganda is rapidly becoming one of the most profitable agribusiness ventures for both small-scale and commercial farmers. With rising demand in urban markets such as Kampala, Wakiso, Mukono, and regional export markets like South Sudan and the Democratic Republic of Congo, onions have become a high-value crop.

    In this detailed guide, we present an expert interview with Dr. Grace Mukasa, a seasoned agricultural specialist with over 20 years of experience in crop production and agribusiness development. She shares practical insights on how to grow onions in Uganda, the best onion varieties, production costs, yields, and the profitability of onion farming.

    If you have ever asked yourself, “Is onion farming profitable in Uganda?” or “How can I start onion farming successfully?”, this guide will give you clear, actionable answers.


    Why Onion Farming is Growing in Uganda

    Onions are an essential ingredient in almost every Ugandan dish. From homes to restaurants, schools, and hotels, onions are used daily. This creates a consistent and reliable market.

    • High demand: Onions are consumed throughout the year.
    • Good market prices: Prices increase during dry seasons.
    • Export opportunities: Strong demand in neighboring countries.
    • Short production cycle: Harvest within 3–4 months.
    • High returns per acre: One of the most profitable vegetable crops.

    Because of these advantages, onion farming in Uganda is attracting youth, agripreneurs, and investors.


    Interview with Dr. Grace Mukasa

    Q: Why are onions a profitable crop in Uganda?

    Dr. Mukasa: Onions have a ready market every single day. Unlike some crops that depend on seasonal demand, onions are used in almost every meal. This ensures continuous demand and stable prices.

    She explains further: “The profitability of growing onions in Uganda depends on good farm management. Farmers who use improved seeds, apply fertilizers correctly, and manage pests effectively often achieve very high yields.”

    Additionally, onions have a relatively long shelf life compared to other vegetables, which allows farmers to store and sell when prices improve.


    Q: What are the best varieties of onions in Uganda?

    Dr. Mukasa: Choosing the right variety is key to success. Some of the best-performing onion varieties in Uganda include:

    • Red Creole: Hardy, disease-resistant, and stores well.
    • Texas Early Grano: Sweet flavor, fast maturity, ideal for fresh markets.
    • Bombay Red: High yield, strong taste, popular in local markets.

    She advises: “For beginners, I recommend starting with Red Creole onions. They are easier to manage and more tolerant to environmental stress.”


    Q: How to grow onions successfully in Uganda?

    Dr. Mukasa: Successful onion farming starts with proper planning and land preparation.

    Step 1: Land Preparation

    • Choose well-drained, fertile soil.
    • Loosen the soil to allow bulb expansion.
    • Add compost or well-rotted manure.
    • Prepare raised beds to prevent waterlogging.

    Step 2: Nursery Establishment

    • Sow seeds in a well-prepared nursery bed.
    • Water regularly but avoid flooding.
    • Protect seedlings from harsh sun and heavy rain.

    Step 3: Transplanting

    After 6–8 weeks, transplant seedlings into the main garden:

    • Space plants 10 cm apart.
    • Maintain row spacing of 30 cm.
    • Water immediately after transplanting.

    She emphasizes: “Spacing is critical. Overcrowding reduces bulb size and overall yield.”


    Q: What fertilizers should onion farmers use?

    Dr. Mukasa: Fertilizer application is essential for high yields.

    • Apply DAP fertilizer during planting.
    • Use CAN fertilizer after 3 weeks to boost growth.
    • Incorporate organic manure to improve soil health.

    Balanced nutrition ensures strong root development and large bulb formation.


    Q: What are the common pests and diseases?

    Dr. Mukasa: Onion farmers should watch out for:

    Common Pests

    • Thrips
    • Onion maggots

    Common Diseases

    • Downy mildew
    • Purple blotch

    Control methods include:

    • Using neem-based organic pesticides
    • Practicing crop rotation
    • Avoiding overhead irrigation
    • Regular field monitoring

    “Early detection is the key to preventing crop loss,” she advises.


    Q: When is the best time to plant onions in Uganda?

    Dr. Mukasa: The best planting seasons are:

    • March to May (first rainy season)
    • August to October (second rainy season)

    However, farmers with irrigation systems can grow onions all year round, giving them an advantage in off-season markets where prices are higher.


    Q: How long do onions take to mature?

    Dr. Mukasa: Maturity depends on the variety:

    • Texas Early Grano – about 90 days
    • Bombay Red – about 110 days
    • Red Creole – about 120 days

    Harvest when the leaves fall over and begin to dry.


    Q: What is the yield per acre?

    Dr. Mukasa: Average yields range between 10 to 15 tonnes per acre. With excellent management, some farmers achieve up to 20 tonnes per acre.


    Q: How profitable is onion farming in Uganda?

    Dr. Mukasa: Onion farming is highly profitable.

    Estimated costs per acre:

    • Seeds: 300,000 UGX
    • Fertilizers: 1,000,000 UGX
    • Labor: 1,200,000 UGX
    • Other costs: 500,000 UGX

    Total cost: ~3 million UGX

    Revenue: 10–15 million UGX

    Profit: 7–12 million UGX per acre

    “Timing the market is very important,” she adds. “Selling when supply is low increases profits significantly.”


    Post-Harvest Handling and Storage

    Proper handling after harvest ensures quality and reduces losses.

    • Dry onions under shade for 1–2 weeks.
    • Remove excess soil and roots.
    • Sort and grade according to size.
    • Store in a well-ventilated, dry area.

    Good storage allows farmers to sell later at better prices.


    Marketing Strategies for Onion Farmers

    To maximize profits, farmers should adopt smart marketing strategies:

    • Sell directly to markets and traders.
    • Supply supermarkets and restaurants.
    • Join farmer cooperatives.
    • Target export markets.

    Building strong buyer relationships ensures consistent income.


    Common Challenges in Onion Farming

    • Pests and diseases – controlled through integrated management
    • Water stress – solved through irrigation
    • Price fluctuations – managed through storage and timing
    • Lack of quality seeds – solved by sourcing certified seeds

    Proper planning helps farmers overcome these challenges.


    Conclusion

    Onion farming in Uganda offers enormous potential for farmers willing to invest time and effort. From selecting the right variety to proper land preparation, pest control, and marketing, every step contributes to success.

    The insights shared by Dr. Grace Mukasa clearly show that growing onions in Uganda is not only feasible but highly profitable when done correctly.

    If you are looking for a reliable agribusiness, onion farming is a smart choice. Start small, apply best practices, and scale gradually.

    Take action today—start your onion farming journey and grow your income sustainably.

  • Grow Tomatoes in Uganda: A Step-by-Step Guide for Profit

    Grow Tomatoes in Uganda: A Step-by-Step Guide for Profit


    Grow Tomatoes in Uganda: A Step-by-Step Guide for Profit

    Tomatoes are a valuable crop in Uganda. They are used in many daily dishes. This means there is always a high demand. With the right knowledge, growing tomatoes in Uganda can be very profitable. This guide is for beginners. It will show you every step. You will learn from seed to sale. Let’s get started.

    Why Grow Tomatoes in Uganda?

    The climate in Uganda is perfect for tomatoes. You can grow them almost anywhere. The profitability of growing tomatoes in Uganda is high. A small piece of land can give you a good income. Many farmers earn money quickly. This is because tomatoes have a short growing cycle. You can harvest in just a few months. The local market always needs fresh tomatoes. You can sell them to neighbors, markets, or hotels.

    Prerequisites: What You Need to Start

    Before you begin, gather these items. You do not need much money. Keep it simple.

    • Good quality tomato seeds. Use varieties like Tylka or Roma.
    • A piece of land. Even a small backyard works.
    • Basic gardening tools. You need a hoe, a rake, and a watering can.
    • Organic manure or compost. This feeds the plants.
    • Mulch materials. Use dry grass or banana leaves.
    • Stakes or sticks. These support the plants as they grow.

    Step 1: Prepare the Nursery Bed

    A nursery bed is where you start your seeds. It is like a baby room for plants. This step is very important. Healthy seedlings grow into strong plants.

    Screenshot Description: A small, raised bed of soil, about 1 meter wide and 2 meters long, with fine soil and a light shade cover made of banana leaves above it.

    How to Make a Nursery Bed

    1. Choose a sunny spot near a water source.
    2. Make a raised bed. It should be 1 meter wide. The length can be any size.
    3. Break the soil into fine particles. Remove stones and weeds.
    4. Mix the soil with well-rotted manure. Use a ratio of 3 parts soil to 1 part manure.
    5. Water the bed lightly. Let it settle for one day.
    6. Make shallow rows. They should be 1 cm deep. Space rows 15 cm apart.
    7. Sow the seeds thinly. Cover them with a thin layer of soil.
    8. Mulch with dry grass. This keeps the soil moist.
    9. Water gently every day. Use a watering can with a fine rose.

    Nursery Bed Care

    Seeds will germinate in 5 to 10 days. Remove the mulch once you see sprouts. Water them in the morning and evening. Protect them from heavy rain. Use a shade net or banana leaves. After 3 to 4 weeks, the seedlings will be ready. They should have 4 to 6 true leaves.

    Step 2: Prepare the Main Garden

    The main garden is where the tomatoes will grow to maturity. Good preparation means healthy roots. Healthy roots mean more fruit.

    Screenshot Description: A cleared garden plot with rows of raised beds, each about 1 meter wide, with a path between them.

    1. Clear the land. Remove all weeds, grass, and stones.
    2. Dig the soil deeply. Use a hoe to turn the soil. Go 30 cm deep.
    3. Add compost or manure. Spread it evenly. Use one wheelbarrow per 10 square meters.
    4. Make raised beds. They should be 1 meter wide. Leave a 50 cm path between beds.
    5. Level the beds. Break any big clumps of soil.
    6. Apply a base fertilizer. Use DAP (Diammonium phosphate) at planting time. Follow the instructions on the pack.

    Step 3: Transplant the Seedlings

    Transplanting is moving seedlings from the nursery bed to the main garden. Do this in the evening. It gives the plants time to adjust.

    Screenshot Description: A hand holding a small tomato seedling by its leaves, ready to place into a hole in the garden soil.

    1. Water the nursery bed well. This makes it easy to remove seedlings.
    2. Gently lift seedlings. Hold them by the leaves, not the stem. The stem is fragile.
    3. Dig holes in the main garden. Space holes 50 cm apart in a row. Space rows 60 cm apart.
    4. Place one seedling per hole. Bury it up to the first leaves.
    5. Firm the soil around the stem. This removes air pockets.
    6. Water each plant immediately. Give each plant about 500 ml of water.
    7. Protect the plants from sun. Use shade for the first three days.

    Step 4: Care for Your Tomato Plants

    Tomato plants need regular care. This ensures a big harvest. Follow these steps.

    Watering

    Water deeply twice a week. Do not water the leaves. Wet leaves cause diseases. Use drip irrigation if possible. It saves water.

    Mulching

    Apply dry grass around the plants. This keeps the soil moist. It also stops weeds. Mulch should be 5 cm thick.

    Staking

    Tomato plants grow tall. They need support. Insert a stake next to each plant. Tie the stem to the stake with a soft cloth. Do this gently.

    Pruning

    Remove side shoots. These are small stems that grow between the main stem and branches. They take energy from the fruit. Let only one or two main stems grow.

    Fertilizing

    Feed the plants every two weeks. Use a balanced fertilizer like NPK 17:17:17. Follow the instructions. Stop fertilizing when fruits start to ripen.

    Step 5: Manage Pests and Diseases

    Tomatoes face many pests and diseases. Act quickly to save your crop.

    Common Pests

    • Aphids: Small green insects. They suck sap. Spray with neem oil or soapy water.
    • Whiteflies: Tiny white flies. They cause leaves to yellow. Use yellow sticky traps.
    • Tomato hornworm: Big green caterpillars. They eat leaves. Pick them off by hand.

    Common Diseases

    • Early blight: Brown spots on lower leaves. Remove affected leaves. Spray with copper fungicide.
    • Late blight: Watery spots on leaves and fruit. This is serious. Use a fungicide like Ridomil.
    • Bacterial wilt: Plants suddenly wilt and die. There is no cure. Remove the plant and do not plant tomatoes there again for two years.

    Prevention Tips

    • Do not plant tomatoes in the same place every year. Rotate crops.
    • Water at the base of plants. Keep leaves dry.
    • Remove weeds. They hide pests.
    • Inspect your plants every day. Act fast if you see a problem.

    Step 6: Harvesting Tomatoes

    Harvesting tomatoes at the right time is key. It affects taste and shelf life. Tomatoes take 60 to 80 days from transplanting to harvest.

    Screenshot Description: A hand holding a ripe, red tomato that has just been picked from a vine. The plant behind it is green and healthy.

    When to Harvest

    Pick tomatoes when they are firm and fully colored. For red varieties, pick when they are bright red. For yellow varieties, pick when they are bright yellow. You can also pick them when they are turning color. They will ripen indoors.

    How to Harvest

    1. Use a sharp knife or scissors. Cut the stem above the fruit.
    2. Do not pull the fruit. This damages the plant.
    3. Handle tomatoes gently. They bruise easily.
    4. Collect them in a clean basket or crate.
    5. Harvest every two to three days. This encourages more fruit.

    Expected Outcomes

    From a well-managed garden, you can expect 10 to 15 kilograms of tomatoes per plant. A quarter-acre plot can yield 500 to 800 kilograms. This is a good amount for a beginner. With better care, you can get more.

    Step 7: Marketing Tomatoes

    Marketing tomatoes is the last step. This is where you make money. Good marketing ensures you sell everything.

    Screenshot Description: A display of fresh tomatoes in wooden crates at a local market, with customers looking at them.

    Where to Sell

    • Local markets: Take your tomatoes to the nearest market. Sell them directly to customers.
    • Neighbors and community: Tell people you have tomatoes. They will come to buy.
    • Restaurants and hotels: They buy in bulk. Offer them a good price.
    • Schools and hospitals: They need tomatoes for meals. Contact their kitchen managers.
    • Wholesale buyers: They buy large quantities. You get less money per kilogram, but you sell everything fast.

    Pricing Tips

    • Know the market price. Visit a market to see what others charge.
    • Start with a fair price. You can negotiate.
    • Grade your tomatoes. Separate big, perfect ones from small or blemished ones. Sell the best ones at a higher price.
    • Be flexible. If you have many tomatoes, sell them at a lower price to clear stock.

    Packaging

    • Use clean crates or baskets. Do not use plastic bags. They cause tomatoes to rot.
    • Line the crate with banana leaves or soft paper. This prevents bruising.
    • Place tomatoes in a single layer. Do not pile them high.

    Troubleshooting Tips

    Even experienced farmers face problems. Here are common issues and solutions.

    Problem Cause Solution
    Seedlings die after transplanting Shock or lack of water Water well and shade for 3 days.
    Leaves turn yellow Lack of nitrogen Apply a nitrogen-rich fertilizer like Urea.
    Flowers fall off without fruit Too much heat or lack of pollination Shade plants during hot afternoons. Shake plants gently to help pollination.
    Fruits have black spots Blossom end rot Water evenly. Add calcium to the soil.
    Fruits crack Irregular watering Water consistently. Mulch to keep soil moisture steady.
    Pests are many No natural predators Plant flowers like marigolds nearby. They attract beneficial insects.

    Profitability of Growing Tomatoes in Uganda

    The profitability of growing tomatoes in Uganda is excellent. Let us look at simple numbers.

    Costs for a Quarter-Acre (Approximate)

    • Seeds: 50,000 UGX
    • Manure and fertilizer: 100,000 UGX
    • Stakes and twine: 50,000 UGX
    • Pesticides and fungicides: 50,000 UGX
    • Labor: 100,000 UGX
    • Total Cost: 350,000 UGX

    Income from a Quarter-Acre

    • Average yield: 600 kg
    • Price per kg: 2,000 UGX (average market price)
    • Total Income: 1,200,000 UGX
    • Profit: 1,200,000 – 350,000 = 850,000 UGX

    This is a good profit for a beginner. You can grow tomatoes twice a year. That means you can earn over 1.5 million UGX per year from a small plot.

    Final Tips for Success

    • Start small. Learn first, then expand.
    • Keep records. Write down what you spend and earn.
    • Join a farmer group. You can learn from others and share costs.
    • Use good seeds. Cheap seeds give poor results.
    • Be patient. Farming takes time. Do not give up.

    Growing tomatoes in Uganda is a rewarding journey. You can feed your family and earn money. Follow these steps carefully. You will succeed. Happy farming!


  • Istiara Mbalimbali katika Kiswahili: Mwongozo Kamili wenye Mifano Zaidi ya 100

    Istiara ni mbinu muhimu ya kifasihi inayotumiwa kueleza jambo kwa njia ya picha au mafumbo badala ya kusema moja kwa moja. Kwa kutumia istiara, msemaji au mwandishi huongeza uzito, mvuto, na ladha ya lugha.

    Katika lugha ya Kiswahili, istiara hutumika sana katika mashairi, hadithi, hotuba, na hata mawasiliano ya kila siku. Makala hii itakupa ufahamu wa kina wa istiara, aina zake, pamoja na orodha ya zaidi ya istiara 100 zenye maana zake ili kukusaidia kuboresha lugha yako.


    Istiara ni Nini? (Maana Rahisi)

    Istiara ni matumizi ya neno au kifungu cha maneno kumaanisha kitu kingine kwa sababu ya kufanana kwa sifa fulani.

    👉 Kwa kifupi:

    Istiara = Kusema kitu kimoja lakini kumaanisha kingine.


    Umuhimu wa Istiara katika Kiswahili

    Matumizi ya istiara yana faida nyingi, zikiwemo:

    • Hufanya lugha iwe ya kuvutia na yenye mvuto
    • Husaidia kueleza mawazo kwa ufupi lakini kwa kina
    • Huongeza ubunifu wa lugha
    • Husaidia kuelewa fasihi kwa undani zaidi
    • Hutumika katika ufundishaji na mawasiliano ya kila siku

    Aina za Istiara katika Kiswahili

    1. Istiara ya Mtu kwa Mtu

    Hapa mtu anafananishwa na mtu mwingine kutokana na sifa zake.

    Mifano:

    • Mwalimu ni Socrates wa kizazi hiki (mwenye hekima nyingi)
    • Kiongozi ni Simba wa siasa (jasiri na mwenye nguvu)

    2. Istiara ya Mtu kwa Mnyama

    Mtu anafananishwa na mnyama kwa tabia zake.

    Mifano:

    • Ni chui darasani (mkali sana)
    • Yeye ni kobe wa kazi (huchukua muda lakini hufanikiwa)

    3. Istiara ya Mtu kwa Kitu

    Mtu anafananishwa na kitu kisicho hai.

    Mifano:

    • Baba ni nguzo ya familia (mhimili mkuu)
    • Yeye ni taa ya jamii (huongoza wengine)

    4. Istiara ya Mnyama kwa Mtu

    Mnyama hupewa sifa za kibinadamu.

    • Mbwa ni rafiki wa kweli (mwaminifu)

    5. Istiara ya Kitu kwa Kitu Kingine

    Kitu kinafananishwa na kitu kingine.

    • Jua ni tanuri la mbinguni (joto kali)

    Orodha ya Istiara Zaidi ya 100 na Maana Zake

    Istiara za Watu

    1. Moyo wa chuma – mtu jasiri
    2. Mwamba wa maisha – mtu tegemeo
    3. Taa ya jamii – mwongozo
    4. Jicho la taifa – mlinzi
    5. Nguzo ya familia – mhimili
    6. Simba wa uongozi – kiongozi jasiri
    7. Nyota ya darasa – mwanafunzi bora
    8. Mfalme wa soka – mchezaji bora
    9. Moyo wa huruma – mtu mwenye upendo
    10. Sauti ya wengi – msemaji wa jamii

    Istiara za Wanyama

    1. Nyoka – mtu msaliti
    2. Simba – jasiri
    3. Mbwa – mwaminifu
    4. Chui – mkali
    5. Kuku – mwoga
    6. Paka – mjanja
    7. Punda – mvumilivu
    8. Tai – mwenye maono makubwa
    9. Kobe – mwenye subira
    10. Mamba – hatari

    Istiara za Vitu

    1. Mwanga wa elimu – maarifa
    2. Giza la ujinga – ukosefu wa elimu
    3. Mlima wa matatizo – changamoto nyingi
    4. Bahari ya mawazo – fikra nyingi
    5. Moto wa hasira – hasira kali
    6. Barafu ya moyo – mtu asiye na hisia
    7. Daraja la mafanikio – njia ya kufanikiwa
    8. Kioo cha jamii – mfano
    9. Mto wa maisha – maisha yanayoendelea
    10. Upepo wa mabadiliko – mabadiliko yanakuja

    Istiara Mbalimbali Zaidi (31–110)

    1. Jua la matumaini – tumaini jipya
    2. Wingu la huzuni – huzuni kubwa
    3. Radi ya maneno – maneno makali
    4. Moyo wa jiwe – ukatili
    5. Mikono ya dhahabu – ujuzi mkubwa
    6. Sauti ya radi – sauti kubwa
    7. Kivuli cha hofu – woga
    8. Mlango wa mafanikio – fursa
    9. Shamba la maarifa – elimu nyingi
    10. Kisu cha maneno – kuumiza kwa maneno

    Hitimisho

    Istiara ni nyenzo yenye nguvu sana katika lugha ya Kiswahili. Hutusaidia kuwasiliana kwa ubunifu, kueleza hisia kwa kina, na kufanya lugha iwe hai na yenye mvuto.

    Kwa kujifunza na kutumia istiara hizi, utaweza:

    • ✔ Kuboresha uandishi wako
    • ✔ Kuongeza ufasaha wa kuzungumza
    • ✔ Kuelewa fasihi kwa undani zaidi

    Maswali ya Kujipima

    1. Istiara ni nini?
    2. Taja aina tatu za istiara
    3. Toa mifano mitano ya istiara na maana zake
    4. Tumia istiara tatu kutunga sentensi
  • Jinsi ya Kuandika Insha ya Wasifu: Mwongozo Kamili kwa Wanafunzi na Walimu

    Kuandika insha ya wasifu ni mojawapo ya ujuzi muhimu katika somo la Kiswahili na hata katika maisha ya kila siku. Wasifu hutusaidia kuelewa maisha ya watu, mafanikio yao, changamoto walizopitia, na mchango wao katika jamii.

    Katika makala hii ya kina, utajifunza:

    • Maana ya insha ya wasifu
    • Vipengele muhimu vya kuandika wasifu bora
    • Mbinu za kitaalamu za uandishi
    • Mfano halisi wa insha ya wasifu
    • Makosa ya kuepuka
    • Vidokezo vya kuboresha uandishi wako

    Insha ya Wasifu ni Nini?

    Insha ya wasifu ni aina ya insha inayomwelezea mtu fulani kwa kina kuhusu:

    • maisha yake
    • tabia zake
    • mafanikio yake
    • changamoto alizokumbana nazo
    • mchango wake katika jamii

    Mtu anayezungumziwa anaweza kuwa:

    • mtu mashuhuri (kiongozi, mwanasayansi, mwanamichezo)
    • au mtu wa kawaida mwenye mchango wa kipekee

    Kwa kifupi, insha ya wasifu ni hadithi ya maisha ya mtu iliyoandikwa kwa mtiririko mzuri na lugha rasmi.


    Umuhimu wa Kuandika Insha ya Wasifu

    Kuandika wasifu si zoezi la darasani tu. Lina faida nyingi kama:

    1. Husaidia Kujifunza Historia

    Wasifu hutupa maarifa kuhusu maisha ya watu waliobadilisha jamii.

    2. Hutoa Mafunzo ya Maisha

    Tunajifunza maadili kama:

    • bidii
    • uvumilivu
    • ujasiri

    3. Huboresha Ujuzi wa Lugha

    Mwanafunzi hujifunza kutumia:

    • msamiati sahihi
    • sentensi zenye mpangilio mzuri

    4. Huchochea Utafiti

    Kuandika wasifu kunahitaji kuchunguza na kukusanya taarifa sahihi.


    Vipengele Muhimu vya Insha ya Wasifu

    Ili kuandika insha bora, lazima ufuate muundo maalum. Hapa chini ni vipengele muhimu:


    1. Utangulizi

    Hii ndiyo sehemu ya mwanzo wa insha yako.

    Unapaswa:

    • Kumtambulisha mhusika
    • Kueleza kwa nini umemchagua
    • Kutaja umuhimu wake

    Mfano:
    Mtu huyu ni muhimu kwa sababu alitoa mchango mkubwa katika jamii.

    👉 Utangulizi mzuri huvutia msomaji kuendelea kusoma.


    2. Maisha ya Mhusika

    Sehemu hii inaelezea historia ya maisha ya mtu.

    Jumuisha:

    • tarehe ya kuzaliwa
    • mahali alipozaliwa
    • familia yake
    • elimu yake

    👉 Eleza kwa mpangilio wa wakati (chronological order).


    3. Mafanikio na Mchango Wake

    Hii ndiyo sehemu kuu ya insha.

    Eleza:

    • kazi au taaluma yake
    • mafanikio makubwa
    • mchango wake kwa jamii

    👉 Hapa ndipo unaonyesha umuhimu wa mhusika.


    4. Tabia na Sifa za Mhusika

    Taja sifa zake kama:

    • uaminifu
    • uadilifu
    • bidii
    • ujasiri

    Kisha eleza:
    👉 Sifa hizi zilimsaidiaje kufanikiwa?


    5. Changamoto Alizokumbana Nazo

    Hakuna maisha yasiyo na changamoto.

    Eleza:

    • matatizo aliyokutana nayo
    • jinsi alivyoyashinda

    👉 Sehemu hii huongeza uhalisia wa insha.


    6. Hitimisho

    Hii ndiyo sehemu ya mwisho.

    Unapaswa:

    • Kufupisha hoja kuu
    • Kutoa funzo
    • Kutoa maoni yako binafsi

    👉 Hitimisho bora huacha msomaji na jambo la kufikiria.


    Mbinu Muhimu za Kuandika Insha ya Wasifu

    Ili insha yako iwe bora na ya kuvutia, zingatia mbinu hizi:


    1. Tumia Lugha Rasmi

    Epuka:

    • lugha ya mtaani
    • maneno yasiyo rasmi

    Tumia:

    • Kiswahili sanifu
    • sentensi zilizo sahihi

    2. Hakikisha Mtiririko wa Mawazo

    • Panga mawazo kwa mpangilio
    • Aya moja iwe na wazo kuu moja

    👉 Usichanganye taarifa bila mpangilio.


    3. Toa Taarifa Sahihi

    • Epuka kubuni
    • Tumia ukweli unaoweza kuthibitishwa

    👉 Uhalisia huongeza ubora wa insha.


    4. Tumia Vielezi na Vivumishi

    Vielezi husaidia kueleza:

    • namna
    • wakati
    • mahali

    Vivumishi husaidia kuelezea sifa.

    Mfano:
    Alikuwa kiongozi mnyenyekevu sana na mwenye hekima kubwa.


    5. Tumia Semi na Methali

    Methali huongeza uzito wa insha.

    Mfano:

    “Bandu bandu humaliza gogo.”

    👉 Inaonyesha umuhimu wa juhudi za taratibu.


    Mfano wa Insha ya Wasifu

    Julius Kambarage Nyerere

    Utangulizi

    Julius Kambarage Nyerere alikuwa mmoja wa viongozi mashuhuri barani Afrika waliopigania uhuru wa nchi zao kwa bidii kubwa. Alizaliwa mwaka 1922 katika kijiji cha Butiama nchini Tanzania. Kutokana na juhudi zake, alifanikiwa kuwa rais wa kwanza wa Tanzania na kuacha urithi mkubwa wa uongozi bora.


    Maisha na Elimu

    Nyerere alizaliwa katika familia ya kichifu. Alipata elimu ya msingi na sekondari nchini Tanzania. Baadaye alisoma katika Makerere University na kuendelea na masomo katika Chuo Kikuu cha Edinburgh, ambako alipata shahada ya elimu.


    Mchango Wake katika Jamii

    Alianzisha chama cha TANU kilichoongoza harakati za uhuru. Mwaka 1961, Tanganyika ilipata uhuru, na mwaka 1962 akawa rais wa kwanza.

    Alisisitiza:

    • elimu kwa wote
    • usawa
    • umoja wa kitaifa

    Sifa Zake

    Nyerere alikuwa:

    • mnyenyekevu
    • mwenye hekima
    • mzalendo

    Aliamini katika haki na usawa kwa wananchi wote.


    Changamoto

    Alikumbana na:

    • matatizo ya kiuchumi
    • changamoto za kisiasa

    Hata hivyo, aliendelea kusimamia umoja wa taifa.


    Hitimisho

    Kwa ujumla, Nyerere alikuwa kiongozi wa kipekee aliyetoa mchango mkubwa katika Afrika. Maisha yake yanatoa funzo la kujitolea na uzalendo.


    Makosa ya Kuepuka Unapoandika Insha ya Wasifu

    Wanafunzi wengi hufanya makosa yafuatayo:

    1. Kukosa Mpangilio

    👉 Epuka kuruka kutoka wazo moja hadi jingine bila mpangilio.

    2. Kutumia Lugha Isiyo Rasmi

    👉 Epuka slang au maneno ya mitaani.

    3. Kutoa Taarifa za Uongo

    👉 Hakikisha unatumia taarifa sahihi.

    4. Kukosa Hitimisho

    👉 Usimalize insha ghafla bila muhtasari.


    Vidokezo vya Kuandika Insha Bora Zaidi

    • Fanya utafiti wa kutosha
    • Panga mawazo kabla ya kuanza kuandika
    • Soma insha yako baada ya kuandika
    • Rekebisha makosa ya sarufi

    Hitimisho Kuu

    Kuandika insha ya wasifu ni ujuzi muhimu unaohitaji:

    • mpangilio mzuri wa mawazo
    • matumizi sahihi ya lugha
    • uelewa wa maisha ya mhusika

    Kwa kufuata mbinu hizi, utaweza kuandika insha yenye mvuto, uhalisia, na ubora wa hali ya juu.


    Maswali ya Kujadili

    1. Kwa nini ni muhimu kujifunza kuandika insha ya wasifu?
    2. Ni sehemu ipi ya insha ya wasifu ni muhimu zaidi? Kwa nini?
    3. Eleza changamoto zinazoweza kujitokeza katika kuandika wasifu.
  • Raising Local Chicken for Profit in Uganda: A Practical Guide for Starting Small and Scaling Smart

    Raising Local Chicken for Profit in Uganda: A Practical Guide for Starting Small and Scaling Smart

    Uganda loves local chicken. Walk through any market and you will hear buyers asking for native birds and village eggs. If you want a simple plan to start and make steady income, you are in the right place. This guide shows how to set up, feed, vaccinate, and sell, with clear numbers you can copy.

    Why focus on raising local chicken for profit in Uganda?

    Local breeds are hardy, need fewer inputs, and fetch better prices for taste. Start small, manage costs, and grow with confidence. You will learn how to choose the right birds, build affordable housing, feed smart, and sell fast in your area.

    Start Strong: Breeds, Housing, Feeding, and Health for Profitable Local Chickens

    Choose hardy local breeds and smart crossbreeds for profit

    Indigenous birds handle heat, survive on modest feed, and sell well for flavor. Improved dual-purpose types like Kuroiler or Kenbro add speed and eggs, with Kuroilers laying about 200 to 250 eggs per year. If your market buys eggs weekly, add more improved birds. If buyers prize taste and live weight, keep more pure local birds. Match your choice to budget and buyers.

    Build low-cost housing that keeps birds safe and dry

    Pick a raised, well-drained site. Use iron sheets or thatch for roofing, plus wire mesh for airflow and light. Fit strong doors to block dogs, mongooses, and snakes. Use deep litter with wood shavings, add perches, and design for easy cleaning. Target space at about 7 birds per square meter. For layers, add simple lighting to reach 14 to 16 hours per day.

    Feed smart:

    mix free-range foraging with simple supplements

    Local chickens can forage for insects and greens, which saves money. Profits rise when you add balanced feed with maize, soybean or sunflower cake, and greens. A common rule when fully housed is about 5 kg of feed per bird per 3 months. For free-range, supplement less but keep it steady. Give clean water at all times and consider automatic drinkers to cut labor.

    Prevent disease with a basic vaccine and biosecurity plan

    Follow a simple plan.

    Vaccinate for Newcastle, Gumboro (IBD), and Fowl pox. Buy healthy chicks from trusted suppliers, keep the house and tools clean, isolate sick birds, and limit visitors. Work with a local vet or an experienced farmer. Aim for less than 10 percent mortality so profit stays on track. See practical guidance from NAADS on local chicken.

    Know Your Numbers:

    Simple Costs, Profits, and Pricing in Uganda

    Ugandan farmers who track feed, mortality, and sale prices keep more cash. Use real market prices in your area and update them often. Recent checks suggest day-old local chicks at about 5,000 UGX each, starter feed around 1,200 to 1,400 UGX per kg, and market prices of 12,000 to 15,000 UGX per local bird, with eggs at 300 to 500 UGX each. Prices move, so confirm weekly.

    Startup budget example for 50 local birds

    List key costs: chicks or growers, housing and repairs, feeders and drinkers, feed, vaccines and vet care, bedding, and transport. For fully housed birds, a sample guide is 5 kg per bird per 3 months at 2,000 UGX per kg, which is 10,000 UGX per bird per quarter. Free-range birds need less feed, but supplement consistently. A larger house for 2,000 birds can cost over 13,000,000 UGX, so start small and scale.

    ItemUnit cost (UGX)QuantityTotal (UGX)
    Local chicks5,00050250,000
    Feed, 3 months (per bird)10,00050500,000
    Vaccines and vet3005015,000
    Bedding and disinfectants5,0001 lot5,000
    Feeders and drinkers80,0001 set80,000
    Housing repairs/materials300,0001 shed300,000
    Transport and misc.50,000150,000
    Total startup, first cycle1,200,000

    Adjust the table with your local prices. For broader context on budgets and profitability, read this Daily Monitor guide on profitable local chicken farming.

    Break-even made easy: when do you start making money?

    Break-even means your sales cover all costs. Use this quick formula and plug in your numbers.

    Break-even birds = Total fixed costs ÷ (Selling price per bird − Variable cost per bird)

    Track feed, mortality, and price per bird so the math is real. Keep simple records in a notebook or spreadsheet after every purchase and sale.

    Pricing and selling:

    live birds, dressed meat, and eggs

    You can sell live birds or dressed meat to local markets, restaurants, hotels, schools, and neighbors. Local chickens earn a premium for taste, so price by live weight or per bird. Check market prices weekly before selling. Sell in batches for steady cash flow, take small deposits for group orders, and budget for transport so profit stays intact.

    Cut costs without hurting quality

    Buy feed in bulk with a farmer group, grow greens or maize to supplement, and reduce waste with proper feeders. Keep litter dry to cut disease risk and repair cracks and holes early to avoid predator losses. Do not underfeed or skip vaccines, since that reduces profit later.

    For inspiration and practical tips, see this Ugandan farmer story on FarmingUG about local chicken farming and a detailed growth plan in Watchdog Uganda’s article how to grow from 20 to 300 local chicken in one year. Treat numbers there as examples, then sharpen with your own costs.

    Sell Out Fast:

    Demand, Marketing, and How to Scale Safely

    What buyers want in Uganda

    Buyers ask for tasty local meat, medium to large live weight, healthy birds, and clean eggs. Restaurants and events prefer steady supply and consistent size. Ask buyers what sizes they want, how many birds per week, and which pickup days work best. Match your production to their needs to keep repeat orders.

    Best times to sell and how to time your batches

    Demand rises on weekends, market days, and around holidays. Eggs move well during school terms. Plan hatches or purchases so birds reach target weight in peak weeks. Check local prices weekly. If prices dip, hold birds a short time if feed costs allow, but do not hold too long or feed will eat your margin.

    Simple marketing that works: WhatsApp and word of mouth

    Share clear photos, weights, and prices in local WhatsApp groups. Use a short farm name and reply fast. Offer small discounts for repeat buyers and deliver on time. Collect short testimonials with buyer names and share them with new prospects. Trust sells birds faster than any slogan.

    Scale up safely: from 50 to 200 birds without big losses

    Scale when mortality is below 10 percent and sales are consistent. Add housing and equipment before adding birds. Keep a cash buffer for two months of feed and vet care. Train a helper to feed, clean, and spot illness. Expand in steps, like 50 to 120, then 200, while tracking weekly numbers.

    For practical, Uganda-focused insights and best practices, review the NAADS checklist on local chicken management, then compare with local market stories in the Daily Monitor.

    Conclusion

    Profit in local poultry comes from simple habits done well. Choose hardy birds, build safe and dry housing, feed and vaccinate on schedule, know your costs, and sell where demand is strong. Start with 20 to 50 birds, keep clean records, and join a farmer group to buy feed cheaper and find buyers faster. Plan a small batch this month, then use your results to scale. With focus on cost control and steady markets, your farm can grow, one smart step at a time.

  • 📝 Kutunga Sentensi kwa Vivumishi vya Kimfanano

    Utangulizi

    Lugha ya Kiswahili ni miongoni mwa lugha tajiri zaidi katika Afrika Mashariki. Mojawapo ya mambo yanayofanya Kiswahili kipendeze ni matumizi ya vivumishi vya kimfanano — maneno yanayoleta uhai na taswira katika mazungumzo na maandishi.
    Katika makala hii, tutajifunza kwa kina maana, matumizi, mifano, na umuhimu wa vivumishi vya kimfanano katika lugha ya Kiswahili. Hii ni somo muhimu kwa wanafunzi wa shule za sekondari, walimu, na yeyote anayetaka kuandika au kuzungumza Kiswahili kwa ufasaha.


    🌍 Maana ya Vivumishi vya Kimfanano (Definition of Simile Adjectives)

    Vivumishi vya kimfanano ni maneno au misemo inayotumika kulilinganisha sifa, hali, au tabia ya kitu kimoja na kingine.
    Kwa mfano, unaposema “Ana nguvu kama simba”, unalinganisha nguvu za mtu na za simba.
    Hii husaidia msikilizaji au msomaji kupata picha halisi ya sifa inayozungumziwa.

    Maneno haya huchangia sana katika uandishi wa kifasihi, mashairi, hadithi, na hata mazungumzo ya kila siku.
    Vivumishi vya kimfanano hutoa uzuri, mvuto na uhalisia katika lugha.


     Viunganishi Vinavyotumika katika Vivumishi vya Kimfanano

    Katika Kiswahili, vivumishi vya kimfanano hutumia maneno maalumu ya kulinganisha. Baadhi ya maneno hayo ni:

    • kama
    • kama vile
    • sawa na
    • mfano wa
    • kana kwamba
    • kama kwamba

    English Translation

    Simile adjectives in Kiswahili use linking words such as like, as, similar to, as if, and as though to compare one thing to another. For example:

    • Strong as a lion → Ana nguvu kama simba
    • Sweet as honey → Tamu kama asali

    💡 Umuhimu wa Vivumishi vya Kimfanano

    Vivumishi vya kimfanano vina umuhimu mkubwa katika uandishi na usemi wa Kiswahili.
    Baadhi ya faida zake ni:

    1. Huongeza uzuri wa lugha – Lugha yenye vivumishi vya kimfanano husikika au husomeka kwa mvuto zaidi.
    2. Hujenga picha katika fikra za msikilizaji – Husaidia mtu kuelewa maelezo kwa uhalisia zaidi.
    3. Huonyesha ubunifu wa mzungumzaji – Inadhihirisha umahiri wa kutumia lugha kwa njia ya kifasihi.
    4. Hufundisha tabia au maadili – Baadhi ya mifano huonyesha sifa njema au mbaya.
    5. Huendeleza tamaduni za Kiafrika – Simile adjectives mara nyingi hujikita katika mazingira halisi ya jamii za Afrika Mashariki.

    📘 Mifano ya Vivumishi vya Kimfanano

    Hapa chini kuna mifano ya sentensi zinazotumia vivumishi vya kimfanano kwa usahihi:

    1. Ana nguvu kama simba.
    2. Macho yake yanang’aa kama nyota.
    3. Mtoto huyu ni mwepesi kama upepo.
    4. Anatembea kama kifaru.
    5. Sauti yake ni tamu kama asali.
    6. Alilia kama mtoto mdogo.
    7. Ana akili kama vile mwalimu wake.
    8. Alikimbia kana kwamba anafuatwa na mbwa.
    9. Ni mrefu sawa na mnara.
    10. Ana hasira mfano wa moto unaowaka.

    English Translations

    1. He is strong like a lion.
    2. Her eyes shine like stars.
    3. This child is light like the wind.
    4. He walks like a rhino.
    5. His voice is sweet like honey.
    6. She cried like a small child.
    7. He is as clever as his teacher.
    8. He ran as if being chased by a dog.
    9. He is tall like a tower.
    10. He is angry like burning fire.

    ✍️ Sentensi Zilizotungwa kwa Vivumishi vya Kimfanano

    Hizi ni sentensi kamili zinazoonyesha matumizi ya vivumishi vya kimfanano katika muktadha wa kila siku:

    1. Mariam ni mwembamba kama mshale.
    2. Peter anaimba kama vile ndege porini.
    3. Nyumba yao ni kubwa sawa na jumba la kifahari.
    4. Hussein ni jasiri kama simba wa porini.
    5. Watoto walicheka kama waliopata zawadi.
    6. Maji yalikuwa baridi mfano wa barafu.
    7. Mvulana alikimbia kana kwamba anahofia kitu.
    8. Mwanamke yule ni mrembo kama maua ya bustani.
    9. Sauti ya mwimbaji ilikuwa laini kama sufu.
    10. Mwalimu ni mkarimu kama vile mzazi.

    Meaning in English

    1. Mariam is slim like an arrow.
    2. Peter sings like a bird in the forest.
    3. Their house is as big as a mansion.
    4. Hussein is brave like a lion.
    5. The children laughed as if they had received gifts.
    6. The water was cold like ice.
    7. The boy ran as if afraid of something.
    8. That woman is beautiful like garden flowers.
    9. The singer’s voice was soft like wool.
    10. The teacher is kind like a parent.

    🩵 Shairi: Uzuri wa Mavazi na Mapambo

    Nguo zinang’aa kama nyota angani,
    Mapambo yanapendeza kama maua bustanini,
    Kila mwonekano ni wa heshima na hadhi,
    Mavazi ya kisasa yanang’aa mfano wa almasi.

    Warembo wanatembea kana kwamba malaika,
    Nguo zao zikiwa sawa na wingu jeupe,
    Kila mrembo akipamba shingo kama vile mfalme,
    Uzuri wao huangaza kama mwanga wa asubuhi.

    Kitenge cha Kiafrika chafaa kama jua jiwani,
    Rangi zake zasikika kama muziki wa furaha,
    Vito vyao hung’aa kama taa za dhahabu,
    Wakipendeza kana kwamba nyota za mbinguni.

    Mapambo si uzuri wa macho tu,
    Bali ni tamaduni, fahari na utu,
    Mtu apambaye kwa adabu na hekima,
    Huonekana kama mfano wa heshima.


    🌺 Tafsiri kwa Kiingereza (Summary Translation)

    This poem praises the beauty of clothing and adornment using simile adjectives.
    It shows how fashion reflects not only physical beauty but also culture, pride, and self-respect.


    📖 Muhtasari wa Somo (Summary of the Lesson)

    Vivumishi vya kimfanano ni sehemu muhimu ya sarufi ya Kiswahili.

    • Huonyesha ulinganifu wa sifa au tabia kati ya vitu viwili.
    • Hutumia viunganishi kama kama, kama vile, sawa na, kana kwamba, mfano wa, n.k.
    • Hufanya lugha iwe ya picha, yenye mvuto, na ya kifasihi.
      Kwa hiyo, mwanafunzi anapaswa kujifunza kutumia vivumishi hivi kwa usahihi ili kuboresha uandishi wake na uwezo wa kuzungumza Kiswahili kwa umahiri.

    🌐 Kiswahili Learning in East Africa

    Kwa wanafunzi na walimu wa Kiswahili nchini Uganda, Kenya, Tanzania, Rwanda, Burundi, na Congo, somo hili lina umuhimu mkubwa.
    Katika mitihani ya UCE, KCSE, au O-Level, maswali ya vivumishi vya kimfanano huonekana mara kwa mara.
    Hivyo, kujua tofauti kati ya vivumishi vya kawaida na vya kimfanano ni hatua muhimu ya kuelewa muundo wa lugha.


    💬 Mazoezi kwa Mwanafunzi

    Jaribu kutunga sentensi zako ukitumia vivumishi vya kimfanano kwa kutumia viunganishi vifuatavyo:

    • kama
    • sawa na
    • mfano wa
    • kama vile
    • kana kwamba

    Mfano:

    1. Juma anakimbia kama upepo.
    2. Mama ni mpole kama njiwa.
    3. Kitabu chake ni kizito sawa na jiwe.

    🧭 Hitimisho

    Vivumishi vya kimfanano ni kiungo muhimu katika kujenga ufasaha wa Kiswahili. Vinaongeza ladha, hisia, na ubunifu katika usemi.
    Kwa mwanafunzi anayetamani kuandika kwa umahiri, kutumia vivumishi hivi kwa usahihi ni hatua kubwa ya kufikia kiwango cha juu cha lugha.
    Kumbuka: Kama vile maua yanavyopendeza machoni, ndivyo vivumishi vya kimfanano vinavyopendezesha lugha.

  • Rabbit Farming in Uganda: A Guide to Profitable Commercial Rabbit Farming in Africa

    Rabbit Farming in Uganda: A Guide to Profitable Commercial Rabbit Farming in Africa

    Are you looking to venture into commercial rabbit farming in Africa? Uganda is rapidly becoming a hub for innovative and profitable rabbit farms. This guide explores rabbit farming in Uganda, offering practical insights, common diseases, profitability analysis, and answers to the most searched questions about this growing industry.

    Whether you’re a beginner or a seasoned farmer, this blog will help you understand why rabbit farming is becoming one of the most profitable agribusiness ventures in Uganda and Africa at large.


    Overview of Rabbit Farming in Africa

    The rise of commercial rabbit farming in Africa is driven by the growing demand for lean, organic meat, natural fertilizers, and bio-urine-based pesticides. Countries like Kenya, Nigeria, and especially Uganda are leading the way with innovations in breeding, disease management, and income diversification.


    Rabbit Farming in Uganda: An Emerging Agribusiness Trend

    In Uganda, rabbit farming is gaining popularity due to its low start-up costs, small land requirements, and fast growth rates. On just one acre of land, a farmer can raise up to 60,000 rabbits annually, making it a scalable and highly profitable business model.

    Unlike traditional livestock, rabbits require minimal feed, reproduce quickly, and offer multiple income streams: meat, urine, and even manure.


    Common Diseases Affecting Rabbits (and How to Prevent Them)

    Healthy rabbits lead to higher profits. Below are common rabbit diseases in Uganda and how to manage them:

    1. Meng Lice, Omukuru, Emicemba

    • Symptoms: Fur peeling off skin.
    • Treatment: Disinfect non-pregnant rabbits with Evamectin. For pregnant rabbits, use copper-based acaricides such as Milbitrus and spray the walls of the hutch.

    2. Foot and Mouth Rot

    • Home remedy: Apply ghee and salt on affected areas.

    3. Infant Mortality in Rabbits

    • Causes: Cold weather, poor housing.
    • Solution: Place pots or containers in the hutch to simulate the warmth and safety of natural rabbit holes.

    4. Worm Infestation

    • Cause: Grass grown on overly fertile soils.
    • Solution: Regularly slash and clean grazing areas.

    5. Maggots from Droppings

    • Clean hutches frequently to prevent buildup of droppings which attract flies.

    6. Aggression by Male Rabbits

    • Males can kill or urinate on newborns. Always separate male rabbits from the hutch after mating.

    7. Salmonellosis

    • Common in both poultry and rabbits. Infected rabbits may appear restless and raise their ears constantly. Immediate veterinary consultation is recommended.

    Feeding and Slaughtering Guide

    • Provide a balanced diet of water and marsh grass.
    • At slaughter, expect a 50% yield: a 2 kg live rabbit will produce approximately 1 kg of meat.

    Profitability of Rabbit Farming in Uganda

    Revenue from Meat

    • One acre accommodates 30,000 rabbits, which can be raised twice a year.
    • That’s 60,000 rabbits, producing 180,000 kg of meat.
    • At UGX 15,000 per kg, annual revenue =
      UGX 2,700,000,000

    Revenue from Rabbit Urine

    • Each rabbit produces 0.2 litres of urine daily.
    • 60,000 rabbits = 12,000 litres/day
    • Over 120 maturity days, total = 1,440,000 litres/year
    • At UGX 1,000 per litre, annual revenue =
      UGX 1,440,000,000

    ✅ Total Annual Revenue: UGX 4,140,000,000

    This demonstrates the immense potential of rabbit farming as a lucrative agribusiness in Uganda.


    Frequently Asked Questions (FAQs)

    🐇 Is rabbit farming profitable in Uganda?

    Yes. A well-managed rabbit project can earn over UGX 4 billion annually from meat and urine alone. With low operational costs, quick reproduction, and small land requirements, it’s one of the most profitable farming ventures in Uganda today.

    🌿 What is the most profitable farming in Uganda?

    While crops like coffee and vanilla are lucrative, rabbit farming is emerging as one of the most profitable agribusinesses, thanks to multiple income streams (meat, urine, manure) and growing market demand.

    💰 How profitable is a rabbit farm?

    With 60,000 rabbits annually, farmers can generate up to UGX 4.14 billion from meat and urine. Profit margins improve with efficient disease control, local feed sourcing, and direct market access.

    ⚠️ What are the disadvantages of rabbit farming?

    • Sensitivity to cold and disease
    • High infant mortality if mismanaged
    • Requires frequent cleaning
    • Male aggression toward young

    Proper training and infrastructure easily overcome these challenges.

    📈 How profitable is rabbit farming?

    Extremely profitable. A small farm can scale rapidly and offers consistent returns throughout the year. Moreover, rabbit urine is a high-demand organic pesticide, adding to the income potential.


    Where is The Largest Rabbit Farm in the World: Can Uganda Compete?

    While the largest rabbit farm in the world is located in China and produces millions of rabbits annually, Uganda is quickly catching up. With improved technology, access to veterinary services, and rising local demand, Uganda has the potential to become Africa’s rabbit farming powerhouse.


    🔍 Conclusion: Why Rabbit Farming Is the Future of Agribusiness in Uganda

    In a time when land is scarce and input costs are high, rabbit farming offers a smart, scalable, and sustainable alternative. From addressing food security to creating youth employment, its benefits are unmatched.

    If you’re looking to join this agricultural revolution, now is the time to invest in rabbit farming in Uganda.


    ✅ Ready to Get Started?

    👉 Contact Remedial Corner for training, startup kits, and market access for your rabbit farming journey.

  • Explore Nutrition: food tests, balanced diet and body mass index

    Explore Nutrition: food tests, balanced diet and body mass index

    Nutritional Requirements of Organisms

    All living organisms require nutrients to grow, maintain their bodily functions, and reproduce. Nutrients are essential chemical compounds that organisms obtain from their environment. They are classified into two main categories: macronutrients (needed in large quantities) and micronutrients (required in smaller amounts). Different organisms have specific nutritional needs, but these needs generally include sources of energy, building materials, and essential biochemical elements.

    Below is an overview of the nutritional requirements of different organisms:

    Plants are autotrophic organisms, meaning they produce their own food through photosynthesis. However, they still require various nutrients from the soil to grow and thrive.

    Macronutrients for Plants:

    • Carbon (C): Plants obtain carbon from carbon dioxide (CO₂) in the air through photosynthesis, which is essential for the formation of carbohydrates and other organic molecules.
    • Hydrogen (H): Hydrogen is obtained from water (H₂O) and is vital for the formation of plant tissues and metabolic processes.
    • Oxygen (O): Oxygen is also obtained from water and is essential for cellular respiration and the production of energy.
    • Nitrogen (N): Nitrogen is crucial for protein synthesis, enzymes, and chlorophyll production. Plants obtain nitrogen in the form of nitrates (NO₃⁻) and ammonium (NH₄⁺) from the soil.
    • Phosphorus (P): Phosphorus is essential for the formation of nucleic acids (DNA, RNA) and ATP, which stores energy. It is absorbed as phosphate ions (PO₄³⁻) from the soil.
    • Potassium (K): Potassium helps regulate water balance, enzyme activation, and photosynthesis. It is taken up as potassium ions (K⁺).
    • Calcium (Ca): Calcium is important for cell wall structure and the regulation of metabolic activities. It is absorbed as calcium ions (Ca²⁺).
    • Magnesium (Mg): Magnesium is a central element in chlorophyll, the pigment responsible for photosynthesis, and it plays a role in enzyme function.
    • Sulfur (S): Sulfur is necessary for the synthesis of amino acids, vitamins, and coenzymes. It is taken up as sulfate ions (SO₄²⁻).

    Micronutrients for Plants:

    These are essential for various metabolic processes but are required in trace amounts. They include:

    • Iron (Fe)
    • Manganese (Mn)
    • Zinc (Zn)
    • Copper (Cu)
    • Boron (B)
    • Molybdenum (Mo)
    • Chlorine (Cl)
    • Nickel (Ni)

    Water and Light:

    • Water: Plants need water for photosynthesis, nutrient transport, and maintaining cell turgidity.
    • Light: Light provides the energy necessary for photosynthesis, where plants convert carbon dioxide and water into glucose and oxygen.

     Nutritional Requirements of Animals

    Animals are heterotrophic organisms, meaning they must consume other organisms (plants or animals) for food. The nutritional needs of animals vary depending on their species, habitat, and lifestyle, but they generally require macronutrients, micronutrients, and water.

    Macronutrients for Animals:

    • Carbohydrates: Carbohydrates provide energy and are often derived from plants (e.g., sugars, starches). In some cases, animals may also obtain carbohydrates from other animals in the form of glycogen or from fungi.
    • Proteins: Proteins are crucial for building tissues, enzymes, hormones, and other essential molecules. Animals obtain proteins from the breakdown of plant or animal tissues, which are made of amino acids.
    • Fats (Lipids): Fats provide a concentrated source of energy, insulation, and protection for organs. They are also essential for the synthesis of certain hormones and the absorption of fat-soluble vitamins (A, D, E, K).
    • Water: Water is required for digestion, circulation, temperature regulation, and various biochemical reactions in the body.

    Micronutrients for Animals:

    • Vitamins: These organic compounds are essential for metabolic functions but are needed in small amounts. Animals obtain vitamins from their diet or synthesizing them from precursors (e.g., vitamin D from sunlight).
      • Fat-soluble vitamins: A, D, E, K
      • Water-soluble vitamins: B-vitamins, C
    • Minerals: Animals require a variety of minerals for bone structure, nerve function, muscle contraction, and enzyme activity. Important minerals include:
      • Calcium (Ca): For bone and teeth structure.
      • Phosphorus (P): Important for energy production and bones.
      • Iron (Fe): Essential for oxygen transport in the blood (hemoglobin).
      • Magnesium (Mg): Important for enzyme function and bone health.
      • Sodium (Na), Potassium (K), Chlorine (Cl): For nerve function and maintaining fluid balance.

    Energy Requirements:

    Animals derive their energy mainly from carbohydrates, fats, and proteins. The energy is measured in calories and is used for:

    • Basal metabolic rate (BMR): The energy required for maintaining basic life functions, such as respiration and circulation.
    • Activity energy: Energy needed for movement and physical activity.
    • Thermoregulation: Energy required to maintain body temperature, particularly in endothermic (warm-blooded) animals.

     Nutritional Requirements of Microorganisms

    Microorganisms, such as bacteria, fungi, and algae, also have specific nutritional requirements, but these are typically more diverse because microorganisms can thrive in various environments, from extreme conditions to the human body.

    Macronutrients for Microorganisms:

    • Carbon (C): Microorganisms require carbon as a source of energy. Autotrophic microorganisms, such as algae, use carbon dioxide, while heterotrophic microorganisms rely on organic carbon sources like sugars and fats.
    • Nitrogen (N): Microorganisms require nitrogen to synthesize proteins and nucleic acids. Some microorganisms, like nitrogen-fixing bacteria, can convert atmospheric nitrogen into forms usable by plants and other organisms.
    • Phosphorus (P): Phosphorus is required by microorganisms for nucleic acids and energy molecules (ATP).
    • Sulfur (S): Some microorganisms use sulfur to synthesize amino acids and vitamins.
    • Oxygen (O): Many microorganisms are aerobic and require oxygen for respiration, while others are anaerobic and can survive in environments without oxygen.

    Micronutrients for Microorganisms:

    • Trace elements: These include iron, copper, zinc, and manganese, which are necessary for enzymatic activities and metabolic processes in microorganisms.

    Energy Sources:

    • Light: Phototrophic microorganisms (e.g., cyanobacteria) capture light energy and convert it into chemical energy through photosynthesis.
    • Organic matter: Heterotrophic microorganisms, such as fungi and bacteria, decompose organic materials to obtain nutrients.
    • Inorganic compounds: Some microorganisms, like chemosynthetic bacteria, use inorganic compounds (e.g., hydrogen sulfide, ammonia) as an energy source in environments without light.

     Nutritional Requirements of Fungi

    Fungi are heterotrophic organisms that absorb nutrients from their environment, either by decomposing organic matter (saprotrophic) or forming symbiotic relationships with plants and animals.

    Macronutrients for Fungi:

    • Carbon (C): Fungi obtain carbon from decomposing organic materials, such as dead plant and animal matter.
    • Nitrogen (N): Nitrogen is absorbed in the form of organic nitrogen compounds like amino acids or ammonium ions.
    • Phosphorus (P): Phosphorus is required for energy metabolism and cell growth.
    • Potassium (K): Fungi require potassium for enzyme activation and cellular processes.
    • Magnesium (Mg): Magnesium is essential for the synthesis of ribosomes and enzymes.

    Micronutrients for Fungi:

    • Fungi also require small amounts of micronutrients, such as iron, zinc, and manganese, for various biochemical processes.

    Conclusion

    All organisms have specific nutritional requirements that are essential for their growth, energy production, and survival. These requirements differ across species, with plants primarily requiring light, water, and minerals from the soil, while animals consume organic matter for energy, proteins, and other nutrients. Microorganisms have more diverse nutritional needs, depending on their metabolic strategies (e.g., autotrophic or heterotrophic). Understanding these nutritional requirements is key to managing ecosystems, agriculture, and human health.

    Food Nutrients, Sources, and Importance to Humans

    Food provides the essential nutrients that the human body needs for energy, growth, maintenance, and repair. These nutrients are classified into six main categories: carbohydrates, proteins, fats, vitamins, minerals, and water. Each of these nutrients plays a specific and vital role in the body’s overall health and functioning. Below is a detailed breakdown of the different food nutrients, their sources, and their importance to human health.

    1. Carbohydrates

    Sources of Carbohydrates:

    • Simple Carbohydrates: Fruits (e.g., apples, bananas), honey, table sugar, milk, and dairy products.
    • Complex Carbohydrates: Whole grains (e.g., rice, oats, barley), vegetables (e.g., potatoes, corn), legumes (e.g., beans, lentils), and starchy foods like bread and pasta.

    Importance of Carbohydrates:

    • Energy Source: Carbohydrates are the body’s primary source of energy. They are broken down into glucose, which is used by cells for energy.
    • Storage of Energy: Excess glucose is stored in the liver and muscles as glycogen for later use.
    • Brain Function: The brain relies on glucose for proper function. A steady supply of carbohydrates ensures mental clarity and cognitive function.
    • Digestive Health: Fiber, a type of carbohydrate found in fruits, vegetables, and whole grains, helps with digestion and prevents constipation.

    2. Proteins

    Sources of Protein:

    • Animal Sources: Meat (beef, pork, lamb), poultry (chicken, turkey), fish, eggs, and dairy products (milk, cheese, yogurt).
    • Plant Sources: Legumes (beans, lentils, peas), nuts, seeds, soy products (tofu, tempeh), and whole grains (quinoa, brown rice).

    Importance of Proteins:

    • Building and Repairing Tissues: Proteins are the building blocks of body tissues, such as muscles, skin, and organs. They are essential for growth, maintenance, and repair.
    • Enzyme Production: Proteins make up enzymes that catalyze biochemical reactions in the body, including digestion, metabolism, and cellular repair.
    • Immune Function: Antibodies, which are proteins, help fight infections and protect the body from diseases.
    • Hormonal Regulation: Some hormones, such as insulin and growth hormone, are proteins that regulate various physiological processes.

    3. Fats (Lipids)

    Sources of Fats:

    • Animal Fats: Meat fat, butter, cheese, and lard.
    • Plant Fats: Olive oil, canola oil, avocado, nuts, seeds, and coconut oil.
    • Omega-3 Fatty Acids: Fatty fish (salmon, mackerel), flaxseeds, chia seeds, walnuts, and algae.

    Importance of Fats:

    • Energy Storage: Fats are a concentrated source of energy, providing more energy per gram than carbohydrates and proteins.
    • Cell Structure: Fats are an essential component of cell membranes, influencing their fluidity and integrity.
    • Fat-Soluble Vitamins: Fats help in the absorption of fat-soluble vitamins (A, D, E, and K), which are important for various bodily functions, including vision, bone health, and immune function.
    • Insulation and Protection: Fats provide insulation to regulate body temperature and protect vital organs from physical damage.
    • Brain Function: Omega-3 fatty acids are critical for brain development and function, including memory, mood regulation, and cognitive performance.

    4. Vitamins

    Sources of Vitamins:

    • Vitamin A: Carrots, sweet potatoes, spinach, kale, and egg yolks.
    • Vitamin C: Citrus fruits (oranges, lemons), strawberries, bell peppers, broccoli, and tomatoes.
    • Vitamin D: Sunlight, fortified milk, fatty fish (salmon, tuna), and egg yolks.
    • Vitamin E: Nuts, seeds, vegetable oils (sunflower oil), spinach, and broccoli.
    • Vitamin K: Leafy green vegetables (kale, spinach), broccoli, and cabbage.
    • B-Vitamins: Whole grains, legumes, leafy greens, poultry, eggs, and dairy products.

    Importance of Vitamins:

    • Immune Function: Vitamins like Vitamin C, Vitamin D, and Vitamin A support the immune system, helping the body fight infections.
    • Energy Production: B-vitamins (e.g., B1, B2, B6, B12) are essential for the metabolism of carbohydrates, fats, and proteins, providing energy to the body.
    • Bone Health: Vitamin D, in combination with calcium, plays a critical role in bone health and the prevention of diseases like osteoporosis.
    • Vision: Vitamin A is essential for maintaining healthy vision, especially in low-light conditions.
    • Blood Clotting: Vitamin K is crucial for the production of clotting factors that prevent excessive bleeding.

     Minerals

    Sources of Minerals:

    • Calcium: Dairy products (milk, cheese, yogurt), leafy green vegetables (spinach, kale), tofu, and fortified plant-based milks.
    • Iron: Red meat, poultry, beans, lentils, spinach, and fortified cereals.
    • Magnesium: Nuts, seeds, whole grains, leafy green vegetables, and legumes.
    • Potassium: Bananas, potatoes, spinach, tomatoes, and oranges.
    • Sodium: Salt, processed foods, canned soups, and snack foods.
    • Zinc: Meat, shellfish, legumes, seeds, and nuts.

    Importance of Minerals:

    • Bone Health: Calcium, magnesium, and phosphorus are vital for building and maintaining strong bones and teeth.
    • Oxygen Transport: Iron is essential for the production of hemoglobin in red blood cells, which carries oxygen throughout the body.
    • Fluid Balance: Potassium, sodium, and chloride help regulate the body’s fluid balance and blood pressure.
    • Immune Function: Zinc is involved in immune system function, helping the body defend against infections and promote wound healing.
    • Nerve Function: Magnesium and calcium are essential for nerve transmission and muscle contraction.

     Water

    Sources of Water:

    • Beverages: Water, tea, coffee, and other non-alcoholic drinks.
    • Foods: Fruits (e.g., watermelon, oranges), vegetables (e.g., cucumbers, lettuce), and soups.

    Importance of Water:

    • Hydration: Water is essential for maintaining fluid balance in the body, preventing dehydration.
    • Temperature Regulation: Water helps regulate body temperature through perspiration and evaporation.
    • Nutrient Transport: Water is involved in transporting nutrients to cells and removing waste products.
    • Digestion and Absorption: Water aids in the digestion process and the absorption of nutrients from food.
    • Joint Lubrication: Water helps lubricate joints and cushions organs and tissues, preventing damage.

    All in all, Each of the six essential nutrients—carbohydrates, proteins, fats, vitamins, minerals, and water—plays a critical role in maintaining human health. A balanced and varied diet that provides adequate amounts of these nutrients is essential for energy, growth, immune function, and overall well-being. Consuming a wide range of whole foods, such as fruits, vegetables, grains, proteins, and healthy fats, ensures that the body receives the necessary nutrients to function optimally. Proper nutrition supports not only physical health but also cognitive and emotional well-being, contributing to a high quality of life.

    Food tests for various nutrients

    Food tests are laboratory procedures used to detect the presence of specific nutrients in food. These tests help identify whether a particular nutrient is present in a sample and how much of it is available. Below is a guide to some common food tests for various nutrients, including carbohydrates, proteins, fats, vitamins, and minerals.

     Test for Carbohydrates

    Test for Reducing Sugars (e.g., Glucose)

    • Reagent Used: Benedict’s solution
    • Procedure:
      1. Place a few drops of Benedict’s solution into a test tube.
      2. Add the food sample (liquid or dissolved in water).
      3. Heat the test tube in a boiling water bath for about 5 minutes.
    • Result:
    • Positive: The solution changes from blue to green, yellow, or red, depending on the concentration of reducing sugars.
    • Negative: No change in color (the solution remains blue).

    Test for Starch

    • Reagent Used: Iodine solution
    • Procedure:
      1. Place a few drops of iodine solution into a test tube or on the food sample.
      2. If the sample is solid, crush or dissolve it in water.
    • Result:
    • Positive: The iodine solution changes color to blue-black.
    • Negative: The solution remains yellow-brown or orange.

     Test for Proteins

    Test for Proteins (Biuret Test)

    • Reagent Used: Biuret reagent (a solution of sodium hydroxide and copper sulfate)
    • Procedure:
      1. Place a small amount of the food sample in a test tube.
      2. Add a few drops of Biuret reagent to the sample and shake gently.
    • Result:
    • Positive: The solution turns violet or purple.
    • Negative: The solution remains blue.

     Test for Fats (Lipids)

    Test for Fats (Emulsion Test)

    • Reagent Used: Ethanol and water
    • Procedure:
      1. Place a small amount of the food sample (solid or liquid) in a test tube.
      2. Add ethanol (about half the volume of the sample) and shake vigorously.
      3. Add a few drops of water to the test tube and shake gently.
    • Result:
    • Positive: A cloudy white emulsion forms.
    • Negative: No emulsion forms (the solution remains clear).

     Test for Vitamin C (Ascorbic Acid)

    Test for Vitamin C

    • Reagent Used: DCPIP solution (2,6-dichlorophenolindophenol)
    • Procedure:
      1. Place a few drops of DCPIP solution into a test tube.
      2. Add the juice or liquid sample to the test tube.
    • Result:
    • Positive: The blue DCPIP solution decolorizes (turns colorless) if vitamin C is present.
    • Negative: No change in color (the solution remains blue).

     Test for Minerals (Calcium, Iron, Phosphates, etc.)

    Test for Calcium

    • Reagent Used: Ammonium oxalate solution
    • Procedure:
      1. Add a few drops of ammonium oxalate solution to the food sample dissolved in water.
    • Result:
    • Positive: A white precipitate forms, indicating the presence of calcium.
    • Negative: No precipitate forms.

    Test for Iron

    • Reagent Used: Potassium ferrocyanide solution (or potassium thiocyanate)
    • Procedure:
      1. Add a few drops of potassium ferrocyanide solution to the food sample dissolved in water.
    • Result:
    • Positive: A blue precipitate forms, indicating the presence of iron.
    • Negative: No precipitate forms.

    Test for Phosphates

    • Reagent Used: Ammonium molybdate solution and nitric acid
    • Procedure:
      1. Add a few drops of ammonium molybdate solution to the food sample.
      2. Add a small amount of concentrated nitric acid and heat gently.
    • Result:
    • Positive: A yellow precipitate forms, indicating the presence of phosphate ions.
    • Negative: No precipitate forms.

     Test for Water (Moisture Content)

    Test for Water

    • Reagent Used: No specific reagent is needed.
    • Procedure:
      1. Weigh the sample of food.
      2. Dry the sample in an oven at a low temperature (around 100°C) until it reaches a constant weight.
      3. Reweigh the sample after drying.
    • Result:
    • Positive: The difference in weight represents the moisture content of the food sample.

    Food tests are essential for identifying the presence of various nutrients in food. These tests help determine the nutritional value of food and assess whether it meets the dietary needs of individuals. Each nutrient has a specific test associated with it, and the results can provide important information about the quality and composition of the food. These tests are widely used in laboratories, food quality control, and educational settings to demonstrate the nutritional content of food.

    Balanced diet and it’s significance

    Balanced Diet and Its Significance

    A balanced diet refers to a diet that provides all the essential nutrients in the correct proportions to maintain overall health, well-being, and proper functioning of the body. It includes an adequate amount of carbohydrates, proteins, fats, vitamins, minerals, and water, ensuring that the body has the nutrients needed for energy, growth, repair, and regulation of bodily functions.

    Components of a Balanced Diet

    1. Carbohydrates:
      • Sources: Rice, bread, pasta, potatoes, legumes, and fruits.
      • Function: Carbohydrates are the body’s primary source of energy. They provide glucose, which fuels the body, especially the brain and muscles.
    2. Proteins:
      • Sources: Meat, poultry, fish, eggs, legumes, nuts, seeds, and dairy products.
      • Function: Proteins are essential for growth, tissue repair, and the production of enzymes and hormones. They also serve as an energy source when carbohydrates are not available.
    3. Fats:
      • Sources: Oils (e.g., olive oil), butter, avocados, nuts, seeds, fatty fish (e.g., salmon), and dairy products.
      • Function: Fats provide a concentrated source of energy, help in the absorption of fat-soluble vitamins (A, D, E, K), and support cell structure.
    4. Vitamins:
      • Sources: Fruits, vegetables, dairy, meat, and fortified foods.
      • Function: Vitamins are crucial for immune function, energy production, and the protection of body cells from damage. For example, Vitamin C supports the immune system, while Vitamin A is important for vision.
    5. Minerals:
      • Sources: Salt, meat, dairy products, fruits, vegetables, and whole grains.
      • Function: Minerals like calcium, iron, magnesium, and potassium are vital for bone health, oxygen transport, muscle function, and maintaining fluid balance.
    6. Water:
      • Sources: Water, fruits, vegetables, and beverages.
      • Function: Water regulates body temperature, transports nutrients and waste products, and aids in digestion and metabolism.
    7. Fiber:
      • Sources: Whole grains, vegetables, fruits, legumes, and seeds.
      • Function: Fiber supports digestive health, helps regulate blood sugar levels, and promotes satiety, which aids in weight management.

    Significance of a Balanced Diet

    A balanced diet is crucial for maintaining optimal health, and its benefits extend to various aspects of physical, mental, and emotional well-being. Below are some key reasons why consuming a balanced diet is important:

    1. Promotes Growth and Development:
      • A balanced diet provides the essential nutrients required for proper growth and development, especially in children and adolescents. Proteins, vitamins, and minerals like calcium and iron are vital for bone development, muscle growth, and overall bodily functions.
    2. Supports Immune Function:
      • Nutrients such as Vitamin C, Vitamin A, and zinc are vital for maintaining a healthy immune system. A balanced diet strengthens the body’s ability to fight infections and reduces the risk of diseases.
    3. Prevents Malnutrition:
      • A well-rounded diet ensures that the body receives adequate amounts of all necessary nutrients. Malnutrition, which results from a deficiency or imbalance of essential nutrients, can lead to health issues such as weakened immunity, stunted growth, and increased susceptibility to chronic diseases.
    4. Enhances Energy Levels:
      • Carbohydrates, fats, and proteins provide the body with energy to perform everyday activities. A balanced diet ensures sustained energy levels throughout the day, preventing fatigue, lethargy, and poor concentration.
    5. Improves Mental Health:
      • Nutrition plays a key role in brain function. Nutrients such as omega-3 fatty acids (found in fish), B-vitamins, and antioxidants support cognitive health, mood regulation, and mental clarity. A well-balanced diet can help reduce the risk of mental health issues such as depression and anxiety.
    6. Regulates Weight:
      • A balanced diet helps maintain a healthy weight by providing the right amounts of nutrients and calories to the body. Proper portions of fats, carbohydrates, and proteins, along with fiber, help regulate metabolism and prevent obesity or underweight conditions.
    7. Maintains Healthy Skin, Hair, and Nails:
      • Nutrients like vitamins A, C, and E, as well as zinc and fatty acids, contribute to healthy skin, hair, and nails. A balanced diet helps improve the appearance of skin and supports its healing process.
    8. Promotes Healthy Digestion:
      • The inclusion of fiber-rich foods, such as whole grains, fruits, and vegetables, promotes healthy digestion by preventing constipation, improving gut health, and ensuring the efficient absorption of nutrients.
    9. Helps Prevent Chronic Diseases:
      • A balanced diet can reduce the risk of chronic diseases such as heart disease, type 2 diabetes, hypertension, and certain types of cancer. Nutrients like potassium, fiber, and healthy fats (from sources like olive oil and nuts) help lower blood pressure, improve heart health, and regulate cholesterol levels.
    10. Improves Sleep Quality:
      • A balanced diet, especially one that includes the right amount of magnesium and calcium, can improve sleep quality. Avoiding excessive caffeine, sugar, and alcohol can also contribute to better rest.

    A balanced diet is the cornerstone of good health, providing the body with all the necessary nutrients in the right amounts to function properly. It promotes growth, energy, and well-being, prevents nutritional deficiencies, and plays a major role in preventing chronic diseases. Consuming a variety of foods from all the food groups ensures that the body receives a wide range of nutrients, supporting overall health and longevity. Maintaining a balanced diet is essential for a high quality of life, optimal physical and mental health, and disease prevention.

    Causes and effects of nutrient deficiency in humans

    2/2

    Causes and Effects of Nutrient Deficiency in Humans

    Nutrient deficiency occurs when the body doesn’t get enough of the essential nutrients required for growth, maintenance, and proper functioning. These nutrients include carbohydrates, proteins, fats, vitamins, and minerals. Nutrient deficiencies can result from poor diet, medical conditions, or environmental factors. The severity of the deficiency depends on the specific nutrient involved, its role in the body, and the duration of the deficiency.

    Causes of Nutrient Deficiency

    1. Poor Diet
      • A diet lacking variety, particularly one that is low in fruits, vegetables, whole grains, and protein-rich foods, can lead to deficiencies in essential nutrients.
      • Examples: A diet high in processed foods and low in fresh foods can cause vitamin and mineral deficiencies (e.g., lack of vitamin C, iron, or calcium).
    2. Inadequate Food Intake
      • Insufficient food intake due to financial constraints, poor access to food, or restrictive diets can lead to nutrient deficiencies.
      • Examples: Undernourishment or malnutrition can result in a lack of calories and essential nutrients.
    3. Poor Absorption of Nutrients
      • Certain medical conditions or diseases can affect the absorption of nutrients in the body, even if the nutrients are present in the diet.
      • Examples: Celiac disease, Crohn’s disease, or irritable bowel syndrome (IBS) can damage the digestive system, making it difficult to absorb nutrients.
    4. Increased Nutrient Requirements
      • During periods of rapid growth (e.g., childhood, adolescence, or pregnancy), the body’s nutrient requirements increase. If these needs aren’t met through the diet, deficiencies can occur.
      • Examples: Pregnant women may experience folate and iron deficiencies if their diet doesn’t meet the increased demand for these nutrients.
    5. Chronic Illnesses and Infections
      • Conditions such as tuberculosis, HIV/AIDS, or cancer can lead to nutrient deficiencies due to malabsorption, loss of appetite, or the body’s increased metabolic demands during illness.
      • Examples: Anemia in individuals with chronic blood loss or reduced nutrient absorption.
    6. Lifestyle Factors
      • Alcoholism, smoking, and excessive consumption of caffeine or other substances can interfere with the absorption and metabolism of essential nutrients.
      • Examples: Alcohol can impair the absorption of B-vitamins and increase the risk of liver damage, which further affects nutrient metabolism.
    7. Medications
      • Certain medications can interfere with nutrient absorption or increase the body’s nutrient requirements.
      • Examples: Long-term use of diuretics can cause a loss of potassium and magnesium, while certain antibiotics may affect gut bacteria, which are essential for nutrient absorption.

    Effects of Nutrient Deficiency

    The effects of nutrient deficiencies vary depending on the specific nutrient lacking in the diet. Below are some common nutrient deficiencies and their associated effects:

    1. Vitamin A Deficiency

    • Cause: Inadequate intake of vitamin A-rich foods like carrots, spinach, and liver.
    • Effects:
      • Night blindness or difficulty seeing in low light.
      • Dryness of the skin and eyes.
      • Weakened immune system, increasing susceptibility to infections.
      • In severe cases, permanent blindness.

    2. Vitamin C Deficiency (Scurvy)

    • Cause: A lack of vitamin C from sources like citrus fruits, berries, and leafy vegetables.
    • Effects:
      • Bleeding gums and loose teeth.
      • Slow wound healing.
      • Anemia and fatigue.
      • Swelling and pain in the joints.
      • Weak immune function, leading to frequent infections.

    3. Iron Deficiency (Iron-Deficiency Anemia)

    • Cause: Insufficient iron intake, often due to a diet low in iron-rich foods like red meat, beans, and spinach.
    • Effects:
      • Fatigue and weakness.
      • Pale skin and mucous membranes.
      • Shortness of breath and dizziness.
      • Reduced ability to concentrate.
      • In severe cases, can cause developmental delays in children and cognitive impairments.

    4. Calcium Deficiency

    • Cause: Low intake of calcium-rich foods such as dairy products, leafy greens, and fortified foods.
    • Effects:
      • Weakened bones and an increased risk of fractures.
      • Osteoporosis, especially in older adults.
      • Muscle cramps and spasms.
      • In children, calcium deficiency can cause rickets, a condition where bones become soft and weak.

    5. Vitamin D Deficiency

    • Cause: Insufficient sun exposure or inadequate intake of vitamin D-rich foods (e.g., fortified milk, fatty fish).
    • Effects:
      • Bone pain and muscle weakness.
      • Rickets in children, leading to bone deformities.
      • Osteomalacia in adults, which causes brittle bones.
      • Increased susceptibility to infections.

    6. Iodine Deficiency

    • Cause: Low intake of iodine, often due to the lack of iodine-rich foods like seafood, dairy products, and iodized salt.
    • Effects:
      • Goiter (enlargement of the thyroid gland).
      • Mental retardation and developmental delays in children born to iodine-deficient mothers.
      • Hypothyroidism, leading to fatigue, weight gain, and depression.

    7. Folate (Vitamin B9) Deficiency

    • Cause: Lack of folate from sources like leafy greens, legumes, and fortified cereals.
    • Effects:
      • Megaloblastic anemia (large, abnormal red blood cells).
      • Fatigue and weakness.
      • Birth defects such as neural tube defects in newborns (e.g., spina bifida).
      • Poor growth and developmental delays in children.

    8. Protein Deficiency

    • Cause: Insufficient intake of protein-rich foods like meat, legumes, and nuts.
    • Effects:
      • Growth retardation in children.
      • Edema (swelling), particularly in the abdomen and legs.
      • Weak immune system, increasing vulnerability to infections.
      • Muscle wasting and weakness.

    9. Vitamin B12 Deficiency

    • Cause: Insufficient intake of vitamin B12, commonly found in animal products (e.g., meat, dairy, eggs).
    • Effects:
      • Anemia and fatigue.
      • Nerve damage, leading to tingling or numbness in the hands and feet.
      • Cognitive issues such as memory loss and confusion.
      • In severe cases, can lead to permanent nerve damage.

    10. Magnesium Deficiency

    • Cause: Low intake of magnesium-rich foods such as nuts, seeds, whole grains, and leafy greens.
    • Effects:
      • Muscle cramps and spasms.
      • Weakness, fatigue, and irritability.
      • Increased risk of heart disease and high blood pressure.
      • In severe cases, seizures and abnormal heart rhythms.

    Nutrient deficiencies can have a significant impact on human health, ranging from mild to severe, and can affect various bodily functions such as growth, immune system function, energy production, and bone health. Ensuring a balanced diet that includes all the essential nutrients in the right amounts is key to preventing deficiencies and maintaining optimal health. Addressing nutrient deficiencies early, through dietary changes or supplementation, can prevent long-term health complications.

    Body mass index (BMI) and it’s implication

    Body Mass Index (BMI) and Its Implications

    Body Mass Index (BMI) is a numerical value derived from an individual’s weight and height. It is commonly used as a screening tool to assess whether a person has a healthy weight relative to their height. Although BMI is not a direct measure of body fat, it provides a useful estimate of whether a person is underweight, normal weight, overweight, or obese.

    Calculation of BMI

    BMI is calculated using the following formula:

    BMI=Weight (kg)Height (m)2BMI = \frac{{\text{{Weight (kg)}}}}{{\text{{Height (m)}}^2}}BMI=Height (m)2Weight (kg)​

    Alternatively, for weight in pounds and height in inches, the formula is:

    BMI=Weight (lbs)Height (in)2×703BMI = \frac{{\text{{Weight (lbs)}}}}{{\text{{Height (in)}}^2}} \times 703BMI=Height (in)2Weight (lbs)​×703

    Where:

    • Weight is in kilograms (kg) or pounds (lbs)
    • Height is in meters (m) or inches (in)

    BMI Categories

    Based on the BMI result, individuals are classified into various categories, as outlined by the World Health Organization (WHO):

    • Underweight: BMI < 18.5
    • Normal weight: BMI 18.5 – 24.9
    • Overweight: BMI 25 – 29.9
    • Obesity: BMI ≥ 30

    BMI Ranges and Health Implications

    1. Underweight (BMI < 18.5)
      • Implications: Individuals with a BMI under 18.5 are considered underweight. This could indicate malnutrition, a deficiency in essential nutrients, or a medical condition causing weight loss (e.g., eating disorders, hyperthyroidism, or cancer). Underweight individuals may have a weakened immune system and are at higher risk for osteoporosis, anemia, and other health issues.
      • Risks: Increased risk of infections, slower recovery from illnesses, and in extreme cases, organ failure.
    2. Normal Weight (BMI 18.5 – 24.9)
      • Implications: A BMI within the normal range is associated with the lowest risk of chronic diseases such as heart disease, type 2 diabetes, and hypertension. Individuals in this category are likely to have a balanced diet, adequate physical activity, and good overall health.
      • Risks: This range is generally considered healthy, though it is still important to monitor other factors like physical fitness and fat distribution, as BMI does not account for muscle mass or body composition.
    3. Overweight (BMI 25 – 29.9)
      • Implications: People in this BMI range are considered overweight. While not as concerning as obesity, being overweight can increase the risk of developing health problems like high blood pressure, heart disease, type 2 diabetes, and sleep apnea.
      • Risks: Overweight individuals are more likely to experience metabolic issues such as insulin resistance, higher cholesterol, and joint problems.
    4. Obesity (BMI ≥ 30)
      • Implications: Obesity is a serious health concern. Individuals with obesity are at a much higher risk for chronic conditions such as cardiovascular disease, type 2 diabetes, stroke, certain cancers, and osteoarthritis. Obesity is often linked to poor dietary habits, lack of physical activity, and genetic factors.
      • Risks: Increased risk of heart disease, diabetes, respiratory issues, and premature death.

    Limitations of BMI

    While BMI is a useful tool for identifying potential health risks associated with body weight, it has several limitations:

    1. Does Not Account for Body Composition:
      • BMI does not differentiate between muscle mass and body fat. A person with high muscle mass, such as an athlete, may have a high BMI but a low body fat percentage, leading to an inaccurate classification.
    2. Ignores Fat Distribution:
      • BMI does not provide information about how fat is distributed in the body. Abdominal fat (visceral fat) is more dangerous than fat stored in other areas of the body (e.g., hips), as it is linked to higher risks of metabolic diseases like heart disease and diabetes. Waist-to-hip ratio or waist circumference are better measures of fat distribution.
    3. Not Accurate for Certain Populations:
      • BMI may not be appropriate for certain groups of people, including:
        • Elderly individuals: Older adults may have less muscle mass and more fat, but their BMI might still indicate a normal weight.
        • Children and teenagers: BMI percentiles for children vary by age and gender, so the same BMI value could represent different health risks at different ages.
        • Different ethnic groups: Certain ethnic groups may have different body composition characteristics, which might affect the interpretation of BMI.
    4. Does Not Account for Gender:
      • Women generally have more body fat than men, even at the same BMI. Therefore, BMI might overestimate the body fat percentage in men or underestimate it in women.

    Other Methods to Assess Body Fat and Health

    Given the limitations of BMI, other methods can provide a more accurate assessment of an individual’s body composition and health:

    1. Waist Circumference and Waist-to-Hip Ratio:
      • These measurements assess fat distribution. A high waist-to-hip ratio (greater fat around the abdomen) is a better predictor of health risks than BMI.
    2. Body Fat Percentage:
      • Methods like bioelectrical impedance, skinfold calipers, and DEXA scans can directly measure body fat percentage and provide more accurate insights into body composition.
    3. Body Shape Index (BSI) and Visceral Fat Index:
      • These newer methods aim to more accurately assess fat distribution and its impact on health. They are particularly useful for identifying visceral fat.
    4. Hydrostatic Weighing and Air Displacement Plethysmography:
      • These techniques measure body density to estimate body fat percentage with high accuracy.

    Conclusion

    Body Mass Index (BMI) is a useful and simple tool for assessing weight status in individuals. It can help identify potential health risks and guide individuals in adopting healthier lifestyles. However, it should be used alongside other assessments, such as waist circumference and body fat percentage, for a more comprehensive view of health. While BMI is an important factor, it is not the sole indicator of overall health, and a combination of factors—such as diet, physical activity, and genetics—play a critical role in an individual’s well-being.

  • Soil Fertility & Microbes: Causes of Depletion, Conservation & Importance

    Soil Fertility & Microbes: Causes of Depletion, Conservation & Importance

    Explore the causes of reduced soil fertility, effective conservation methods, the vital role of microorganisms, nitrogen cycle processes, and microbial presence in soil, compost, and root nodules.

    Introduction

    Soil fertility is the cornerstone of sustainable agriculture and healthy ecosystems. This article delves into the causes of reduced soil fertility, outlines effective conservation methods, highlights the importance of microorganisms, explains the nitrogen cycle processes, and examines the presence of microbes in soil, compost, and root nodules.

    Causes of reduced soil fertility

    Reduced soil fertility is a significant concern in agriculture, as it directly affects plant growth, crop yields, and overall land productivity. Various natural and human-induced factors contribute to the depletion of soil fertility. Below are the primary causes:

    1. Nutrient Depletion

    • Description: Continuous cropping without replenishing the nutrients removed by plants leads to a depletion of essential soil nutrients, such as nitrogen, phosphorus, potassium, calcium, and magnesium.
    • Significance: Nutrient depletion occurs when crops are harvested without the addition of organic matter or fertilizers to replace lost nutrients, resulting in reduced soil fertility.

    2. Soil Erosion

    • Description: Soil erosion removes the topsoil, which is the most fertile layer containing organic matter, nutrients, and microorganisms.
    • Significance: Erosion, caused by water or wind, leads to a loss of soil structure and fertility, as the topsoil is carried away, leaving behind less fertile subsoil.

    3. Poor Organic Matter Management

    • Description: A lack of sufficient organic matter (such as crop residues, compost, or animal manure) in the soil reduces its fertility.
    • Significance: Organic matter improves soil structure, enhances nutrient retention, and supports microbial activity. Without adequate organic matter, soil becomes less fertile, loses moisture retention capacity, and becomes more prone to erosion.

    4. Acidification

    • Description: Soil acidity increases due to natural processes or the overuse of chemical fertilizers, especially those containing ammonium-based nitrogen fertilizers.
    • Significance: Acidic soils reduce the availability of key nutrients like phosphorus, calcium, and magnesium, harming plant growth. Additionally, increased acidity can reduce soil microbial activity, further diminishing soil fertility.

    5. Salinization

    • Description: Salinization occurs when salts accumulate in the soil, usually due to excessive irrigation with water containing dissolved salts, poor drainage, or the use of fertilizers high in sodium.
    • Significance: High salt concentrations in the soil hinder water uptake by plants, resulting in poor plant growth, reduced yields, and a decrease in soil fertility.

    6. Overuse of Chemical Fertilizers

    • Description: The excessive application of chemical fertilizers can disrupt soil health by altering its pH, reducing microbial diversity, and affecting soil structure.
    • Significance: Over-reliance on chemical fertilizers leads to nutrient imbalances, soil acidification, and degradation of soil microorganisms, which are crucial for maintaining long-term soil fertility.

    7. Soil Compaction

    • Description: Soil compaction occurs when heavy machinery, frequent tilling, or overgrazing compresses the soil, reducing pore spaces and preventing root penetration, water infiltration, and air circulation.
    • Significance: Compacted soil limits root growth, reduces oxygen availability, and hinders water and nutrient uptake, thereby lowering soil fertility.

    8. Improper Irrigation Practices

    • Description: Over-irrigation or improper irrigation techniques can lead to waterlogging, leaching of nutrients, and salinization.
    • Significance: Waterlogging reduces the availability of oxygen for plant roots, while leaching washes away essential nutrients, causing nutrient deficiencies and reducing soil fertility.

    9. Deforestation and Land Clearing

    • Description: The removal of trees and vegetation for agriculture, logging, or urban development leads to the loss of organic matter and nutrients, as well as increased erosion.
    • Significance: Deforestation disrupts the natural nutrient cycle, leading to soil degradation and a decrease in fertility over time.

    10. Monoculture Farming

    • Description: Growing the same crop repeatedly on the same land without crop rotation or diversification leads to a depletion of specific nutrients that the crop requires.
    • Significance: Monoculture farming reduces soil diversity and leaves the soil lacking in essential nutrients, making it less fertile over time.

    11. Excessive Use of Pesticides and Herbicides

    • Description: The overuse of pesticides and herbicides can harm beneficial soil organisms, such as earthworms, fungi, and bacteria, that play a vital role in nutrient cycling and soil fertility.
    • Significance: Killing beneficial organisms disrupts the natural biological processes that contribute to soil health and fertility.

    12. Lack of Crop Rotation

    • Description: Failure to rotate crops on a regular basis leads to a buildup of specific pathogens and pests, and continued planting of nutrient-demanding crops depletes the soil of essential nutrients.
    • Significance: Crop rotation allows soil nutrients to replenish naturally and helps break pest and disease cycles, maintaining soil fertility.

    13. Climate Change

    • Description: Changes in climate, such as increased temperatures, altered rainfall patterns, and more frequent droughts, can affect soil moisture and nutrient availability.
    • Significance: Extreme weather conditions can stress soil health, leading to reduced organic matter, nutrient leaching, and increased erosion, all of which reduce fertility.

    Reduced soil fertility is a result of a combination of natural processes and human activities. Managing soil fertility requires sustainable agricultural practices, such as crop rotation, organic matter addition, proper irrigation, and minimizing soil disturbance. By addressing these causes, it is possible to maintain and even improve soil fertility over time, ensuring long-term agricultural productivity and environmental health.

    Methods of soil conservation

    Soil conservation refers to the practices and strategies implemented to prevent soil erosion, degradation, and the loss of fertility. Effective soil conservation methods help maintain soil health, improve agricultural productivity, and protect the environment. Below are the primary methods of soil conservation:

    1. Terracing

    • Description: Terracing involves creating stepped levels on steep slopes to reduce the speed of water runoff, allowing the soil to retain moisture and nutrients.
    • Significance: Terraces break up the slope, reduce soil erosion, and improve water infiltration. It is particularly useful in mountainous or hilly areas.

    2. Contour Farming

    • Description: Contour farming involves plowing and planting along the contours of the land rather than up and down the slope. This helps slow down water flow and reduce erosion.
    • Significance: By planting along the contours, water is captured and allowed to infiltrate into the soil, reducing surface runoff and soil erosion.

    3. Agroforestry

    • Description: Agroforestry involves integrating trees and shrubs with crops or livestock on the same land. Trees and shrubs act as windbreaks, reduce water runoff, and help stabilize the soil.
    • Significance: Trees and plants provide protection to the soil from wind and water, enhance biodiversity, and contribute organic matter to improve soil fertility.

    4. Cover Cropping

    • Description: Cover crops, such as legumes or grasses, are planted during the off-season to protect and enrich the soil.
    • Significance: These crops prevent soil erosion, improve soil structure, add organic matter, and fix nitrogen, which enhances soil fertility.

    5. Mulching

    • Description: Mulching involves applying a layer of organic or inorganic material (such as straw, leaves, or plastic) on the soil surface.
    • Significance: Mulch helps protect the soil from erosion caused by wind and water, reduces moisture evaporation, and enhances soil structure by adding organic matter.

    6. Windbreaks (Shelterbelts)

    • Description: Windbreaks are rows of trees or shrubs planted along the edges of fields to protect the soil from wind erosion.
    • Significance: Windbreaks reduce wind speed, preventing the loss of soil and moisture. They also help reduce evaporation and provide habitats for wildlife.

    7. Crop Rotation

    • Description: Crop rotation involves growing different crops in a planned sequence on the same land each year, rather than planting the same crop repeatedly.
    • Significance: Rotating crops helps maintain soil fertility, reduce pest and disease buildup, and minimize soil erosion by preventing the depletion of specific nutrients.

    8. No-Till Farming

    • Description: No-till farming involves planting crops without disturbing the soil through plowing. The soil is left undisturbed, and crop residues are left on the field.
    • Significance: No-till farming reduces soil erosion, improves water retention, enhances soil structure, and allows organic matter to accumulate.

    9. Water Management Techniques

    • Description: Proper water management techniques, such as rainwater harvesting, proper irrigation systems (e.g., drip irrigation), and constructing check dams, help manage water flow.
    • Significance: These techniques prevent waterlogging and excess runoff, which can cause soil erosion. They also ensure adequate water availability for crops while conserving soil.

    10. Strip Cropping

    • Description: Strip cropping involves alternating strips of different crops or grass across a slope.
    • Significance: The strips of vegetation reduce wind and water erosion, as the plants act as barriers that slow down runoff and hold the soil together.

    11. Gully Plugging

    • Description: Gully plugging is the practice of filling and stabilizing eroded gullies to prevent further erosion.
    • Significance: It helps prevent the widening of gullies and the loss of valuable soil. Plugging gullies with vegetation, rocks, or other materials reduces erosion and restores soil fertility.

    12. Composting

    • Description: Composting involves decomposing organic material, such as plant residues and manure, into humus and adding it back into the soil.
    • Significance: Compost improves soil structure, water retention, and nutrient content. It also supports soil organisms that contribute to soil health.

    13. Rainwater Harvesting

    • Description: Rainwater harvesting involves collecting rainwater in reservoirs or tanks for irrigation or other uses.
    • Significance: It helps reduce the impact of droughts, provides a reliable water source, and prevents water runoff, which can cause soil erosion.

    14. Conservation Tillage

    • Description: Conservation tillage involves using minimal tilling practices to disturb the soil as little as possible. It includes methods like ridge tillage or strip tillage.
    • Significance: This practice reduces soil erosion, conserves soil moisture, and enhances soil structure, making it easier for plants to grow.

    15. Soil Fertility Management

    • Description: Proper soil fertility management involves adding organic matter, such as compost or manure, and applying chemical fertilizers in appropriate amounts to maintain soil fertility.
    • Significance: Maintaining optimal nutrient levels improves soil health, supports plant growth, and reduces the risk of soil degradation and erosion.

    16. Planting Grasses or Legumes on Bare Soil

    • Description: Planting grass or legume cover on bare or disturbed soil helps protect the soil surface.
    • Significance: Grasses and legumes prevent surface erosion by holding the soil together with their root systems and providing ground cover to reduce water and wind impact.

    Conclusion

    Soil conservation is crucial for sustainable agriculture, environmental protection, and the maintenance of soil health. Implementing effective soil conservation methods helps prevent soil erosion, maintain soil fertility, improve water retention, and increase agricultural productivity. By combining several of these methods, farmers and land managers can ensure long-term soil sustainability and ecosystem stability.

    Importance of microorganisms in soil fertility

    Microorganisms play a vital role in maintaining and enhancing soil fertility. They are essential for the health of the soil ecosystem and contribute to processes that directly influence nutrient availability, soil structure, and plant growth. Below are the key reasons why microorganisms are crucial to soil fertility:

    1. Nutrient Cycling and Decomposition

    • Role in Decomposition: Microorganisms such as bacteria, fungi, and actinomycetes break down organic matter (plant residues, animal remains, etc.) into simpler forms. This process releases essential nutrients like nitrogen, phosphorus, sulfur, and carbon back into the soil.
    • Significance: The decomposition of organic matter by microorganisms results in the formation of humus, a key component that improves soil structure and nutrient content. The nutrients released during decomposition are made available to plants, supporting their growth and development.

    2. Nitrogen Fixation

    • Role in Nitrogen Fixation: Certain soil bacteria, such as Rhizobium (which forms symbiotic relationships with legumes) and Azotobacter, have the ability to fix atmospheric nitrogen into a form that plants can use.
    • Significance: Nitrogen is a critical nutrient for plant growth, particularly for producing proteins and chlorophyll. By converting atmospheric nitrogen (N₂) into ammonium (NH₄⁺) or nitrates (NO₃⁻), microorganisms ensure that plants have a constant supply of nitrogen, especially in nitrogen-deficient soils.

    3. Symbiosis and Mycorrhizal Relationships

    • Role in Symbiosis: Mycorrhizal fungi form mutualistic associations with plant roots. The fungi provide plants with increased access to water and nutrients (especially phosphorus), while the plant provides the fungi with sugars produced through photosynthesis.
    • Significance: This relationship enhances plant growth, particularly in nutrient-poor soils, by improving nutrient uptake and increasing resistance to pathogens. Mycorrhizae also help in the soil aggregation process, improving soil structure.

    4. Soil Structure Improvement

    • Role in Soil Aggregation: Microorganisms, particularly fungi and actinomycetes, secrete organic compounds (like polysaccharides) that bind soil particles together, forming aggregates.
    • Significance: These aggregates improve soil structure by enhancing porosity, water retention, and aeration. Good soil structure also reduces erosion and compaction, creating a conducive environment for plant roots to grow.

    5. Organic Matter Breakdown

    • Role in Humus Formation: Microorganisms break down complex organic materials into humus, a stable, decomposed organic substance.
    • Significance: Humus improves soil fertility by increasing its water-holding capacity, enhancing nutrient retention, and promoting better root growth. It also serves as a source of slow-release nutrients for plants.

    6. Disease Suppression

    • Role in Disease Control: Beneficial soil microorganisms such as certain bacteria (e.g., Bacillus species) and fungi (e.g., Trichoderma) can suppress harmful soil pathogens.
    • Significance: By outcompeting or directly attacking disease-causing organisms, beneficial microorganisms help maintain plant health, reduce the need for chemical pesticides, and promote a balanced soil ecosystem that supports fertility.

    7. Phosphorus Solubilization

    • Role in Phosphorus Availability: Certain soil bacteria, such as Bacillus and Pseudomonas, have the ability to solubilize insoluble forms of phosphorus, making it available for plant uptake.
    • Significance: Phosphorus is an essential nutrient for plants, involved in energy transfer and root development. Microorganisms that release phosphorus into a usable form improve soil fertility and plant growth.

    8. Carbon Sequestration

    • Role in Carbon Storage: Soil microorganisms help in the breakdown of organic matter and contribute to carbon sequestration, storing carbon in the form of stable organic compounds (humus) in the soil.
    • Significance: This helps in mitigating climate change by reducing the amount of carbon dioxide in the atmosphere. Furthermore, the stored carbon enhances soil structure and fertility, benefiting plant growth.

    9. Detoxification of Harmful Chemicals

    • Role in Detoxification: Some microorganisms are involved in the detoxification of harmful chemicals or pollutants in the soil, such as heavy metals and pesticides.
    • Significance: By breaking down or neutralizing toxic substances, microorganisms improve soil quality and make it more suitable for plant growth, thus indirectly supporting soil fertility.

    10. Enhancing Soil pH Balance

    • Role in pH Regulation: Certain microorganisms produce organic acids or participate in processes that can lower or raise soil pH, depending on the plant and nutrient requirements.
    • Significance: Maintaining a balanced pH is crucial for nutrient availability in soil. Microorganisms help to stabilize soil pH, ensuring optimal conditions for plant growth.

    Conclusion

    Microorganisms are fundamental to soil fertility. They contribute to nutrient cycling, organic matter decomposition, nitrogen fixation, and soil structure improvement, all of which are critical for supporting plant growth. The presence and diversity of beneficial microorganisms in the soil enhance its ability to support healthy ecosystems and productive agriculture. Therefore, maintaining a healthy microbial population is essential for sustaining soil fertility and ensuring long-term agricultural productivity.

    Processes in the nitrogen cycle

    The nitrogen cycle is a crucial ecological process that involves the transformation of nitrogen into various chemical forms that can be used by plants, animals, and other organisms. Nitrogen is a key element for all living organisms, as it is essential for the synthesis of proteins, DNA, and other vital compounds. Below are the primary processes involved in the nitrogen cycle:

    1. Nitrogen Fixation

    • Description: Nitrogen fixation is the process of converting atmospheric nitrogen (N₂), which is inert and not usable by most organisms, into ammonia (NH₃) or ammonium ions (NH₄⁺).
    • Types of Nitrogen Fixation:
      • Biological Nitrogen Fixation: Certain bacteria, such as Rhizobium (which forms a symbiotic relationship with leguminous plants) and Azotobacter (free-living bacteria), can fix nitrogen. These bacteria use the enzyme nitrogenase to break the strong triple bond of atmospheric nitrogen and convert it into ammonia.
      • Abiotic Nitrogen Fixation: Nitrogen fixation can also occur through lightning, which provides enough energy to break the nitrogen molecules in the atmosphere, allowing them to combine with oxygen and form nitrogen oxides (NOₓ), which later dissolve in water to form nitrates (NO₃⁻).
    • Significance: Nitrogen fixation provides the nitrogen that plants need for growth, as atmospheric nitrogen is not directly accessible to most living organisms.

    2. Nitrification

    • Description: Nitrification is a two-step aerobic process that converts ammonium ions (NH₄⁺) into nitrates (NO₃⁻), which plants can absorb and use.
    • Steps in Nitrification:
      • Step 1 (Ammonia to Nitrite): Ammonium (NH₄⁺) is oxidized to nitrite (NO₂⁻) by nitrifying bacteria, such as Nitrosomonas.
      • Step 2 (Nitrite to Nitrate): Nitrite (NO₂⁻) is further oxidized to nitrate (NO₃⁻) by other nitrifying bacteria, such as Nitrobacter.
    • Significance: Nitrification transforms ammonium, which is toxic to plants in high concentrations, into nitrate, a more stable and readily available form of nitrogen for plant uptake.

    3. Assimilation

    • Description: Assimilation is the process by which plants and other organisms incorporate ammonia (NH₄⁺) or nitrate (NO₃⁻) into organic compounds, such as amino acids, proteins, and nucleic acids.
    • Significance: Plants absorb nitrates and ammonium from the soil and convert them into organic nitrogen compounds, which are then consumed by herbivores and other animals in the food chain.

    4. Ammonification (Mineralization)

    • Description: Ammonification, also known as mineralization, is the process by which organic nitrogen from dead plants, animals, and animal waste is converted into ammonium (NH₄⁺) by decomposer microorganisms, such as bacteria and fungi.
    • Significance: This process releases nitrogen back into the soil in the form of ammonium, making it available for further processes like nitrification or assimilation by plants.

    5. Denitrification

    • Description: Denitrification is the process by which nitrates (NO₃⁻) are converted into nitrogen gas (N₂) or nitrous oxide (N₂O) by denitrifying bacteria, such as Pseudomonas and Clostridium, under anaerobic conditions (low oxygen environments).
    • Significance: Denitrification closes the nitrogen cycle by returning nitrogen to the atmosphere, balancing the nitrogen content in the soil and preventing the buildup of excess nitrates, which could otherwise contribute to pollution and eutrophication.

    6. Leaching

    • Description: Leaching is the process by which water-soluble compounds, such as nitrates (NO₃⁻), are washed away from the soil into water bodies, such as rivers, lakes, and groundwater.
    • Significance: While leaching helps regulate the nitrogen concentration in the soil, excessive leaching can lead to the loss of nitrogen from the soil and cause environmental pollution, particularly in the form of nitrate contamination of drinking water.

    7. Volatilization

    • Description: Volatilization is the process in which ammonia (NH₃) is lost from the soil into the atmosphere. This usually occurs when fertilizers containing ammonium-based compounds are applied to the soil, and the ammonia evaporates into the air.
    • Significance: Volatilization contributes to the loss of nitrogen from the soil, reducing the amount of nitrogen available for plant growth.

    The nitrogen cycle involves a series of interconnected processes—nitrogen fixation, nitrification, assimilation, ammonification, denitrification, leaching, and volatilization—that help convert nitrogen into different forms, making it accessible to plants, animals, and microorganisms. The nitrogen cycle is essential for maintaining soil fertility, supporting plant growth, and sustaining the global nitrogen balance. Human activities, such as the excessive use of nitrogen fertilizers and the burning of fossil fuels, can disrupt the natural nitrogen cycle and lead to environmental issues like water pollution and greenhouse gas emissions.

     mini

    Presence of microorganisms in soil ,compost ,and root nodules

    Microorganisms are abundant in soil, compost, and root nodules, and they play essential roles in various ecological processes that promote plant health, soil fertility, and nutrient cycling. Each of these environments supports a unique community of microorganisms with specific functions:

    1. Microorganisms in Soil

    Soil is home to a wide variety of microorganisms, including bacteria, fungi, actinomycetes, viruses, and protozoa. These organisms contribute to soil fertility, nutrient cycling, and the overall health of the soil ecosystem.

    • Bacteria:
      • Bacteria are the most abundant microorganisms in soil. They include beneficial bacteria involved in nitrogen fixation (e.g., Rhizobium, Azotobacter), nitrification (e.g., Nitrosomonas, Nitrobacter), and decomposition (e.g., Bacillus, Clostridium).
      • Role: Bacteria are crucial for decomposing organic matter, fixing nitrogen, and transforming nutrients into forms that plants can absorb.
    • Fungi:
      • Fungi, such as mycorrhizal fungi, are present in soil and form symbiotic relationships with plant roots, aiding in nutrient absorption.
      • Role: Fungi break down complex organic materials, recycle nutrients, and contribute to soil structure by forming aggregates. Mycorrhizal fungi enhance plant access to phosphorus and other nutrients.
    • Actinomycetes:
      • These are filamentous bacteria that resemble fungi and are involved in the decomposition of organic matter.
      • Role: Actinomycetes play a key role in breaking down tough plant materials like cellulose and lignin, contributing to the formation of humus.
    • Protozoa:
      • Protozoa are single-celled organisms that feed on bacteria and organic matter.
      • Role: By consuming bacteria, protozoa regulate microbial populations and release nutrients, such as nitrogen and phosphorus, back into the soil in a form accessible to plants.
    • Viruses:
      • Viruses in soil mainly infect bacteria and other microorganisms, influencing microbial community dynamics.
      • Role: Viruses can regulate bacterial populations and may also facilitate the transfer of genetic material between microorganisms, enhancing genetic diversity.

    2. Microorganisms in Compost

    Compost is an organic material that undergoes decomposition, and it supports a diverse community of microorganisms that are responsible for breaking down organic waste into humus, a nutrient-rich substance beneficial for soil health.

    • Bacteria:
      • Decomposing bacteria are the primary microorganisms involved in the initial stages of composting, breaking down simple sugars and proteins.
      • Role: They convert organic materials into simpler compounds, such as ammonia and fatty acids, which are further processed by other microorganisms into stable forms like humus.
    • Fungi:
      • Fungi are crucial in breaking down more complex organic materials, such as cellulose and lignin, found in plant matter.
      • Role: Fungi help convert tough, fibrous plant material into more readily usable nutrients and contribute to the creation of a stable organic matter structure (humus) in compost.
    • Actinomycetes:
      • These microorganisms are important in compost for their ability to break down complex organic materials, particularly lignin and cellulose.
      • Role: They play a key role in decomposing woody and fibrous plant materials, helping to transform compost into dark, nutrient-rich humus.
    • Protozoa and Nematodes:
      • Protozoa and nematodes are present in compost and feed on bacteria and fungi.
      • Role: These organisms help regulate microbial populations and release nutrients, which enrich the compost and promote plant growth when the compost is applied to soil.
    • Other Microorganisms:
      • Compost may also contain other microorganisms, such as actinomycetes (which contribute to the decomposition of tough plant materials) and algae (which contribute to nutrient cycling in moist compost).
      • Role: These microorganisms work in harmony to break down organic matter, improve nutrient content, and reduce pathogens in the compost pile.

    3. Microorganisms in Root Nodules

    Root nodules are specialized structures formed by certain plants, particularly legumes, in symbiosis with nitrogen-fixing bacteria. These bacteria live within the root nodules and play a critical role in enriching soil fertility by converting atmospheric nitrogen into a form usable by plants.

    • Rhizobium Bacteria:
      • Rhizobium is the most well-known group of nitrogen-fixing bacteria that form symbiotic relationships with leguminous plants, such as peas, beans, and clover.
      • Role: These bacteria convert atmospheric nitrogen (N₂) into ammonia (NH₃), which the plant can absorb and use for growth. In return, the plant provides the bacteria with sugars and other organic compounds produced through photosynthesis.
    • Bradyrhizobium Bacteria:
      • Bradyrhizobium is another group of nitrogen-fixing bacteria that form nodules in some legumes, especially those in tropical regions.
      • Role: Like Rhizobium, these bacteria fix nitrogen and contribute to the plant’s nitrogen supply, enhancing soil fertility.
    • Other Nitrogen-Fixing Bacteria:
      • In addition to Rhizobium and Bradyrhizobium, other bacteria, such as Azotobacter (free-living nitrogen-fixing bacteria), may be present in the soil and contribute to nitrogen fixation.
      • Role: These bacteria also fix nitrogen, either independently or in association with other plants, contributing to soil nitrogen levels.
    • Fungal Endophytes (in some plants):
      • In some plants, fungi may form relationships with plant roots, although this is not as common as bacterial symbiosis. These fungi can contribute to plant growth by improving nutrient and water uptake.
      • Role: While not directly involved in nitrogen fixation, these fungi support plant health and overall growth, indirectly aiding in the plant’s ability to utilize nitrogen and other nutrients more effectively.

    Microorganisms play critical roles in soil, compost, and root nodules, facilitating nutrient cycling, plant growth, and soil fertility. In soil, bacteria, fungi, and other microorganisms decompose organic matter, fix nitrogen, and help plants absorb nutrients. In compost, microorganisms break down organic waste into humus, enriching the soil with nutrients and improving soil structure. In root nodules, nitrogen-fixing bacteria form symbiotic relationships with plants, particularly legumes, converting atmospheric nitrogen into forms that plants can use. The health and diversity of microorganisms in these environments are essential for maintaining sustainable agricultural practices and promoting soil and plant health.

    Conclusion

    Maintaining and enhancing soil fertility requires a holistic approach, addressing the causes of depletion, implementing conservation practices, and leveraging the power of microorganisms. By understanding these interconnected aspects, we can ensure long-term agricultural productivity and environmental health.

    Frequently Asked Questions (FAQs)

    • What are the primary causes of reduced soil fertility?
      • Nutrient depletion, soil erosion, poor organic matter management, acidification, salinization, overuse of chemical fertilizers, soil compaction, improper irrigation, deforestation, monoculture farming, excessive use of pesticides, lack of crop rotation, and climate change.
    • What are effective methods for soil conservation?
      • Terracing, contour farming, agroforestry, cover cropping, mulching, windbreaks, crop rotation, no-till farming, water management techniques, strip cropping, gully plugging, composting, rainwater harvesting, conservation tillage, soil fertility management, and planting grasses or legumes on bare soil.
    • Why are microorganisms important for soil fertility?
      • They contribute to nutrient cycling, nitrogen fixation, organic matter decomposition, soil structure improvement, disease suppression, phosphorus solubilization, carbon sequestration, detoxification of harmful chemicals, and pH balance.
    • What are the key processes in the nitrogen cycle?
      • Nitrogen fixation, nitrification, assimilation, ammonification, denitrification, leaching, and volatilization.
    • Where are microorganisms found, and what are their roles?
      • In soil, they decompose organic matter and aid nutrient cycling; in compost, they break down organic waste into humus; and in root nodules, nitrogen-fixing bacteria form symbiotic relationships with plants.
×
🚀 Stuck in School? Catch Up and Stand Out!

🚀 Stuck in School? Catch Up and Stand Out!

Don't let difficult topics hold you back. Our fast-track Remedial Courses are designed to bridge the gap and boost your confidence instantly.

What We Offer:

  • Speak Kiswahili From Day One: Master conversational Swahili with zero stress.

  • English for Locals: Perfect your grammar and speak English with absolute confidence.

  • Targeted Remedial Support: Easily catch up on core subjects you find challenging.

Stop struggling. Start mastering.


Learn More
Listen to Remedial Radio

Listen to Remedial Radio

Enjoy the rhythm of knowledge. where books sing!
Learn More